Search for a Recipe

Pages

Tuesday, 28 January 2014

Chocolate Cheesecake Swirl Brownies

These are some of my absolute favorite brownies.  I can't make them often because I just want to eat them all.  You get a wonderfully deep, dark chocolate brownie that perfectly pairs with the lighter cheesecake swirls.  I prefer using vanilla bean paste in this recipe vs vanilla extract so I get a stronger vanilla flavor in each bite.  My friend Julie LOVED them and said I absolutely must get this recipe on my blog asap. I may have taken a bit longer than she was hoping, but here is the recipe, in all it's delicious easiness!  Enjoy!

Gluten Free Chocolate Cheesecake Swirl Brownies
Gluten-Free Chocolate Cheesecake Swirl Brownies
Mmm... all those lovely swirls of cheesecake mixed with brownie.   I made this in a round spring-form pan, lined with parchment paper - but I tend to just pop it into square or rectangular pans, as listed in the recipe.

Chocolate Cheesecake Swirl Brownies
Based on a recipe from Comfort Foods by Bridget Jones (this happens to be my favorite cookbook of all time - I've just been converting things bit by bit to gluten-free from this cookbook)
Makes 12-16 brownies

Preheat the oven to 325F.
Line an 8x8 pan with parchment paper, OR use two smaller pans that give you approximately an 8x8 sized space.  The wonderful thing about this recipe is that you can really make it in any size somewhere around an 8x8 pan and it will work out! This is nice if you want some to give away or take a smaller batch with you somewhere, while still having some left at home! 

In a large bowl or mixer, beat together until smooth:
1 egg
1 cup (8 oz/225 g) cream cheese, softened
1/4 cup white sugar
1 tsp vanilla bean paste (or vanilla extract)

In a large microwave-safe bowl, melt together at 50% power (so your chocolate doesn't burn - you want to melt the chocolate/butter, but not have them get too hot):
4 oz dark chocolate (minimum 70% cocoa solids)
1/2 cup butter

Mix into to chocolate/butter:
3/4 cup dark brown sugar

Stir in, until thoroughly combined:
2 eggs

Add and mix in gently:
1/2 cup Kristin's gluten-free flour mix OR 1/2 cup cornstarch OR 1/2 cup arrowroot starch (this recipe is quite flexible since there's so little flour, but you want something that will help thicken/hold things together nicely)

Spread 2/3 of the brownie mixture in your pan(s).  Spoon the cheesecake batter on top, trying to spread it around fairly evenly.  Scoop the remaining brownie mixture on top of the cheesecake batter.  Use a knife to swirl around, so you have wonderful bits of brownie and cheesecake all mixed up!

Bake at 325F 25-35 minutes (depending on the size of your pan), until the brownies are just set in the centre. I just shake the pan a little bit to see if it still jiggles alot. Once it doesn't really jiggle anymore, they're done!  These should have just a tiny bit of browning starting to happen around the edges when they're finished.

Let cool completely in pan OR let cool in pan a bit, then you can remove the brownies (using the parchment paper to pick it all up) and put it on a cooling rack if you want to help them cool faster.  Cut into squares of whatever size you desire and enjoy!


Friday, 24 January 2014

Easy Sourdough Cinnamon Swirl Rolls

We've really enjoyed the variety using a gluten-free sourdough starter gives. It's very forgiving in many recipes, since the rising time is so long.  These cinnamon swirl rolls are my 'easy' take on my normal cinnamon roll recipe.  I even made them one day when we lost electricity and since it was cold they didn't rise until the electricity was back and the house heated back up - and still they worked out wonderfully! The best part is that if you freeze the rolls, and freeze the glaze in a separate container, they can be heated up for a delicious breakfast or snack anytime! Enjoy!


Easy Sourdough Cinnamon Swirl Rolls
Makes 15 rolls

Butter a 9x13 pan.

Mix in a large bowl:
3/4 cup white rice flour
3/4 cup potato starch
3/4 cup tapioca starch
1 cup brown rice flour
4 tsp xanthan gum
1 tsp salt

In a mixer, combine:
1/2 cup gluten-free sourdough starter
1 cup lukewarm water
3 eggs, room temperature
1 Tbsp honey
1 1/2 Tbsp maple syrup
4 Tbsp oil

Add in dry ingredients and beat 1-2 minutes, until nice and smooth.

While that's beating, mix together in a small bowl:
1/4 cup butter, melted
3/4 cup brown sugar
2 Tbsp cinnamon

Scoop spoonfuls of the cinnamon filling into the mixer and let mix briefly, until just swirled.
Dough with cinnamon swirl mixed in briefly.

Using a large cookie scoop, scoop 15 scoops into a buttered 9x13 pan. Cover pan with plastic wrap.  Set in a warm place and let rise 4-5 hours, until properly puffed up.  It won't look like they're rising for a good 2 hours.
Rolls after rising, ready to be baked. 

Bake at 350F for 30-35 minutes.  Set pan on a cooling rack.
Rolls after baking.  You can leave them to cool in the pan. 

While still warm, drizzle with cream cheese glaze (below).   Note: These freeze well if you don't add glaze.  You can freeze the rolls in one bag and the glaze in a separate bag/container and remove/warm as desired.  They'll be just as delicious.
Enjoy!

Cream Cheese Glaze
Mix together in a bowl, until smooth:
1.5 - 2 oz cream cheese, softened (approx 1/8 of a container)
1 Tbsp butter, softened
3/4 tsp vanilla bean paste or extract
1 cup powdered sugar

Add milk by teaspoonfuls, until you have your preferred consistency.

Put glaze in a ziploc baggie. Snip a corner and drizzle over your swirl rolls. Enjoy!

Tuesday, 21 January 2014

Meaty Spaghetti Sauce w/ Spinach, Garlic & Basil

I find it's important to keep tweaking recipes around, even some of the most basic meals, so we get a nice variety in our diet, and keep food fun and interesting.  I've posted a spaghetti sauce packed with veggies previously, but I find throwing a bit of meat and then veggies in to cook before adding a jar of our favorite spaghetti sauce takes dinner from the 'quick and easy' to 'wow', without really adding much work on my part.  It tastes great, so you feel like you're having a rich, filling dinner, and not a 'quick and easy' one, which is the best part!  Enjoy!

Fresh GF fusilli pasta with the sauce on top, plus some fresh sliced basil and grated parmesan.

Meaty Spaghetti Sauce w/ Spinach, Garlic & Basil
Serves 4-6

Heat in large, low-sided saucepan over medium heat:
1-2 Tbsp olive oil

Cook until meat is cooked through:
1 red onion, chopped
3/4 - 1 lb. ground beef (lean or extra-lean)

Push the meat/onion to the sides of the pan, and cook in the middle for 1-2 minutes, until fragrant:
1-2 Tbsp garlic, minced

Mix in, until spinach is wilted:
1 bag baby spinach, sliced

Fold in:
1/4 - 1/3 cup fresh basil, sliced/chopped

Add 1 jar Classico Pesto Spaghetti Sauce (or your favorite sauce - I like Classico b/c almost all of their sauces do not add sugar)

Let simmer 20-30 minutes, while you prepare your pasta.
Mmmm...  Ready to serve.

Serve over gluten-free pasta (I used Catelli 4-grain GF fusilli pasta here, which I've found tastes great!) with grated parmesan and fresh basil.  Enjoy!

Thursday, 16 January 2014

Cinnamon Sugar Bagels - Gluten-Free!

I always loved the bagels with the wonderfully crispy cinnamon-sugar topping on them.  These bagels have the chewy inside and crispy outside without requiring the boiling that typical bagels require.  They can be easily mixed together and piped onto a pan and left to rise, then baked.   We've happily been eating cinnamon-raisin bagels, blueberry bagels, everything bagels, and jalapeno-cheddar bagels - but I felt like it was time to branch out a bit.  These were a hit! Enjoy! 
Fresh cinnamon-sugar bagel, sliced and ready for cream cheese.

Cinnamon Sugar Bagels - Gluten Free!
Makes 4 bagels (you can easily double the recipe)

Line cookie sheet with silicon mat or parchment paper.

In a 1 cup measuring cup mix and let rest 5 minutes:
1/3 cup warm water
2 Tbsp brown sugar (or honey)
1 tsp rapid rise yeast (quick-rise yeast)

Add to yeast mixture:
1 egg
2 Tbsp oil

Set liquids aside, and mix together in a mixer (it's important to mix the dry ingredients before adding wet so the xanthan gum gets thoroughly mixed in):
2/3 cup tapioca starch
½ cup brown rice flour
2 Tbsp potato starch
1 ¼ tsp xanthan gum
½ tsp ground cinnamon
½ tsp salt

Add liquids to mixer.  Mix on low, until combined.  Then mix on medium speed, scraping occasionally, for 2-3 minutes.  Batter will be nice and smooth.

Mix the following topping together while your batter is mixing: 
2 Tbsp white sugar
2 Tbsp brown sugar
1 1/2 tsp ground cinnamon

Put batter into a Ziploc (I like the freezer bags because they’re stronger).  Cut ¾” – 1” off one corner.  Pipe 4 bagels onto prepared cookie sheet. Using wet hands, spread bagels so the holes are nice and big. You can also smooth out any areas that are a bit lumpy. 

Sprinkle cinnamon-sugar mixture generously on top of wet bagels.
Make sure you're generous with your cinnamon-sugar mixture, so you have plenty of crispy topping once cooked.


Let rise in a warm location for 30-40 minutes.  They’ll look a bit puffier, but won’t fully double in size.
Bagels after rising 30-40 minutes in a warm location. You do NOT need to cover these during the rise.

Bake at 350F for 20-25 minutes until browned.  Cool on cooling rack.  
These baked for 20 minutes, until a nice golden brown. Yum!

Once cooled, you can slice and freeze if you aren’t planning to eat them right away. These are great fresh with cream cheese, or if you eat them later, sliced and toasted with cream cheese.

Enjoy!

Monday, 13 January 2014

Twice-Baked Potatoes - with Broccoli, Chicken & Cheese topping

I rarely think to make twice-baked potatoes, but I was intrigued by the idea of having a twice baked potato that became a full meal, particularly one that incorporates broccoli.  I sometimes find broccoli can be overpowering in a meal, but paired with the chicken, potato and cheese here, it worked! It became a delicious combination the whole family loved. Enjoy!


Twice-Baked Potatoes - with Broccoli, Chicken & Cheese Topping
Based on a recipe from Southern Living

Scrub, poke several times with a fork and then cook 4 large russet potatoes either by baking in the oven until soft or microwaving.  (Oven takes ~40 minutes at 400F, microwave takes ~ 10-15 minutes to give you a rough guideline)

Preheat oven to 400F. Line a baking sheet with foil.

Slice potatoes in half and carefully scoop out the insides, placing potato flesh into a large mixing bowl.  Place the potato shells on your foil-lined baking pan.


Mix into potato in large bowl:
4 oz regular or light cream cheese
1/2 cup milk
Salt and pepper, if desired (you'll season the topping, so this doesn't need salt/pepper, I find)

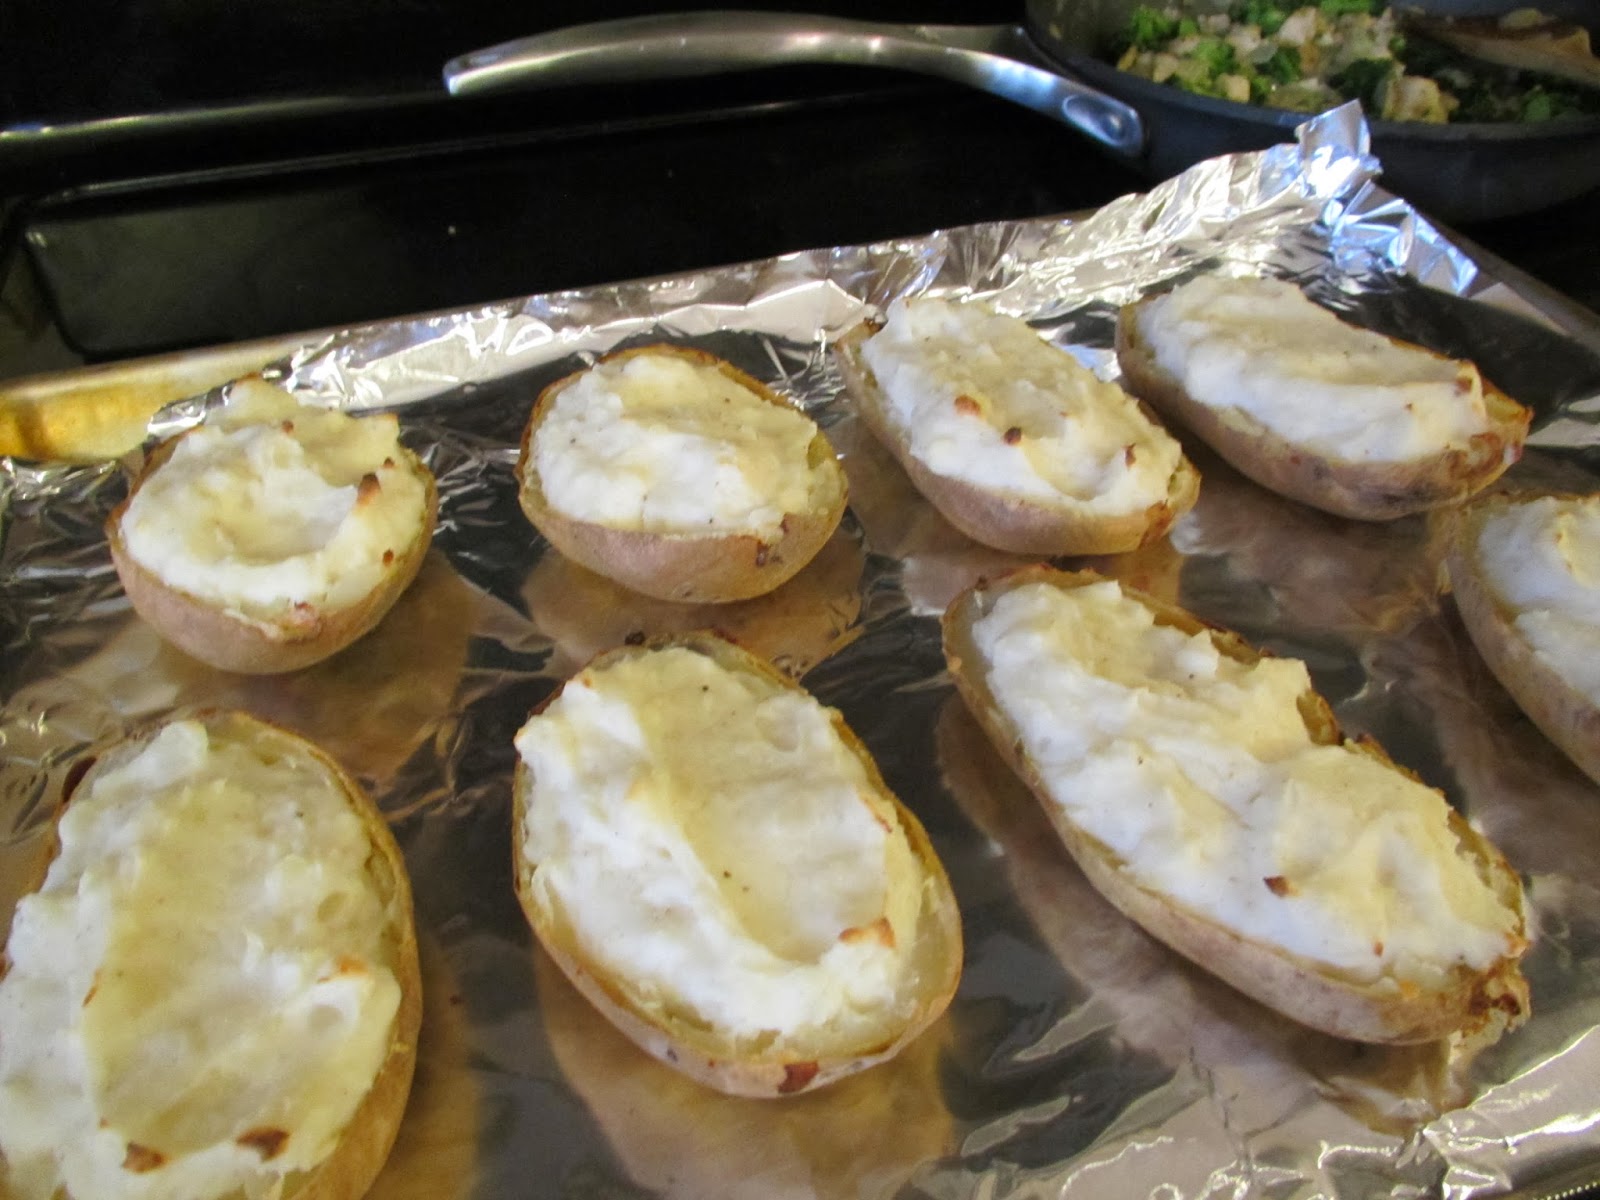
Fill potato skins with potato mixture, as shown below.  Bake in the oven ~15 minutes, until lightly browning on top.  Meanwhile, prepare topping.
Potatoes filled and ready to be baked. 
Prepare filling while potatoes are cooking: 
Saute in large saucepan over medium heat until onion has softened: 
2 Tbsp butter
1 small/medium onion, diced

Add and cook until softened: 
2-3 cups broccoli heads (bagged fresh or 10oz pkg frozen work well, or 1-2 clusters fresh broccoli)

Stir in: 
2 cups chopped, cooked chicken
1 1/2 cups sharp cheddar, grated
salt and pepper, to taste

Remove from heat, taste and season with additional salt/pepper, if desired.
Topping ready to go!
Potatoes after lightly browning. You can let them cook until a bit more browned on top, if you want a little more of a crunchy topping.  

Remove potatoes from the oven and serve with a big scoop of broccoli, chicken and cheese topping on top. Enjoy!!! 

Thursday, 9 January 2014

Gluten-Free White Sourdough Bread

I've really found cooking with my gluten-free sourdough starter to be wonderfully easy, and this bread recipe is no exception.  The starter itself, has proved to be amazingly forgiving (I've forgotten to feed it some days - no problems; I've popped it in the refrigerator for a week and ignored it - no problem; I've fed it extra flour and water some days to get more starter - no problem). Nice, right!?  While the breads do take extra time to rise, the resulting bread is airy and sturdy enough for thick or thin slicing.  It also freezes wonderfully, which is great to have around for school sandwich bread. I should note that while it is made with a gluten-free sourdough starter, it doesn't have a proper 'sourdough' taste, but rather tastes like a nice, white bread. Enjoy!


Gluten-Free White Sourdough Bread

Butter 2 bread pans.

Mix in a large bowl:
1 cup white rice flour
1 cup potato starch
1/2 cup brown rice flour
1/2 cup tapioca starch
2 tsp xanthan gum
1 tsp salt

In a mixer, combine:
1/2 cup gluten-free sourdough starter
1 cup lukewarm water
3 eggs, room temperature
1 Tbsp honey
1 1/2 Tbsp maple syrup
4 Tbsp oil

Add in dry ingredients and beat 1-2 minutes, until nice and smooth. Divide dough into two buttered loaf pans. The pans should each be 1/2 full. Cover with plastic wrap.
Fill buttered pans halfway and cover fully with plastic wrap.

 Set in a warm location to rise 4 hours (yes, 4 hours). You won't see much evidence of rising until at least 2 hours have passed.
Loaves have risen and are ready to bake! 

Once dough has risen (not quite doubled in size), bake at 350F for ~ 45 minutes.

Remove from pans and cool on cooling rack. Slice and enjoy!
I find it's best warm or toasted.  It's delicious toasted and buttered.  It works great for garlic bread or sandwiches.  You can slice and freeze, too.  Enjoy!
The bread is nice and airy!
They slice very neatly, so you can cut thick or thin slices.


Coconut Rice Pudding

This is a delicious and easy rice pudding to whip together.  Everyone loves it at my house - and it's great warm or cooled.  We find it's a nice snack to have in the refrigerator whenever someone wants a quick and filling snack.  Enjoy!
If you look closely, you can see tiny flakes of vanilla bean - I find using vanilla bean paste in place of vanilla extract in recipes like this really makes the flavor pop. 

Coconut Rice Pudding

Makes 6-8 servings (approximately - it kind of depends how much each person wants, since this is a rich pudding)

In a medium saucepan mix the following:
1/2 cup jasmine rice, rinsed thoroughly (or your pudding will thicken too quickly!)
1 cup 2% milk (lactose-free works well)
1 cup heavy/whipping cream (lactose-free works well)
1 can coconut milk

Bring to a boil over high heat, stirring occasionally.  Lower heat and simmer, uncovered for 30-40 minutes, stirring occasionally, until pudding thickens.

Once pudding is thickness you prefer, add and mix in the following:
1/4 - 1/3 cup sugar
1/2 tsp vanilla bean paste OR vanilla extract

Continue cooking for 5 minutes over low heat.  Remove from heat and put into bowls for serving or one larger bowl.  Great warm or cooled.  You can let this pudding cool uncovered.   Store in the refrigerator once it's cooled a bit.

To turn this into more of a Caribbean coconut pudding, add shredded or flaked coconut and raisins, if desired, when serving.

Enjoy!

Coconut Rice Pudding Recipe by Successfully Gluten Free!

Wednesday, 8 January 2014

Favorite Frosted Sugar Cookies

My goal with making frosted sugar cookies was to end up with a cookie that wasn't crunchy, but had a perfect softness to the texture to compliment my favorite marshmallow frosting.  This combination of sugar cookie and marshmallow fluff frosting was just what I was hoping for.  These cookies have been made and devoured with rave reviews from young and old (especially young!) on many occasions.  I brought some to my friend Lisa's house, and her sons were repeatedly telling her to make sure they got this recipe from me.  Here it is! Enjoy!

Frosted sugar cookies - they're wonderfully soft. And, if you're more skilled (or patient) at frosting than I am, they have potential to look absolutely gorgeous AND be delicious! 

Delicious Sugar Cookies
Cookie recipe is based on the recipe from 'Artisanal Gluten-Free Cooking' by Kelli and Peter Bronski (This is the only GF cookbook I would recommend)

Makes 12 large cookies and 25 small cookies (it really depends on your cookie cutters)

Mix the dry ingredients in a large bowl: (it's important to do this in GF cooking to avoid clumping)
1 1/2 cups Kristin's Gluten-Free Flour mix
1 1/2 tsp xanthan gum
1/2 tsp baking soda
1/2 tsp cream of tartar

Beat in a mixer until fluffy:
3/4 cup powdered sugar
1/2 cup butter

Add and mix in thoroughly:
1/2 egg (beat the egg in a bowl with a fork and dump in approx. half the egg - the recipe is forgiving)
1 tsp vanilla bean paste (or vanilla extract)

Add dry ingredients and mix until well-combined.   Wrap the dough in plastic wrap and refrigerate at least 30 minutes to chill. 

Preheat oven to 375F.  Line baking sheets with silicon lining or parchment paper.

Roll out chilled dough between two pieces of plastic wrap to approx 1/4" thickness.  Cut into whatever shapes you like and place on prepared cookie sheets.   *Note: I recommend placing similar sized cookies altogether on the same baking pan, so you have even cooking.  Otherwise, you will end up with some cookies getting too dark. 

Bake cookies ~6-9 minutes (depending on size) until just barely browned on edges of the cookies.  Remove pan from oven.  Let sit a few minutes before placing your cookies on a cooling rack.  

Once cookies are cooled, frost as desired with my marshmallow frosting, below.
Mini cookies, ready for baking 
Mini cookies, just barely browned at edges (this keeps them soft - if you like crispy cookies, just cook longer) 
Let cool before frosting. Feel free to snack on a few. Yum!

Kristin's Marshmallow Fluff Frosting - proper consistency (and amount) for frosting cookies!!!
I've posted my delicious marshmallow fluff frosting recipe previously, but for this cookie recipe, you don't need as much as that recipe makes, and this ratio of ingredients gives you a frosting that is a perfect consistency to spread, pipe, or color for frosting cookies.

Beat until smooth in a mixer:
3/4 cup butter, softened
2 cups powdered sugar

Add and mix in:
1 tsp vanilla bean paste (or vanilla extract)
1 cup marshmallow fluff

You can color with food coloring, if desired.  This easily spreads with a knife, or can be piped onto your cookies, as desired.

Monday, 6 January 2014

Spinach, Ham & Cheese Brunch Casserole

We've really been enjoying the wonderful taste of the sourdough starter breads and rolls lately.  This recipe is a delicious use for the gluten-free sourdough brown bread I make. I was inspired by some suggestions for brunch casseroles in the Food Network Magazine, and tweaked things around to make a gluten-free version that had all the ingredients I love.  This version has been a hit with the whole family. So much so that I made it for our friends Julie and Jeremy who came for dinner, and they loved it as well.  I find it's a wonderful dish for any time of day, even thought I've called it a brunch casserole.  It reheats wonderfully, and it also nice chilled, like a quiche.  While I love quiche, this is a wonderful alternative - perfect for a chilly day! Enjoy!

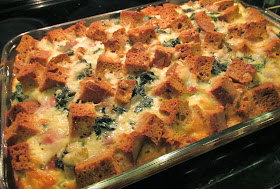
Ready to eat! 

Spinach, Ham & Cheese Brunch Casserole
Serves 6-8
Prep ~20 minutes, Sitting time ~30 minutes, Baking/resting time ~1 hr.

Butter a 9x13 pan.

In a large frying pan, heat at medium heat:
2-3 Tbsp olive oil

Add and saute until tender:
2 large shallots, diced OR 2 small onions, diced

Add, stirring until wilted:
4-5 large handfuls of baby spinach
salt & pepper, optional

Remove from heat and set aside.

Chop up one loaf of gluten-free sourdough brown bread, ideally one day old (or bread of your choice, ideally 1 day old) into 1" cubes.  You should have 8-9 cups.  (I have a 9 cup tupperware that I put my 1" cubes into once chopped after baking/cooling my bread, then I'm ready to make this casserole the next day)

Place 1/2 your bread cubes into the bottom of the 9x13 pan.

Sprinkle over top of the bread:
2 cups grated flavored cheese (flavored gouda (I've used a nice mustard & pepper, and an italian-seasoned gouda), strong cheddar, or similar density cheese w/ flavor of your choice would work well)
One half bread cubes topped by 2 cups grated flavored Gouda

Spread over top of cheese:
Cooked spinach & onions
1 1/2 - 2 cups chopped ham (cubed ham or slices of ham, diced)

Top with remaining cubes of bread.

Mix together, and then pour evenly over pan:
10 eggs
1.5 cups cream (lactose free works great)
1.5 cups milk (2%) (lactose free works great)
1 - 1.5 tsp salt
Spinach mixture, then ham, then bread cubes, then egg and milk/cream mixture, prior to covering.

Cover pan with plastic wrap and let sit 30 minutes.  Remove plastic wrap.  Bake at 325F for 50 minutes, or until set in the center.  Let sit 10 minutes before cutting and serving.

This is great fresh and hot, but also wonderful as leftovers either cold or warm.  I find it's similar to a tasty quiche, but with the crust throughout.

Enjoy!!!