Search for a Recipe

Pages

Sunday, 30 November 2014

Chili - with multiple veggie options

My go-to chili recipe, in time for chilly weather!  I tend to vary things up when I'm making chili, throwing in different types of veggies depending on what I have on-hand, or what sounds good at the moment.  I've given a number of options here - and just written 'optional' next to them.  You can throw things in that you like and leave out things you dislike.  A win-win for everyone! We like to eat it with a variety of things -  homemade cornbread, tortilla chips, over baked potatoes, on top of nachos, with GF crackers or bread.  This version isn't too spicy - but I tend to just add an extra pinch of cayenne powder, and use a heaping Tbsp/tsp of chili powder and cumin if I want a spicier chili. Enjoy!
Chili made with sweet potato & corn, topped with cinnamon-sour cream, fresh cilantro & green onion. Mmmm... 
Fresh chili in the pot - almost ready to eat! Made with local corn, onions & purple celery!

Chili - with multiple veggie options
Serves 4-6

In a medium-large pot or large high-sided frying pan, heat over medium to medium-high heat: 
2-3 Tbsp olive oil

Add and let cook 2-3 minutes: 
1 onion, chopped

Add in, cooking until browned:
1 lb. ground beef 

Add in a variety of the following veggies, and cook 3-5 minutes, until veggies are tender, but not soft: 
3-4 cloves garlic, minced
1 sweet potato, peeled & diced in small pieces (optional)
1-2 stalks celery, diced (optional)
1 green pepper, chopped (optional)
1 small zucchini, chopped (optional)
1 small yellow squash, chopped (optional)

Add: 
1 large can diced tomatoes
1-2 cups beef broth (add more/less depending on thick you like your chili)
1 Tbsp chili powder
1 tsp ground cumin 
1 - 1 1/2 tsp salt
1 tsp garlic powder
1/2 tsp fresh ground pepper

Bring to a boil.  Lower heat and let simmer ~20 minutes.  Check to make sure the sweet potato is softened.  I like to cut them into very small pieces, so they cook quickly. If it's not, continue simmering a few extra minutes.  

Add: 
1 can kidney beans and/or black beans, drained
1 cup frozen corn kernels (optional)

Let chili simmer ~10 minutes after adding beans and corn.  Serve hot with your preferred side and/or toppings. Enjoy!

Topping ideas: 
grated cheddar cheese
sour cream (add a pinch of cinnamon to the sour cream for something a little different)
fresh cilantro
sliced green onions

Side ideas: 
tortilla chips
nachos
homemade GF breads and/or crackers
baked potatoes
Chili topped nachos! (still steaming)

Tuesday, 25 November 2014

Tempering Dark, Milk or White Chocolate

There's a great deal of information out there regarding tempering chocolate.  Unless you want shiny dipped chocolates, chocolate decorations, or molded chocolates that can last days without looking funny (blooming to streaking) - don't bother with tempering.  Just following the instructions I've given here for dipping your chocolates, and enjoy.  Anything eaten within a day or two will look just fine made this way.  And if you store your chocolates in the refrigerator, they can look great for a couple weeks.  However, sometimes I want lovely crisp, shiny tempered chocolate.

Homemade molded truffles & caramels, decorated with edible shimmer, colored cocoa butter or chocolate transfer sheets. 

Why would you want to temper your chocolate?  The short story is: Tempered chocolate has a smooth sheen.  It hardens quickly - so you don't have to put things in the refrigerator to cool/harden the chocolate. It's crisp and not soft, so when you bite into it, it isn't mushy tasting - it snaps.  If you make molded chocolates, dip chocolates, or make chocolate decorations - it is nice to temper the chocolate or you might get what is called 'blooming' or 'streaking'.  There's nothing wrong with chocolate that has streaks or blooming in it, but it doesn't look as pretty and means your chocolate won't have that crisp snap to it since it's not "tempered".
Molded pear-shaped truffles with chocolate just going out of temper - hence the swirls. No problem! Still tastes delicious - and looks rather neat, too. (Although I try not to do this)

I love making molded chocolates - although I keep it to about once or twice a year that I get out my molds and whip things together.  I'm all about simplifying my cooking while ending up with the best possible result, and this version of tempering chocolate is about as good as it gets. You still need patience during the cooling part of the process.  If you're nervous about using a microwave to make these. No problem!  Just set your toaster oven (or regular oven) to 175-200F and use that to slowly heat up your chocolate.  It takes a bit more time to bring things to temperature, and you still want to remove the bowl every couple minutes to stir the chocolate, but since it heats a bit slower, it will give you a bit more time to get used to how quickly chocolate heats up and how slowly it cools down.
A variety of molded chocolates - made with tempered chocolate. 

Tempering Dark, Milk or White Chocolate
Based on directions in the book 'Making Artisan Chocolates' by Andrew Garrison Shotts (a beautiful chocolate making book)

You can temper as much or as little chocolate as you like.  Just use the following percentage guideline:

Place 75% of your total amount of high-quality chocolate (chopped or as chips) in a microwave-safe bowl.  Save 25% chopped, chips or as a large hunk for later.  (For example, I typically use 3 bags ghirardelli or guittard chocolate chips and save 1 bag for later in the recipe. I find milk & white chocolates can be thick and a bit difficult to work with - but the guittard chips seem a bit less sticky than ghirardelli.  My favorite are Callebaut, with a proper consistency for molding, but I have to order these online.  However, the taste and texture is wonderful to work with!). 

* Purchased chocolate chips have varying amounts of cocoa butter in them. Some melt and are quite sticky and others are nice and smooth and flow easily.  Unfortunately, for most of us not ordering bulk from chocolate companies, it just takes a bit of experimentation to find the right kind.  Just don't get any chocolate that has 'extra' ingredients added into it, or it won't temper properly.  I find milk chocolate tends to be harder to work with and temper than dark chocolate - so best to keep that in mind!

Tempering process:
Usually takes me ~45 minutes - 1 hr.  A little longer if heating in toaster oven/regular oven (as mentioned above as a heating option, though the cooling time is the most time-intensive part of this process). 

Step 1: 
Heat 75% total chocolate in the microwave for 60 seconds at 50% power.  Stir well (even if it looks like nothing has happened).  Repeat heating and stirring process.

Heat until 115-120F.

Step 2:
Place bowl on the counter and let SIT for 10 minutes.

Step 3:
This next step takes time - be patient as you wait for your chocolate to cool.
Start adding ~ half of your 25% remaining chocolate by handfuls to your melted chocolate.  Stir in thoroughly.  Stirring every 20-30 seconds, allow the mixture to lower in temperature to:
86F for dark chocolate
81F for milk or white chocolate
When your initial chocolate you've added has melted in most of the way, add another handful or two of chocolate to your mixture to help it continue to cool.   Keep stirring every 20-30 seconds.  Be patient!  This can take 30-45 minutes or more depending on how much chocolate you have melted.

Step 4:
Once your chocolate has cooled.  Return it to the microwave and heat 1-5 seconds at 50% power.  Chocolate heats fast compared to how slowly it cools!  You don't want to go above 91F for the dark chocolate or ~89F for the milk chocolate, or the chocolate will go out of temper.
Heat chocolate to:
89F for dark chocolate
86F for milk or white chocolate

You can scoop out any chunks of chocolate that didn't melt all the way.  (Plop them on parchment paper and save them and reuse them next time you temper chocolate - or save for chocolate chip cookies, etc.)

Step 5:
Test your tempered chocolate on **parchment paper by drizzling a small bit with a fork. It should harden quickly.

Now, work quickly!  Use chocolate however you like for molds, dipping, piping decorations, etc.  Don't use too much chocolate from the bowl at a time, so the chocolate stays warm.  If you worry it's cooling, place it back in the microwave for 1-5 seconds at 50% power.  Make sure to give the chocolate a stir occasionally, so you can keep it in temper.

If you lose the temper, then you will have to reheat the chocolate back to 115F-120F and start the process again.

**Parchment paper is wonderful for chocolate making - I use it to line the counters & line cookie sheets.  I line containers with it before putting tempered chocolate items in them.   It helps a great deal with clean-up, too!
Molds filled w/ tempered chocolate, then shaken to remove excess, and excess scraped off with a knife.

Molds filled most of the way with white chocolate ganache filling. Extra white chocolate was put on top once filling set.  I find they're easier to get out if I pop them into the refrigerator for a few minutes before removing. (Plus, I sometimes don't bother tempering the chocolate going on the bottoms, so refrigerating it a bit helps it harden).

Finished chocolates - lightly dusted with edible shimmer.

Thursday, 20 November 2014

Cranberry-Pumpkin Bread

This has long been a family favorite since I was a kid.  Cranberry-pumpkin bread being made always meant the holiday season was underway.  I've previously posted the pumpkin bread we make regularly, but there's something festive about this particular bread with the mix of sweet and tart.   I prefer and would recommend making it in mini loaf size, since I find the crust has an extra bite of sweetness to it in this bread, and so I like having more of it! For a bit of a less dessert-style cranberry pumpkin bread, you can try my updated family favorite cranberry pumpkin bread recipe.  Enjoy!
Gluten Free Cranberry Pumpkin Bread
Gluten Free Cranberry-Pumpkin Bread

Cranberry-Pumpkin Bread (Our Family Recipe - converted to GF)
Makes 4 mini loaf pans or 1 loaf pan

Preheat oven to 325F. Grease (butter) and flour (use GF flour mix) 4 mini loaf pans or 1 large loaf pan.

Mix dry ingredients in a large bowl: (it’s important to mix GF flours on their own before adding to wet ingredients)
1 1/2 cups white sugar (OR 1/2 cup sugar + 1/2 cup honey (mixed in with liquids))
1 tsp xanthan gum
1 tsp baking soda
¼ tsp baking powder
1/2 tsp salt
1 tsp pumpkin pie spice + pinch of cloves (OR ½ tsp cinnamon, ¼ tsp ginger, 1/8 tsp allspice, 1/8 tsp nutmeg, pinch of cloves)

In a separate bowl, mix together:
¼ cup vegetable oil
2 eggs
1/3 cup milk
¾ cup pumpkin puree (canned 100% pumpkin or make your own pumpkin puree)

Mix wet and dry ingredients together.

Fold carefully into batter:
1 1/2 cup fresh cranberries (about 1/2 bag or 6 oz), rinsed and dried off (you can freeze fresh cranberries to use later - baking time will need to be increased to compensate)


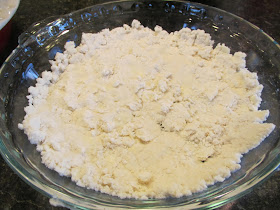
The batter should look like this - a bit smoother if you're using canned pumpkin rather than homemade pumpkin puree. 


Pour batter into prepared pans, filling each pan halfway.
Bake 40-45 minutes for mini-pans and 70-75 minutes for large pans.
Let cool in pans on cooling rack 5-10 minutes before unmolding.  Cool & slice.
Enjoy!
Gluten Free Cranberry Pumpkin Bread Gluten Free Cranberry Pumpkin Bread
Let bread cool 5-10 min. in pans, as on left, before carefully removing to wire rack to cool completely.

Tuesday, 18 November 2014

Pumpkin Pie!

This is a wonderful pumpkin pie recipe with flaky buttery crust and a rich filling, which you can make with or without dairy!  My husband and son absolutely love this pie and inhale it every time I make it.  I always think it will burn or something will happen to it while it's cooking since you start at a hotter temperature and then lower the heat, but it always seems to work itself out and end up with a nice browned crust and perfect filling.  We've already enjoyed this at our Canadian Thanksgiving here, but I think we'll have to whip it up again for the American Thanksgiving. One can never be too thankful (or have too much pie)!  Enjoy!

Pumpkin Pie!
Serves 8

Preheat oven to 400F.  Put a cookie-tray in the oven to heat up (you'll place the pie on this cookie tray while cooking).

Prepare pie crust recipe (or recipe of your choice).  You will just need 1/2 the recipe for this pie, so you can save the remaining dough to use for a quiche, pie, or galette.  Line the bottom of the pie plate with the pie crust and prick the bottom with a fork.
Pie crust rolled out between plastic wrap, and pressed into the pan.  Use plastic wrap to shape the edges nicely (so it doesn't stick to your fingers!)

Mix together in a large bowl until smooth:
2 cups pumpkin puree OR 100% canned pumpkin
1/2 cup brown sugar (dark or light, but I prefer dark)
1/4 tsp nutmeg
1/4 tsp allspice
1/2 tsp cinnamon
1/4 tsp ginger
1/4 tsp salt
2 eggs
1/2 cup thick part of canned coconut milk OR 1/2 cup whipping/heavy cream

Pour into prepared pie plate and put in the oven on top of your preheated cookie sheet.
Ready to pop in the oven! 

Bake at 400F for 15 minutes.  Without opening the oven door, lower the temperature to 350F and cook another 30-35 minutes, until the filling is just set in the center.

Cool and Enjoy!  

Saturday, 15 November 2014

Gouda, Bacon & Onion Quiche w/ Buttermilk Biscuit Crust

There's so many wonderful options when making quiche.  We have some friends who took over the Cheese Lady's Gouda shop here on PEI and they make the most wonderful Gouda cheese (they can now ship to the US as well as within Canada if anyone's interested) - the new name is Glasgow Glen Farms, conveniently located near my house.  It's inevitable that I find uses for this wonderful variety of cheese in my cooking.  Of course, you can replace gouda with any flavorful cheese you like. I find it's uses are similar to a good cheddar.  And, of course, any recipe with bacon has to be delicious, right?! Enjoy!


Gouda, Bacon & Onion Quiche w/ Buttermilk Biscuit Crust

Heat oven to 425F.  Get yourself out a pie pan.
I tend to make a full batch of buttermilk biscuits and use half for the crust and just cook the other half as biscuits.  But, if you just want to make the quiche, mix the crust as follows:

First, make your buttermilk (or just use ¼ cup buttermilk)

In a measuring cup place:
1 ½ tsp lemon juice OR white vinegar

Fill so you have total of:
¼ cup milk

Mix in a bowl:
¼ cup brown rice flour
¼ cup tapioca starch
2 Tbsp cup cornstarch
2 Tbsp cup potato starch
1/8 tsp xanthan gum
¾ tsp sugar
1 tsp baking powder
¼ tsp salt
pinch of baking soda

Add and dice in with a pastry cutter:
2 ½ Tbsp butter

Add and mix with a spoon, just until combined:
¼ cup buttermilk (from above)

Press biscuit dough gently into pie pan.  I find the batter tends to be sticky – spread out while pouring in the pie plate as best you can, then put a tiny bit of water on your fingertips to help.  Don't worry about it being perfect - it rises as it bakes.


Sprinkle onto bottom of dish:
1 cup sliced or finely chopped Gouda cheese (The 'Cheese Lady's Gouda' on PEI is fabulous!)

On top of cheese put:
1 small onion, diced and sautéed in 1 Tbsp olive oil until tender (3-4 minutes)
Then add:
1 cup chopped pork loin bacon (cooked), or bacon of your choice (cooked)


Mix together in a separate bowl:
4-6 eggs (4 cooks faster, but you’ll have a smaller quiche, I prefer 6 myself)
1/3 - ½ cup milk (lactose free works great)
Salt
Pepper (be generous)

Pour egg mixture carefully and evenly over the top of the bacon/cheese/onions.   Pop in the oven!

Bake 10 min at 425F. Lower heat to 350F and cook 20-25 minutes more, until centre is set (doesn’t jiggle when you gently shake the pan).

Remove from oven. Let cool 10-15 minutes before cutting.  Great warm or cold!   Enjoy!

Friday, 7 November 2014

Ginger Pear Tart w/ homemade GF puff pastry crust!

Once I figured out I could make gluten-free puff-pastry, I simply had to do something with all the lovely fresh pears available this time of year.  This is a great treat because there is very little sugar added - the rich flavor is from the pears themselves, and fresh grated ginger.  They're such a perfect combination.  I based my recipe off this one, but I use vanilla bean paste to add extra oomph.  If you don't have the bean paste, you can scrap in a bit of vanilla seeds from a fresh pod and use vanilla extract.  The bean paste really adds something extra to the pear & ginger flavors.  Enjoy! 

Fresh out of the oven. Yum!

Sliced into pieces, ready to enjoy. Look at that lovely flakiness!

Ginger Pear Tart w/ homemade GF puff pastry crust!
Makes 1 large tart (can easily be doubled or tripled using the puff pastry crust recipe)

Make 1 batch of homemade GF puff pastry dough.   Follow the instructions on creating danishes or tarts from letter 4.  You can make this tart any size or shape you want, but avoid having it much bigger than 12x12 (primarily b/c I think the edges are the loveliest part of the puff pastry).

Preheat oven to 400F.

Cut off a 2-4" piece from your puff pastry dough.  Roll out your piece into a rectangle (or square) that is ~1/4" thick between two pieces of plastic wrap. (Mine went from 1" to 1/4" thick from the envelope-sized rectangle I had).  Flip your dough from the plastic wrap onto parchment paper-lined cookie sheet.  Fold in the sides of the dough to create an edge using the parchment paper to help lift the edges.
Rolled out dough.  Dough flipped onto parchment paper, with edges folded up.

Peel and thinly slice:
2 ripe pears (not overripe - make sure they're still firm)

Mix together ginger glaze:
2 Tbsp melted butter
1 tsp fresh grated ginger
1 Tbsp brown sugar
1 tsp vanilla bean paste
1/2 tsp cinnamon

Brush the dough gently with the ginger glaze.
Layer the pears overlapping (as shown) onto puff pastry.
Brush the remaining glaze over the top of the pears.
Bake at 400F ~12-15 minutes, until nicely browned.

Remove from oven.  Let cool slightly, then slice and serve.  This is great warm or cool. Enjoy!
Mmmm... delicious!


Wednesday, 5 November 2014

Leek & Potato Soup

 I fell in love with leek & potato soup while living in England.  (Leeks seemed to be plentiful over there).  It's a rich, creamy soup that is just perfect for chilly weather.  I find that locating leeks where I live can be hit or miss.  Luckily, our organic veggie CSA grew some lovely leeks this fall and we put them to use in a soup that was absolutely loved by everyone.  I had no idea it would be such a hit with the kids, but they inhaled it and asked for more.  I also love that while the soup is rich and creamy, it actually has no cream in it. Enjoy!
Gluten Free Leek and Potato Soup
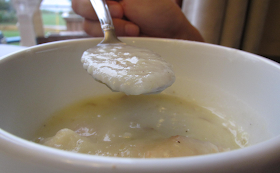
GF Leek & Potato Soup - My son inhaling his leek & potato soup

Leek & Potato Soup
Based on a recipe from Comfort Foods by Bridget Jones (this happens to be my favorite cookbook of all time)
Serves 6-8 

In a large pot over medium-high heat combine:
1/2 cup butter
~3 cups chopped potatoes (use thin-skinned, washed potatoes)
2 large leeks, sliced thinly & rinsed (don't use the very bottom or the dark green tops)
2-3 medium onions, chopped

Wait until the mixture is bubbling nicely.  Put on the lid, lower the heat to low and let the veggies steam for ~15 minutes.

Increase heat to medium-high.  Remove lid and add:
6 cups chicken broth
2 tsp salt
3/4 - 1 tsp ground pepper

Bring soup to a boil.  Once the soup is boiling, cover and lower heat again.  Let simmer ~20 minutes.

Blend with a stick blender.  You don't want to over-blend or the soup can get a bit too thick.  There will be some smaller pieces of veggies in the soup, but this is okay.

Wonderful served with fresh GF cornbread, made on a cookie sheet so the pieces are nice and thin for dipping.  Enjoy!