Search for a Recipe

Wednesday, 22 May 2013

Lemon (Raspberry or Poppy seed) Muffins!

There's something about the warmer weather that makes you want to eat something citrus-based.  It all started with my orange poppy seed muffins, and I've been branching out from there. I always have experimented, but now I'm getting my modifications and variations all typed up!  This recipe is wonderful as lemon muffins, but we love them as lemon raspberry muffins or lemon poppy seed muffins.  I think you will, too!  Enjoy!
Lemon (Raspberry or Poppy seed) Muffins
Makes 12 muffins

Preheat oven to 375F.  Line muffin tin with 12 paper liners.

Mix dry ingredients in a medium bowl:
½ cup brown rice flour
¼ cup white rice flour
¼ cup tapioca starch
¼ cup potato starch
½ cup *lemon sugar (*to make lemon sugar – use grated zest from 1 lemon + ½ cup sugar – let rest in fridge 2-3 days for best flavor OR just include ½ cup sugar + grated zest from 1 lemon here in the recipe)
1 tsp xanthan gum
3 tsp baking powder
½ tsp salt
1 - 2 Tbsp poppy seeds (If making lemon poppy seed muffins)

Mix wet ingredients in a large bowl:
8 oz milk (lactose-free works great)
3 oz oil (canola or extra light olive oil)
1 eggs

Add dry ingredients into wet ingredients and whisk until blended. There will still be a few small lumps left, but don’t worry about it.  It’s best not to over-mix muffins.

Gently fold in:
¾ cup fresh raspberries, broken/chopped into smaller pieces (If making lemon raspberry muffins - you can also use frozen berries, don’t thaw, and cook an extra 3-4 minutes)

Pour batter evenly into 12 muffin cups. They should be about ¾ full.

Bake at 375F for 20 - 25 minutes, until nicely golden on top.  Remove from oven and set to cool on a cooling rack. Top with lemon glaze, below.

Lemon Glaze
 This makes a small amount of glaze, if you like your muffins with a bit extra, just double the glaze recipe. It'll work great!

Mix together in a small bowl:
2-3 tsp fresh lemon juice
½ tsp zest of lemon (optional)
¼ cup powdered sugar

Spread over warm or cool muffins.  Enjoy!

Tuesday, 21 May 2013

Pork Carnitas Tacos

Another fun taco variety!  I love that you can make this with boneless pork chops, since I feel like they're always on sale, and...well, I just don't love pork chops. But I do love tacos!  You'll need a couple hours to let this cook up, but if you've got the time to let it cook, it's definitely easy and delicious! Serve these up as a taco salad or with homemade corn tortillas! Enjoy!

Pork Carnitas Tacos
Serves 3-4
You can easily double or triple this recipe!
 
Mix together in a 2qt pot:
¾ lb. boneless pork loin, cut into 3-4 pieces (you can use boneless pork chops, too!)
2 tsp minced garlic
1 small onion, diced
½ tsp ground cumin
½ tsp ground chili powder
Salt and pepper
 
Add ~ 2 cups water, until the pot is filled to about ¾ full.
 
Bring to a boil over high heat.  Lower heat to medium and cook, uncovered, for ~ 2 hours, until the meat is nice and tender and breaks apart easily with forks.  Most of the liquid should be gone by the time the meat is finished, leaving enough juice to keep the meat moist. 
 
Break apart the pork using two forks to create shredded pork.  Add and mix in:
½ - 1 tsp ground cumin
½ - 1 tsp ground chili powder
¼ - ½ tsp garlic powder
Salt and pepper, to taste


It’s ready to go! 
Make sure to prep some toppings while it finishes cooking!
Lettuce, homemade guacamole, homemade salsa, fresh chopped jalapenos, grated cheese

Lovely served on homemade corn flourtortillas, but you can serve this on hard tacos, in taco salad, make into tamales (if you’re really ambitious).  Enjoy!!!
Piled with toppings - so delicious!
 

Corn Flour Tortillas

I have a lovely friend, Laura, who taught me how to make these wonderfully simple corn tortillas.  In addition to costing pennies compared to the store-bought corn tortillas, these taste SO much better!  You buy the Maseca flour, a special corn flour.  If I can buy it up here in Prince Edward Island, you should be able to locate it, too.  It was in the International section of the grocery store.  The tortillas are simple and easy to mix, flatten and fry.  Laura has a great tortilla press, but it works just as well to flatten between two cutting boards.  My 7-yr old can prep and press them all on his own! So fun! Enjoy!
Corn Flour Tortillas
Makes 8 tortillas
 
Set a frying pan over medium-heat.  This mixes together quickly, so you want the pan nice and hot when you’re ready to cook.
Mix together in a bowl, using a spoon or your hands:
1 cup Maseca flour (a special kind of white corn flour, likely sold in your international section)
¾ cup water
Dash of salt (optional, I prefer without)


This is what the Maseca flour bag looks like.

The dough should easily hold together when handled.  Separate into 8 even pieces. 
Roll each piece of dough into a ball and flatten with hands.
 
Using two flat cutting boards (or anything heavy/flat), layer as follows:
flat board, piece of plastic wrap, 1 piece of dough, another piece of plastic wrap, another flat board.  Press down to flatten.  You can even stand on the boards to help flatten the tortilla even more!  Fun!


Prepping to flatten, arranging the cutting boards with plastic wrap, and being flattened by my son.

After flattening, remove one side of the plastic wrap, and use the other to lift the flattened tortilla carefully onto your hand.   You can re-use the two piece of plastic wrap for the remainder of the dough. 


The more you press, the flatter your tortilla will become.  Notice how nicely the plastic wrap peels off the top, allowing you to keep re-using your two pieces of plastic wrap.

To cook: You want to place the tortilla into the warm frying pan.   The tortilla will cook maybe 10-20 seconds, until it easily slides around the pan.  Flip and cook the other side 10-20 seconds.  You will flip and cook the tortilla until you’ve cooked each side 3 times, for a total of about 1 minute per side.   Remove from pan and stack on a plate. 


They fry up so quickly and easily.  I use my fingers (as directed by my friend, Laura) to flip them over again and again. So easy and fun once you get the hang of it!

These are great with any taco-like fillings, like my recipe for regular tacos or pork carnitas tacos. You can use them for quesadillas, enchiladas, or wraps.
Enjoy!
Filled with pork carnitas tacos and topped with lots of veggies and a little cheese! Yum!
 

Monday, 20 May 2013

Caramelized Almond Crunch Cookies

These are amazing!!! I based these on the almond wafer cookies sandwiched with chocolate sold at the Anne of Green Gables Chocolate Shop here on Prince Edward Island.  They call it 'Moo Munch'.  They are SO delicious.  It's a good thing they only come in small packages.  We love them!  I figured it was high time to figure out how to make them at home, so after some trial and error, we have success!  As you may note, the recipe doesn't make a huge number of cookies, so yes, you can double, triple, quadruple the recipe, as desired.  However, I find this number is perfect for those snack-time sweet-tooth munchies. Enjoy!
Doesn't that caramelized almond-chocolate goodness look amazing?! Yes, they are!
 
I applied to the Recipe to Riches show with this recipe - looking like these here.  I was a finalist in both Moncton and Toronto. Woohoo! (aka, these are tasty treats)

Caramelized Almond Crunch Cookies
Makes 7-8 sandwiched cookies
 
Preheat oven to 350F. Line 2 cookie sheets with parchment paper.

Mix together in a bowl the following:
¼ cup slivered almonds, chopped into even smaller pieces
Chop slivered almonds so they look something like this.
2 Tbsp butter, softened
2 Tbsp sugar
1 tsp milk (lactose-free works well)
1/8 tsp salt
1/8 tsp vanilla extract
 
Scoop small teaspoon-sized amounts onto the parchment paper, leaving ample room for them to spread.  Gently flatten each scoop into a 1 ½ - 2 inch diameter circle. (it doesn’t need to be perfectly neat.)  You will find you can only fit about 12 cookies per tray, so you’ll need to put another 2 – 6 cookies on the next tray. (this all depends on the size of your scoops)

Bake 8-9 minutes, until browned.  Remove from oven, let cool on parchment paper.  You can remove the parchment paper to the counter to finish cooling after about 5 minutes.

These spread A LOT, but even if they all run into each other, you can still let cool and sandwich odd sizes together. It's a win-win recipe!
Line a cookie sheet with a fresh piece of parchment paper.  You need this to fit into the refrigerator to help the chocolate set, so if needed, use plates or something flat that will fit into your refrigerator.
 
Melt in a small bowl:
1/3 cup milk, semi-sweet or dark chocolate chips

Carefully spread a bit of chocolate on the underside of one wafer cookie.  Sandwich together and place on the prepared parchment paper.   Continue sandwiching the remainder of your wafer cookies. Once finished, place the tray into the refrigerator until your chocolate has set. 
You can store your finished cookies at room temperature for 3-4 days (perhaps more, but they’ve never lasted longer than a few days).  Drizzle with chocolate, as shown below, for a fancier looking treat.  But both ways are equally delicious!
Enjoy!!!


Coconut Banana Bread w/ Lemon Glaze

Coconut Banana Bread was my wonderful friend Julie's favorite banana bread recipe. She asked me to modify it, since she's missed it since going gluten-free. And, we have success! It is fantastic!  You will love the mix of flavors that takes it from being plain old banana bread into something even better!  I always find myself with over-ripe bananas in the freezer, so this is a great way to use them up that the whole family will love! Enjoy!
Fresh out of the oven and glazed. Yum!

Coconut Banana Bread w/ Lemon Glaze

Makes 2 mini loaves
 
Butter 2 mini loaf pans (or 1 bread loaf pan)
Preheat oven to 350F.
 
Mix the following dry ingredients in a bowl, then set aside:
¾ cup Kristin’s gluten free flour mix (*see note below)
¾ tsp xanthan gum
½ tsp baking soda
¼ tsp salt
 
Whisk in a large bowl:
¾ cup mashed ripe banana (2 small bananas  - ** see note below)
2 Tbsp oil
1 ½ Tbsp orange juice (fresh-squeezed is best)
2 Tbsp plain yogurt (lactose-free works well)
½ cup sugar
¼ - ½ tsp vanilla extract
1 egg
 
Add dry ingredients to wet ingredients, stirring until combined. 
Then add:
¼ cup sweetened flaked coconut
 
Pour into prepared pans, dividing evenly.
Sprinkle over top of batter:
½ Tbsp sweetened flaked coconut


Bake at 350F for 30-35 minutes for mini loaves, 45-50 for single loaf. 
Remove from oven and place pan on cooling rack for 10 minutes. 
While resting, mix together the following to glaze the bread:
½ Tbsp sweetened flaked coconut
¼ cup powdered sugar
2 tsp fresh lemon (or lime) juice
 
After 10 minutes, remove loaves from pan and place loaves on cooling rack.  (place a bit of foil under the cooling rack)  Spread the glaze evenly on top of loaves. 


Let cool, slice and enjoy!!!
 
* Flour note: to make 1 cup Kristin’s GF flour mix (this recipe calls for ¾ cup), you can mix the following for a close approximation that will work very well:
½ cup brown rice flour
¼ cup sorghum flour (or extra brown rice, if you don’t have sorghum)
¼ cup cornstarch (or scant ¼ cup of arrowroot)
1 Tbsp potato starch
1 Tbsp tapioca starch
1/3 tsp xanthan gum (aka, between ¼ and ½ tsp)
 
** Banana note: I freeze old bananas peeled, and in a Ziploc bag. Let them defrost on the counter and toss in when you’re ready to make your bread.  Don’t be worried if you’ve got a little bit too much or too little banana. This recipe is forgiving.

Coconut Banana Bread w/ Lemon Glaze Recipe by Successfully Gluten Free!

Tasty Banana Pudding

Banana pudding is one of those desserts I often forget about making, but when I remember, I am always wondering why I don't make it more often. It's so delicious and easy to make!  Whip up a batch of Kristin's homemade vanilla pudding, add ripe bananas, and you have a wonderfully delicious dessert! Enjoy!

Banana Pudding
Serves 6-8
 
 
You’ll need about 4-6 fresh, ripe bananas (not over-ripe!)
 
Take out either one big bowl OR several individual serving-sized bowls.
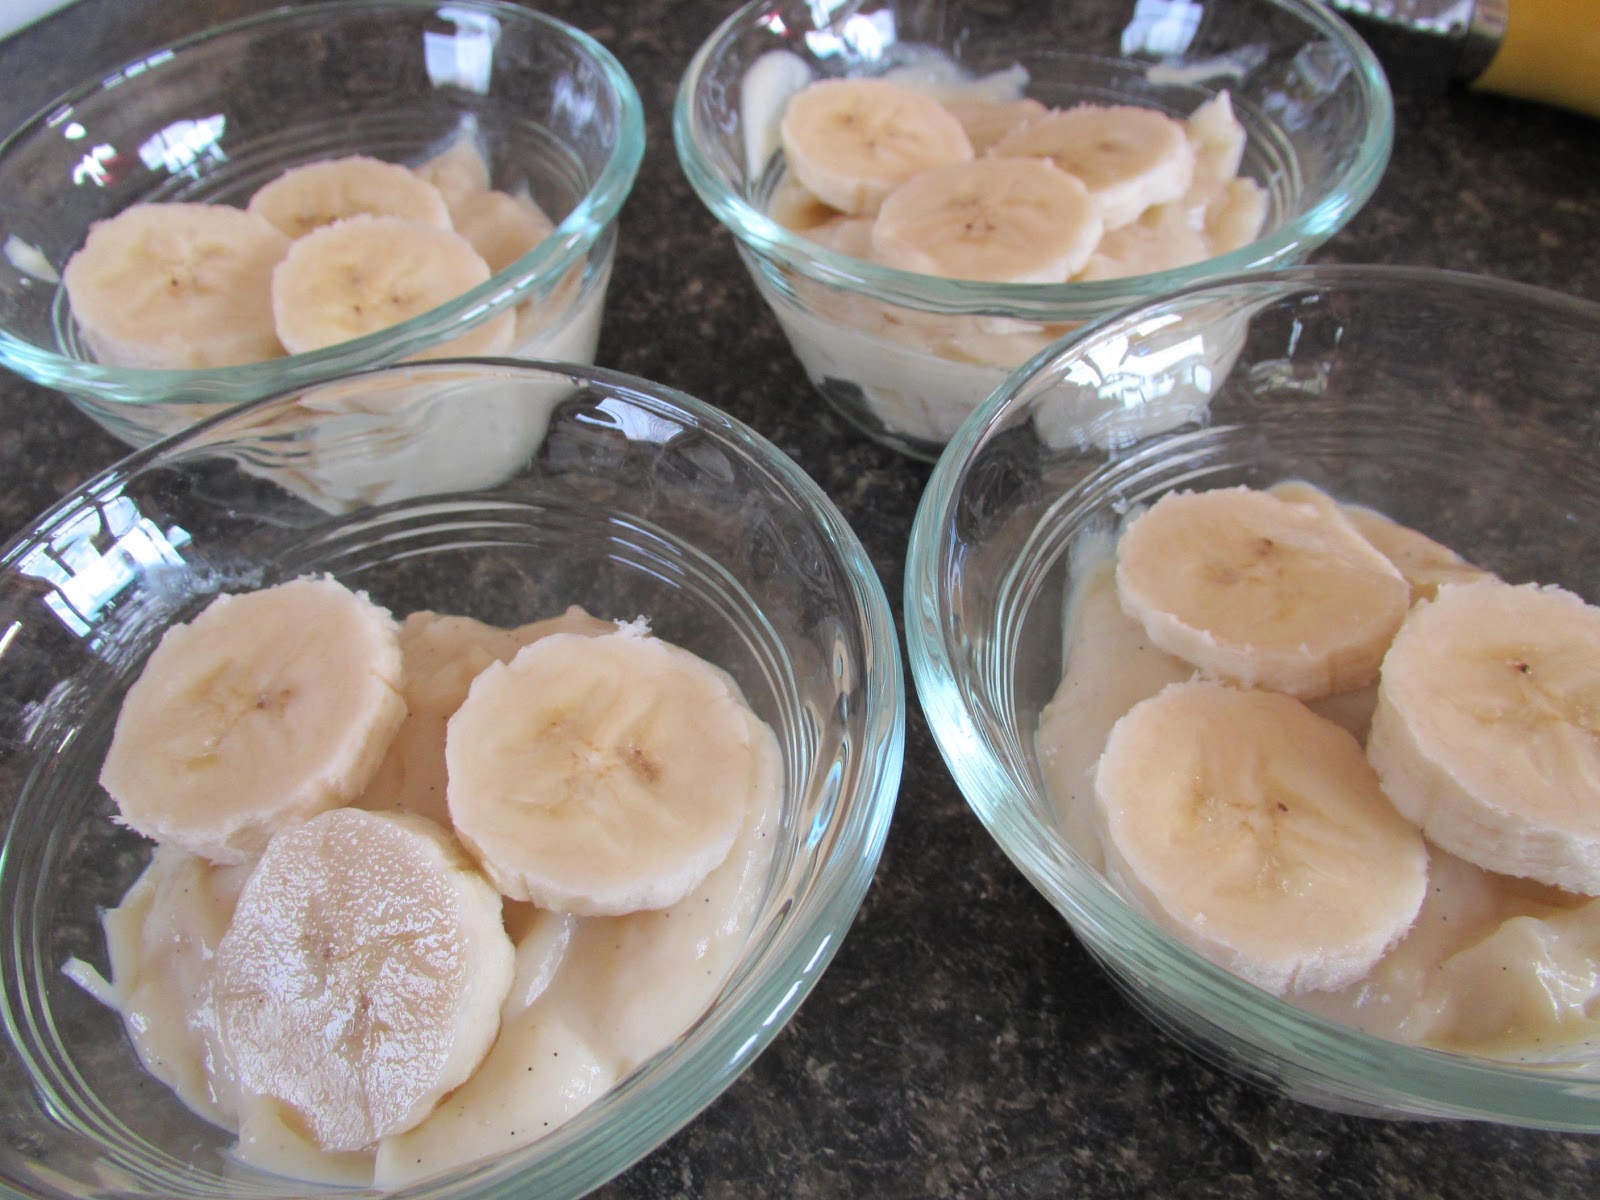
Line the bottom of the bowl with fresh banana slices. 
These were mini-dessert size - perfect for little kids
Place homemade vanilla pudding over the top of banana slices, making sure to fully cover.
 
Make sure your bananas are fully covered by the pudding, otherwise they can turn brown, which you don't want.

If serving later, cover the bowl(s) and place in the refrigerator (up to 24 hrs) until ready to serve.
 
To serve:
Put plenty of fresh banana slices on top, serve and enjoy!
 

Friday, 17 May 2013

Kristin's Homemade Vanilla Pudding

Amazing! Like ice cream in pudding form. It's so rich, creamy and delicious.  I find you can eat it normally, like you would pudding. But it works in place of custard or ice cream on a dessert like apple crisp.  You can easily use it to whip together a tasty treat of banana pudding.  A big hit for all ages. Plus, it's an easy use for those extra egg yolks if you've made the delicious white bread recipe. Enjoy!
 Delicious homemade vanilla pudding on apple crisp. Notice the delicious vanilla bean flecks you get from using the vanilla bean paste instead of vanilla extract. Yum!

Kristin’s Homemade Vanilla Pudding
Place in a saucepan over medium heat:
2 3/4 cup milk (lactose-free works great)
1/2 - 2/3 cup sugar
1/2 tsp salt
Stir occasionally, letting the mixture come to a boil.  Meanwhile, prepare the following egg yolk mixture.
In a separate bowl, mix:
1/4 cup milk (lactose-free works great)
4 egg yolks
1/4 cup cornstarch
Once milk and sugar has come to a boil, let boil 1 minute.  Then add in the egg yolk mixture, whisking constantly.   The mixture should thicken quickly.  Keep stirring until mixture has begun boiling again. 
Remove from heat and add:
1 - 3 tsp vanilla bean paste OR vanilla extract (the bean paste is absolutely lovely in the pudding, if you can locate it, *see note below)
Pour into one large bowl or smaller individual serving-sized containers. Cover with plastic wrap, making sure the wrap is on the surface of the pudding to avoid a tough layer from forming on top.
Serve warm or cold. This pudding is thick and creamy.  It can be used like a custard or ice cream on top of desserts, if desired.
Enjoy!

* Note: you can order vanilla bean paste off amazon.com or amazon.ca.  I really like the Nielsen-Massey brand. You can use it in place of vanilla extract in any recipe, too! Yum!