Search for a Recipe

Thursday, 20 June 2013

Gluten-Free Cinnamon Swirl Bread

One of the treats I absolutely adored growing up was toasted cinnamon swirl bread with butter.  The tricky thing about gluten-free bread making is that to make the bread light and fluffy when baked, the batter has to be gooey.  If you add too much flour, you end up with a loaf that looks and feels like a brick.  This made it tricky to think about how to add the cinnamon swirl into the bread.  Most gluten-free recipes I've found have only a line or two of cinnamon, but I wanted cinnamon swirl throughout my bread. The method of making a runny cinnamon paste works perfectly in this recipe, because you can fold it througth the batter, getting a swirl-like effect, so you end up with cinnamon throughout! Enjoy!
Delicious Gluten-Free Cinnamon Swirl Bread  - ready to eat! 

Gluten Free Cinnamon Swirl Bread
Makes 1 large loaf, or 3 mini loaves

Preheat oven to 350F. Butter 1 large loaf pan or 3 mini loaf pans.

Mix together the dry ingredients in a bowl:
There are 2 options for flour in this recipe – each gives you a slightly different taste in your bread, but both are delicious!
Option 1:
1 cup brown rice flour
¾ cup white rice flour
½ cup potato starch
¼ cup tapioca starch
2 Tbsp sugar
2 ½ tsp xanthan gum
2 tsp quick-rise (rapid-rise) yeast
1 ¼ tsp salt
OR
Option 2:
1 ½ tsp xanthan gum
2 Tbsp sugar
2 tsp quick rise (rapid-rise) yeast
1 ¼ tsp salt

In a mixer, combine the following:
1 cup milk (lactose-free works well)
2 tsp apple cider vinegar
2 Tbsp vegetable or extra light olive oil
3 eggs

Add the dry ingredients to wet and mix on medium speed 3 minutes. Batter should look nice and smooth.

Combine cinnamon swirl mix in a small bowl: *You can double this mixture if you want MORE cinnamon  swirl in your bread
½ cup powdered sugar
1 ½ Tbsp ground cinnamon (I prefer Saigon cinnamon)
½ tsp vanilla extract
¼ tsp salt
2-3 tsp water

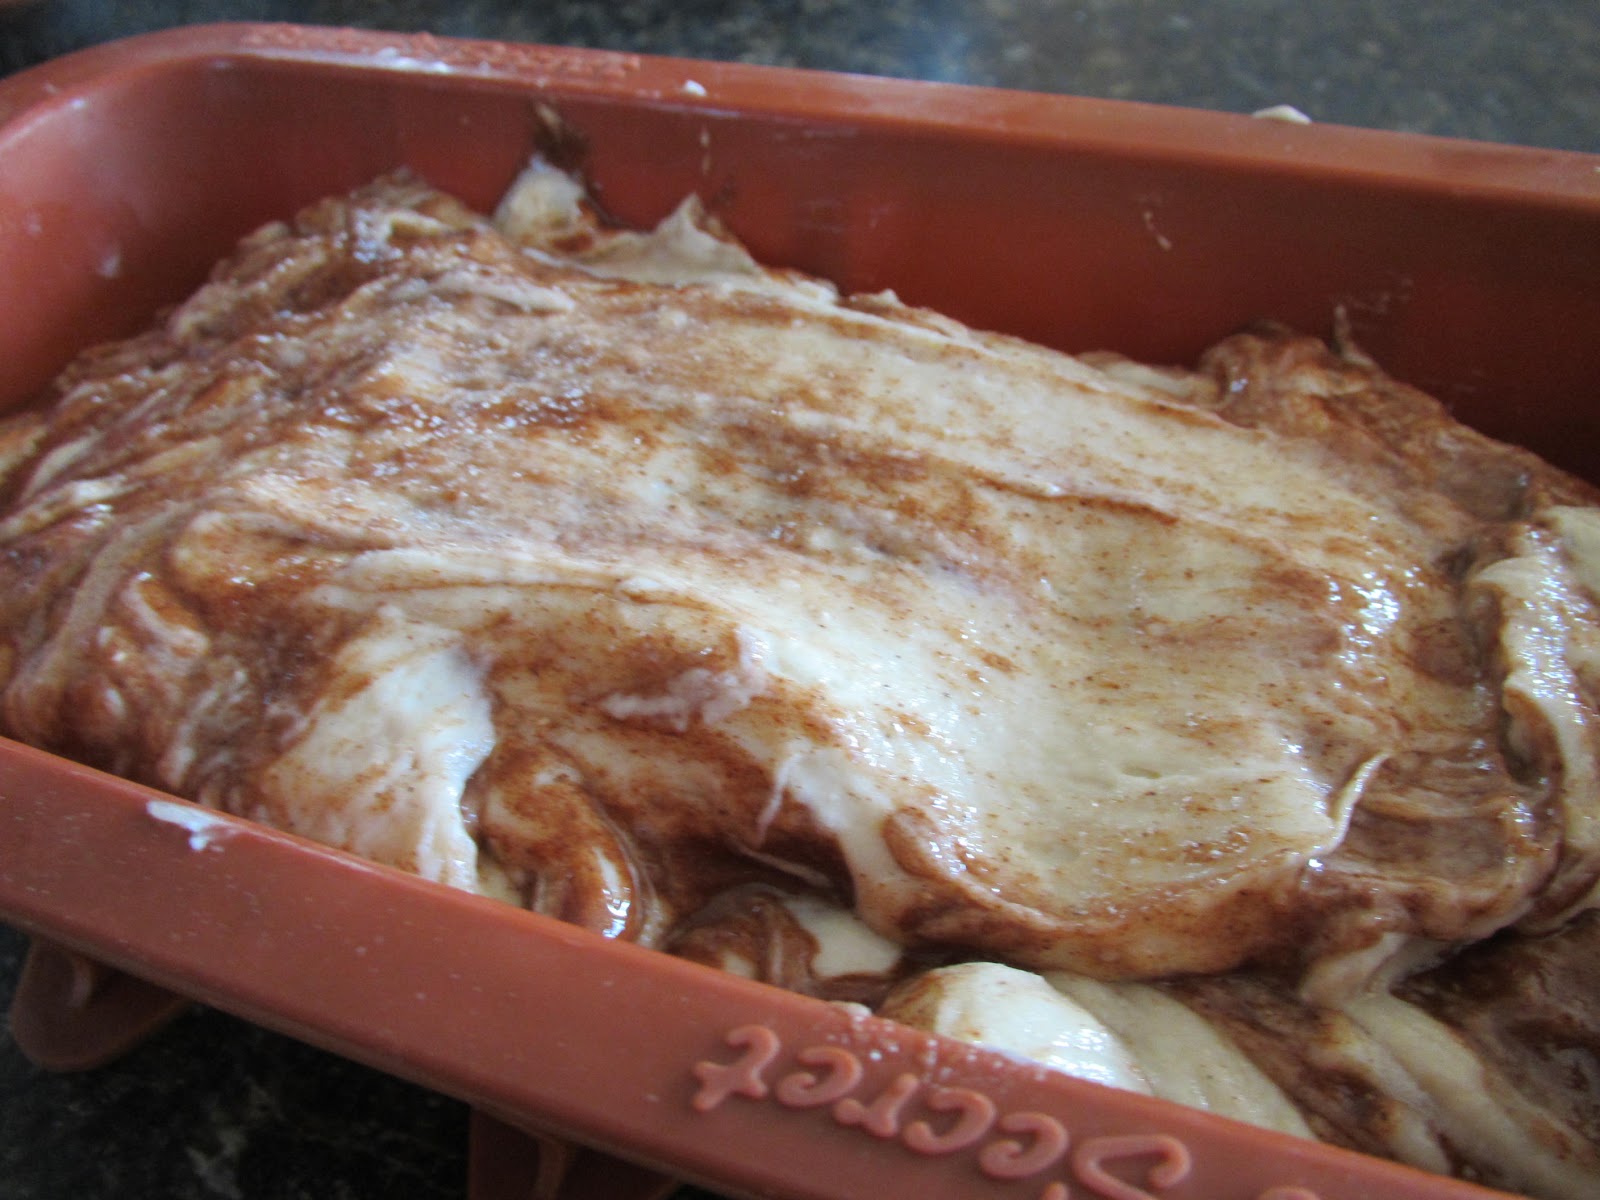
Drizzle half the cinnamon swirl mix into your mixer, fold in gently using a spatula. Add in the other half, and fold in gently. Don’t overmix or you’ll loose the lovely streaks of cinnamon in your bread.
 
Scrap the dough into your prepared loaf pan.  Let rise in a warm location just until the dough is level with the top of the pan (usually around 30 minutes).


Bake at 350F 35-40 minutes for large loaf pan or 25-30 minutes for mini loaf pans.  It should be nice and golden on top, and a hollow sounding when tapped on the bottom.


Remove from pan, you may have to use a knife to help remove it from the side of the pan since the cinnamon swirl mix can make it stick a little.   Let cool on a wire rack.
Slice and eat as is, or toast and butter.  Once cool, it freezes well if you slice and place in a freezer bag.  Enjoy!!!


Mmmm.. toasted with butter. Delicious!

Wednesday, 19 June 2013

Beef, Vegetable & Noodle Stir-Fry

A fun and easy dish to whip up.  It may look like there are a lot of steps, but the hardest thing about making a stir-fry is just getting all the ingredients together and chopped so you can whip it up in a hot wok or frying pan.   This is a fun version with rice vermicelli noodles that was a big hit here.  Enjoy!
Stir-Fry Beef, Veggies & Rice Noodles
Serves 4
 
Mix together marinade:
¾ cup water
4 Tbsp GF soy sauce (I like Bragg’s Liquid Soy Seasoning)
2 Tbsp white wine vinegar or white vinegar
2 Tbsp brown sugar
2 Tbsp cornstarch
2 tsp minced garlic
1 tsp grated ginger
Pinch of salt
½ tsp pepper
 
Pour marinade in a plastic container. Then add and marinate in refrigerator at least 30 minutes (no longer than 24 hrs):
¾ lb/.35kg sirloin-tipped beef, sliced thinly for stir-fry.
 
Prep the following (or you can use an Asian stir-fry veggie mix, which some grocery stores have ready-to-cook):
2-3 mushrooms
¼ - ½ red bell pepper, sliced
snow peas, a handful
1 small carrot, grated
¼ - ½ cup bean sprouts
 
Also prepare:
3 cloves garlic, minced
½ red onion, sliced thinly
 
When your meat has marinated for 30 minutes, set a pot of water on the stove to boil.  Once boiling, put in the boiling water and let cook 2 minutes:
½ pkg (125g) rice vermicelli noodles (spinach or regular)
You will want aim to put your noodles in to boil about the time you’ve finished the beef and mixed in the marinade and let it thicken a few minutes. I put another note below.
 
Heat wok/frying pan over high heat and add, cooking 2 minutes:
2 Tbsp oil
3 cloves garlic, minced
½ red onion, sliced thinly
 
Add prepared veggies to pan and cook 4-5 minutes, stirring regularly, until just beginning to soften.  Remove veggies and set aside.
 
Add and heat up:
1 Tbsp oil
 
Remove beef from marinade and cook, 2-3 minutes, until done.  Give the marinade a quick stir (cornstarch tends to settle). Then, add the marinade to the pan (with cooked meat) and mix, stirring constantly & scraping the bottom of the pan, until mixture begins to thicken and bubble, 3-4 minutes. 
 
Now would be a good time to pop your vermicelli noodles into your boiling water.
 
Add your cooked veggies to the beef and cook all together 2-3 minutes.
 
Add in cooked vermicelli noodles, mixing gently.  Serve immediately. 
Ready to serve!
Sprinkle with red pepper flakes overtop, if desired.
Enjoy!

Tuesday, 18 June 2013

Fantastic Fluffy Pumpkin Pancakes

They are light, fluffy and packed with pumpkin and spices.  They are absolutely amazing!  They've become a family favorite for anytime of year, since you can used canned pumpkin.  My husband requested these as his Father's Day breakfast - and they would've been terrific, if I hadn't accidently put baking soda in them instead of baking powder (don't make that mistake).  We re-made them and they were great - and they were wonderful. Enjoy!
A bit too much whipped cream, but delicious with or without.

Fluffy Pumpkin Pancakes
Makes 12-15 pancakes

Mix together in a bowl, then set aside:
1 ½ cups Kristin’s gluten-free flour mix (*see note below for measurements just for this recipe)
1 Tbsp baking powder

In a bowl or large measuring cup with spout mix:
1 scant cup/200ml pumpkin puree (make your own, or use 100% canned pumpkin)
1 egg
1 cup milk (lactose-free works great) - a bit extra milk can be used if you want them a little thinner
1/2 cup oil
1/2 - 3/4 cup white sugar
3/4 tsp baking powder
1/2 tsp ground cinnamon
1/4 tsp ground clove
1/4 tsp ground nutmeg
1/2 tsp salt

Whisk dry ingredients into wet ingredients.


Mmmm.. ready to cook!
Heat a skillet over med-low heat.  Butter pan lightly, add the desired amounts of batter, spreading a bit to flatten each pancake.  The pancakes will spread/puff a bit, so keep that in mind when you put the batter in the pan. 
Once you scoop some onto the pan, spread it out a bit. They really do puff up quite a bit!
Cook until a few bubbles appear on top (these don’t look quite the same as normal pancake bubbles, but once you notice the edges starting to look done, it’s time to flip)  Flip pancakes quickly to the other side and cook until nicely browned.  Remove to plate and repeat with the remaining batter.
 
Serve with maple syrup, and whipped cream, if desired.  They're also tasty topped with nutella. 
We've found they freeze well, too, if you end up with any extras.
Enjoy!


*Note: If you don’t want to make a full batch of Kristin’s GF flour mix – just use the following for this recipe: ¾ cup brown rice flour, ¼ cup sorghum flour, ¼ cup cornstarch (OR 3 Tbsp arrowroot starch), and 2 Tbsp potato starch, 2 Tbsp tapioca starch, 1/2 tsp xanthan gum

Monday, 17 June 2013

Herb-Stuffed Zucchini

This is so simple to whip together, and tastes absolutely wonderful!  I was inspired by a Food Network Magazine recipe to easily convert their idea into a gluten-free version.  They called for parsley and dill, but I went with some tasty herbs I had growing outside.  I'd say go with whatever kinds you're in the mood for that day. If you use rosemary, just use very little since it's strong.  Even my 2 year old enjoyed it! Enjoy!
Ready to pop in the oven!

Gluten-Free Herb-Stuffed Zucchini
Serves 2 (as a meal) or 4 (as side dish)
Pre-heat oven to 425F. Line a cookie sheet with aluminum foil.
Split 2 medium zucchini length-wise and scoop out the seeds. Place on foil-lined pan.


Mix together the following:
1/3 cup gluten-free breadcrumbs
1 small tomato, diced OR handful of grape tomatoes, diced
1-2 Tbsp mix of fresh herbs, minced (I used fresh chives, thyme and a little rosemary from my herb garden)
1-2 tsp minced garlic
2 Tbsp extra virgin olive oil
Salt and pepper


Spoon into the zucchini. Drizzle with olive oil and sprinkle with extra salt and pepper.


Bake 25-30 minutes.  Zucchini should be tender and filling will be nice and crispy.
Enjoy!

Saturday, 15 June 2013

Gluten-Free Cherry Fried Fruit Pies!

These are a wonderful alternative to individual baked turnovers.  They fry up quickly and have a nice crunch to the crust.  I fell in love with fried fruit pies (or fry pies) when I lived in Ohio. They were sold at the Farmer's Market on Saturdays.  They used a glaze over the top, but I like them sprinkled with a bit of powdered sugar before serving, since I'm not trying to walk around an outdoor market while eating mine.  It took some tweaking to figure out the best method to make a crust that had that pie pastry taste, but didn't soak up the oil while frying.  The end-result is gloriously delicious. Enjoy!

I also have posted a recipe for Blueberry Fried Fruit Pies - which are filled a bit differently than here, so check them out!
Gluten Free Cherry Fried Fruit Pie
Gluten Free Cherry Fried Fruit Pie - Fresh and ready to eat! 

Gluten-Free Cherry Fried Fruit Pies!
Makes 8 individual fry pies
Make buttermilk in a small measuring cup (or just buy/use buttermilk):
2-3 tsp lemon juice OR white vinegar
Add milk up to ½ cup (lactose-free works well)
Mix together in a large bowl:
3 Tbsp sugar
½ tsp xanthan gum
1 tsp salt
Chop in with a pastry cutter:
1/3 cup butter
When flour/butter mixture looks nice and crumbly, add and mix in:
½ cup buttermilk (from above)
1 egg
You can use your hands to get it thoroughly mixed.  Once well mixed (doesn’t need to be perfectly mixed), cover with plastic wrap and chill 30 minutes.
Line the counter with two sheets of plastic wrap that overlap in the middle.  Put dough onto plastic wrap, cover with another piece of plastic wrap and roll out the dough between the two sheets, until you have a rectangle that is approximately 12” x 24”.   Pull off the top layer of plastic wrap.
I like to turn on my oil to heat up right about now.  Fill a large, low-sided saucepan ½ - 1” deep with oil (whatever kind you prefer for frying – I tend to use Canola). 
Set the oil over med-high heat.  (Reminder: Make sure your pan has high enough sides that oil won’t splatter out easily, but low enough you could get your spatula in to help flip over your fried pies)
Cut your dough in half, long-wise, using a pizza cutter.  Cut in half the short way, and then in half again, so you have 8 even pieces of dough.

Spoon into the middle of each square:
1 heaping Tbsp Cherry Pie Filling (Luckily, most canned pie fillings are gluten-free! You can also make your own fruit filling like you would for a pie.  Mix together and cook in a saucepan until fruit is cooked/thickened. Let cool before using in this recipe)
Make sure you don’t overfill your pies!  You’ll end up with fruit filling oozing out everywhere, which can be messy.

Use your plastic wrap to help you fold over the dough.  Press the edges of the dough through the plastic wrap (aka, just press through the plastic wrap to help seal the edges – remember, gluten-free dough tends to be stickier than normal dough, so this way you don’t end up pulling off any dough!) 

When oil is nice and hot (I tend to throw in a piece of dough to see if it’s bubbling nicely when it enters the oil), carefully lower your fruit pies into the hot oil.  Cook a few at a time, so the pan isn’t overcrowded, and it’s easy for you to flip them over.   It’s easiest to use a slotted spatula to help flip them over and remove them from the oil when they’re done.
Don't over-crowd the pan, so you can easily flip them when they're browned on one side.

 
Before and after frying, to give you the idea of color.
Let each fry pie cook until nicely browned on each side.  (a few minutes per side seems to do it)
Remove from oil and place on a paper-towel lined plate to cool.  These don’t absorb much oil, which is terrific!   

These can be eaten hot, warm or cool. Sprinkle with powdered sugar just before serving. 
Store any that aren't eaten in a tupperware. Re-heat in a toaster oven or regular oven before sprinkling with powdered sugar and eating!
Enjoy!!!

Thursday, 13 June 2013

Gluten-Free Cinnamon-Sugar Donut Holes

Absolutely delicious and gluten-free donut holes! These are so wonderfully easy to whip together because the batter mixes in a bowl (using a spoon), you scoop them (using a cookie scoop) into a low pan of oil, and they fry up in no time (sometimes turning themselves over. Fun, right?!) They puff right up while they're cooking, and it's so much fun to watch!  Roll them in the cinnamon-sugar mixture while hot so it sticks nicely.  Enjoy!
Gluten-Free Cinnamon Sugar Donut Holes
Makes 40 donut holes
 
Line a cookie sheet with a double-layer of paper towel. 
 
Mix together some cinnamon sugar in a bowl:
½ cup white sugar
1 – 2 Tbsp cinnamon
*Note: you can adjust the ratio of sugar/cinnamon so it’s how you like it best.
 
Fill a wide frying pan (with higher sides) with ½ - 1” canola oil.  Set over medium-high heat.
 
If you want to make 1 cup buttermilk (which I tend to do) do the following now:
Put  in a 1 cup measuring cup:
2 Tbsp lemon juice OR white vinegar
Fill up to 1 cup with milk (lactose-free works, too)
 
Mix in a large bowl the following until nicely blended:
½ cup light brown sugar
1 tsp baking powder
1 tsp baking soda
2 tsp ground cinnamon
½ tsp ground allspice
 
Add and mix with a large spoon, just until well combined:
1 cup buttermilk
1 egg
2 Tbsp butter, melted
 
Reminder: The donut holes need to be rolled in the cinnamon sugar mixture while they are still nice and hot, so don’t let them cool too much before rolling in the cinnamon sugar or it won’t stick well.  It helps to have someone else around who can start to do this part so you can keep your eye on the donuts in the pan.
 
Once oil is nicely heated, drop donut holes by 1 Tbsp sized (I use a mini cookie scoop) into the oil.  They’ll sink at first and then rise to the top.   They sometimes turn themselves over if the pan isn’t too crowded.  These will puff right up while they cook.  Let cook 2-3 minutes per side, until nicely browned, rotating at least once, but it’s okay if you rotate a few times to make sure you’ve gotten everything evenly cooked.   Once cooked, remove to your paper towel-lined cookie sheet. 
Repeat with remaining batter, until all donut holes have been cooked.
Donuts cooking in 1/2-1" oil.  Donuts finished and cooling on paper towel-lined cookie sheet.
While the donuts are nice and warm/hot roll them in the cinnamon-sugar mix.  Eat and enjoy!
Roll in cinnamon sugar asap! Just place back on the paper towel.
Enjoying the delicious fresh donut holes.

*If you have extras that aren’t eaten within a day or two, you can freeze them in a Ziploc bag.  Just pop them in the microwave to warm them up. They won't be as nice and crunchy, but they'll still be yummy.  Enjoy!

Tuesday, 11 June 2013

Herb-Crusted Salmon

This is a wonderful, easy salmon recipe that packs a bit of everything into it.  The fish is moist and flaky, the crust is well-seasoned and crunchy.  I cannot tell you enough how much of a difference 15 minutes of brining made for the fish. (Thanks for the tip, Cook's Illustrated!)  I can't wait until I can make this for my nana when she visits this summer, because she absolutely loves salmon.  Lucky for you, you don't have to wait that long and can whip it right up now!  Enjoy!

Herb-Crusted Salmon
Serves 3-4
Based loosely on a recipe from Cook’s Illustrated, because, really, I wouldn’t have thought to brine my salmon. It makes such a difference!
 
Pre-heat oven to 325F.  Line a medium-sized pan with foil.  Brush lightly with olive oil.
 
Mix in a large jug:
2 quarts water
5 Tbsp salt
 
Add and brine 15 minutes:
3 – 4 salmon filets, evenly cut (use individual serving sized pieces, I prefer with skin off, though skin-on works, too)
 
Pat the salmon dry and set, spaced 1 – 2” apart on prepared pan.
 
Mix together (use a pastry cutter or fingers)
1 ½ Tbsp butter
1 egg yolk
¾ cup gluten-free breadcrumbs
¼ - ½ tsp ground coriander
¼ - ½ tsp garlic powder
Pinch of salt
¼ - ½ tsp pepper (just an estimate, season generously)
 
In a second bowl, mix together:
1 Tbsp Dijon mustard
1 ½ Tbsp mayonnaise
¼ cup fresh basil, sliced/chopped
 
Spread the basil mixture evenly over the salmon filets.  Spread/sprinkle the breadcrumb mixture over top of the basil mixture. 
Bake at 325F 20-25 minutes.  If in doubt, let it go the full 25 minutes, but you can check the internal temperature, too. Aim for 125F at the thickest part of the fish.
 
Let rest 5 minutes before serving.  Serve with lemon wedges, if desired.  Great with a side of steamed veggies or salad.

Enjoy!