Search for a Recipe

Thursday, 8 September 2022

Pumpkin Chocolate Chip Snack Bars

I've been making this yummy pumpkin chocolate chip snack bars for years, but I kept forgetting to actually take a picture before they were eaten!  These freeze really well and we often use them for school snacks, which is why I was mixing up another batch of them.   I really like the taste of coconut, oats, and puffed rice added to the bars.  Yum! Enjoy! 
A bite out of a piece from a fresh batch of pumpkin chocolate chip snack bars!

Pumpkin Chocolate Chip Snack Bars

Preheat oven to 350 F.  Line one large or two smaller metal cookie sheets with parchment paper. (I prefer the smaller sizes - officially called a 1/4 size baking tray (they measure 8" x 12" at the largest).  


In a large bowl mix together: 
2 1/2 cup whole oats (make sure they're gluten-free if Celiac or sensitive)
1 1/2 cup Kristin's Gluten-Free Flour Mix
1/2 cup unsweetened shredded coconut
1 Tbsp cinnamon
1 tsp baking powder
1 tsp baking soda
1/2 tsp salt

In a mixer (or you can just mix together by hand, using the back of your spoon to smooth out the batter), combine: 
2 cups pumpkin puree (homemade puree or canned) (If your canned pumpkin is on the thicker side, add 1/4 cup sour cream or 1/4 cup milk to your batter, and it will help balance it out)
1/2 cup butter, softened
1 cup brown sugar (OR 1/2 cup brown sugar + 1/4 cup 100% date paste)
2 eggs
1 Tbsp molasses (OR extra 1 Tbsp date paste or Agave nectar if you don't like the molasses flavor)
2 tsp vanilla extract

Mix the dry ingredients into the wet.  

Add and mix in: 
1 cup unsweetened puffed cereal of your choice OR rice krispie type cereal
1/2 - 1 cup dark chocolate chips
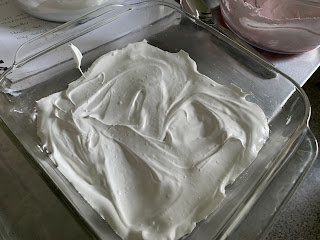
Batter spread into the pan(s) with the back of a spoon or using the back of spatula.

Spread into a large normal cookie sheet or TWO 8"x 12" (1/4 sized) cookie sheets lined with parchment paper.  Bake at 350 F for 25-30 minutes until nicely browned.  Remove to a wire rack.  
Fresh from the oven, ready to slice. 
Slice while warm.  Let cool.  They freeze really well.  The slices hold together perfectly to take for quick breakfasts or snacks.  Enjoy! 
Sliced while warm - this will make for nice, clean slices to store later. 

Pumpkin Chocolate Chip Snack Bars Recipe by Successfully Gluten Free! 


Wednesday, 24 August 2022

Blueberry Crumble Pie Bars

 These tasty gluten-free blueberry pie bars were inspired by a recipe in the NY Times.  However, their recipe used ready-made cookies, and I've created a delicious crumbly crust and topping that make it a yummy blend of blueberry pie and blueberry crisp/crumble.  Yum!  Enjoy! 
A lovely, delicious slice of blueberry crumble pie bar
Fresh from the oven. Yum!

Blueberry Crumble Pie Bars

Preheat oven to 350 F.  Have a 9 x 13 glass pan ready. 

Mix together in a large bowl: 
1/4 tsp xanthan gum
1 cup GF whole oats
3/4 cup brown sugar
1 tsp baking powder
1/4 tsp salt

Add and chop in with a pastry cutter until butter is in small pieces (but make sure it stays crumbly and doesn't mush): 
2/3 cup butter, chilled (not softened)

Gently press into 9 x 13 pan 2/3 of the crust mixture. 
2/3 of crust gently pressed into the pan. 

In a mixer or large bowl, beat together: 
8 oz cream cheese, softened (lactose-free cream cheese or dairy-free cream cheese substitute will work well)
1/4 cup sugar
1 egg

Gently spread/pour the cream cheese mixture onto the crust.  

In a large bowl, toss together, then spread on top of cream cheese mixture: 
4 cups wild blueberries (wild blueberries are tiny, flavorful blueberries and naturally sweet)
1 Tbsp cornstarch
pinch salt
Blueberries sprinkled over the cream cheese layer, ready for topping. 

Sprinkle the remaining 1/3 of crumble crust over your blueberries.  Bake your blueberry pie bars at 350 F for 40 minutes, or until browned a nice light golden brown.  
Topped with the remaining 1/3 crumble mixture. Ready to bake!
Fresh from the oven! Nicely browned, but not too dark. 

Remove to a wire rack to cool.  You can serve these warm, or let them cool before serving.  Leftovers store well in the refrigerator for a few days.  Enjoy! 

Yum!

Blueberry Crumble Pie Bars Recipe by Successfully Gluten Free! 

Tuesday, 16 August 2022

Cinnamon & Brown Sugar Flan

 I really wanted something easy, but to compliment homemade enchiladas.  Cinnamon-sugar donuts were calling my name, but I wasn't in the mood to fry anything.  This cinnamon-infused flan made with brown sugar was just perfect!  I discovered a slightly faster method to whip it together using a microwave vs stovetop, like I use for my regular vanilla flan or pumpkin flan.  Enjoy! 
A yummy slice of cinnamon & brown sugar gluten-free flan, ready to eat! 

Cinnamon & Brown Sugar Flan

Preheat oven to 350 F. Butter 8 x 8 glass pan.  

In a large microwave safe cup heat just until bubbling at the edges (I heated 3 minutes): 
2 1/2 - 2 3/4 cup 10% cream (or 2 cups milk & 3/4 cup 10% cream for a lighter flan)
1 Tbsp brown sugar

Whisk together in a bowl: 
4 eggs
1/2 cup brown sugar

Add and whisk into the bowl: 
1/2 - 1 tsp cinnamon
2 tsp vanilla bean paste

Slowly add, whisking regularly, to avoid scrambling the eggs: 
hot milk/cream from above

Pour into prepared pan.  Bake at 350 F for 15 minutes.  Lower heat to 300 F and cook an additional 30-40 minutes.  It should puff up during baking.  
Flan, fresh from the oven. You can see how it puffs up a bit.

Remove from oven and cool on a wire rack.  I prefer to let cool a full hour for really nice, clean slices, but we rarely last that long before digging in.  It still slices pretty neatly even if cut while hot.  Enjoy!!!! 

A side view after baking.  I liked the darker, speckled look from the cinnamon and brown sugar. Yum!

Cinnamon & Brown Sugar Flan Recipe by Successfully Gluten Free!

Monday, 1 August 2022

Sloppy Joe's

 I spent a good portion of my childhood being very unhappy every time we had Sloppy Joe's for dinner.  Back then, the meat was cooked with a packet of spices and always incredibly salty.  It would be served on store bought rolls that always seem to fall apart under the weight of the soupy meat mixture.  However, when my dad decided to try the Pioneer Woman's recipe, we actually enjoyed it!  I've tweaked it a little bit and to make it just how I like it, and one of my kids requested it as their birthday dinner this year, so I'd say it's come a long way from the unpleasant stuff of my childhood.  Enjoy! 

My dad serving up sloppy joe's! He served it with a side of zucchini, chips, and a piece of one of our favorite family brownies, with a few mint chips thrown in. Yum!

Sloppy Joe's

Based on a recipe by Ree Drummond. Serves 8-12 

In a large deep skillet over medium heat melt: 
2 Tbsp butter

Add and cook until meat is fully browned (once cooked, you can drain it if needed, but I usually don't)
2 lb ground beef (I prefer lean or extra lean)

Add, cooking a few minutes: 
1 large onion, diced
1 green bell pepper, diced
5-6 cloves garlic, minced

Add the following: 
14 oz can tomato sauce + add 1/4 - 1/3 cup water used to rinse out the can
1 cup ketchup
2-3 tsp Worchestershire sauce
2 Tbsp brown sugar
2 tsp chili powder
1 tsp dry mustard powder
1/2 tsp red pepper flakes
1/2 tsp pepper
1/4 - 1/2 tsp salt

Let the whole mixture come to a boil, then lower heat to simmer, uncovered for about 15 minutes.   You can taste it at this point and add an extra dash of Worchestershire sauce or salt & pepper, if needed.  

Serve the meat on top of homemade gluten-free rolls.  My versatile dinner rolls are a nice option.  We've also enjoyed it with my soft, buttery dinner rolls and my quick and delicious hamburger buns in a mixer recipes. 

Delicious with some favorite brownies for dessert! 

Sloppy Joe's Recipe by Successfully Gluten Free!


Monday, 11 July 2022

Snickerdoodle Cookies!

 There are all sorts of varieties of snickerdoodle cookies, but these are the light and flaky sort of cookie.  I really wanted some sort of light cinnamon treat to have after a rich meal of homemade enchiladas (technically, I made the easier to whip up lasagna-style layered enchiladas), but wasn't quite in the mood for something as decadent as a gluten-free tres leches cake.  These were perfect!  Nice and light.  Enjoy! 
Yummy GF Snickerdoodle Cookies, fresh from the oven! 

Snickerdoodle Cookies!

Makes ~48 small cookies
Preheat oven to 350 F.  Line cookie sheets with parchment paper or silicon liners.  

In a small bowl, mix together, and then set aside: 
1/2 cup sugar
1-2 Tbsp cinnamon (depending on how you like it)

In a large bowl, whisk together dry ingredients: 
1/2 cup brown rice flour
1/2 cup arrowroot starch (or scant 1/2 cup cornstarch)
1/4 cup tapioca starch/flour
1/4 cup potato starch
3/4 tsp xanthan gum
1/4 tsp baking soda
1/4 tsp salt

In a mixer, cream until light and fluffy: 
1/2 cup butter, softened
4 oz cream cheese, softened
3/4 cup sugar

Add and mix in, scraping down a couple times: 
1 egg
1 tsp vanilla bean paste or extract

Add the flour mixture ingredients into wet ingredients.  Mix, just until combined.  

Scoop small scoops of dough into your cinnamon-sugar mixture, gently using your fingertips to roll the dough around in the cinnamon-sugar.  Place each cookie ball onto your pan.  Press gently to flatten a bit.   These do spread out quite a bit, so here I used a smaller than average scoop and some did hit into the others, if in doubt, make a tray with them 3 x 4 and see how they look, then you can adjust.  

Scooped, rolled, and ready to flatten!
Flattened slightly, and ready to bake.  I find doing this before baking makes for a much more event cookie overall. 

Bake at 350 F. 10-12 minutes, or until just turning brown at the edges.   Remove from the oven and let rest a couple minutes on the pan before using a spatula to move to a cooling rack.  

These should be fine to store in a closed container for a few days at room temperature, but I prefer to freeze leftovers in a ziploc for later.  Enjoy! 
Fresh from the oven! Yum! 


Gluten-Free Snickerdoodle Cookies by Successfully Gluten Free!

Monday, 20 June 2022

Creamy Vegetable & Chicken Soup

This comforting creamy chicken & vegetable soup recipe is pretty versatile.   If you don't want to make your own rice, you can add a bag of pre-cooked microwaved rice (microwave it before adding it in).  You can use a drained can of cooked chicken instead of diced, roasted chicken.  You can use a bag of riced broccoli in place of the sliced/diced head of broccoli.  All sorts of variations to make life easier for those busy nights!  Enjoy! 
A yummy bowl of vegetable filled creamy soup with some salad on the side. 

Creamy Vegetable & Chicken Soup

In a large pot over medium-heat, sauté 3 - 5 minutes:
1 - 2 Tbsp butter
1 - 2 Tbsp oil 
1/2 - 1 onion, finely diced
1 - 2 carrots, finely diced
1 - 2 stalks celery, finely diced
1/2 tsp salt
1/2 tsp pepper
1/2 - 1 tsp freeze-dried or dried parsley
1/4 tsp dried sage or 1 - 2 tsp fresh sage, minced (optional)
1/4 tsp dried rosemary or 1 - 2 tsp fresh rosemary, minced (optional) 

*This recipe also works well with a holiday blend of vegetables (finely diced sweet potato, butternut squash, onion, celery, carrot with the sage and rosemary addition)*

Add and cook an additional 3-4 minutes: 
1 large head broccoli, sliced and diced

Add: 
1 can GF cream of chicken soup *see comment at end if you can't find this*
2 cups water
3/4 cup milk
2 tsp GF chicken bouillon paste

Bring to a boil, then lower heat and simmer for 10-15 minutes.  

Add the following, returning briefly to a boil before serving: 
1 - 2 cups cooked white Jasmine rice (make sure your rice is cooked!)
1 cup roast chicken, diced (Canned, drained chicken will work well in this recipe, too)

This is a nice all-in-one meal, but you can serve it with a side of GF crackers or GF garlic bread, whatever you're in the mood for!  Enjoy! 

A pot of soup, ready to eat!

*** If you cannot find a can of Gluten-Free cream of chicken soup, then this is my recommendation (and yes, I've done this)
Add an extra cup of chicken broth before you simmer your soup.  
After the 10-15 minutes of simmering, whisk the following together in a small bowl:
1/3 cup cold milk
1/4 - 1/3 cup cornstarch

Add to your soup and stir, bringing to a boil just to let it thicken a bit. 
And that'll be your work around! 

Creamy Vegetable & Chicken Soup Recipe by Successfully Gluten Free!

Monday, 13 June 2022

Homemade Neapolitan Marshmallows!

 The fun medley of vanilla, chocolate and strawberry in ice cream was a childhood favorite.  Imagine my surprise when I discovered that using freeze-dried strawberries ground up and sifted in marshmallows adds the perfect strawberry flavor to make a strawberry layer in a Neapolitan marshmallow!  If you don't want to make SO many jut Neapolitan marshmallows, you can use half the marshmallow to make some homemade GF s'mores marshmallows and just use half the strawberry and cocoa powder for your Neapolitan layers.  
Some of the yummiest marshmallows I've ever tasted in my life!

Homemade Neapolitan Marshmallows!

Butter a 9x13 glass pan OR butter two 8x8 pans 

Combine in a mixer with whisk attachment:
½ cup cool water
3 pkg. (1/4 oz each) (This is about 2 1/2 Tbsp or 7 1/2 tsp) unflavored gelatin
 
In a small, deep saucepan, combine the following over medium heat.  Make sure the liquid fills no more than 1/2 of your pan because it will bubble up while heating. Cook, stirring regularly, until syrup reaches 240 F on a candy thermometer:
½ cup cool water
1 ½ cups sugar
1 cup light corn syrup
1/8 tsp. salt
 
I find heating to 240F takes ~20-30 minutes, and will go in phases of seeming not to increase in temperature to suddenly jump up 5-10 degrees.  So, make sure you’re paying attention, particularly at the end.

Remove your hot sugar from heat.  With the mixer on low speed, slowly pour the sugar syrup into the softened gelatin.  Increase speed to high and whip until closer to room temperature, about 8-10 minutes. After a few minutes, it will start looking like marshmallow!  
 
Towards the end add and beat in:
1 tsp vanilla bean paste OR vanilla extract

Remove 1/3 of the marshmallow and spread in your buttered pan, using lightly dampened hands to spread evenly.  
A layer of vanilla in an 8x8 pan

Remove 1/3 of the marshmallow into a separate bowl and mix in: 
1/4 - 1/3 cup sifted crushed freeze-dried strawberries (I like to prep this while the marshmallow is mixing/cooling)

Spread the strawberry layer on top of your vanilla layer, using lightly dampened hands to spread evenly.  
Adding the strawberry layer.  This definitely looked a bit more pink in person.  If you want it darker pink, you can always add a drop of food coloring with your freeze-dried strawberries. 

In your mixer, add and whisk in to make your chocolate layer: 
2 - 4 Tbsp cocoa powder

Spread your chocolate layer on top of the strawberry layer, using lightly dampened hands to spread evenly.  
The chocolate was last to be added.  

Sprinkle the top of your marshmallows generously with powdered sugar.   Let them sit 3-4 hours at room temperature to dry.  Use a buttered knife to slice the marshmallows (reapply butter, as needed).  Toss them gently in powdered sugar to coat evenly.   
Don't worry if the edges aren't perfect!  Here's a side-view of the three layers of marshmallows, topped with powdered sugar and left to dry for a few hours.  

Marshmallows are now ready to eat!  They can be stored in an air-tight container at room temperature for up to a couple weeks and will retain their freshness.  Enjoy!!! 
A bite out of a freshly made Neapolitan marshmallow! Yum!

Homemade Neapolitan Marshmallows Recipe by Successfully Gluten Free!