Search for a Recipe

Friday, 26 May 2023

Wholesome Sourdough Waffles - Egg-Free, Dairy-Free, Gluten-Free!

Making gluten-free sourdough starter does take some patience, but it's pretty easy to whip together and feed.  And, it makes the most delicious waffles.  These are a modification of my regular sourdough waffles - with some egg-free and dairy-free options!  I also have some tasty chocolate chip sourdough waffles and lemon-blueberry sourdough waffles, too!  Enjoy! 
GF Sourdough waffles with apple chunks added. Yum! 

Wholesome Sourdough Waffles - Egg Free, Dairy Free, Gluten Free!

Makes 16-18 waffles
(My waffle iron makes 6 waffles at a time, and I can fill it almost 3x)

Mix in a 4 cup tupperware the night before you want your waffles:
1/2 cup brown rice flour
1/2 cup sorghum flour
1/2 tsp xanthan gum

Add and mix in, just until combined:
1 cup water (filtered, if your water contains chlorine)
1 cup gluten-free sourdough starter

Put the tupperware lid on tightly, and let rest overnight at room temperature. This mixture will grow naturally overnight due to the yeast, so make sure your container is at least a 4 cup container and can be fully closed.


In the morning, preheat your waffle iron.
Mix together in a small bowl and let sit 3-5 minutes, stirring once:
2 Tbsp chia seeds
6 Tbsp water

(You can use 2 eggs in place of the chia seeds & water if you prefer)

Mix together in a large bowl, just until combined:
Chia seed mixture (or 2 eggs, if preferred)
5 Tbsp oil
1 Tbsp maple syrup
1 tsp vanilla bean paste (or extract)
1 tsp cinnamon
1/2 tsp baking powder
1/2 tsp baking soda
1/2 tsp salt
1 Tbsp flaxseed meal (optional)
1-2 apples, peeled and finely diced (optional, but I prefer it)
Mixture from last night (starter/flour/water)

Butter waffle iron lightly each time you use it.  Cook batter in pre-heated waffle iron until nicely browned and crispy.  Remove from waffle iron and place on cooling rack (I do this even when making my favorite plain or apple-cinnamon waffles, or any waffles, because it keeps them from ever getting soggy on the bottom, especially if I make extras to freeze).

Best served fresh with maple syrup, or jam, or any topping you enjoy on your waffles!
Once cooled, you can freeze these in a ziploc bag and re-heat in a toaster oven for quick breakfasts.
Enjoy!!!

Wholesome Sourdough Waffles - Egg-free, Dairy-free, Gluten-Free Recipe by Successfully Gluten Free!

Thursday, 18 May 2023

Mini Pizzelles

 My youngest got a mini pizzelle maker.  Pizzelles may look like miniature waffles, but unlike waffles (which I use very little sugar in), these are more of a cookie/biscuit.  The sugar helps them caramelize and turn into delicious crispy thin cookies.  Just lovely, and very easy to make. 
Mini Gluten-Free Pizzelles - delicious little crispy & buttery biscuits!

Mini Pizzelles

Makes ~24 mini pizzelles

Mix together: 
1/3 cup brown rice flour
1/3 cup tapioca starch/flour
1/3 cup arrowroot starch
1/2 tsp xanthan gum
1 tsp baking powder
1/4 tsp salt
1/2 cup sugar

Add and mix in, just until smooth: 
2 eggs
6 Tbsp butter, melted
1 tsp vanilla bean paste OR vanilla extract

Heat up the pizzelle maker, as directed.  Butter the pizzelle maker lightly before cooking each pizzelle.  Cook 1 Tbsp (no more or it will overflow) of batter per pizzelle.  Cook until a nice golden brown.  Remove to wire rack to cool. Cooled pizzelles can be stored in a tupperware on the counter.  Enjoy! 
My daughter cooking up (and taste-testing) pizzelles. You can see how small of scoops need to go onto the mini pizzelle maker - or it will overflow.  This recipe will work for a larger pizzelle maker, just test a few to determine how much batter is needed since they flatten a lot. 


Mini Pizzelles Recipe by Successfully Gluten Free!

Wednesday, 10 May 2023

Fluffy Vanilla Cupcakes

I'm always playing around with recipes.  Can I make something we love even better?  This is an update on the vanilla cupcake recipe I've been making for years.  This recipe does need to beat for a couple minutes in a mixer, so just use the older recipe if you're hoping for a quick whisk together in a bowl.  Both are delicious, but this one has become a new favorite!  Enjoy!
Decorated with chocolate marshmallow fluff frosting by my daughter. Yum!
There are options to make these a bit larger, which also works great!

Kristin's Fluffy Vanilla Cupcakes

Makes 12-18 

Preheat oven to 350 F.  Line cupcake pans with paper liners.

Mix together dry ingredients (this is important in gluten-free baking):
1/2 cup brown rice flour
1/2 cup white rice flour
1/3 cup cornstarch (or arrowroot starch)
2 Tbsp coconut flour
1/2 cup sugar
1 tsp baking powder
1/2 tsp baking soda
1/2 tsp xanthan gum
1/4 tsp salt

Add and beat for 2 minutes at medium speed:
2/3 cup buttermilk (can be made by using 1 Tbsp lemon juice + milk)
1/4 cup oil 
1/2 cup softened butter
1 tsp vanilla bean paste (or vanilla extract)
1/4 - 1/2 tsp almond extract (optional, but add if you like the flavor)
3 eggs

Pour into cupcake holders (you can make 12 large cupcakes, each filled almost to the top of the cupcake liners or 18 cupcakes, each filled ~2/3 full).
You can scoop them in with a spatula. 
Or, you can scoop them in with a larger cookie scoop, which works great!

Bake cupcakes at 350 F for 16-22 minutes, or until light golden brown (less time for smaller cupcakes, more for larger.   If you would like to make this as an 8x8 cake, line the pan with parchment paper and bake ~25-28 minutes.
Larger sized cupcakes (filled 7/8 full)
Scooped with a large cookie scoop to ~3/4 full.

Cool completely on a wire rack.  Frost with your favorite frosting.  Some of our favorites are:
Chocolate Marshmallow Fluff Frosting
Vanilla Marshmallow Fluff Frosting
Strawberry Frosting

Cooling on a wire rack. They smell delicious!
We made these for Halloween and decorated them with googly eyes to make monsters.
No, these aren't poop emoji-topped cupcakes - just delicious chocolate marshmallow frosting on top of vanilla cupcakes.

Fluffy Vanilla Cupcakes Recipe by Successfully Gluten Free!

YUM!

Thursday, 27 April 2023

Chocolate Pudding Pie

Yummy chocolate pudding pie! I've previously posted how I make this - but just briefly mentioned it amidst all the yummy Thanksgiving pie recipes.  Here is the way I typically make the chocolate pudding pie! Enjoy! 
A tasty slice of chocolate pudding pie with whipped cream. Yum! 

Chocolate Pudding Pie

Prepare and bake one buttermilk pastry pie crust.  

Your pudding filling can go into a warm or cooled crust.  I typically start making the filling once the pie crust is in the oven.  

Whisk together, then set aside: 
4 egg yolks
1/4 cup milk
1/4 cup cornstarch

Whisk together in a medium-sized sauce pan: 
1/3 - 1/2 cup sugar
1/4 cup cocoa powder (the type of cocoa powder will affect the final taste - so choose one you like)
1/2 tsp salt
pinch cinnamon (optional)

Add and whisk in: 
2 1/4 cup whole milk or 10% cream (I prefer using cream for a richer dessert)

Cook over medium-low to medium heat, until mixture is almost coming to a boil.  Add 1/4 cup hot cocoa mixture to your egg/cornstarch mixture.  Whisk together.  Add another 1/4 cup hot cocoa mixture to your egg/cornstarch mixture.   

Add the warmed egg/cornstarch mixture to the pot.  Whisk, stirring constantly, until the pudding begins to thicken.  Remove from heat and stir in: 
1 tsp vanilla
1/2 cup dark chocolate chips (Optional - but I like the richness it adds)

Pour the pudding filling into your baked pie crust.  Immediately cover with plastic wrap - press the plastic wrap tightly to the surface of your pudding.  Refrigerate until chilled.  Slice and serve with whipped cream.  Enjoy! 
Make sure to cover tightly with the plastic wrap. 

Chocolate Pudding Pie Recipe by Successfully Gluten Free!

Wednesday, 12 April 2023

Gluten-Free Eclairs!

 A delicious eclair is one of my favorite things - although I rarely have them (mostly because I am far too tempted to eat them all and share with no one).  This recipe is similar to my cream puffs and both the chocolate Paris Brest and caramel-vanilla Paris Brest pastries, with some slight modifications which I find work better for the eclair shape, taste, and desired fillings.  
Had to sneak a bite of a yummy chilled eclair. 
Delicious gluten-free eclairs!

Gluten-Free Eclairs!

Makes about 24 - 30 eclairs, depending on size

Make your cream filling first, so it has time to cool. 

Creme Patissiere (Pastry Cream):

In a medium saucepan (avoid non-stick coated pans), heat over medium heat until just boiling: 
2 1/2 cup half & half (10% cream) OR whole milk
1/3 - 1/2 cup sugar
2 tsp vanilla bean paste OR vanilla extract
1/4 - 1/2 tsp salt

In a small bowl, mix together: 
1/4 - 1/3 cup cornstarch (extra cornstarch will make a bit of a thicker cream, which is helpful if you use milk vs half & half
4 egg yolks
1/4 cup half & half OR whole milk

Whisk the yolks/cornstarch mixture into the hot sugar/cream mixture.  Increase the heat to medium-high to speed up the process, but whisk constantly and rapidly.  Once the mixture thickens and starts to boil (I find it makes big, thick popping bubbles when done, and I quickly have to remove from heat to avoid getting burned), remove from heat and pour the pudding into a glass dish.  (You can strain the pudding in a wire mesh strainer if you have any lumps or are worried about lumps).  

Cover the pudding with plastic wrap pressed directly on the surface of the pudding.  Let cool at room temperature until it's cool enough to place in the refrigerator to completely chill.  (I like to make this in the morning if I need it chilled by evening, or you can make it the day before). 

Choux Pastry (Pate a Choux):

Preheat oven to 375 F.  Line two baking sheets with parchment paper. 

In a medium sized saucepan (avoid non-stick coated pans), heat the following over medium heat just til starting to boil: 
1 1/4 cup water
1/2 cup salted butter
1 tsp sugar
1/4 - 1/2 tsp salt

Remove from heat and stir in quickly with a wooden spoon: 

Put the pot back on the heat and stir vigorously over the heat for 2 - 3 minutes.  It should smooth during this time.  

Remove from heat and place the dough into a mixer.  Turn on the mixer speed to low.  Let it mix for ~5-10 minutes, scraping occasionally.  Your dough should look nice and shiny and be quite thick.  

Add to the dough (one at a time or just all together): 
4 large eggs, room temperature

You want to let the dough mix on medium to medium-high speed until it's nice and smooth, scraping occasionally.  Scoop the dough into two freezer ziplocs (not absolutely necessary, but it's quite a thick dough and I find this helps avoid having a bag split while piping).  Snip ~1/2" - 3/4" from the corner of the bag.  

 Pipe thin éclairs onto one of the parchment-lined pans.  Bake ~30 minutes until nicely browned.  (Light brown can be a bit sticky inside, too dark and it'll be dry and prone to cracking when you go to slice and fill).  

Immediately slice little 3 little holes along the side of each éclair after it comes out of the oven, then put it on a wire rack to cool. (This lets the hot air escape so the eclairs don't collapse on themselves).  You could also poke holes in the bottoms if you'd prefer to pipe your cream in from the bottom. I recommend 2-3 holes in the bottom of each one.  
Piped and ready to bake!
They end up a nice light to medium brown color.  Often you brush choix pastry with an egg wash for a rich golden color, but since we're filling then topping with ganache, I don't do that for eclairs. 

Pipe the second pan of éclairs and bake.  Slice and cool, as above.  

Once they are fully cool, I like to slice them carefully down the sides to fill.  Make sure you have the appropriate metal piping tip if you plan to pipe in the filling from the bottom.  

Chocolate Ganache Topping

I like the make the chocolate ganache then let it cool while filling the eclairs.  Otherwise, the ganache will end up a bit too runny - like in these pictures. ha! Taste will still be delicious, but it won't be as neat as you may want.   

In a saucepan over medium heat combine and heat until bubbling gently: 
1/4 cup butter
1/4 cup whole cream/whipping cream
1/4 tsp vanilla bean paste or extract

Remove from heat and stir in until smooth (this takes a bit of patience, usually a few minutes): 
4-5 oz high quality semi-sweet or bittersweet chocolate

Once the ganache is nice and smooth, you can let it rest to cool 5-10 minutes, then spoon it into a freezer ziploc.  Just before assembling, snip a corner of the bag for piping your ganache.  

Assembling the Eclairs

Scoop your pastry cream into a piping bag or freezer Ziploc.  Snip the corner (or use a tip for a neater finish).  Pipe filling evenly into your eclairs.  

Sliced and filled with pastry cream. Yum!

Put ganache into a piping bag or freezer ziploc.  Gently pipe ganache along the tops of your eclairs.  If the ganache is a bit too warm, it may be a bit runny (like here).  If you just let it rest a few extra minutes (I have no patience), then you can get cleaner lines piped on top of your eclairs.  Chill in the refrigerator and serve!  Keep leftovers chilled in the refrigerator.   Enjoy!   
Covered with ganache.  When the ganache is a bit too warm, it will be a bit runnier and messier (like here).  I'm usually too impatient to wait for it too cool and become a bit thicker, but if you're patient, you'll end up with really neat looking eclairs.
I ended up with two pans of eclairs.  These are fairly small and thin eclairs. 

Gluten Free Eclairs Recipe by Successfully Gluten Free!

Thursday, 6 April 2023

Meammar - Creamy Egyptian-Style Rice with Beef

      This rice is so creamy and rich and delicious.  It's basically a savory version of a rice pudding.  Yum!  My sweet friend, Haidy, served this for us when we went to their house for dinner, and we loved it.  She learned how to make it from her mother-in-law - meaning tried and true. Haidy was kind enough to have me over and teach me how to make it!  I took lots of notes, and then worked on figuring out measurements so it's easy to follow and bake when you don't have years of experience just eyeballing things.  Technically, Haidy makes even more at a time, using ~5 cups of rice and doing things by eye, but I've played around with it to get measurements (for myself and you all) since we can't all be lucky enough to have a friend over our shoulder telling us how it should look.   My family loves this new addition to our repertoire of dinner meals.  
     You can cover and freeze one of the pans to heat up later for another meal, which works great!  Just cover it loosely with foil and place it in the oven, then turn on the heat to 350 so the pan slowly heats up as your oven does.   In case you're wondering about the thin layer of yogurt spread on the top - this gives the beautiful rice brown color and crust to the top of the dish when baking.  Enjoy! 
A yummy serving of delicious Egyptian Rice! Yum! 

Meaamar (Maamar, M'ammar, M'armer) - Creamy Egyptian Style Rice with Beef

NOTE: This recipe has ~1.5 hour prep and ~45-55 minutes baking time.  
*You will start by soaking the rice (it soaks 1 hour).  After 30 minutes (or sooner) you want to start cooking your beef.  You'll finish soaking the rice and prepping it in the pans while your beef cooks.*    

Prepping the Rice (takes ~90 minutes - start cooking your beef after 30 minutes)

Soak fully immersed in cool water, giving a little stir occasionally:
3 cups Calrose rice (Egyptian-style or sushi-style)

***About half an hour after the rice starts soaking, begin cooking the beef.***

After soaking 1 hour, drain and rinse the rice.  Divide into a 9 x 13 pan and 8 x 8 pan so there are even layers of rice on the bottom.   I'll include amounts to add to both pans, to avoid confusion.  
After soaking & rinsing, divide between pans
It fills the pans about like this.

Add to the 8 x 8 pan, and mix in thoroughly: 
1/4 - 1/3 cup mascarpone cheese

Add to the 9 x 13 pan, and mix in thoroughly: 
1/2 - 2/3 cup mascarpone cheese   
This is a very forgiving recipe, so you can use more or a bit less as you prefer - but I find this amount works well. 
Mascarpone mixed in thoroughly.  This takes some patience.

To the 8 x 8 pan, add and mix gently: 
~ 160 ml / 5.5 oz heavy cream
~ 300 ml / 1 1/4 cup milk
1/4 tsp salt

To the 9 x 13 pan, add and mix gently: 
~ 320 ml / 11 oz heavy cream
~600 ml / 2 1/2 cup milk
1/2 tsp salt

Let sit and soak until beef is ready.  
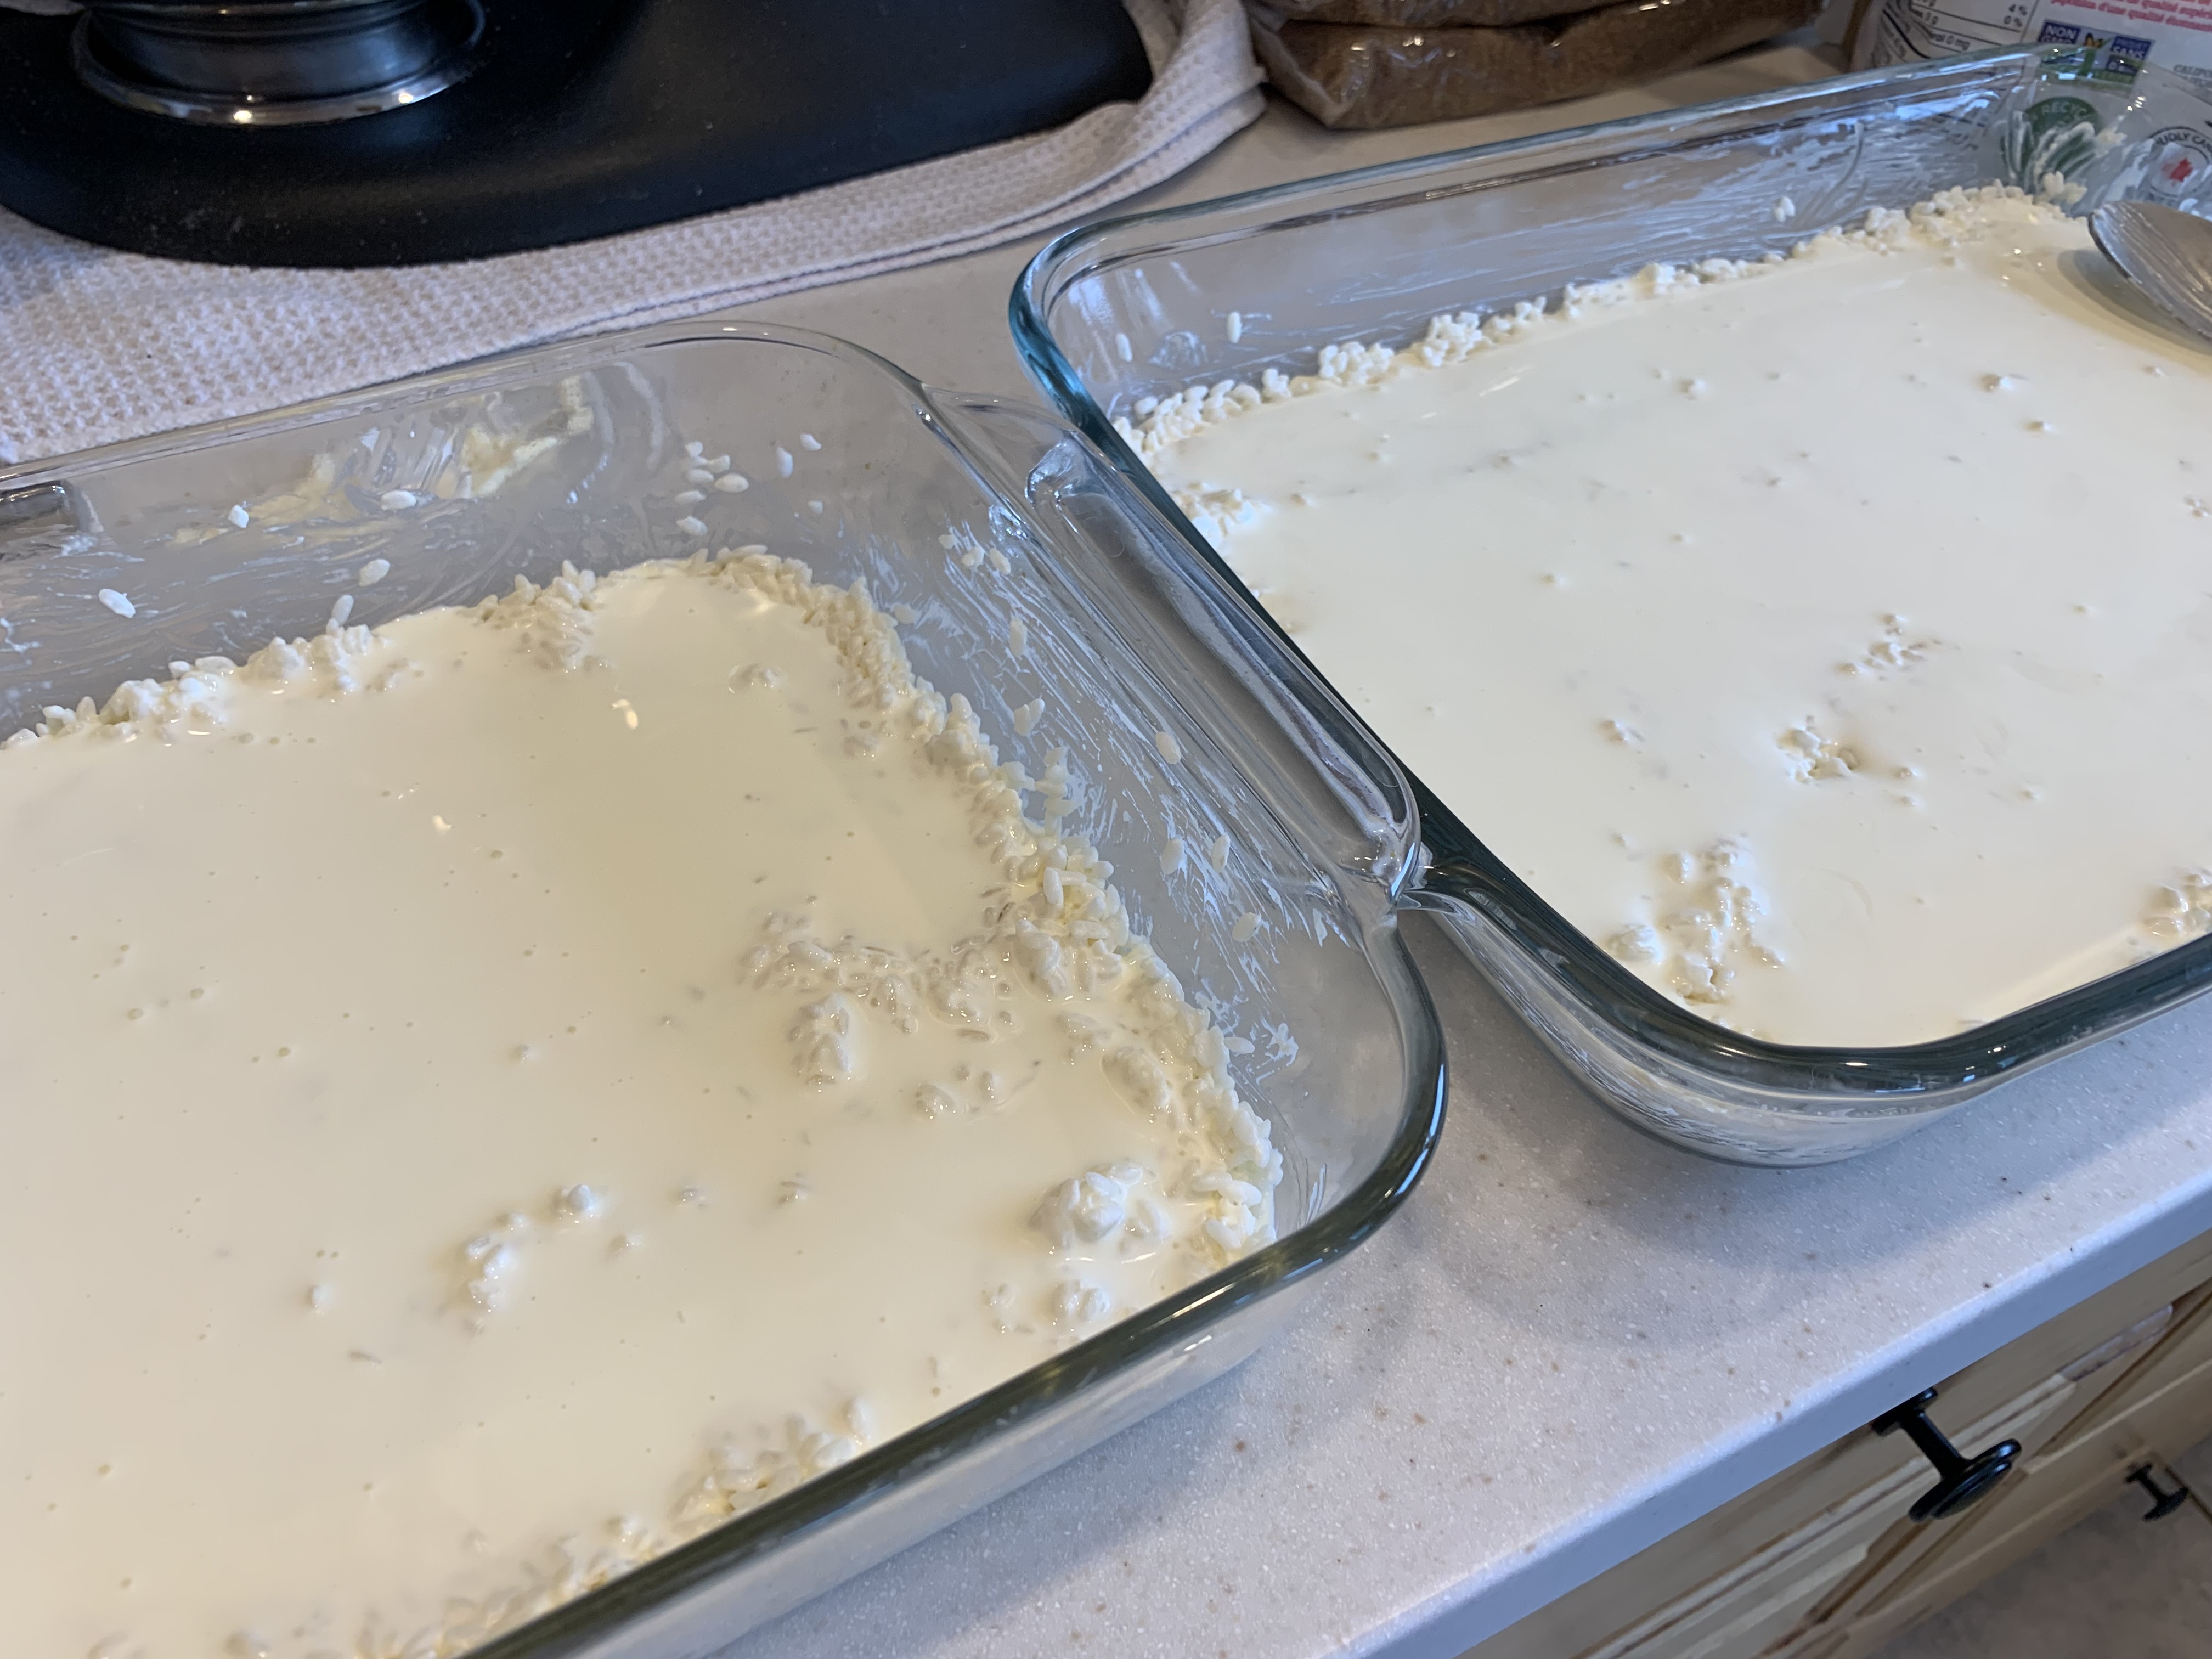
This is just showing the thin layer of cream when added - it just covers the rice in a thin layer, then add the milk and salt.
This is how it looks with the milk added - it's about a half and half rice to liquid ratio.

Cooking the Beef - takes ~60 minutes

In a large pot with well-fitted lid, cook over medium-high to high heat, stirring occasionally: 
2-3 Tbsp avocado oil 
~1 kg/2 lbs stewing beef, diced into medium or large bite size pieces 
Do NOT add any salt/pepper at this point

Keep the lid ON, except while stirring.  Let the beef cook, stirring occasionally, until ALL the liquid has been absorbed.  Initially, the pot will have quite a bit of liquid that is released from the beef, then it will slowly cook off/be absorbed by the beef.  When all the liquid is almost absorbed, add:
3/4-1 cup water

 Lower the heat to medium-low to continue simmering until the meat softens and you can cut it with the cooking spoon.  Most of the liquid should be gone at this point.  If the meat still isn't tender enough, you can add a little extra water and continue simmering.   
Make sure to keep the lid on while cooking, just removing it to stir occasionally.  Once you add the extra water, be sure to lower the heat. 

Once your meat is soft and there is very little liquid left, add, and stir, cooking a few minutes: 
salt & pepper
Egyptian spice blend - this is a lovely mix of regular or smoked paprika, cardamom, cumin, black pepper, ground coriander, nutmeg, cinnamon, and cloves (it's sometimes called a Lebanese 7 spice blend, but this doesn't always contain cardamom, which is a flavor I love in this blend)

The amount of seasoning depends on your taste - it can be light and mild, or you can season generously.  Personally, I like to season generously, since it will be within a creamy rice.  
Seasoned and ready to add to the rice. 

Divide the meat between the pans.  Any liquid left can be added as well, to add extra flavor to your dish.  

Divided evenly between the pans
Larger pieces of meat work well in this recipe, but I like smaller pieces since it spreads more evenly throughout the dish.  Just divide any leftover liquid from the meat dish over the rice.

Final prep before baking - & baking (baking time takes about 45-55 minutes)

Spoon small scoops around and spread gently over the top of the 8 x 8 pan: 
~3 Tbsp plain yogurt

Spoon small scoops around and spread gently over the top of the 9 x 13 pan: 
~6 Tbsp plain yogurt

Bake at 425 F for about 15 minutes, until rice is bubbling nicely.  Lower heat to 350 F and cook an additional 30-40 minutes, until nicely browned on top and light browned on the bottom.  

This is the sort of deep golden brown on top that you're looking to see.
The best thing about a pyrex baking dish is being able to see the light golden brown on the bottom, which is how it should look when baked.


Meammar - Creamy Egyptian-Style Rice with Beef Recipe adapted by Successfully Gluten Free!


Friday, 31 March 2023

Fennel & Chicken over Rice

 This recipe was inspired by the delicious poule au pot recipe.  It has nice, delicate flavors.  It's easy to whip up for a quick, comforting dinner.  I love the taste of fennel, but I recognize the slight anise-flavor may not be to everyone's liking.  However, my kids don't like black licorice flavor, but they do love fennel cooked into soups, frittatas, and meals like this easy fennel & chicken over rice.  Enjoy!
A tasty meal of fennel & chicken over rice. 

Fennel & Chicken over Rice

Cook 2 cups of the rice of your choice (basmati or jasmine are two of my go-to varieties). 

In a large high-sided saucepan, sauté over medium heat: 
2 Tbsp oil
3-4 Tbsp butter
1/2 onion, diced or sliced
1 large or 2 small fennel bulbs, sliced/diced with part of the fronds included
3 chicken breasts, cubed (Or you can add cooked chicken later in the recipe - I often will use leftover roast chicken for a recipe like this. You could even used canned chicken, which stores well so is nice when you can't make it to the store for fresh.)

Once chicken is cooked, add and cook 1 minute: 
2 tsp minced garlic 

Add: 
5 cups chicken broth (5 cups water plus 5 tsp GF chicken bouillon paste or 5 tsp Asian mushroom seasoning)
1/2 - 3/4 tsp dried thyme 
1 Tbsp freeze-dried parsley
1/2 tsp rosemary (dried, or 1-2 tsp fresh, minced)
1 tsp pepper
1 tsp salt

Simmer for 20-30 minutes.   Mix together in a small bowl, then add to thicken, stirring constantly until nice and bubbly: 
3/4 cup milk
1/4 - 1/3 cup cornstarch

If using pre-cooked chicken, add: 
2 cups cooked, diced chicken

Serve over your choice of rice.  Enjoy! 

Cooked and ready to serve!

Gluten Free Fennel & Chicken over Rice Recipe by Successfully Gluten Free!