Search for a Recipe

Thursday 30 October 2014

Pumpkin Swirl Bread or Rolls - Refined Sugar-Free!

Just in time for Halloween! Another wonderfully successful cinnamon swirl bread recipe - but this time with pumpkin!  If you want more of a pumpkin pie type taste in your bread, you could add a pinch of nutmeg, ginger & cloves to the cinnamon swirl mixture.   It's delicious plain, and I love that it has no refined sugar, too!  It's also a great way to use up any pumpkin puree that you might have on hand (homemade or canned).  The roll form tends to be a bit stickier than the bread, but they both taste delicious!  Enjoy!
Lovely orange pumpkin swirl bread, ready to eat!
Pumpkin swirl rolls - great plain, topped with butter, or you could even top with a little cream cheese frosting for a pumpkin cinnamon roll type treat.

Pumpkin Swirl Bread or Rolls - Refined Sugar-Free!
Makes 12-15 rolls OR ~5 mini loaves (or you can adjust as desired so you have some of each!)

Preheat oven to 350F.  Butter 9x13 pan or 4-5 mini loaf pans, as desired.  (You can make this in 1-2 larger loaf pans, but will need to increase the cooking time).

In a mixer combine:
1 1/4 cup brown rice flour
1/2 cup white rice flour
3/4 cup potato starch
3/4 cup tapioca starch
1 Tbsp xanthan gum
1 Tbsp quick/rapid-rise yeast
1 tsp salt

Add and beat ~3 minutes:
1 cup canned 100% pumpkin puree or homemade pumpkin puree
1/2 cup warm water
3 eggs
1 Tbsp honey
1 1/2 Tbsp maple syrup
4 Tbsp oil 

Combine in a small bowl:
1/4 butter, melted
1/4 cup sucanat sugar
1/4 cup maple syrup
2 Tbsp cinnamon
* For a more pumpkin-pie taste, add slightly less cinnamon and add 1/2 tsp nutmeg, 1/2 tsp ginger, 1/4 tsp cloves 

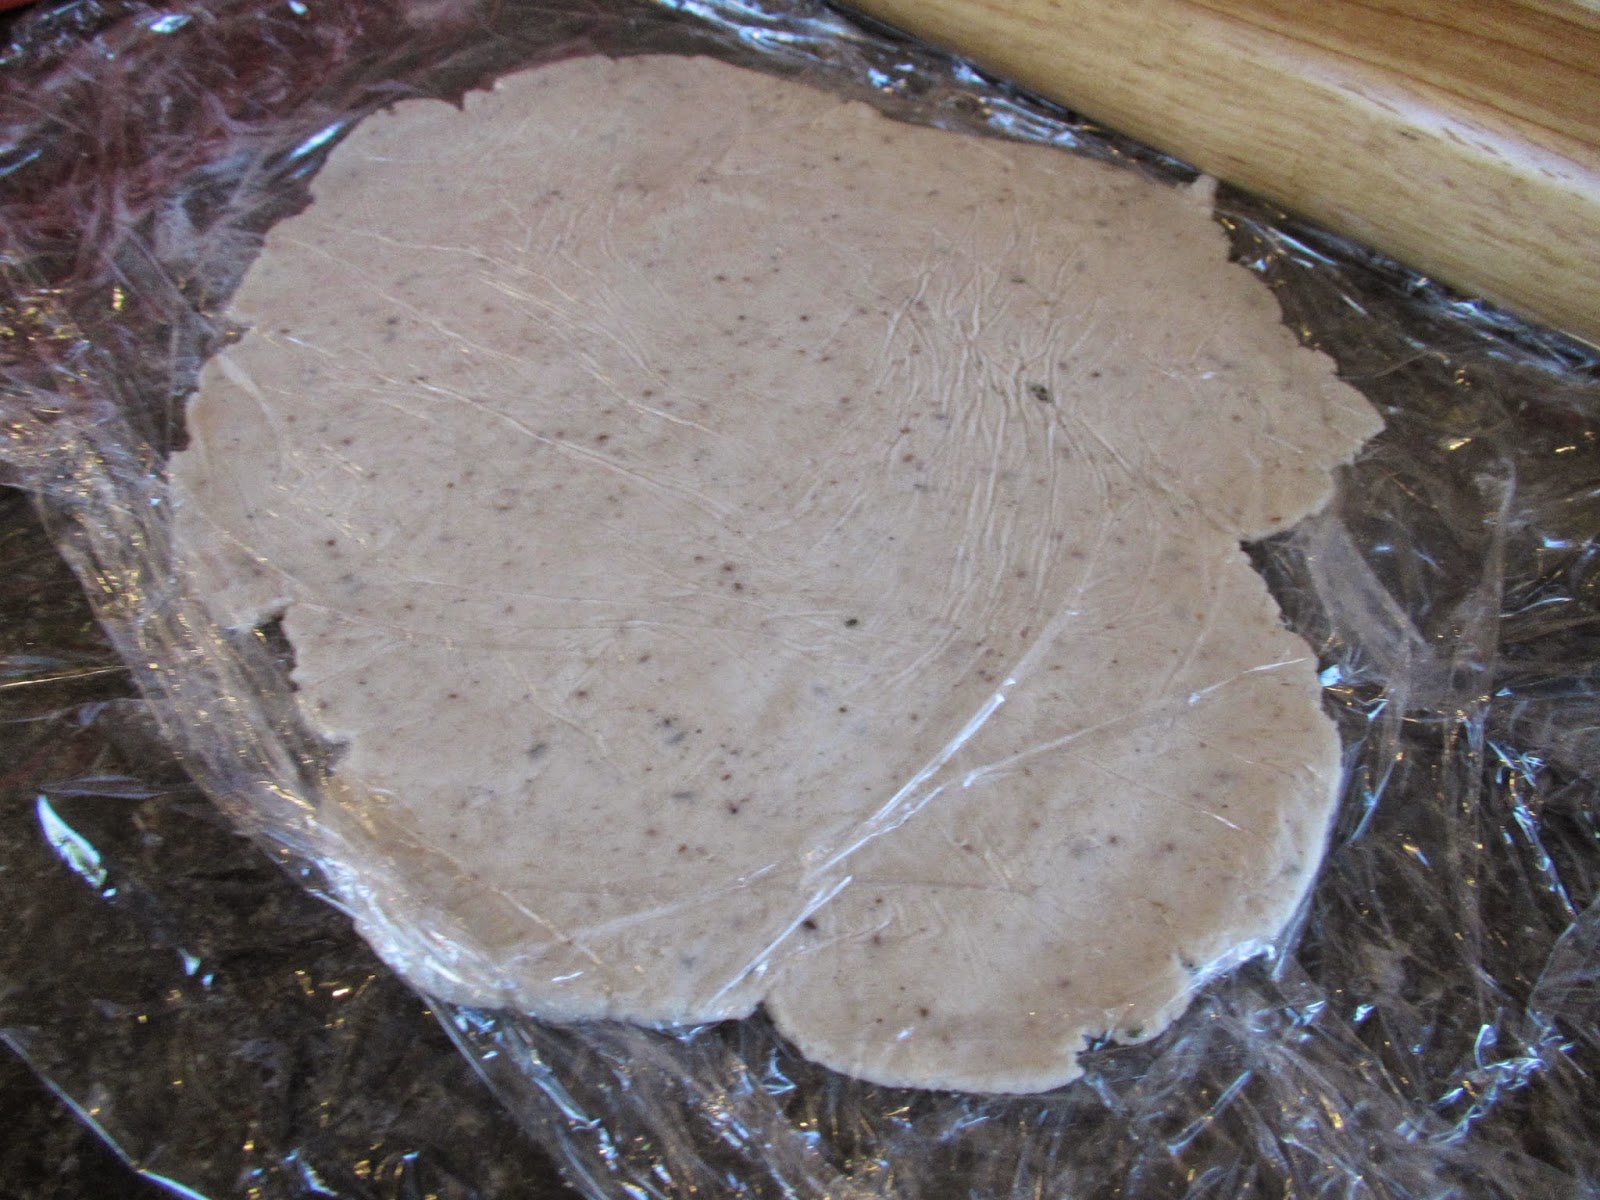
Swirl briefly/gently into dough.

Scoop large scoops into 9x13 pan OR fill mini loaf pans just above 1/2 full.   Here I've made 12 rolls in the 9x13 pan and have enough to make 1 mini loaf pan.  But you could make 15 rolls or 5 mini loaf pans, so you can adjust as you desire.  Cover with plastic wrap and let rise in a warm location ~30 minutes, until dough looks almost doubled and bread in pans has risen to be even with the top of the pan.
Before and after rise for the mini loaf 
Before and after rise for the rolls

Bake at 350F ~25-30 for both rolls and mini loaf pans.  Bread should look nicely browned on top and rolls should look lightly browned on top.  (You'll need to cook the bread closer to 45-50 minutes if you make it in larger loaf pans.  Personally, I find they brown too much for my taste on the crust in larger loaf pans, but it'll still taste great)

Remove bread from loaf pans to cooling rack to cool.  Slice and enjoy!  Wonderful plain, or topped with a dollop of butter.  Enjoy!

Wednesday 29 October 2014

Monster Cookies!

These are a fun cookie - great when you want something in between a cookie and granola bar.  My kids and husband love them!  They're not perfect for everyone, as they do have oats, oat flour and peanuts - but, if you're OK with wheat-free oats & peanuts, then these are a great treat. I add in a bit of brown rice krispies, too, for an extra crunch.  I also made some adjustments to lower the sugar content in these compared with regular monster cookie recipes I've seen around. Enjoy!
Freshly baked monster cookies - ready to eat!

Monster Cookies!

Preheat oven to 350F.  Line cookie sheets with parchment paper.
Makes ~36

In a mixer, beat just until thoroughly combined:
1/2 cup butter, softened
1/4 cup coconut oil
2 eggs
1/4 cup applesauce
1 cup brown sugar
1 tsp vanilla extract
1 cup oat flour
1 1/2 cup whole oats
1 tsp baking soda
1 1/2 - 2 cups crunchy peanut butter

Add in, mixing briefly:
1/2 cup semisweet chocolate chips
1 cup brown rice krispies
1/3 - 1/2 cup shredded coconut (optional)
1/3 - 1/2 cup mini reese's pieces (optional)

Scoop out heaping 1 Tbsp scoops onto the pan.  Top each cookie with 3-4 M&Ms or a few extra chocolate chips.
Topped with 3-4 M&Ms before baking by my 3 year old. 

Bake at 350F ~12-15 minutes, less time for a light brown cookie, longer for a crispier cookie.  Let rest a few minutes on the cookie sheet before removing to wire rack to cool.  You can freeze any leftovers to enjoy later! Enjoy! 

Tuesday 21 October 2014

Spiced Vanilla Pear & Apple Jam - sugar-free!

This is the most delicious jam!  It's perfect for the fall when apples and pears are ripe!  I canned a big batch of spiced vanilla pear jam with my friend Julie.  (We used this recipe using all pears).  However, I wanted to just be able to whip some together anytime without having to deal with peeling and chopping so much fruit and canning things.   I also used local fresh apple cider.  This jam is great and easy to whip together and use or pop in the refrigerator.  It's a great spice and vanilla-filled jam for fall. Enjoy!

Finished spiced vanilla pear & apple jam in a 2 cup and 1 cup containers

Spiced Vanilla Pear & Apple Jam
Makes ~2 cups

Combine in a metal medium-sized saucepan:
1 lb apples, peeled & chopped 
1 lb ripe pears, peeled & finely diced
1 cup apple cider
2 tsp fresh lime or lemon juice
3/4 tsp cinnamon
2 tsp vanilla bean paste (OR 2 tsp vanilla extract & scraped out insides from 1 vanilla bean pod)
1/3 tsp ground cardamom

Bring to a boil over medium-high heat, stirring occasionally.  Lower heat to medium-low and allow to simmer ~45-50 minutes, stirring regularly so it doesn't stick to the bottom.
Mixture just coming to a boil, before 45 minutes of simmering.

It will thicken naturally (apple has natural pectin), and so should make a nice, lumpy jam.  It's so delicious, the kids wanted to eat it by the spoonful!   Store in a covered glass container and use within 2-3 weeks.
Enjoy!

Friday 10 October 2014

Quick BBQ (or oven) Naan Bread

This isn't proper Naan, but it's wonderfully thin and crispy with a lovely flavor.  And so quick and easy to whip up, which is important in my house.  I love that you can cook it up outside on the BBQ, too! Or you can pop it in the oven.  Brushed with butter before cooking, it has a lovely flavor that cooks right into it.  It's even egg-free! Enjoy!
Fresh off the BBQ, and still sizzling.  

Quick BBQ (or oven) Naan Bread
Makes 3 large pieces of Naan

Preheat grill to medium to medium-high heat (~450-475F) OR preheat oven to 475F, place 2 cookie sheets in the oven that you'll put your naan bread onto.

Mix in a large bowl with a spoon:
1 1/2 cup Kristin's Gluten-Free Flour Mix
1 tsp ground chia seed
1/4 tsp ground coriander
1/4 tsp dried cilantro, optional
1/2 tsp salt
1 tsp xanthan gum
1 tsp quick/rapid-rise yeast

Add in slowly, mixing with a spoon just until mixture holds together nicely:
1 to 1 1/4 cup milk (lactose-free works great)

Melt 1/4 cup butter in a small bowl.  Have a brush handy to brush the dough after rolling it out.

Divide the dough into thirds.

Roll 1/3 of the dough between two pieces of plastic wrap until it's nice and thin, between 1/4" and 1/2" thick.  Brush one side with butter.  Flip onto a piece of parchment paper and butter the other side.  Repeat with the remainder of dough.
 If you want a slightly puffier naan, you can let it rest at this point ~15 minutes.  But I find it's wonderful thin and crispy, so I don't bother (not to mention, I want this to be fast!)
Roll between plastic wrap.  Butter one side, then flip onto parchment paper to butter the other side.

Flip quickly onto heated BBQ, using tongs to help straighten it out if it gets folded on itself.  Cook ~5-7 minutes, checking regularly.  Cook until they're a nice dark brown on the bottom.  You can flip these over if you want a bit of browning on both sides, but these are so thin they're nice as-is.

If you want to cook your Naan in the oven, carefully put them on your preheated sheets and cook ~5 minutes, checking regularly.  They may puff up during baking (this is okay!).  Cook until they've got some browned spots.  Remove from oven and serve!

Quick Curry Chicken & Veggies

While I love making proper Indian dishes, sometimes one that is just thrown together with fresh veggies and a nice curry powder makes a wonderful, filling dish.  Perfect for the fall when the days are getting cooler.  And wonderful with the easy thin GF Naan bread.

Fresh quick curry w/ veggies & chicken served over brown basmati rice with a side of fresh GF Naan

Quick Curry Chicken & Veggies

Serves ~4-6

This takes ~40 minutes to cook & simmer.  So, start some brown or plain basmati rice cooking, if desired.  You can also serve this with some quick GF Naan bread.

Heat in a large high-sided frying pan over medium to medium-high heat:
2 Tbsp butter
2 Tbsp olive oil 

Add & cook ~2-3 minutes, until starting to become tender:
1/2 onion, chopped

Add and cook 1 minute:
3 cloves garlic, finely chopped

Add, cooking 2-3 minutes:
1 medium zucchini, chopped

Add to the pan and allow to cook, stirring regularly for ~3 minutes:
4 Tbsp curry powder (more or less, to taste - it really depends on the strength of your curry powder blend)

Add to pan, cook 10 minutes, stirring occasionally:
3 1/2 - 4 cups chopped fresh tomatoes

Add, allowing mixture to come to a boil/simmer:
3 cups cooked chicken, chopped (more or less, to taste)

Put a lid on your pan.  Lower heat, and allow curry to simmer at least 20 minutes before serving, stirring occasionally.  If your curry not as thick as you'd like, you can remove the lid to allow excess liquid to evaporate.

Serve with a side of basmati rice and/or fresh GF naan bread. Enjoy!


Quick Curry Chicken & Veggies by Successfully Gluten Free!

Sunday 5 October 2014

Pumpkin Pie Pancakes - Fabulous and Gluten Free!!!

I've never been a huge pumpkin pie fan, but these are delicious! They're like eating a tiny slice of pumpkin pie.  I eat them plain, but they're also nice with a tiny dollop of maple syrup and whipped cream.  A perfect fall treat for anytime you're in the mood for pumpkin pie or pancakes, or both!  I've included links to all my pumpkin recipes, in case you're looking for something else pumpkin-y.  However, I highly recommend these delicious pancakes. Enjoy!
Fresh pumpkin pie pancakes, with a dollop of maple syrup and whipped cream. (Though I most often just eat them plain)

Pumpkin Pie Pancakes - Fabulous and Gluten Free!!!
Serves 4-6, Makes 30 small 4" pancakes (you can make larger ones, too)

Blend together just until smooth, using a stick blender (or blender, or food processor):
1 cup Kristin's Gluten-Free Flour Mix
1/4 cup sugar
1 tsp pumpkin pie spice (OR 1/2 tsp cinnamon, 1/8 tsp nutmeg, 1/8 tsp allspice, 1/16 tsp cloves)
1/4 tsp salt
1 tsp baking powder
1 cup pumpkin puree (100% canned pumpkin or fresh pumpkin puree)
2 eggs
1 cup milk (lactose-free works great)
3 Tbsp oil

Cook on a skillet over medium-low heat, flipping carefully.  These pancakes are a different consistency from ordinary pancakes - like little slices of pumpkin pie.  Great plain, or with a little maple syrup and/or whipped cream.  Enjoy!
These may only have one bubble or two before you want to flip them. Make sure to use a thin spatula and flip quickly.  They'll be wonderfully soft throughout, just like a mini slice of pie! 

Thursday 2 October 2014

Quick & Delicious GF Hamburger Buns!

I love whipping together my normal hamburger buns - they're great since you can make them without a mixer.  Sometimes, however, it's nice to be able to throw everything into a mixer and just turn it on. Here, you can do that very thing! These hamburger buns taste just as fluffy and buttery as the regular ones.  I'm always looking for ways to simplify my cooking while keeping the wonderful taste in tact.  This nails it! Enjoy!
Fresh from the oven and ready to eat!

Quick & Delicious GF Hamburger Buns!

Makes 10

Preheat oven to 400F.  Line a cookie sheet with parchment paper OR silicon mat.

In a mixer, combine: 
2 1/2 tsp quick/rapid-rise yeast
1 1/2 tsp xanthan gum
1 1/2 tsp salt

Add the following. Beat 3-4 minutes: 
1/2 cup milk (lactose-free works great!)
1/2 cup warm/hot water
1/4 cup butter, softened/half melted
4 Tbsp honey
2 eggs

Drop 10 even piles of dough on the prepared cookie sheet.  Use wet hands to smooth and shape the dough into hamburger bun shapes.  I prefer them a bit wider and flatter. 

Sprinkle top of dough with sesame seeds (optional)
Brush dough with melted butter (optional, but highly recommended)

Let rise, uncovered, in a warm location for 30-35 minutes. The dough will puff up a bit, but not double in size.

Bake at 400F for 15 minutes, until nicely browned.  Remove to a cooling rack.  Slice and serve!

Leftovers?  Yes, these freeze well!  Just let them cool completely.  Slice them all, then freeze in a freezer ziploc.  I like to let them defrost on the counter in the ziploc to avoid any condensation issues.  You can reheat your GF hamburger buns in the oven or on the grill, both work well.  Enjoy!!!
Ready to eat!


Quick &Delicious Gluten-Free Hamburger Buns Recipe by Successfully Gluten Free! 

Wednesday 1 October 2014

Pickled Beets - just one jar for the refrigerator

I nearly died laughing when I served two pieces of pickled beet to my 8 year old alongside a salad topped with leftover pork roast.  He looked intrigued by them and asked what they were.  I told him they were pickled beets.  Since he likes pickles, he popped them both in his mouth (making one very full mouth).  Imagine his surprise to realize that they're a bit stronger than ordinary pickles.  He liked them, but found them a bit too strong to eat all in one big bite.  They're better accompanying something like salad, meat, mashed potatoes, or roasted veggies.  However, unless you like beets, you probably still won't like these.  I find them quite strong - but I find beets quite strong.  I like them best grated over salad.  But, it's an easy way to use up the colorful fresh beets available this time of year.  
Freshly jarred pickled beets, made with colorful organic beets from Heartbeet Organics.

Pickled Beets
Makes one 500ml/1pint jar, stores in the refrigerator up to a month

Preheat oven to 400-425F. (You can also roast these on the BBQ)

Line an 8x8 pan with foil.  Put in your pan:,
fresh beets, chopped to large bite-sized pieces - Use enough beets to cover the bottom of your pan.  

Cover pan gently with an additional piece of foil.  Roast at 400-425F on a foil lined 8x8 pan ~30 minutes.

Put cooked beets in a clean glass jar.  Set aside while you prep the pickling juice.

Pickling juice:
In a medium saucepan, bring to a boil over medium-high heat:
1/2 cup water
1/2 cup white vinegar
1/4 cup sugar
1 tsp salt
pinch ground pepper
1/4 - 1/2 tsp mustard seed
1/4 - 1/2 tsp fennel seed

Pour pickling juice over beets. Cover with lid.  Let cool and then refrigerate at least 72 hours before eating.  Serve alongside roast dinners (chicken, turkey, pork, beef).  Enjoy (if you like beets)!
The entire bottle will darken over time because of the darker colored beets.