Search for a Recipe

Showing posts with label sourdough. Show all posts

Friday, 26 May 2023

Wholesome Sourdough Waffles - Egg-Free, Dairy-Free, Gluten-Free!

Making gluten-free sourdough starter does take some patience, but it's pretty easy to whip together and feed.  And, it makes the most delicious waffles.  These are a modification of my regular sourdough waffles - with some egg-free and dairy-free options!  I also have some tasty chocolate chip sourdough waffles and lemon-blueberry sourdough waffles, too!  Enjoy! 
GF Sourdough waffles with apple chunks added. Yum! 

Wholesome Sourdough Waffles - Egg Free, Dairy Free, Gluten Free!

Makes 16-18 waffles
(My waffle iron makes 6 waffles at a time, and I can fill it almost 3x)

Mix in a 4 cup tupperware the night before you want your waffles:
1/2 cup brown rice flour
1/2 cup sorghum flour
1/2 tsp xanthan gum

Add and mix in, just until combined:
1 cup water (filtered, if your water contains chlorine)
1 cup gluten-free sourdough starter

Put the tupperware lid on tightly, and let rest overnight at room temperature. This mixture will grow naturally overnight due to the yeast, so make sure your container is at least a 4 cup container and can be fully closed.


In the morning, preheat your waffle iron.
Mix together in a small bowl and let sit 3-5 minutes, stirring once:
2 Tbsp chia seeds
6 Tbsp water

(You can use 2 eggs in place of the chia seeds & water if you prefer)

Mix together in a large bowl, just until combined:
Chia seed mixture (or 2 eggs, if preferred)
5 Tbsp oil
1 Tbsp maple syrup
1 tsp vanilla bean paste (or extract)
1 tsp cinnamon
1/2 tsp baking powder
1/2 tsp baking soda
1/2 tsp salt
1 Tbsp flaxseed meal (optional)
1-2 apples, peeled and finely diced (optional, but I prefer it)
Mixture from last night (starter/flour/water)

Butter waffle iron lightly each time you use it.  Cook batter in pre-heated waffle iron until nicely browned and crispy.  Remove from waffle iron and place on cooling rack (I do this even when making my favorite plain or apple-cinnamon waffles, or any waffles, because it keeps them from ever getting soggy on the bottom, especially if I make extras to freeze).

Best served fresh with maple syrup, or jam, or any topping you enjoy on your waffles!
Once cooled, you can freeze these in a ziploc bag and re-heat in a toaster oven for quick breakfasts.
Enjoy!!!

Wholesome Sourdough Waffles - Egg-free, Dairy-free, Gluten-Free Recipe by Successfully Gluten Free!

Monday, 1 February 2016

The Speedy Version of my Favorite Sourdough White Bread & Rolls

I really do love making sourdough breads (and waffles and pizza crusts and rolls), but sometimes I just don't have the time to let things rise for hours or attend to the starter regularly.  This was an experiment that succeeded with flying colors, giving me that same delicious taste I love in my favorite sourdough bread, but in a short amount of time! Win-win!  I've made the recipe as written below, but I've also doubled it to make an assortment of large loaves, mini loaves and rolls.  I've even used the dough to make thin, crispy pizza crusts, which are delicious.  I'll post the pizza instructions soon! In the meantime, enjoy!

Gluten Free Delicious Bread and Rolls
Fresh loaves of gluten-free bread, fresh from the oven.  We couldn't wait for them to cool before we dove into a loaf.
Gluten Free Delicious Bread and Rolls
Fresh GF rolls - baked in a 9" x 13" pan.  They were perfect for open-faced tuna melts.
Gluten Free Delicious Bread and Rolls
It slices SO well and is filled with holes, just like a proper loaf should be. 


The Speedy Version of my Favorite Sourdough White Bread
Makes 2 loaves or 4-5 mini loaves

Preheat oven to 350 F.  Butter 2 regular loaf pans or 4-5 mini loaf pans.

In a 2 cup measuring cup combine and let rest 5-10 minutes until you have at least 1 1/2 cups of puffy yeast mixture (more is fine):
1 cup warm/hot water
1 1/2 Tbsp honey
1 Tbsp maple syrup
2 tsp quick-rise yeast
This was a double batch, so I needed it to rise until I had 3 cups of yeast mixture instead of 1 1/2 cups.

In a mixer combine:
1 cup brown rice flour
1/2 cup white rice flour (OR 1/4 cup sorghum flour + 1/4 cup white rice flour)
1/2 cup tapioca starch
1/2 cup potato starch
1/2 cup arrowroot
2 tsp xanthan gum
1 tsp salt

Add and mix in:
1 1/2 (at least) cups puffy yeast mixture, from above
2 eggs
2 egg whites
4 Tbsp oil
1 tsp apple cider vinegar

Beat for 3 minutes, until light and fluffy.

Fill each buttered bread pan a little less than 1/2 full with bread dough.   Cover with plastic wrap and let rise in a warm location until dough doubles and hits the top of the plastic wrap.  This bread will only bake as high as it rises.  For rolls, scoop even scoops of dough into a buttered 9x13 pan.  Cover with plastic wrap and let rise until doubled.  Remove plastic wrap.
Bread after rising to the top of the pan. 

Bake at 350 F for 25 minutes for mini loaves and 40-45 for regular loaves or about 30-35 minutes for a pan of rolls.   Remove bread/rolls from pans and cool on a cooling rack.  You can slice thin or thick.  Whatever you won't use that day, slice and freeze.  It reheats perfectly.  Enjoy!
Gluten Free Delicious Bread and Rolls
Gluten Free bread fresh from the oven! Yum! 

Gluten Free Delicious Bread and Rolls
Mini GF loaves, fresh from the oven.  These were filled more like 1/3 full and rose almost to the tops of the pans before baking. 

Monday, 20 April 2015

Chocolate Chip Sourdough Waffles

These are so tasty, they don't need anything on them, but the kids still like to put a little maple syrup and sometimes whipped cream on top.  Gluten-free sourdough starter is so easy to get started.  One of our favorite sourdough recipes is making waffles, although we love the sourdough breads, too (I've linked all sorts of recipes on my sourdough starter post)  Sourdough waffles, especially chocolate ship sourdough waffles are some of the lightest and most delicious waffles!   Enjoy!
Gluten Free Chocolate Chip Sourdough Waffles
Gluten-Free Chocolate Chip Sourdough Waffles - Nicely browned and ready to move to the cooling rack.  Yum!

Chocolate Chip Sourdough Waffles
Makes 18 waffles

(My waffle iron makes 6 waffles at a time, and I can fill it 3x)

Mix in a 4 cup tupperware the night before you want your waffles:
1 cup white rice flour
1/2 tsp xanthan gum

Add and mix in, just until combined:
1 cup water (filtered, if your water contains chlorine)
1 cup gluten-free sourdough starter

Put the tupperware lid on tightly, and let rest overnight at room temperature. This mixture will grow naturally overnight due to the yeast, so make sure your container is at least a 4 cup container and can be fully closed.
Gluten Free Sourdough Starter
I find the mixture tends to look like this in the morning - nicely filled with air pockets.

In the morning, preheat your waffle iron.
Mix together in a large bowl:
2 eggs
5 Tbsp oil
1 Tbsp maple syrup
1 tsp vanilla bean paste (or extract)
1 tsp cinnamon (optional, but I like the flavor)
1/2 tsp baking powder
1/2 tsp baking soda
1/2 tsp salt
Mixture from last night (starter/flour/water)

After mixing, fold in:
1/3 - 1/2 cup mini semi-sweet chocolate chips

Butter waffle iron lightly each time you use it.  Cook batter in pre-heated waffle iron until nicely browned and crispy.  Remove from waffle iron and place on cooling rack (I do this even when making my non-sourdough starter favorite plain or apple-cinnamon waffles, because it keeps them from ever getting soggy on the bottom, especially if I make extras to freeze).

Delicious served with maple syrup and whipped cream, but easily stand on their own without any toppings at all!  Enjoy!

Friday, 13 June 2014

Fabulous Thin & Crispy Sourdough Pizza Crust

We love our pizza around here - particularly the thin and crispy pizza crust.  As I've been working with GF sourdough starter lately, it only seemed appropriate to create a delicious (and easy!) thin and crispy sourdough pizza crust.  (GF sourdough starter is easy, forgiving and makes the tastiest waffles ever and now pizza crust, in addition to delicious breads!) The best part about these crusts is you can make them in advance - just cook the first 20-25 minutes, then let cool and refrigerate or freeze them and do the topping and final baking later!  I've also discovered that whether or not you make this recipe or my original thin & crispy pizza crust, both will work wonderfully to do the final cooking on the BBQ!  Yay!!! You'll get a fabulous, crispy crust this way.  Enjoy!!!

Cooked on the BBQ - yum!


Fabulous Thin & Crispy Sourdough Pizza Crust
Makes 2 pizzas

Preheat oven to 400F.  Line the bottoms of 2 cookie/baking sheets with parchment paper. (i.e. flip over your pan and cook on the underside of the pan, so you don't have to worry about the lip of the pan when you want to remove your crust)

In a mixer, combine:
1 3/4 cup Kristin's Gluten-Free Flour Mix
2 tsp sugar
1 tsp salt

Add and mix 3 minutes:
1 cup  GF sourdough starter
1 1/4 cup lukewarm water
2 Tbsp olive oil
1 tsp apple cider vinegar

Divide between parchment paper-lined baking sheets.  Spread into large ovals with a spatula.  Let rest 15 minutes.  Bake 20-25 minutes, until just starting to get some brown spots (I rotate and switch around the pans midway so I can bake them at the same time).  Remove to cooling racks until ready to top and bake or BBQ.
Note: You can layer cooked crusts between parchment paper, wrap and refrigerate or freeze until you're ready to use these pizza crusts! Great in summer if you want to plan ahead or cook in the oven on a cooler day for a BBQ'd meal on a hot day! 
I prefer cooking these on parchment paper, actually - but kept forgetting to take pictures of the before/after.  I also failed to turn these trays upside-down. It's definitely easier to 1. use parchment paper and 2. cook these on the bottom (underside) of the cookie sheets so they're easy to slide off onto a cooling rack. But, you can still see the before/after oven baking to get the idea.

Top pizzas as desired with a mix of the following, as desired: Top crusts lightly for thin-crust pizzas!
pasta sauce, use lightly on thin-crust pizza (I prefer Classico for taste)
mozzarella cheese (fresh is best, sliced thinly)
ham, pepperoni (GF), chicken (cooked, diced)
veggies, thinly sliced and placed sparingly
fresh basil
Topped simply with a little sauce and fresh mozzarella pizza - simple and delicious.
Topped with BBQ sauce mixed with spaghetti sauce, then fresh mozzarella, chicken, green onions, heirloom tomatoes, and drizzled with extra BBQ sauce

To cook in oven:  Preheat oven to 400F.  Top pizzas as desired.  Place pizzas directly on wire rack in oven and cook 7-10 minutes, until toppings are ready and bottom is browned and crispy.  Remove to a wire rack.  Slice quickly on a cutting board and return to wire rack to keep the bottom crispy. Enjoy!

To cook in BBQ: (using a propane or gas grill is easiest, I find) Cook pizza directly on the grates at low to medium-low on the BBQ.  When the toppings are getting close to being done, turn up the heat to get the bottom crust where you like it.  It shouldn't take more than 5-6 minutes per pizza.  Remove from heat to a wire rack.  Slice on a cutting board and return to your wire rack (this ensures your pizza stays properly crispy on the bottom).  Enjoy!

Fresh Mozzarella Sourdough Thin Crust Pizza after cooking on the BBQ
BBQ Chicken Sourdough Thin Crust Pizza after cooking on the BBQ

Tuesday, 13 May 2014

Our Favorite White GF Sourdough Bread and Rolls

The thing I love about bread-making is that little tweaks can have a big impact.  And this recipe is no exception.  A few modifications turned my tasty white bread recipe into a different version, which we actually think is even tastier - it has a challah-like taste, and we just love that!  The best part is that it's great as both rolls AND loaves.  In fact, I often double this recipe and make 2 loaves AND 12 rolls.  Leftovers freeze wonderfully. Enjoy!

Fresh, airy rolls.  Yum!

Our Favorite White GF Sourdough Bread and Rolls
Makes 2 loaves or 12 rolls

Mix together dry ingredients in a mixer:
1 cup brown rice flour
1/2 cup white rice flour
1/2 cup tapioca starch/flour
1/2 cup potato starch
1/2 cup arrowroot starch/flour
2 tsp xanthan gum
1 tsp salt

Add wet ingredients and then let beat/mix 2 minutes:
1/2 cup Gluten-Free Sourdough Starter
1 Tbsp honey
1 1/2 Tbsp maple syrup
4 Tbsp oil
3 eggs
1 cup lukewarm water

After beating two minutes, you can:
1. 2 bread loaves: Fill 2 buttered bread loaf pans halfway, cover with plastic wrap
2. 12 rolls: Scoop, using a very large cookie scoop, 12 rolls either onto a buttered cookie sheet or buttered 9x13 pan.  Cover cookie sheet with inverted cookie sheet and wrap edges with plastic wrap to seal OR cover 9x13 pan with plastic wrap.

Let rise in a warm location for 4-5 hours, until doubled (or close to doubled).  It won't look like much is happening for the first 2 hours, but then it will start to rise.  Because you are using a sourdough starter and not adding any additional yeast, the rising time takes longer. 
Rolls pre-rise and post-rise.  If desired, you can brush them with egg before baking and sprinkle with poppyseeds or sesame seeds. 

Preheat oven to 350F.
If desired, you can brush the loaves/rolls gently with 1 egg, beaten, before baking.  You can also sprinkle on poppyseeds or sesame seeds, after brushing with egg, before baking.

Bake bread loaves 40-45 minutes, until nicely browned.  Bake rolls 25-30 minutes, until nicely browned.  Remove from oven and cool on a cooling rack.
Rolls fresh from the oven. 
Bread fresh from the oven, transferred to a cooling rack.

We like it best warmed, but the bread/rolls reheat wonderfully in a toaster or oven.  Eat within the first day or two, or slice and freeze to enjoy later.  It freezes and reheats wonderfully. Enjoy!
The bread loaves after cooling and slicing.  The bread is wonderfully airy and has a light, yet rich flavor, similar to Challah-bread. 

Friday, 7 February 2014

Lemon-Blueberry Sourdough Waffles!

We've absolutely been loving eating sourdough waffles.  We like to eat them for breakfast, then freeze any leftovers to eat later in the week.  I typically make them plain or with apples and cinnamon in them, but we had these wonderful organic blueberries and fresh lemons, so I thought I'd experiment with making lemon-blueberry waffles.  They were a hit!  Absolutely our favorite version of sourdough waffles to date.  Don't forget, you do have to mix together a few things the night before so the starter has time to grow before morning! Enjoy!

Lemon-Blueberry Sourdough Waffles topped with fresh maple syrup and whipped cream, ready for eating! 

Lemon-Blueberry Sourdough Waffles!
Makes 18 waffles

(My waffle iron makes 6 waffles at a time, and I can fill it 3x)

Mix in a 4 cup tupperware the night before you want your waffles:
1 cup white rice flour
1/2 tsp xanthan gum

Add and mix in, just until combined:
1 cup water (filtered, if your water contains chlorine)
1 cup gluten-free sourdough starter

Put the tupperware lid on tightly, and let rest overnight at room temperature. This mixture will grow naturally overnight due to the yeast, so make sure your container is at least a 4 cup container and can be fully closed.
I find the mixture tends to look like this in the morning - nicely filled with air pockets.

In the morning, preheat your waffle iron.
Mix together in a large bowl:
2 eggs
5 Tbsp oil
1 Tbsp maple syrup
1 tsp vanilla bean paste (or extract)
1 tsp cinnamon (optional, but I like the flavor)
1/2 tsp baking powder
1/2 tsp baking soda
1/2 tsp salt
Mixture from last night (starter/flour/water)

After mixing, fold in:
zest of 2 meyer lemons (or regular lemons)
1 1/2 - 2 cups fresh blueberries, rinsed
The batter has lovely flecks of lemon zest in it, and is full of fresh blueberries.

Butter waffle iron lightly each time you use it.  Cook batter in pre-heated waffle iron until nicely browned and crispy.  Remove from waffle iron and place on cooling rack (I do this even when making my favorite plain or apple-cinnamon waffles, because it keeps them from ever getting soggy on the bottom, especially if I make extras to freeze).
Nicely browned and ready to move to a cooling rack. 
Delicious served with maple syrup and whipped cream, but easily stand on their own without any toppings at all!  Enjoy!
Topped with maple syrup, ready to be eaten! Yum!

Friday, 24 January 2014

Easy Sourdough Cinnamon Swirl Rolls

We've really enjoyed the variety using a gluten-free sourdough starter gives. It's very forgiving in many recipes, since the rising time is so long.  These cinnamon swirl rolls are my 'easy' take on my normal cinnamon roll recipe.  I even made them one day when we lost electricity and since it was cold they didn't rise until the electricity was back and the house heated back up - and still they worked out wonderfully! The best part is that if you freeze the rolls, and freeze the glaze in a separate container, they can be heated up for a delicious breakfast or snack anytime! Enjoy!


Easy Sourdough Cinnamon Swirl Rolls
Makes 15 rolls

Butter a 9x13 pan.

Mix in a large bowl:
3/4 cup white rice flour
3/4 cup potato starch
3/4 cup tapioca starch
1 cup brown rice flour
4 tsp xanthan gum
1 tsp salt

In a mixer, combine:
1/2 cup gluten-free sourdough starter
1 cup lukewarm water
3 eggs, room temperature
1 Tbsp honey
1 1/2 Tbsp maple syrup
4 Tbsp oil

Add in dry ingredients and beat 1-2 minutes, until nice and smooth.

While that's beating, mix together in a small bowl:
1/4 cup butter, melted
3/4 cup brown sugar
2 Tbsp cinnamon

Scoop spoonfuls of the cinnamon filling into the mixer and let mix briefly, until just swirled.
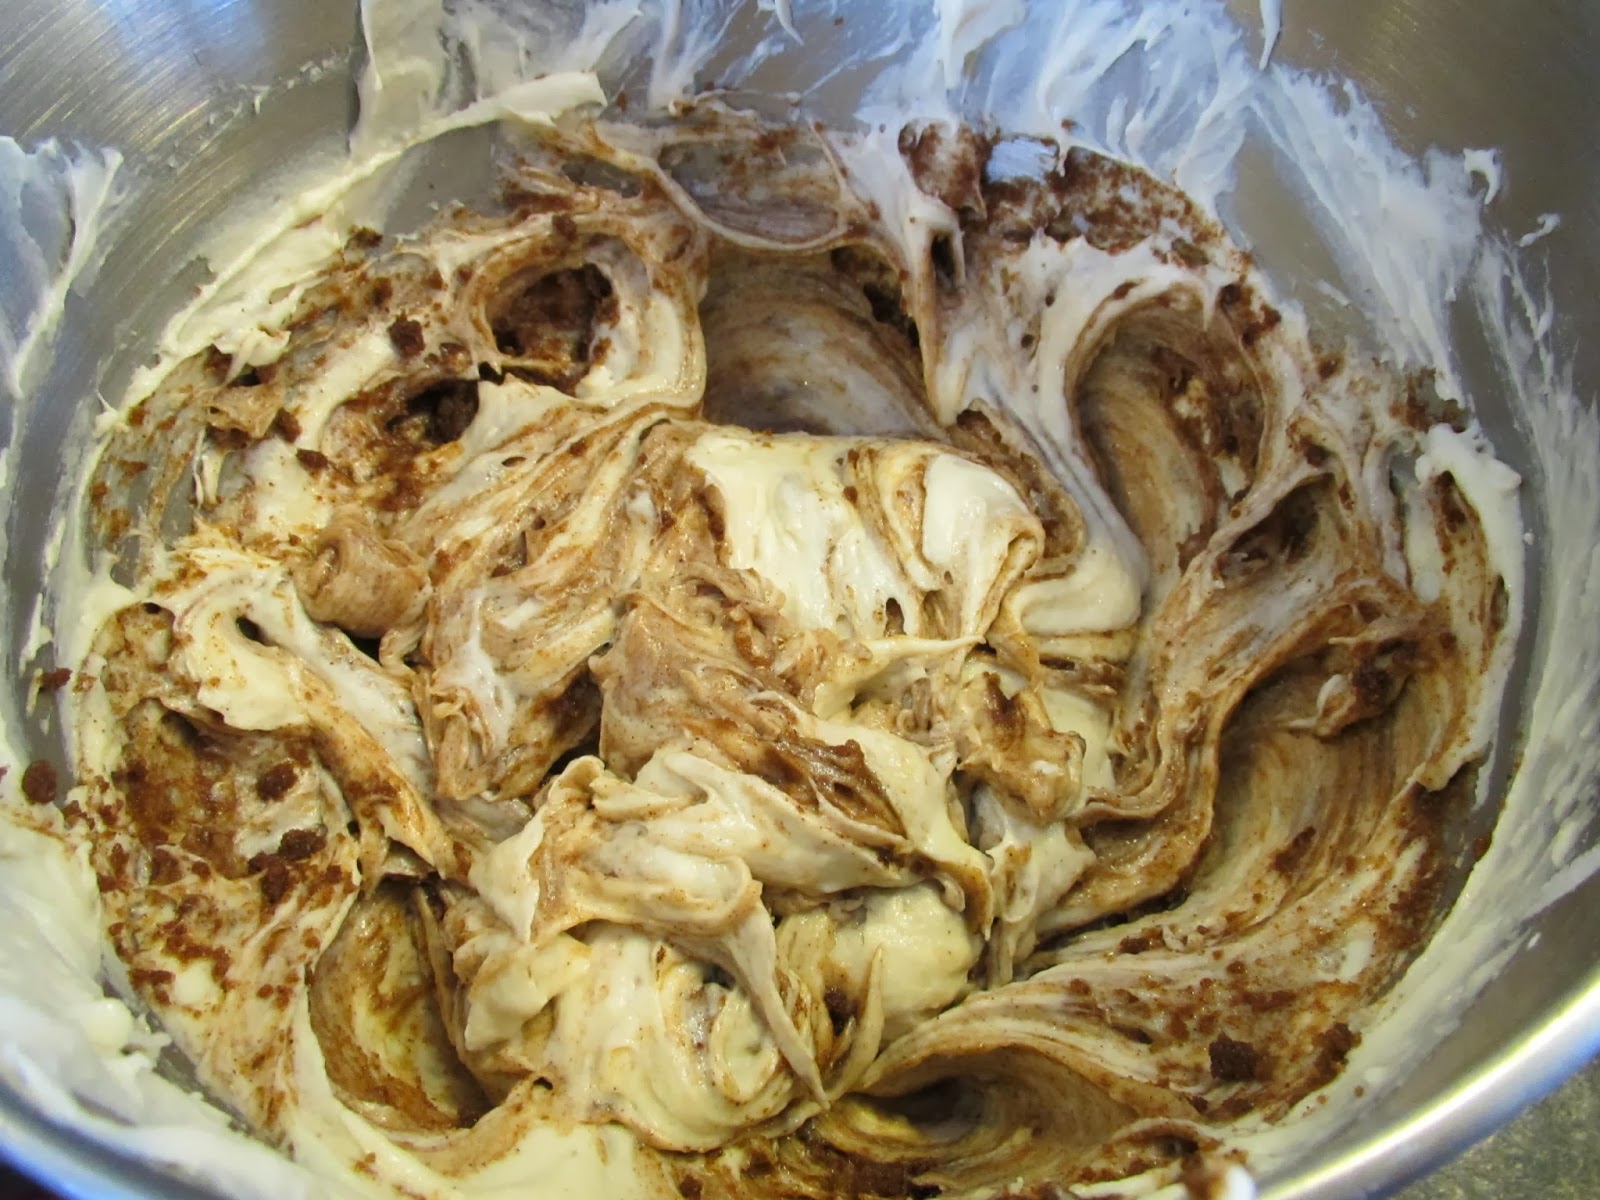
Dough with cinnamon swirl mixed in briefly.

Using a large cookie scoop, scoop 15 scoops into a buttered 9x13 pan. Cover pan with plastic wrap.  Set in a warm place and let rise 4-5 hours, until properly puffed up.  It won't look like they're rising for a good 2 hours.
Rolls after rising, ready to be baked. 

Bake at 350F for 30-35 minutes.  Set pan on a cooling rack.
Rolls after baking.  You can leave them to cool in the pan. 

While still warm, drizzle with cream cheese glaze (below).   Note: These freeze well if you don't add glaze.  You can freeze the rolls in one bag and the glaze in a separate bag/container and remove/warm as desired.  They'll be just as delicious.
Enjoy!

Cream Cheese Glaze
Mix together in a bowl, until smooth:
1.5 - 2 oz cream cheese, softened (approx 1/8 of a container)
1 Tbsp butter, softened
3/4 tsp vanilla bean paste or extract
1 cup powdered sugar

Add milk by teaspoonfuls, until you have your preferred consistency.

Put glaze in a ziploc baggie. Snip a corner and drizzle over your swirl rolls. Enjoy!

Thursday, 9 January 2014

Gluten-Free White Sourdough Bread

I've really found cooking with my gluten-free sourdough starter to be wonderfully easy, and this bread recipe is no exception.  The starter itself, has proved to be amazingly forgiving (I've forgotten to feed it some days - no problems; I've popped it in the refrigerator for a week and ignored it - no problem; I've fed it extra flour and water some days to get more starter - no problem). Nice, right!?  While the breads do take extra time to rise, the resulting bread is airy and sturdy enough for thick or thin slicing.  It also freezes wonderfully, which is great to have around for school sandwich bread. I should note that while it is made with a gluten-free sourdough starter, it doesn't have a proper 'sourdough' taste, but rather tastes like a nice, white bread. Enjoy!


Gluten-Free White Sourdough Bread

Butter 2 bread pans.

Mix in a large bowl:
1 cup white rice flour
1 cup potato starch
1/2 cup brown rice flour
1/2 cup tapioca starch
2 tsp xanthan gum
1 tsp salt

In a mixer, combine:
1/2 cup gluten-free sourdough starter
1 cup lukewarm water
3 eggs, room temperature
1 Tbsp honey
1 1/2 Tbsp maple syrup
4 Tbsp oil

Add in dry ingredients and beat 1-2 minutes, until nice and smooth. Divide dough into two buttered loaf pans. The pans should each be 1/2 full. Cover with plastic wrap.
Fill buttered pans halfway and cover fully with plastic wrap.

 Set in a warm location to rise 4 hours (yes, 4 hours). You won't see much evidence of rising until at least 2 hours have passed.
Loaves have risen and are ready to bake! 

Once dough has risen (not quite doubled in size), bake at 350F for ~ 45 minutes.

Remove from pans and cool on cooling rack. Slice and enjoy!
I find it's best warm or toasted.  It's delicious toasted and buttered.  It works great for garlic bread or sandwiches.  You can slice and freeze, too.  Enjoy!
The bread is nice and airy!
They slice very neatly, so you can cut thick or thin slices.


Monday, 6 January 2014

Spinach, Ham & Cheese Brunch Casserole

We've really been enjoying the wonderful taste of the sourdough starter breads and rolls lately.  This recipe is a delicious use for the gluten-free sourdough brown bread I make. I was inspired by some suggestions for brunch casseroles in the Food Network Magazine, and tweaked things around to make a gluten-free version that had all the ingredients I love.  This version has been a hit with the whole family. So much so that I made it for our friends Julie and Jeremy who came for dinner, and they loved it as well.  I find it's a wonderful dish for any time of day, even thought I've called it a brunch casserole.  It reheats wonderfully, and it also nice chilled, like a quiche.  While I love quiche, this is a wonderful alternative - perfect for a chilly day! Enjoy!

Ready to eat! 

Spinach, Ham & Cheese Brunch Casserole
Serves 6-8
Prep ~20 minutes, Sitting time ~30 minutes, Baking/resting time ~1 hr.

Butter a 9x13 pan.

In a large frying pan, heat at medium heat:
2-3 Tbsp olive oil

Add and saute until tender:
2 large shallots, diced OR 2 small onions, diced

Add, stirring until wilted:
4-5 large handfuls of baby spinach
salt & pepper, optional

Remove from heat and set aside.

Chop up one loaf of gluten-free sourdough brown bread, ideally one day old (or bread of your choice, ideally 1 day old) into 1" cubes.  You should have 8-9 cups.  (I have a 9 cup tupperware that I put my 1" cubes into once chopped after baking/cooling my bread, then I'm ready to make this casserole the next day)

Place 1/2 your bread cubes into the bottom of the 9x13 pan.

Sprinkle over top of the bread:
2 cups grated flavored cheese (flavored gouda (I've used a nice mustard & pepper, and an italian-seasoned gouda), strong cheddar, or similar density cheese w/ flavor of your choice would work well)
One half bread cubes topped by 2 cups grated flavored Gouda

Spread over top of cheese:
Cooked spinach & onions
1 1/2 - 2 cups chopped ham (cubed ham or slices of ham, diced)

Top with remaining cubes of bread.

Mix together, and then pour evenly over pan:
10 eggs
1.5 cups cream (lactose free works great)
1.5 cups milk (2%) (lactose free works great)
1 - 1.5 tsp salt
Spinach mixture, then ham, then bread cubes, then egg and milk/cream mixture, prior to covering.

Cover pan with plastic wrap and let sit 30 minutes.  Remove plastic wrap.  Bake at 325F for 50 minutes, or until set in the center.  Let sit 10 minutes before cutting and serving.

This is great fresh and hot, but also wonderful as leftovers either cold or warm.  I find it's similar to a tasty quiche, but with the crust throughout.

Enjoy!!!

Wednesday, 18 December 2013

Fabulous Sourdough Waffles - Gluten-Free!

These are delicious - really really delicious.  And so easy, too!!!  It seems common to recommend making pancakes to use up excess sourdough starter, but I have found I prefer these light and crispy waffles.  I find that whereas the pancakes have more of a whole-wheat taste to them, these just taste like wonderfully crispy and flavorful waffles.  We have loved them!  They're great, too, because I freeze any extras, and they can be re-heated in the toaster oven anytime! Enjoy!

Light and fluffy gluten-free sourdough waffles with maple syrup. Yum!

Fabulous Sourdough Waffles - Gluten-Free!
Makes 15-18 waffles
(My waffle iron makes 6 waffles at a time, and I can fill it almost 3x)

Mix in a 4 cup tupperware the night before you want your waffles:
1 cup white rice flour
1/2 tsp xanthan gum

Add and mix in, just until combined:
1 cup water (filtered, if your water contains chlorine)
1 cup gluten-free sourdough starter

Put the tupperware lid on tightly, and let rest overnight at room temperature. This mixture will grow naturally overnight due to the yeast, so make sure your container is at least a 4 cup container and can be fully closed.
I find the mixture tends to look like this in the morning - nicely filled with air pockets.

In the morning, preheat your waffle iron.
Mix together in a large bowl:
2 eggs
5 Tbsp oil
1 Tbsp maple syrup
1 tsp vanilla bean paste (or extract)
1 tsp cinnamon
1/2 tsp baking powder
1/2 tsp baking soda
1/2 tsp salt
Mixture from last night (starter/flour/water)
Here's the batter, ready for cooking.  If desired, you can add finely diced apples (option below).

Apple-Cinnamon Waffle Option: 
After mixing, fold in:
1-2 apples, peeled and finely diced

Butter waffle iron lightly each time you use it.  Cook batter in pre-heated waffle iron until nicely browned and crispy.  Remove from waffle iron and place on cooling rack (I do this even when making my favorite plain or apple-cinnamon waffles, because it keeps them from ever getting soggy on the bottom, especially if I make extras to freeze).
My waffle iron makes 6 waffles at a time, and I find I fill the waffle iron almost 3x for this recipe.  The waffles on the right are apple-cinnamon waffles on the cooling rack.

Best served fresh with maple syrup, or jam, or any topping you enjoy on your waffles!
Once cooled, you can freeze these in a ziploc bag and re-heat in a toaster oven for quick breakfasts.
Enjoy!!!
Apple-cinnamon waffles with syrup. Yum!