Search for a Recipe

Showing posts with label cream cheese. Show all posts

Thursday, 15 March 2018

Gluten Free Light & Fluffy Carrot Cake Pancakes

After a lunch out at a restaurant for my dad's birthday, we wanted something lighter, but still tasty and fun for a birthday dinner.   These were a massive success!  They were fluffy, light, not too sweet, and delicious plain or with a drizzle of a cream cheese-maple syrup mixture.   There was more than one person exclaiming how these were the best pancakes they'd ever eaten. They'd be a perfect breakfast for Easter, being filled with carrots.  Enjoy!
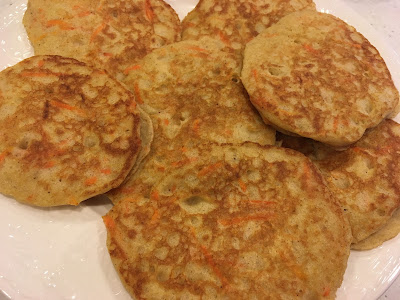
GF Carrot Cake Pancakes
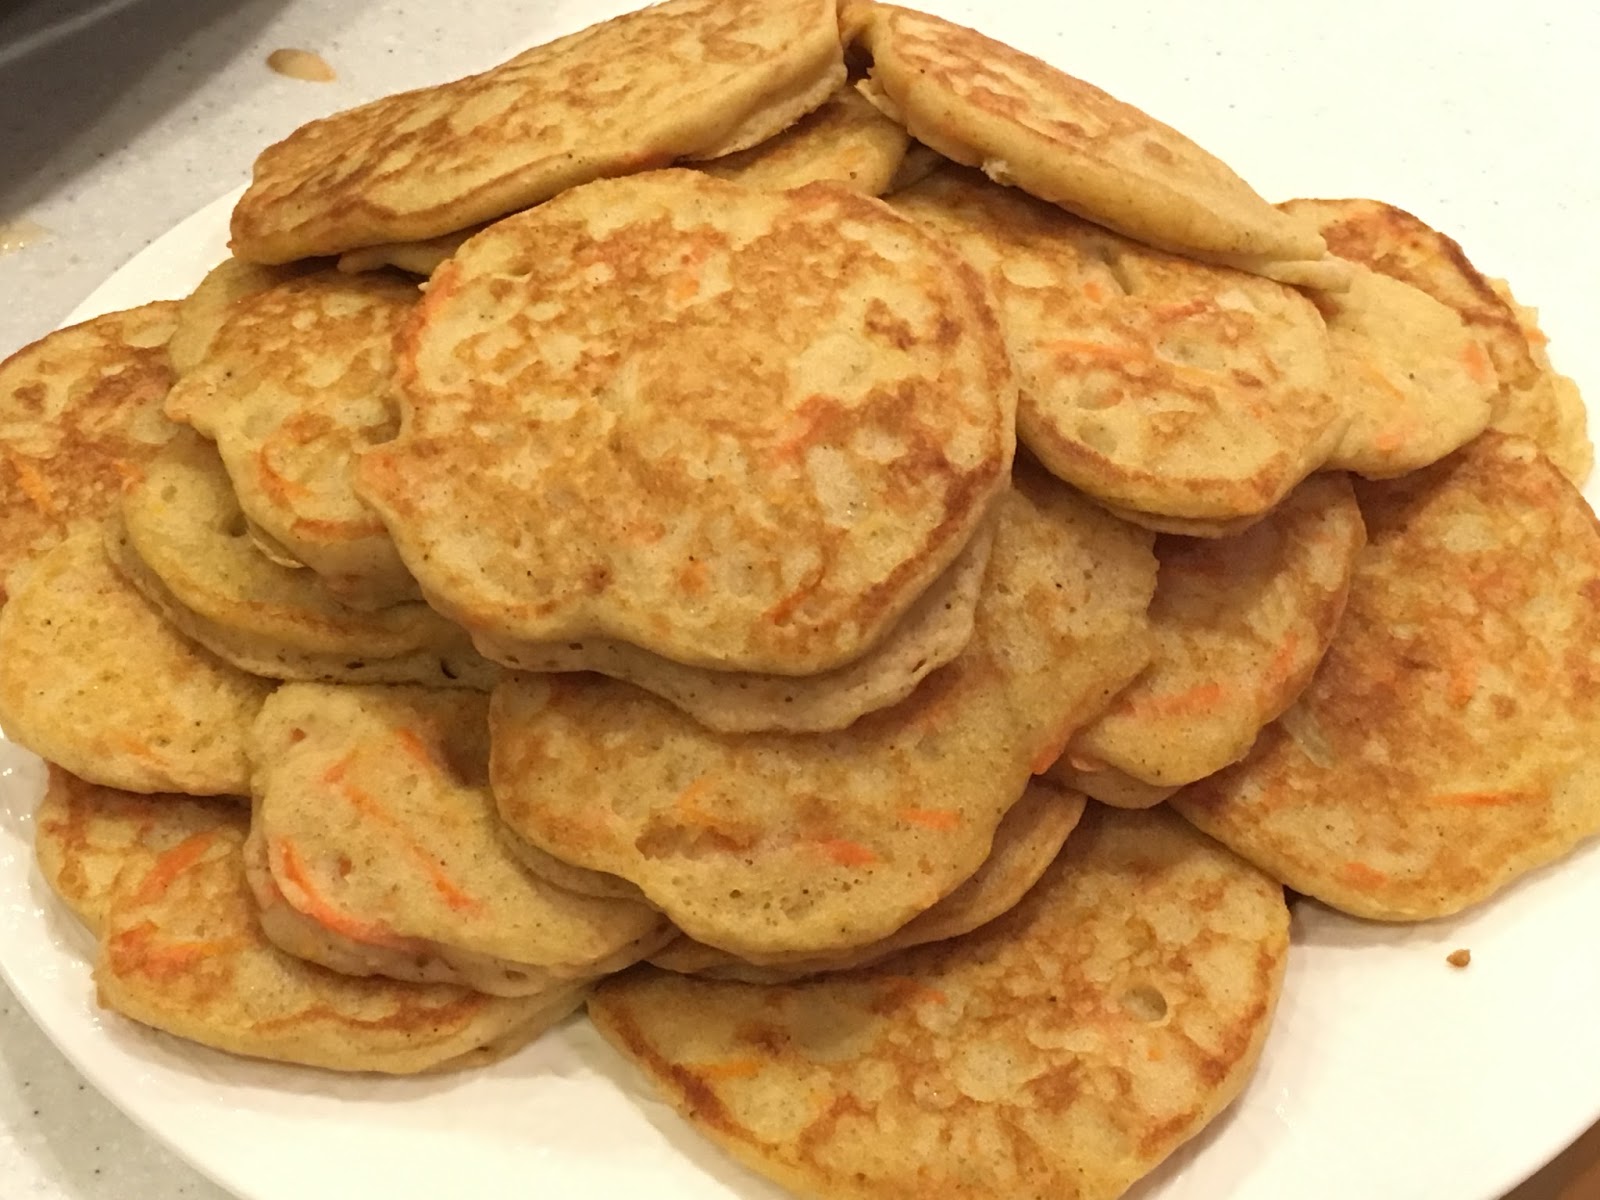
A full plate of carrot cake pancakes!

Gluten Free Light & Fluffy Carrot Cake Pancakes
Based on a recipe by Bobby Flay
This makes a generous amount of pancakes (basically two platefuls like the picture above). You can halve the recipe, if desired, but they are great reheated, too!

Grate and then use paper towels to pat dry:
2 large carrots (making ~2 cups grated carrot, patted dry)

In a large measuring cup, combine and set aside (this is essentially making buttermilk):
1/4 cup white vinegar
2 3/4 cup milk (I like to use half coconut milk and half lactose-free milk, just for a little less dairy)

Mix dry ingredients together with a whisk:
3 cups Kristin's Gluten-Free Flour Mix (*see below for amounts for just this recipe)
1/2 cup white sugar
1 tsp ground cinnamon
1/2 tsp ground ginger
1/4 tsp nutmeg
1/4 tsp allspice
1/8 tsp cloves
2 tsp baking powder
1 tsp baking soda
1 tsp salt

Add and stir in with a spatula until thoroughly combined:
milk/vinegar mixture, from above
patted dried carrots, from above
4 eggs
6 Tbsp butter, melted
1 tsp vanilla extract
2 tsp grated orange zest

Cover and refrigerator batter at least 30 minutes.

Cook the pancakes over medium heat on a well-buttered griddle.  Once there are bubbles throughout the surface of the pancake, flip and cook the other side.  Serve hot with cream cheese-maple syrup, below.  They'll also taste great with plain maple syrup and whipped cream.

Cream Cheese Maple Syrup

Mix together equal parts maple syrup and cream cheese, something like this:
1/4 cup maple syrup
1/4 cup cream cheese

Bring to a boil either on the stove-top or in the microwave.   Whisk together, blending if you really want to get all the lumps out.  This is a simple way to make a maple cream cheese syrup.  It tastes amazing on top of the carrot cake pancakes!  Leftovers store great in the fridge or freezer and reheat wonderfully, too! Enjoy!
GF Carrot Cake Pancakes
You can make the carrot cake pancakes large or small, depending on preference. 

* To make Kristin's Gluten-Free flour mix just for this recipe, whisk together:
1 1/2 cup brown rice flour
3/4 cup sorghum flour
1/2 cup arrowroot flour or 2/3 cup cornstarch
1/4 cup potato starch
1/4 cup tapioca starch
1 tsp xanthan gum
Friday, 8 December 2017

Pumpkin Spice Layer Cake

I decided to make a GF pumpkin spice layer cake as an extra Thanksgiving dessert for one of my daughters who doesn't like pie unless it's a chocolate pie. But, I wanted something a little different in look and shape to accompany the pies.  My daughter LOVED this.  So much so, I made it the following week for a family dinner.  It's remarkably easy, but because of the layering, it has a fancy look.  A fun dessert that's delicious and looks beautiful.  Enjoy! 
Yum! A delicious slice of homemade pumpkin spice layer cake!
Layered & chilled. The frosting was piped for a neater look.
Gluten Free Pumpkin Spice Layer Cake
Serving a slice of pumpkin spice layer cake. This one was not chilled before slicing - we couldn't wait! Yum!

Pumpkin Spice Layer Cake

Preheat oven to 350F.  Line a metal quarter-sized baking pan, approximately 9" x 13", 10" x 10", or 11" x 11" in size, with parchment paper.

Mix in a large bowl (It is important to mix dry ingredients first in gluten-free cooking, or you will end up with inconsistencies in the batter):
3/4 cup Kristin's gluten-free flour mix
1/4 tsp xanthan gum
1 tsp pumpkin pie spice + pinch of cloves (OR 1/2 tsp cinnamon, 1/4 tsp nutmeg, 1/4 tsp allspice, 1/4 tsp ginger, pinch of cloves)
1/2 tsp baking powder
1/2 tsp baking soda
1/4 tsp salt

Add, and mix in thoroughly:
1/2 cup oil (I love avocado oil, but any cooking oil will work)
2/3 - 3/4 cup sugar

Add and mix in until nice and smooth:
2 eggs
1/2 cup pureed pumpkin (canned pumpkin or homemade pumpkin puree will work)
1/2 tsp vanilla extract (vanilla bean paste is best)

Pour into your parchment-paper lined metal baking pan.  Smooth top of batter.

Bake at 350F for 30 minutes, until nicely browned on top.  Cool 5-10 minutes in the pan, then remove to cool completely on a wire rack. Once cooled, slice cake into three even pieces.  Frost and layer as follows:

Beat the following by hand OR in a mixer until nice and smooth:
2 Tbsp butter, softened
3 oz cream cheese, softened
2 cups powdered sugar
1 tsp vanilla bean paste OR vanilla extract
1-2 tsp milk, added slowly, until desired thickness

You can spread the frosting with a spatula OR you can put it in a ziploc bag, then snip the corner, to pipe for a neater look. Optional, but I found this worked well for a neater looking cake: Line an oversized bread pan (just larger than the size of each slice of cake) with plastic wrap.  Gently place one slice of cake in the plastic-wrap-lined pan. Pipe the frosting on, and continue layering as desired. Top loosely with the plastic wrap and set to chill. 
It works neatly to layer in an oversized bread pan, if you have one. But if not, just on a plate or tray works well. 

TWO frosting options: 
1. Frosting on all layers & top
Spread the cream cheese frosting on top of each third of pumpkin cake.  Carefully pick up and layer the cakes on top of each other on a serving dish. *I find using two spatulas works well to pick up each piece of cake* 

2. Frosting between the layers - nothing on top. 
Pipe or spread half the frosting on one of the cake slices. Top with another cake slice. Add the remaining frosting. Top with the last piece. 

Chill frosted cake 2-3 hours, or overnight before serving.  This cake slices best when it's chilled completely.  Slice with a serrated knife when serving.   Enjoy!     

Chilled cake, slicing neatly. 
Neat slices, prepping to share with a friend. Yum!

Pumpkin Spice Layer Cake Recipe by Successfully Gluten Free!

Thursday, 8 September 2016

Pumpkin Bagels made with REAL pumpkin!

Fall and pumpkins are starting to arrive!  What a great way to combine two of my favorite foods. Anyone who knows me knows I love bagels.  I've posted eleven bagel posts so far. This pumpkin bagel recipe will make a dozen, and one more, which is sure to come, will make a proper baker's dozen.   This recipe works best for making small-sized bagels, because of the combination of fresh pumpkin with the other ingredients.  They're great with a pumpkin pie cream cheese (recipe below), too.  Enjoy the fresh fall pumpkin by making up your own pumpkin puree, or use 100% canned pumpkin in this recipe.
I also include a list of all my pumpkin recipes linked from the pumpkin puree & pumpkin seeds post. Enjoy!

Gluten Free Pumpkin Bagels
Fresh gluten-free pumpkin bagels, ready to eat!
Gluten Free Pumpkin Bagels with Pumpkin Pie Spice Cream Cheese
Pumpkin Bagel with Spiced Pumpkin Cream Cheese (below)
Pumpkin Bagels made with REAL pumpkin (cream cheese recipe follows)
Makes 8 - 12 bagels (depending on size you make them)

Preheat oven to 350F.  Line two baking sheets with parchment paper or silicon mats.

Mix dry ingredients in a mixer:
1 1/2 cup brown rice flour
1 1/2 cup tapioca starch
1/2 cup potato starch
1/4 cup brown sugar
2 tsp quick/rapid-rise yeast
2 1/2 tsp xanthan gum
2 tsp cinnamon
1 tsp baking powder (optional, but I find it really helps the rise)
1 tsp salt

Add and beat mixture for 4 minutes (it will look crumbly initially, and then hold itself nicely together after it mixes a couple minutes): 
1 cup 100% pumpkin puree (canned or fresh)
3 eggs
4 Tbsp oil
1 tsp apple cider vinegar

*** This dough will be a lot thicker than my ordinary bagel recipe, but resist the temptation to add more liquid.  The pumpkin puree adds quite a bit of water to the dough, and if you add extra water the bagels will flatten while cooling.***

Use wet hands, form plum sized balls and then make a hole in the center.  You can use extra water to smooth these nicely.  Depending on the consistency of my pumpkin (some are wetter, some thicker), I've sometimes been able to pipe these into large bagels.  It's easiest to just form by hand wetting hands between each bagel.  
Gluten Free Pumpkin Bagels before rising
Let bagels rise 30-40 minutes in a warm location.  You can place an upside down cookie sheet on top of your cookie sheet to help them while rising. (I put mine on top of the oven).
Gluten Free Pumpkin Bagels after rising
Bake at 350F for 20-28 minutes (depending on size).
Gluten Free Pumpkin Bagels after baking
Cool on a cooling rack.  These are great hot fresh, or toasted with pumpkin pie cream cheese (below).  Slice and freeze any extras.  They reheat perfectly in a toaster oven.  Enjoy!

Pumpkin Pie Cream Cheese
You can adjust the spices to your personal taste.  Either use pumpkin pie spice, or a little of the spices listed here plus the brown sugar and pumpkin puree.
Mix together:
1/2 container cream cheese (~4 oz.)
3-4 Tbsp 100% pumpkin puree (canned or fresh)
2 Tbsp brown sugar
1/2 tsp cinnamon
pinch nutmeg
pinch cloves
pinch allspice
pinch ginger

Tuesday, 27 October 2015

Pumpkin Cheesecake Chocolate Swirl Brownies!!!

The perfect grown-up Halloween pumpkin treat!  These are even fabulous if you forget... err... leave out the flour, too!  They're even more rich and dense.  It's a wonderful blend of pumpkin cheesecake and chocolate brownie.  And, it requires that perfectly small amount of pumpkin puree, so when you've only got a little left from your cooked or canned pumpkin, you'll have something tasty to make with it!  Enjoy!
Gluten Free Pumpkin Cheesecake Chocolate Swirl Brownies
Delicious Gluten-Free Pumpkin Cheesecake Chocolate Swirl Brownies - gorgeous AND tasty! 

Pumpkin Cheesecake Chocolate Swirl Brownies
Makes 8" x 8" pan

Line an 8x8 pan (or similar sized pan) with parchment paper.

Mix until smooth: (in a mixer works best)
1 egg
1/2 cup (4 oz/112.5 g) cream cheese
1/2 cup 100% pumpkin puree (use canned or make your own!)
1/4 cup white sugar
1 tsp vanilla bean paste
1 1/2 tsp pumpkin pie spice

In a large microwave-safe bowl, melt:
4 oz (~ 3/4 cup) dark chocolate (over 70% is best)
1/2 cup butter

Mix in:
3/4 cup brown sugar

Add in:
2 eggs

Fold in:  (flour can be left out for more dense/rich brownies!)
1/2 cup Kristin's Gluten-Free Flour Mix  OR 1/2 cup flour/flour mix of your choice

Spread 2/3 of the chocolate brownie batter in prepared pan.  Spread the pumpkin batter on top.  Top with dollops of brownie batter.  Swirl with a knife.
Gluten Free Pumpkin Cheesecake Chocolate Swirl Brownies
Swirled brownie, ready to bake!

Bake at 325F 30-35 minutes (depending on the size of your pan), until the brownies are just set in the centre. I just shake the pan a little bit to see if it still jiggles a lot. Once it doesn't really jiggle anymore, they're done!  These should have just a tiny bit of browning starting to happen around the edges when they're finished.

Let cool completely in pan OR let cool in pan a bit, then you can remove the brownies (using the parchment paper to pick it all up) and put it on a cooling rack if you want to help them cool faster.  Cut into squares of whatever size you desire and enjoy!

Gluten Free Pumpkin Cheesecake Chocolate Swirl BrowniesGluten Free Pumpkin Cheesecake Chocolate Swirl Brownies
Brownies will be a little puffy when done, but will sink down a little once cooled. 

Tuesday, 28 January 2014

Chocolate Cheesecake Swirl Brownies

These are some of my absolute favorite brownies.  I can't make them often because I just want to eat them all.  You get a wonderfully deep, dark chocolate brownie that perfectly pairs with the lighter cheesecake swirls.  I prefer using vanilla bean paste in this recipe vs vanilla extract so I get a stronger vanilla flavor in each bite.  My friend Julie LOVED them and said I absolutely must get this recipe on my blog asap. I may have taken a bit longer than she was hoping, but here is the recipe, in all it's delicious easiness!  Enjoy!

Gluten Free Chocolate Cheesecake Swirl Brownies
Gluten-Free Chocolate Cheesecake Swirl Brownies
Mmm... all those lovely swirls of cheesecake mixed with brownie.   I made this in a round spring-form pan, lined with parchment paper - but I tend to just pop it into square or rectangular pans, as listed in the recipe.

Chocolate Cheesecake Swirl Brownies
Based on a recipe from Comfort Foods by Bridget Jones (this happens to be my favorite cookbook of all time - I've just been converting things bit by bit to gluten-free from this cookbook)
Makes 12-16 brownies

Preheat the oven to 325F.
Line an 8x8 pan with parchment paper, OR use two smaller pans that give you approximately an 8x8 sized space.  The wonderful thing about this recipe is that you can really make it in any size somewhere around an 8x8 pan and it will work out! This is nice if you want some to give away or take a smaller batch with you somewhere, while still having some left at home! 

In a large bowl or mixer, beat together until smooth:
1 egg
1 cup (8 oz/225 g) cream cheese, softened
1/4 cup white sugar
1 tsp vanilla bean paste (or vanilla extract)

In a large microwave-safe bowl, melt together at 50% power (so your chocolate doesn't burn - you want to melt the chocolate/butter, but not have them get too hot):
4 oz dark chocolate (minimum 70% cocoa solids)
1/2 cup butter

Mix into to chocolate/butter:
3/4 cup dark brown sugar

Stir in, until thoroughly combined:
2 eggs

Add and mix in gently:
1/2 cup Kristin's gluten-free flour mix OR 1/2 cup cornstarch OR 1/2 cup arrowroot starch (this recipe is quite flexible since there's so little flour, but you want something that will help thicken/hold things together nicely)

Spread 2/3 of the brownie mixture in your pan(s).  Spoon the cheesecake batter on top, trying to spread it around fairly evenly.  Scoop the remaining brownie mixture on top of the cheesecake batter.  Use a knife to swirl around, so you have wonderful bits of brownie and cheesecake all mixed up!

Bake at 325F 25-35 minutes (depending on the size of your pan), until the brownies are just set in the centre. I just shake the pan a little bit to see if it still jiggles alot. Once it doesn't really jiggle anymore, they're done!  These should have just a tiny bit of browning starting to happen around the edges when they're finished.

Let cool completely in pan OR let cool in pan a bit, then you can remove the brownies (using the parchment paper to pick it all up) and put it on a cooling rack if you want to help them cool faster.  Cut into squares of whatever size you desire and enjoy!


Wednesday, 3 July 2013

Raspberry Cream Cheese Pie

I came up with this recipe for seriously amazing pie on Canada Day, seeing as I had a bunch of fresh raspberries and it seemed like a perfect day to make a naturally red dessert.  There is a fabulous place on Prince Edward Island called the PEI Preserve Company that makes a delectably famous raspberry cream cheese pie.  While I didn't have their recipe at hand and had to come up with my own version(and of course, make sure it's all gluten-free), I've succeeded beyond my wildest dreams!  I actually like this version better!  It's very similar, but the raspberry topping is lighter, there's more of a hint of lemon, and I'm rather partial to my pie crust, although you could use whatever recipe (gluten-free or not) makes you happy.  I think you'll be thrilled with this wonderful dessert - a perfect summer recipe!  Enjoy!

* Check out my Blueberry Cream Cheese Pie, too! *
Delicious slice of raspberry cream cheese pie with whip cream on top, to serve.

Raspberry Cream Cheese Pie
Serves 8-10

Preheat oven to 425F.  Have a pie dish available.

Make Kristin’s buttermilk pie crust (retyped here for convenience - although there is an option in the original recipe to measure out a slightly different flour blend than what is in my flour mix).

For crust:
Mix together in a bowl:
1 tsp salt

Chop in with a pastry cutter:
2/3 cup + 2-3 Tbsp butter

Add and mix in with the pastry cutter:
2 tsp oil
1/3 cup buttermilk (can make by mixing 2-3 tsp vinegar + milk)


Mix as much as you can using the pastry cutter (this keeps the dough cool).
To fully get the dough to form, mix by hand as quickly as possible (so you don’t warm up the dough).   Separate into two pieces.  You’ll use one for this recipe, and can wrap the other half in plastic wrap and stick in the refrigerator to use for another recipe, like a quiche or pie.


Separate your dough into two pieces, wrapping one in plastic wrap and sticking in the refrigerator to use later.
Roll out a nice big circle between pieces of plastic wrap.  I use two pieces overlapping for the bottom and two pieces, overlapping, on top.   Make sure you’ve got a piece as big as your pie dish, plus a little extra.

Remove the plastic from the top.  Flip over the dough into the pie dish.  Press down on the plastic wrap to get the dough to stick to the pie plate.  Remove plastic wrap and carefully shape edges, as desired.

Remember to use the plastic wrap to press down and then use fingers to crimp the edges.
Bake at 425F for 15-17 minutes, until nicely browned.  Remove from oven and cool on a cooling rack.

Fresh baked and cooling.
Make raspberry filling:

In a medium-sized pot over medium heat place the following:
12 oz fresh raspberries, rinsed & drained (there's no need to mash them up - and yes, you can use frozen raspberries - just weigh and use 12 oz)
2/3 cup sugar
1/3 cup water

Let cook, stirring occasionally, until boiling.
Whisk together in a small bowl:
1/3 cup water
¼ cup cornstarch

Add cornstarch mixture to boiling raspberries, stirring constantly.  Bring mixture back to a boil and let boil 1 minute (keep stirring).  Remove from heat and let cool on cooling rack 15-20 minutes. (you don’t want to pour it on top of the cream cheese mixture while boiling hot, so it’s best to make this part first, then whip up the cream cheese mixture).
The raspberries will naturally come apart while cooking and create a lovely smooth filling.

Make cream cheese filling:

Beat together in a mixer, until light and creamy:
6 oz cream cheese, softened
½ cup powdered sugar
2 tsp fresh lemon juice
Zest of ½ lemon

Once cream cheese filling has been whipped, spread it on the bottom of your cooled pie crust.  Place in the refrigerator until your raspberry filling has cooled 15-20 minutes.   

Cooked piecrust with cream cheese filling in the bottom.  Chill until your raspberry topping has cooled 15-20 minutes.
Carefully pour the raspberry mixture over the cream cheese filling.  Let the pie chill in the refrigerator ~ 2 hours, until chilled.   
Mmmm.. nice, eh?!
Slice and serve with whipped cream.  Enjoy!!!
A light, delicious summer dessert, but perfect in winter, too! Yum!

Wednesday, 17 April 2013

Fantastic Gluten-Free Cinnamon Rolls!

There were a few things I really missed making and eating when we had to start going gluten-free.  One was chocolate chip cookies.  The other was cinnamon rolls.  I mean, tasty, puffy, melt-in-your-mouth cinnamon rolls.  Thanks to the trial and error of the authors of Artisanal Gluten-Free Cooking (I have tried a lot of gluten-free cookbooks and theirs is the only one I genuinely like) and my own modifications, what you have here is some fantastically delicious cinnamon rolls that taste oh-so-similar to those I used to make and love.  I should add that my friend, Julie, who is a fabulous baker, has approved these cinnamon rolls - so much so that she asked me if she was actually eating a gluten-free cinnamon roll or if these were regular ones (which I haven't made in years... ;) )What a compliment! 
Homemade Gluten Free Cinnamon Rolls
Delicious Gluten-Free Cinnamon Rolls with Cream Cheese Frosting on top! Yum! 

Fantastic Gluten-Free Cinnamon Rolls
(Dough portion of the recipe is borrowed from Artisanal Gluten-Free Cooking minus my adjustments with flours.  I’ve tried a few adjustments to the recipe, but this method works really well. It’s very similar to one I used to use (pre-gluten-free) that we loved.  I’ve made my own modifications for fillings and frosting!  We prefer this version the best!

Preheat oven to 350F. Butter a 9x13 pan.

Place in a cereal bowl:
3 eggs (still in shells)
Pour warm/hot water over eggs.  This will bring them to room temperature.

In a 2 cup measuring cup, heat until just scalding (90 seconds in the microwave should do it):
¾ cup milk

Immediately add to hot milk:
½ cup butter, chopped into smaller pieces
½ cup sugar
1 ½ tsp salt

In a small measuring cup or bowl combine:
1/3 cup warm water (110-115F)
4 tsp rapid rise yeast or active dry yeast
1 Tbsp sugar
Let yeast rest 5 minutes to foam and allow milk mixture to cool a bit.  

Meanwhile, mix in a large bowl:
4 ½ cups Kristin’s Gluten-Free Flour Mix * (see below for measurement amounts for just this recipe)
2 tsp xanthan gum (this is in addition to the xanthan gum in the flour mix)

Add to the flour mixture:
3 warmed eggs
Milk mixture (with sugar/salt/butter)
Yeast mixture

Mix well with a spoon, using the back of the spoon to help make the mixture nice and smooth.  Let this sit just a moment while you prepare the filling.

Melt in a small bowl:
¼ cup butter

Mix together in a separate bowl:
¾ cup brown sugar (light brown or dark brown work well)
2 Tbsp ground cinnamon

Line two large sheets of plastic wrap side by side on the counter, overlapping a bit.   2-3 foot long pieces work well.  
Spoon out large scoops of the dough and place along the middle of the plastic wrap. 
Pull out another two large sheets of slightly overlapping plastic wrap to cover the dough.  You’ll then flatten out the dough between the sheets until you have – more or less – a two foot long piece of dough that is flattened to somewhere between 10-15 inches wide.  Try to make it nice and even.  You have to slightly adjust the plastic wrap as you’re doing this, since it sometimes gets caught underneath the dough.  But, you’ll find the dough doesn’t stick to the cling wrap, which is fantastic!  Carefully remove the top layer of plastic wrap, setting it aside to use to cover the rolls as they rise.

Pour and spread melted butter over the dough. Sprinkle with cinnamon/sugar mixture. 
You can see how easily the plastic wrap comes off the dough!  Spread butter, then cinnamon mixture.


Carefully roll up the dough, so you have one two-foot long roll of dough.   Pulling up the plastic wrap can help you get the dough to roll over if you’re finding it’s sticking to your hands a bit.   Once you have your long roll of dough, pat the ends slightly to flatten the messy ends.   Use a serrated knife to cut dough into 16 pieces. (i.e. cut in half, cut each half in half, continue until you have 16 slices)

You can use the plastic wrap to help you roll it up. I roll it most of the way using the wrap on the far side, then use the side of the wrap closest to me to roll up the last part.  Slice evenly.  

Place carefully in pan as evenly spaced as you can manage.  Press down slightly on the tops to flatten a bit. 

Pre and post pressing down slightly on the tops to flatten

Cover pan with plastic wrap and set in a warm location to rise 25-30 minutes. 
Post-rise, you can compare with the picture above to see how much they rise.

Bake at 350F for 25-30 minutes, until lightly browned on tops.   You can make the cream cheese frosting (recipe below) while it’s baking.
Remove from oven and put on a wire rack to cool. 
You can either:
1. Add the frosting right away and it oozes into the cinnamon rolls
2. Let cool, then add frosting.  

These freeze really well and heat up quickly in the microwave!  We pop them into tupperwares once cooled and pull out and reheat on a plate for snacks/breakfast/treats.  Enjoy!
Gluten-Free Cinnamon Rolls fresh from the oven Frosted Gluten-Free Cinnamon Rolls
Fresh from the oven and frosted. Yum!

Cream Cheese Frosting (this is a very generous amount, so halve the recipe if you want a lighter bit of frosting/glaze):
In a bowl, warm in the microwave 20 seconds, or let sit to come to room temperature:
3 oz cream cheese
2 Tbsp butter

Add, and mix with a spoon until smooth (ish):
1 ½ tsp vanilla extract

Carefully add, ½ cup at a time:
2 cups powdered sugar
Milk, to desired consistency (add 1-2 tsp at a time)

Some people like a runny glaze, so they’ll find they end up adding more milk, others like a thick topping for cinnamon rolls, so you’ll just leave out the milk or add very little.  Enjoy!

* If you don’t want to make up the flour mix since you’d have to make it twice for this recipe, just use the following: 
2 cups brown rice flour
1 cup sorghum flour
¾ cup + 1 Tbsp cornstarch
¼ cup + 1 Tbsp potato starch
¼ cup + 1 Tbsp tapioca starch
1 ½ tsp xanthan gum (ideally measure 1 1/3 tsp)