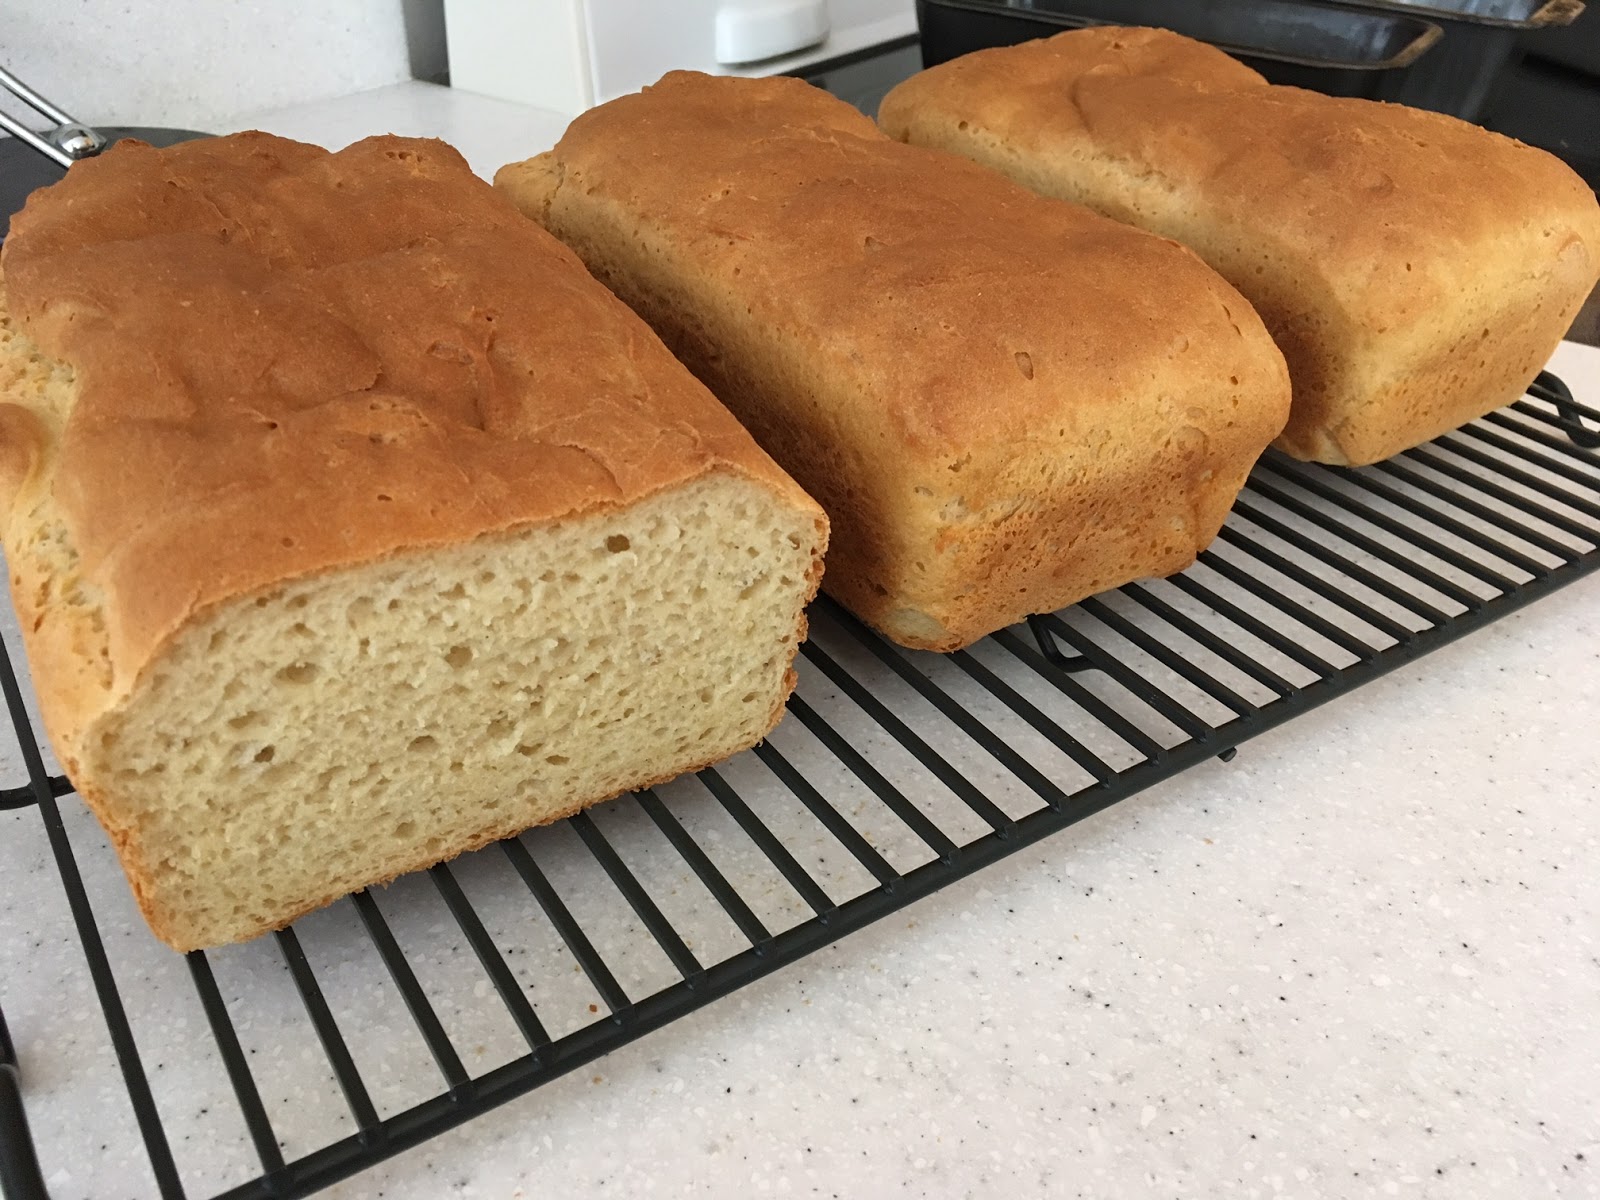
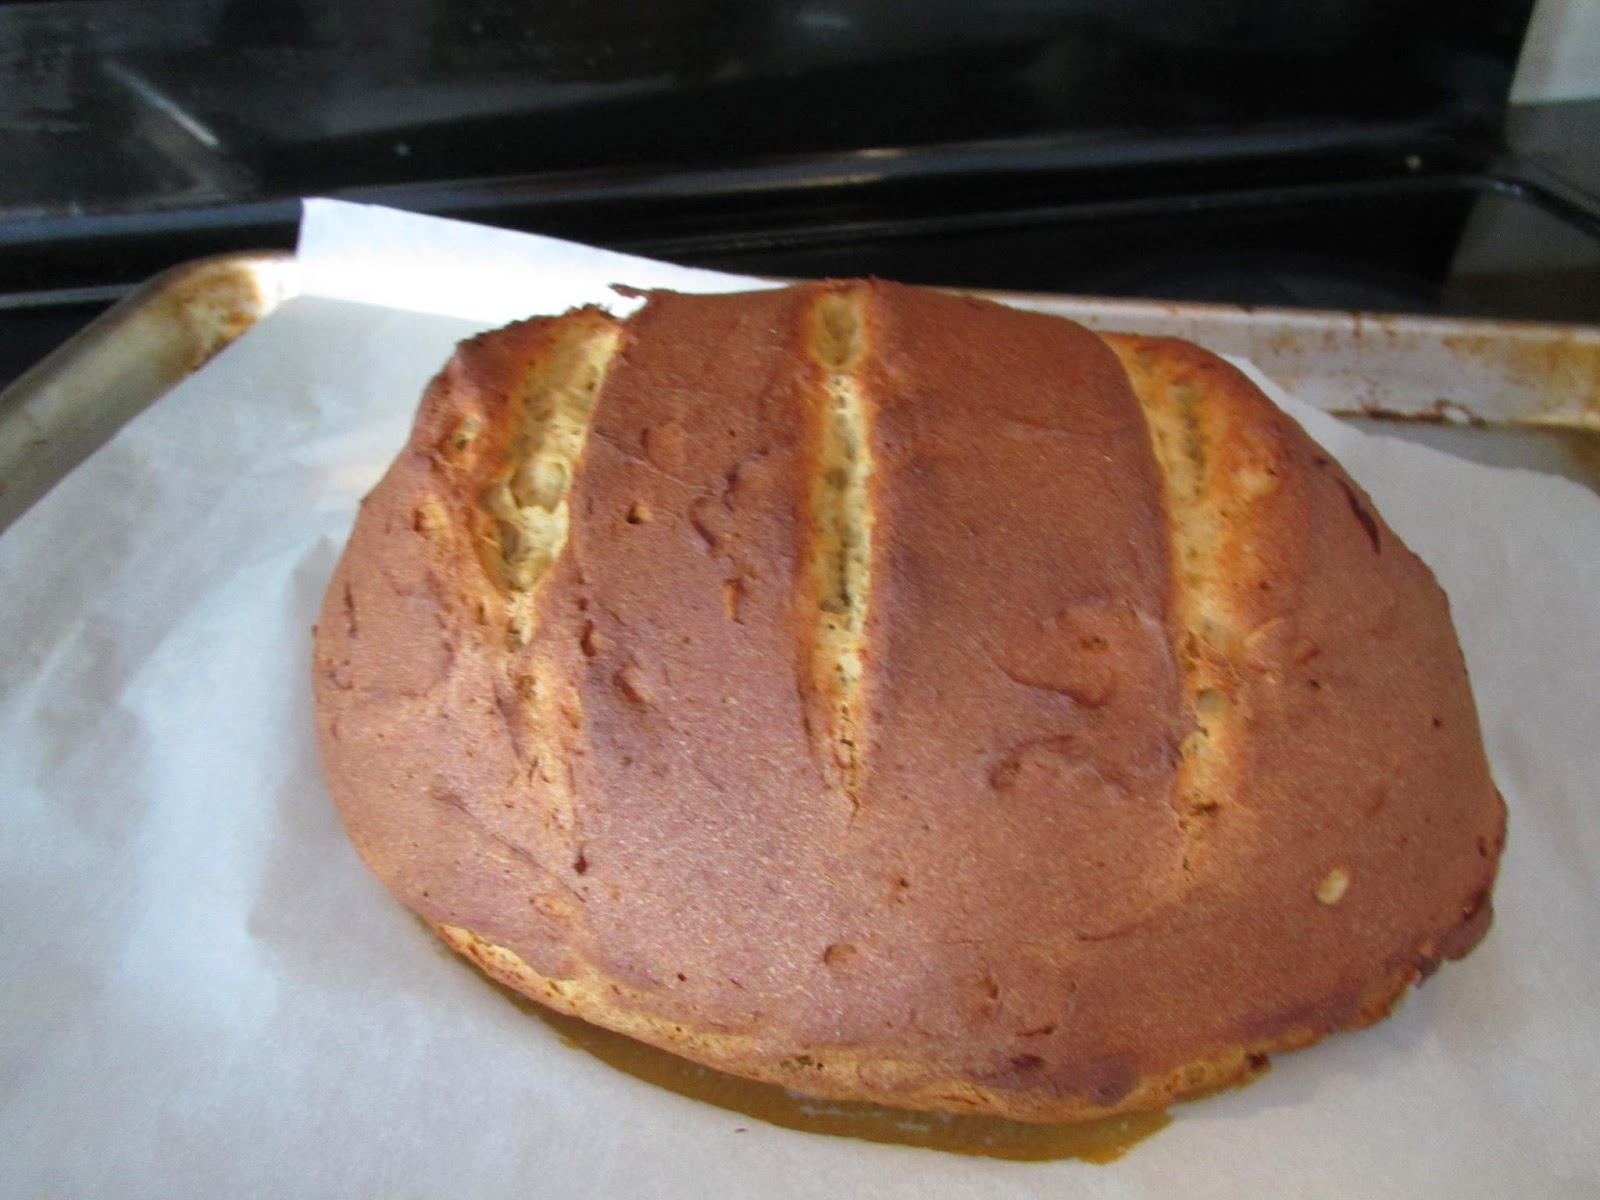
Search for a Recipe

Showing posts with label sandwich bread. Show all posts

Sunday, 7 September 2025

Tasty Bread Loaves

 I'm always trying different tweaks when making bread.  Obviously, this recipe isn't good for those who struggle with oats, but if you're able to each GF oats, this bread has wonderful and versatile texture.  Enjoy! 
Slices of yummy bread - in this case, ready to add garlic and butter for some garlic bread.

Tasty Bread Loaves

Preheat oven to 375 F. Line two bread pans with parchment paper. 

In a mixer, mix together: 
1 1/2 cup tapioca flour/starch
1 1/2 cup oat flour (GF if Celiac or sensitive)
1/2 cup steel cut oats (GF if Celiac or sensitive)
1 cup brown rice flour
6 Tbsp potato starch
1 Tbsp xanthan gum
1 Tbsp rapid-rise/quick yeast
1 Tbsp sugar
1 1/2 tsp salt

Add and mix in slowly, then beat 3-4 minutes, until nice and smooth: 
1 3/4 cup warm water
1 cup egg whites
1/4 cup oil (olive oil is my preference)
2 tsp apple cider vinegar

Divide batter into two parchment paper-lined bread pans.  Smooth the tops. Spray the top with a bit of water.  Cover loosely with an upside down pan in a warm area to rise 45-60 minutes, until doubled in size.  Bake at 375 F for 50-55 minutes.  Remove from pan and parchment paper.  Let cool completely. Slice and serve!  Leftover bread can be sliced and frozen in a freezer ziploc. Enjoy! 

Bread after rising, and ready to bake!
Fresh from the oven! Yum!

Tasty Bread Loaves Recipe by Successfully Gluten Free!

Monday, 9 December 2024

Lovely White Sandwich Bread

 I have so many different sandwich breads, and really I like them all, but I'm constantly tweaking and adjusting things to change textures, simplify the baking process, and play around with how the bread turns out.  This variation on a white loaf is a lovely addition to my bread repertoire. One batch makes three large loaves, which means there's plenty to cool, slice and freeze to eat later. This bread is versatile and works well for things like grilled cheese. Combine with an easy tomato soup for a quick meal. It will work well for a baked french toast, too, which is perfect over the holidays for a crowd. Enjoy!
A yummy slice of the white sandwich bread. 

Lovely White Sandwich Bread

Preheat oven to 375 F. Line 3 large bread pans with parchment paper. Set aside. 

In a large mixer combine: 
2 1/2 cup brown rice flour
3/4 cup sorghum flour (or extra brown rice flour)
2/3 cup arrowroot starch (or cornstarch)
1/2 cup tapioca starch
1/2 cup white rice flour
1/2 cup potato starch
1 1/2 Tbsp xanthan gum
2 Tbsp rapid/quick-rise yeast
2 tsp salt

Add and mix in: 
2 cups warm water
6 eggs
1/2 cup applesauce
1/4 cup oil (I usually use olive oil)
1/4 cup honey
2 Tbsp maple syrup
2 tsp apple cider vinegar
1 cup cottage cheese (optional, but you can add if you'd like to add a bit of extra protein. I find it works well and doesn't affect the texture negatively)

Beat for ~ 4 minutes, scraping occasionally until nice and light and fluffy.  Divide into the three parchment paper-lined bread pans (usually end up being filled ~2/3 each).  Set under an inverted cookie sheet (I usually play around until I can balance the pan on a couple of the bread pan handles).  Let rise in a warm location about 45 minutes, until nicely risen/nearly doubled. 
I forgot to snap a before photo, but here the loaves are risen and ready to bake!

Bake at 375 F for 50-60 minutes.  Let cool a few minutes before removing from pans to fully cool on a wire rack.  Once cool, slice and enjoy!  I have found if you've let it cool at least 20-30 minutes, you can usually slice it pretty decently to use right away.  The best is if you can let it fully cool, then you can get more accurate slicing.  Slice and freeze any leftovers in a ziploc. Pop them in a toaster to reheat. Enjoy! 
Fresh from the oven. Resting a few minutes before removing to a cooling rack.
Yum! Makes the house smell so good.

Lovely White Sandwich Bread Recipe by Successfully Gluten Free!

Thursday, 8 August 2024

Delicious Brown Bread

Sweetening with a bit of honey and molasses creates the brown color of this tasty bread. I'm always looking for yummy family-friendly breads that everyone enjoys. This recipe makes 3 nicely sized loaves.  Cooled bread can be neatly sliced and freezes perfectly. Enjoy!
Fresh yummy bread!
Fresh from the oven before moving to the cooling racks. Yum.

Delicious Brown Bread

Makes 3 regular sized loaves

In a mixer, combine: 
3 1/2 cups brown rice flour
3/4 cup sorghum flour
2/3 cup arrowroot starch/flour (or cornstarch)
1/4 cup potato starch
1/2 cup GF steel cut quick oats (optional - if you leave our use 1/2 less water)
1 1/2 Tbsp xanthan gum
2 Tbsp rapid-rise yeast
2 tsp salt

Add and mix, then beat 4 minutes: 
2 1/2 cup warm water
1/2 cup applesauce
2 tsp apple cider vinegar
4 Tbsp oil (olive oil works nicely)
4 Tbsp honey
2 Tbsp molasses
6 eggs

Divide into 3 loaf pans lined with parchment paper.  Cover with an inverted baking tray.  Let rise ~45 minutes, until nicely puffing over the top of your pans.  


Pans ready to cover and let rise.
Covered with an inverted baking sheet.
Risen and ready to bake!
Bake at 375 F for 50 minutes.  Let rest a few minutes in pan before removing from pan and parchment paper to fully cool on wire racks.  Once fully cool, bread can be sliced. I prefer freezing sliced bread, which helps it maintain it's fresh consistency.  Enjoy!
Baked bread! Yum!
Cooling delicious GF brown bread loaves. 

Delicious Brown Bread Recipe by Successfully Gluten Free!

Monday, 2 November 2020

Soft, Versatile Lunch or Dinner Rolls

 These are soft, tasty rolls that everyone around here enjoys.  I always try to have leftovers in our freezer since they're great for sandwiches, with soup or salad, with sloppy joes (thank you Pioneer Woman - your recipe is probably the only one I've ever liked), and any and all other dishes where a roll or breadstick might be nice to eat.  Enjoy!
Rolls with onion powder and dried minced onion in them.
Rolls with garlic powder and dried garlic flakes.
Piped into breadstick shapes. Fun!

Soft, Versatile Lunch or Dinner Rolls

Makes ~20 large rolls or 30 smaller rolls

In a large measuring cup, combine the following and let rest 5-10 minutes, until it has frothed up nicely: 
2 cups warm/hot water
6 Tbsp honey OR 6 Tbsp sugar (both work - you'll just end up with a slightly different flavor/texture depending on which you use - both are great, although I love the honey best)
4 tsp active dry yeast OR rapid-rise yeast

In a large mixer, combine the following: (It's important to mix the dry ingredients first to avoid clumping in GF baking)
2 cups brown rice flour
1 1/2 cups arrowroot starch
1 1/2 cups tapioca starch
1/2 cup quick-cook steel cut oats (*If you don't want to use these, leave out and use 1/2 cup less water*)
1 Tbsp xanthan gum
1 tsp salt
4 tsp baking powder
Optional add-ins if you'd like some onion/garlic flavor in your rolls:
1 tsp garlic or onion powder
1 - 2 Tbsp dried minced garlic or onion

Add into the flour mixture and beat 3-4 minutes: 
yeast mixture, from above
6 Tbsp butter, softened
4 eggs
2 tsp apple cider vinegar

Scoop batter or put it into a large ziploc and pipe out roll shapes onto 1, 2 or 3 parchment-lined baking pans (I only use 3 pans if I'm making something like some bread sticks that I'd like more spread out and not bumping into each other).   Smooth batter with water.  Cover with upside down baking sheets and let rise 30 - 40 minutes in a warm location until doubled in size.   
Piped out rolls before and after rising (covered with upside down pans)
Different sorts of rolls piped out - I like to use a medium cookie scoop for the round rolls. 
Piped out breadsticks.  Yum! 
Brush the rolls with: 
2 - 3 Tbsp butter, melted

Bake rolls at 375 F or 350 F convection for 20 - 30 minutes, depending on the size of your rolls.  If you make large rolls all on 1 pan, they will all be pressed together and bake for 30 minutes.  If you make smaller rolls divided between two pans or three pans, they'll cook closer to 20 minutes.  They should be a nice, dark golden brown color.  
Fresh from the oven. 

Remove rolls to cooling racks.  Let cool fully before slicing.  You can certainly serve them while warm.  They're a favorite!  Enjoy! 
These ones were just so pretty. 

Soft, Versatile Lunch or Dinner Rolls by Successfully Gluten Free!

Friday, 14 December 2018

Delicious French Bread-Style Sandwich Bread

This bread has been such a hit around here.  It's light and fluffy, with a crispy exterior.  It's absolutely delicious with butter as an accompaniment to all sorts of meals.   It mixes up quickly, then just needs some time to rise and bake.  Best of all, since you're making 5 loaves (although you can easily make a half batch - just make two loaves plus a mini loaf or two).   Friends who aren't even gluten-free have loved it, too!  Enjoy!
Light and fluffy French bread-style sandwich bread

Delicious French Bread-Style Sandwich Bread

Makes 4 or 5 loaves

Line 4 or 5 bread pans with parchment paper. Nothing fancy, just fold it a bit so it holds the shape in the pan.  You can reuse this parchment paper, too! (shake out any crumbs and stack the pans with the parchment paper in them). 

In a mixer, combine:
4 cups tapioca starch
3 cups brown rice flour
3/4 cup potato starch
1 1/2 Tbsp xanthan gum
2 Tbsp quick (rapid-rise) yeast
1 Tbsp salt
2 Tbsp sugar
1/2 cup steel cut oats (certified gluten-free if celiac or sensitive - if you leave out, just reduce water by 1/2 cup)

Add the following. Mix slowly, then beat for 4 minutes, stirring a couple times to get any flours left at the bottom:
3 cups lukewarm water
4 tsp apple cider vinegar
2 cups egg whites (they sell this in cartons in the grocery store OR you can use 2 cups eggs, for a more yellow bread with slightly richer flavor)
1/2 cup oil (I love using avocado oil in this bread recipe)

Scoop bread into bread pans lined with parchment paper.  (You can butter the pans, but I really love using parchment paper for this bread, in particular).

If you're making 5 loaves, then cover pans loosely with plastic wrap.  Let rise in a warm location for 40-60 minutes, or until dough has risen even with the top of the pan. *This won't rise much more during cooking, but will be nice and fluffy and full of lovely holes throughout.  I find most gluten-free breads to be this way.*  If you are making 4 loaves, the bread will rise higher, so you'll want to balance an inverted bread pan over the pans while they rise.  
Making 6 loaves instead of 5 here, but you can see how the bread rises even with the tops of the pans. 
Five loaves of bread, ready to bake.  I prefer to make 4 or 5 loaves vs 6, since I end up with slightly taller, larger slices of bread - better for sandwiches.   These loaves here are the ones shown below.  I have had luck with glass, metal and silicone pans for baking this bread.  

Bake loaves at 375 F for 1 hour.  Remove loaves from bread pans to a wire rack to cool.  I recommend letting them cool at least an hour before cutting.  Ideally, cool completely before slicing.

Notes on slicing this bread: Hot/warm bread fresh from the oven will be a bit sticky when slicing and I always end up making a mess of the end of the loaf (because we inevitably eat one loaf hot every single time I make this bread).  If you want to eat it hot, it can be nice to just pull off chunks of bread.  Once cooled, the bread slices nicely into slightly thicker than normal slices.  If you want nice, thin slices, place cooled loaves in ziploc bags overnight.  This will soften the outer crust of the bread.  You will then be able to slice thin, even pieces.  Sliced bread (thick or thin) freezes perfectly!  We use this for lunches all the time.  I just make the sandwiches on frozen bread. By the time the kids eat lunch, they're ready to eat!

Gluten Free French Bread Style Sandwich Bread Recipe by Successfully Gluten Free!

Thursday, 18 January 2018

Fabulous Gluten-Free French Bread!!!

We have a winner!  French-style bread with a crispy outside, light, chewy inside, and delicious flavor.  It's been requested many times now, and inhaled whenever I make it.  I've had people eating it for breakfast, lunch and dinner.   We had it at a large family dinner buttered and toasted alongside homemade seafood chowder, which was a hit.  We've had it alongside pasta & sauce, with jam for breakfast, alongside eggs & bacon, and just eaten with butter just for fun.   Every single time I make this recipe I am amazed by two things: 1. how amazing tasting this bread is with the crispy edges and chewy inside, 2. how easy it is to whip together. The rise and bake time are lengthier than most of my bread recipes, but it's so easy to whip together that it makes up for the wait time.  And, unlike most gluten-free breads, after cooling, you can leave it in a tupperware or ziploc on the counter top overnight and the texture and taste will still be amazingly delicious in the morning!  (Usually, GF breads do best if you freeze on the day of making).  The texture is equally amazing - retaining it's flexibility and not crumbling as one so often finds with gluten-free breads. Hurray! Enjoy!
Gluten Free French Bread
A fresh loaf of gluten-free French bread, sliced and ready to eat!  YUM! 

Fabulous Gluten Free French Bread!!! 
Makes 3 loaves

Line desired pans with parchment paper (3 loaf pans, large round glass bowls w/ flatter bottom, bagette pans, if you're lucky enough to have them). 

In a mixer, combine thoroughly:
2 cups tapioca flour/starch
1 1/2 cups brown rice flour
6 Tbsp potato starch
3 tsp xanthan gum
1 Tbsp quick/rapid-rise yeast
1 1/2 tsp salt
1 Tbsp sugar

Add and mix in, beating 4 minutes:
1 1/4 cup lukewarm water
2 tsp apple cider vinegar
1/4 cup oil (avocado oil is my preferred choice)
1 cup egg whites (these can be purchased at the store near the eggs)

Scoop bread into 3 pans lined with parchment paper.  Cover loosely with plastic wrap and let rise 45 - 60 minutes in a warm location, until bread has doubled and is getting cracks in the tops from rising.  Yes, you can make this in different shaped pans!  I've made it in normal bread loaf pans, but also in a med-large round glass Pyrex dish, lined with parchment, for a nice round-loaf look.  Same great taste! 
Gluten Free French Bread
Bread after rising and doubling in size.  Ready to bake! 
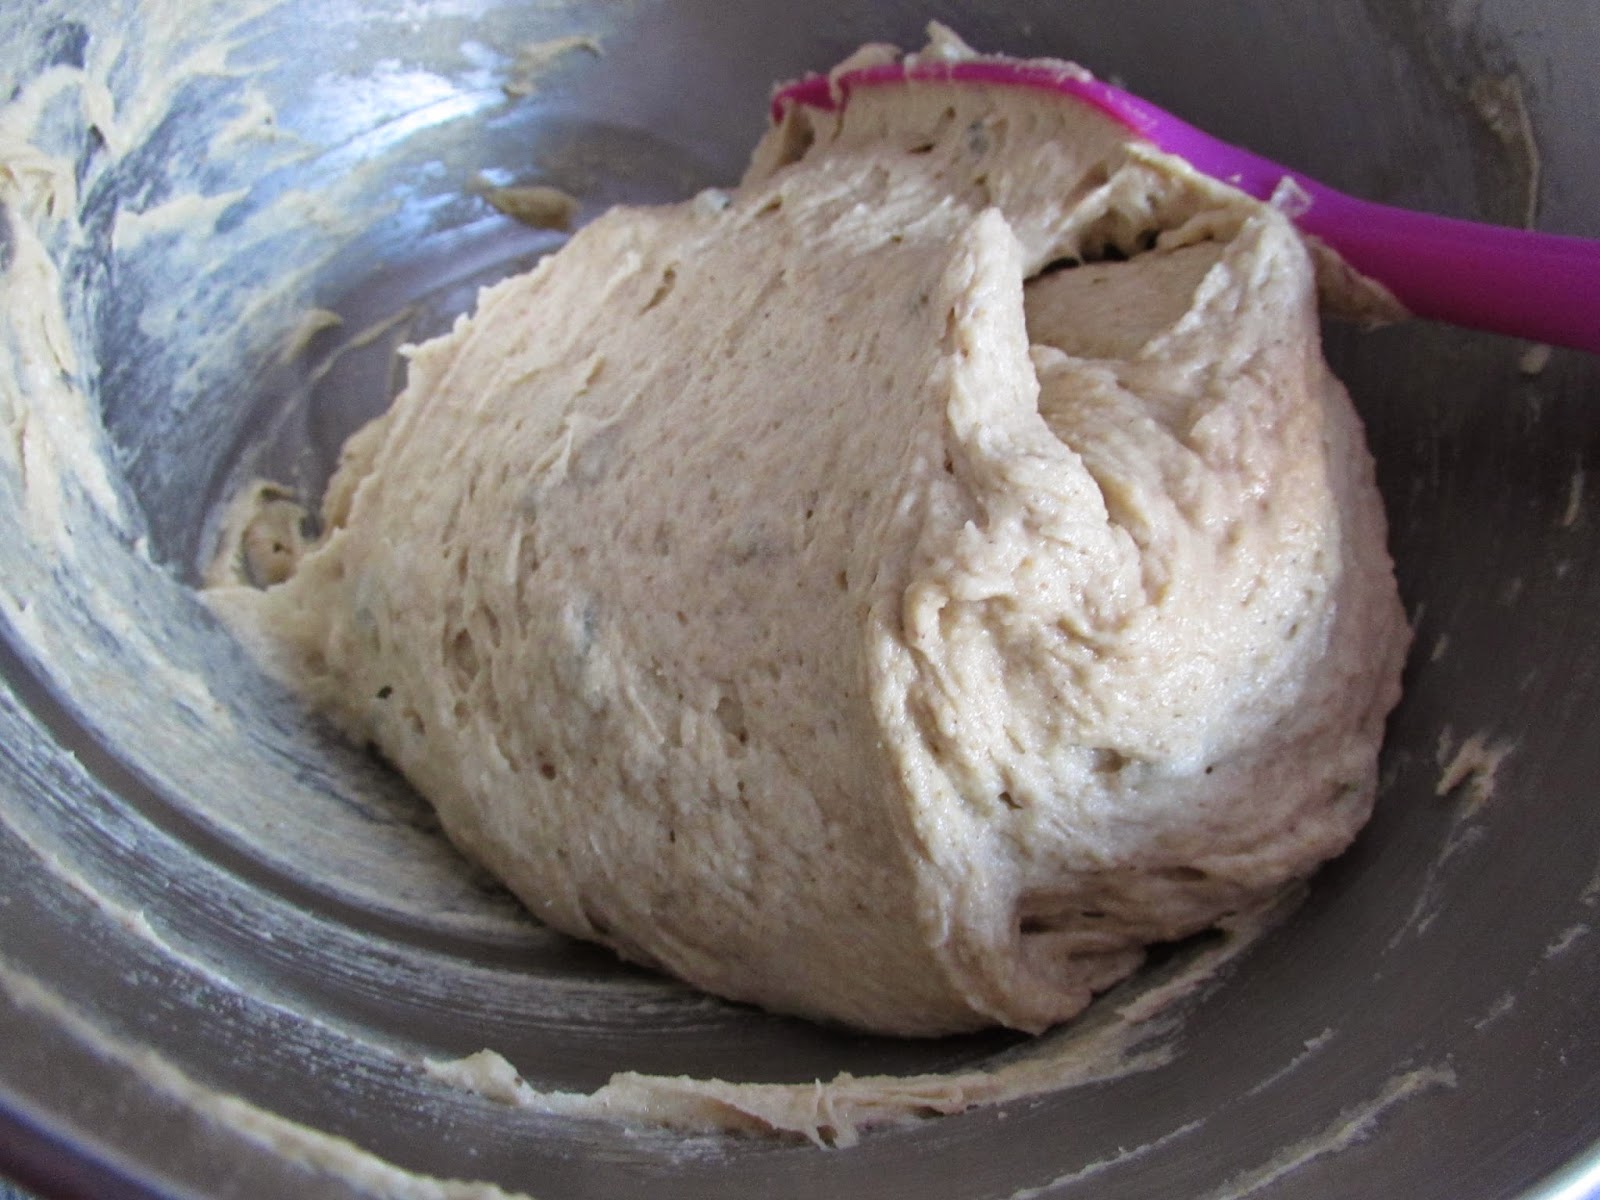
Bake at 375 F for 55-60 minutes.  This length of time will allow the outside to get nice and crispy, but also allow the inside of the bread to fully cook.  If you cook it for less time, you'll find the inside is too sticky.   Let the bread cool before slicing (although yes, we do eat it warm quite often, but it slices more cleanly if cooled).  Sliced bread can be left in a sealed container on the counter and will still be delicious the next day! The crust will soften after being sealed, but a reheat in the oven will crisp it back up!   This has become the uncontested new family favorite bread recipe!
Gluten Free French Bread
A fresh loaf, just out of the oven. Pop it out of the pan and cool on a cooling rack. 

Gluten Free French BreadGluten Free French Bread
I've made round loaves a couple times now, and they can be made larger or smaller (just add a little extra rising/baking time).  Same crispy outside and deliciously chewy inside! 

Wednesday, 7 June 2017

Three Large Delicious Bread Loaves

These large, delicious loaves of gluten-free bread are so easy to whip together!  They're perfect for sandwiches, grilled cheese, garlic bread slices, toast, french toast.  Just a nice, moist, chewy bread that tastes wonderful and is perfect for all.  I've had many amazed it's gluten-free because it tastes so nice.  Enjoy!
Fresh out of the oven - we couldn't wait long enough to sneak a slice (or two). This bread is wonderfully light and chewy.  

Three Large Delicious Bread Loaves

Butter 3 large loaf pans.  Preheat oven to 350 F.

In a large mixer, mix the dry ingredients:
2 cups brown rice flour
1 cup tapioca starch
1 cup potato starch
1 cup arrowroot starch
1/2 cup white rice flour
1/2 cup sorghum flour
4 tsp xanthan gum
4 tsp rapid-rise yeast (quick yeast)
2 tsp salt

Add and beat 3-4 minutes, scraping occasionally, if needed:
2 1/2 cups lukewarm water
5 Tbsp honey (OR 2 Tbsp honey + 3 Tbsp maple syrup)
8 Tbsp oil (I love avocado oil)
6 eggs (chia seeds + water substitute will work well for those egg-intolerant)
2 tsp apple cider vinegar

Fill each loaf pan 1/2 full with batter.  Cover with plastic wrap and let rise in a warm location until dough has reached the plastic wrap (~40 minutes).   Remove plastic wrap - don't worry if a little dough sticks to the top of the plastic wrap. It'll look fine once cooked.
Pans filled with dough.  These were covered with plastic wrap and left to rise 40 minutes before baking. 

Bake at 350 F for 45 minutes until nicely golden brown.  Remove from pans and cool on cooling racks.  You can slice and use immediately or slice and freeze.  I always slice my bread before freezing, and it's perfect to take out and use for lunches or meals.  Enjoy!
Large, fresh loaves of delicious bread. 

Monday, 30 January 2017

Hearty Round Rustic Loaf

The crust of this bread is nice and soft, although I'll be continuing to work on methods to also create a hearty bread with a thicker, crusty edge.  However, this is a wonderful bread-making method for times when I don't want the bother of buttering pans, or when I want something not loaf-shaped.  The addition of gluten-free sweet potato flour adds a rich, sweet taste to the bread.  Enjoy!

Hearty and delicious gluten-free round bread loaf

Hearty Round Rustic Loaf
Makes 1 loaf

Preheat oven to 350F.  Line a cookie sheet with parchment paper.

In a mixer combine:
1 1/2 cups brown rice flour
1/3 cup sorghum flour
1/3 cup sweet potato flour
1/3 cup arrowroot starch/flour
1 Tbsp xanthan gum
1 Tbsp rapid yeast
1 1/4 tsp salt

Add and beat 3-4 minutes:
1 cup warm water
1 tsp apple cider vinegar
2 Tbsp oil 
2 Tbsp honey 
2 Tbsp maple syrup
3 eggs

Fold in: 
1-2 Tbsp sunflower seeds (de-shelled, can use roasted)
1-2 Tbsp pumpkin seeds

Using a spatula, scoop around the bowl to get a nice ball of dough.  Carefully spoon dough onto prepared pan.  Smooth top and sides, as desired, using spatula.  
Dough scrapped into a ball in the bowl using a spatula.
Spread the dough on parchment or silicon-lined pan and smooth out the edges.

Let rise in a warm location 30-45 minutes, until risen, but not yet doubled in size.  

If desired, add a few slashes on top just before baking. It will keep the bread from cracking at random locations as it bakes.  Bake at 350F for 40-45 minutes, until dark golden brown.  Let cool on a cooling rack.   The bread will deflate slightly while cooling (similar to what happens with a regular loaf of bread).   Once cool, slice and serve.  Slice and freeze leftovers - they reheat well.
After the dough has risen, decorative slashes were made in the top of the loaf to give it a rustic look.
Bread after baking - it will have a nice, dark brown color.

Thursday, 3 November 2016

Hempseed & Chia Bread - Fluffy & Delicoius

A nice, fluffy hearty gluten free bread.  Hempseed has a slightly nutty sort of taste, which adds a lovely flavor to this bread.  I like to use the white chia seeds in the bread, but you can use the black ones, too.   This bread is easy to whip together, too.   Just mix the dry ingredients, then add the wet, beat for a few minutes - rise and bake!  It's quick and delicious!  Enjoy!

*** Updated: just realized this didn't list the oil!  Please use the oil or your bread will greatly lack in texture and will be an epic fail (as the poor woman below discovered).   When making GF breads, I find it's very important to have enough fat or they often won't rise enough and will lack the wonderful taste you're hoping for!

Gluten Free Hempseed and Chia Bread
Fresh Gluten Free Hempseed & Chia seed bread, sliced and ready to eat! 

Hempseed & Chia Bread - fluffy & delicious
Makes 3 loaves (2 large, 2 mini is what I usually make)

In a mixer, mix the following: (it's important to mix GF flours before adding liquids to avoid clumping)
2 cups brown rice flour
1 cup white rice flour
1/2 cup sorghum flour
1 cup potato starch
1/2 cup tapioca starch
4 Tbsp sugar
5 tsp xanthan gum
4 tsp rapid-rise yeast
2 1/2 tsp salt

Add and then beat 3-4 minutes, until nice and smooth:
2 cups warm water
3 eggs
1/2 cup hempseeds
6 - 8 Tbsp oil 
3 Tbsp chia seeds + 9 Tbsp water
4 tsp apple cider vinegar

Butter bread pans with coconut oil (or another oil/butter).  Fill pans halfway with batter, spread tops to smooth.  Let rise in a warm location until the bread is even with the top of the pan (about 30 minutes).
Gluten Free Hempseed and Chia Bread
The pans get filled halfway, then are left to rise until they reach the height of the top of the pan.

Bake at 350 F for 40 minutes for a large loaf and 25-30 minutes for a mini loaf.   Remove from pan and cool on wire rack.  Slice and enjoy!
Gluten Free Hempseed and Chia Bread
The large loaves turn out nicely. I've made this bread many times. I like to use large silicon bread pans.

Cooled bread can be sliced and frozen to be used later.  I find with gluten-free breads it's best to freeze on the day you make the bread.  This will retain the fresh flavor after freezing.  Enjoy!!!
Gluten Free Hempseed and Chia Bread
Fresh large and mini loaves, cooling.

Monday, 1 February 2016

The Speedy Version of my Favorite Sourdough White Bread & Rolls

I really do love making sourdough breads (and waffles and pizza crusts and rolls), but sometimes I just don't have the time to let things rise for hours or attend to the starter regularly.  This was an experiment that succeeded with flying colors, giving me that same delicious taste I love in my favorite sourdough bread, but in a short amount of time! Win-win!  I've made the recipe as written below, but I've also doubled it to make an assortment of large loaves, mini loaves and rolls.  I've even used the dough to make thin, crispy pizza crusts, which are delicious.  I'll post the pizza instructions soon! In the meantime, enjoy!

Gluten Free Delicious Bread and Rolls
Fresh loaves of gluten-free bread, fresh from the oven.  We couldn't wait for them to cool before we dove into a loaf.
Gluten Free Delicious Bread and Rolls
Fresh GF rolls - baked in a 9" x 13" pan.  They were perfect for open-faced tuna melts.
Gluten Free Delicious Bread and Rolls
It slices SO well and is filled with holes, just like a proper loaf should be. 


The Speedy Version of my Favorite Sourdough White Bread
Makes 2 loaves or 4-5 mini loaves

Preheat oven to 350 F.  Butter 2 regular loaf pans or 4-5 mini loaf pans.

In a 2 cup measuring cup combine and let rest 5-10 minutes until you have at least 1 1/2 cups of puffy yeast mixture (more is fine):
1 cup warm/hot water
1 1/2 Tbsp honey
1 Tbsp maple syrup
2 tsp quick-rise yeast
This was a double batch, so I needed it to rise until I had 3 cups of yeast mixture instead of 1 1/2 cups.

In a mixer combine:
1 cup brown rice flour
1/2 cup white rice flour (OR 1/4 cup sorghum flour + 1/4 cup white rice flour)
1/2 cup tapioca starch
1/2 cup potato starch
1/2 cup arrowroot
2 tsp xanthan gum
1 tsp salt

Add and mix in:
1 1/2 (at least) cups puffy yeast mixture, from above
2 eggs
2 egg whites
4 Tbsp oil
1 tsp apple cider vinegar

Beat for 3 minutes, until light and fluffy.

Fill each buttered bread pan a little less than 1/2 full with bread dough.   Cover with plastic wrap and let rise in a warm location until dough doubles and hits the top of the plastic wrap.  This bread will only bake as high as it rises.  For rolls, scoop even scoops of dough into a buttered 9x13 pan.  Cover with plastic wrap and let rise until doubled.  Remove plastic wrap.
Bread after rising to the top of the pan. 

Bake at 350 F for 25 minutes for mini loaves and 40-45 for regular loaves or about 30-35 minutes for a pan of rolls.   Remove bread/rolls from pans and cool on a cooling rack.  You can slice thin or thick.  Whatever you won't use that day, slice and freeze.  It reheats perfectly.  Enjoy!
Gluten Free Delicious Bread and Rolls
Gluten Free bread fresh from the oven! Yum! 

Gluten Free Delicious Bread and Rolls
Mini GF loaves, fresh from the oven.  These were filled more like 1/3 full and rose almost to the tops of the pans before baking.