Search for a Recipe

Showing posts with label beef. Show all posts

Thursday, 6 April 2023

Meammar - Creamy Egyptian-Style Rice with Beef

      This rice is so creamy and rich and delicious.  It's basically a savory version of a rice pudding.  Yum!  My sweet friend, Haidy, served this for us when we went to their house for dinner, and we loved it.  She learned how to make it from her mother-in-law - meaning tried and true. Haidy was kind enough to have me over and teach me how to make it!  I took lots of notes, and then worked on figuring out measurements so it's easy to follow and bake when you don't have years of experience just eyeballing things.  Technically, Haidy makes even more at a time, using ~5 cups of rice and doing things by eye, but I've played around with it to get measurements (for myself and you all) since we can't all be lucky enough to have a friend over our shoulder telling us how it should look.   My family loves this new addition to our repertoire of dinner meals.  
     You can cover and freeze one of the pans to heat up later for another meal, which works great!  Just cover it loosely with foil and place it in the oven, then turn on the heat to 350 so the pan slowly heats up as your oven does.   In case you're wondering about the thin layer of yogurt spread on the top - this gives the beautiful rice brown color and crust to the top of the dish when baking.  Enjoy! 
A yummy serving of delicious Egyptian Rice! Yum! 

Meaamar (Maamar, M'ammar, M'armer) - Creamy Egyptian Style Rice with Beef

NOTE: This recipe has ~1.5 hour prep and ~45-55 minutes baking time.  
*You will start by soaking the rice (it soaks 1 hour).  After 30 minutes (or sooner) you want to start cooking your beef.  You'll finish soaking the rice and prepping it in the pans while your beef cooks.*    

Prepping the Rice (takes ~90 minutes - start cooking your beef after 30 minutes)

Soak fully immersed in cool water, giving a little stir occasionally:
3 cups Calrose rice (Egyptian-style or sushi-style)

***About half an hour after the rice starts soaking, begin cooking the beef.***

After soaking 1 hour, drain and rinse the rice.  Divide into a 9 x 13 pan and 8 x 8 pan so there are even layers of rice on the bottom.   I'll include amounts to add to both pans, to avoid confusion.  
After soaking & rinsing, divide between pans
It fills the pans about like this.

Add to the 8 x 8 pan, and mix in thoroughly: 
1/4 - 1/3 cup mascarpone cheese

Add to the 9 x 13 pan, and mix in thoroughly: 
1/2 - 2/3 cup mascarpone cheese   
This is a very forgiving recipe, so you can use more or a bit less as you prefer - but I find this amount works well. 
Mascarpone mixed in thoroughly.  This takes some patience.

To the 8 x 8 pan, add and mix gently: 
~ 160 ml / 5.5 oz heavy cream
~ 300 ml / 1 1/4 cup milk
1/4 tsp salt

To the 9 x 13 pan, add and mix gently: 
~ 320 ml / 11 oz heavy cream
~600 ml / 2 1/2 cup milk
1/2 tsp salt

Let sit and soak until beef is ready.  
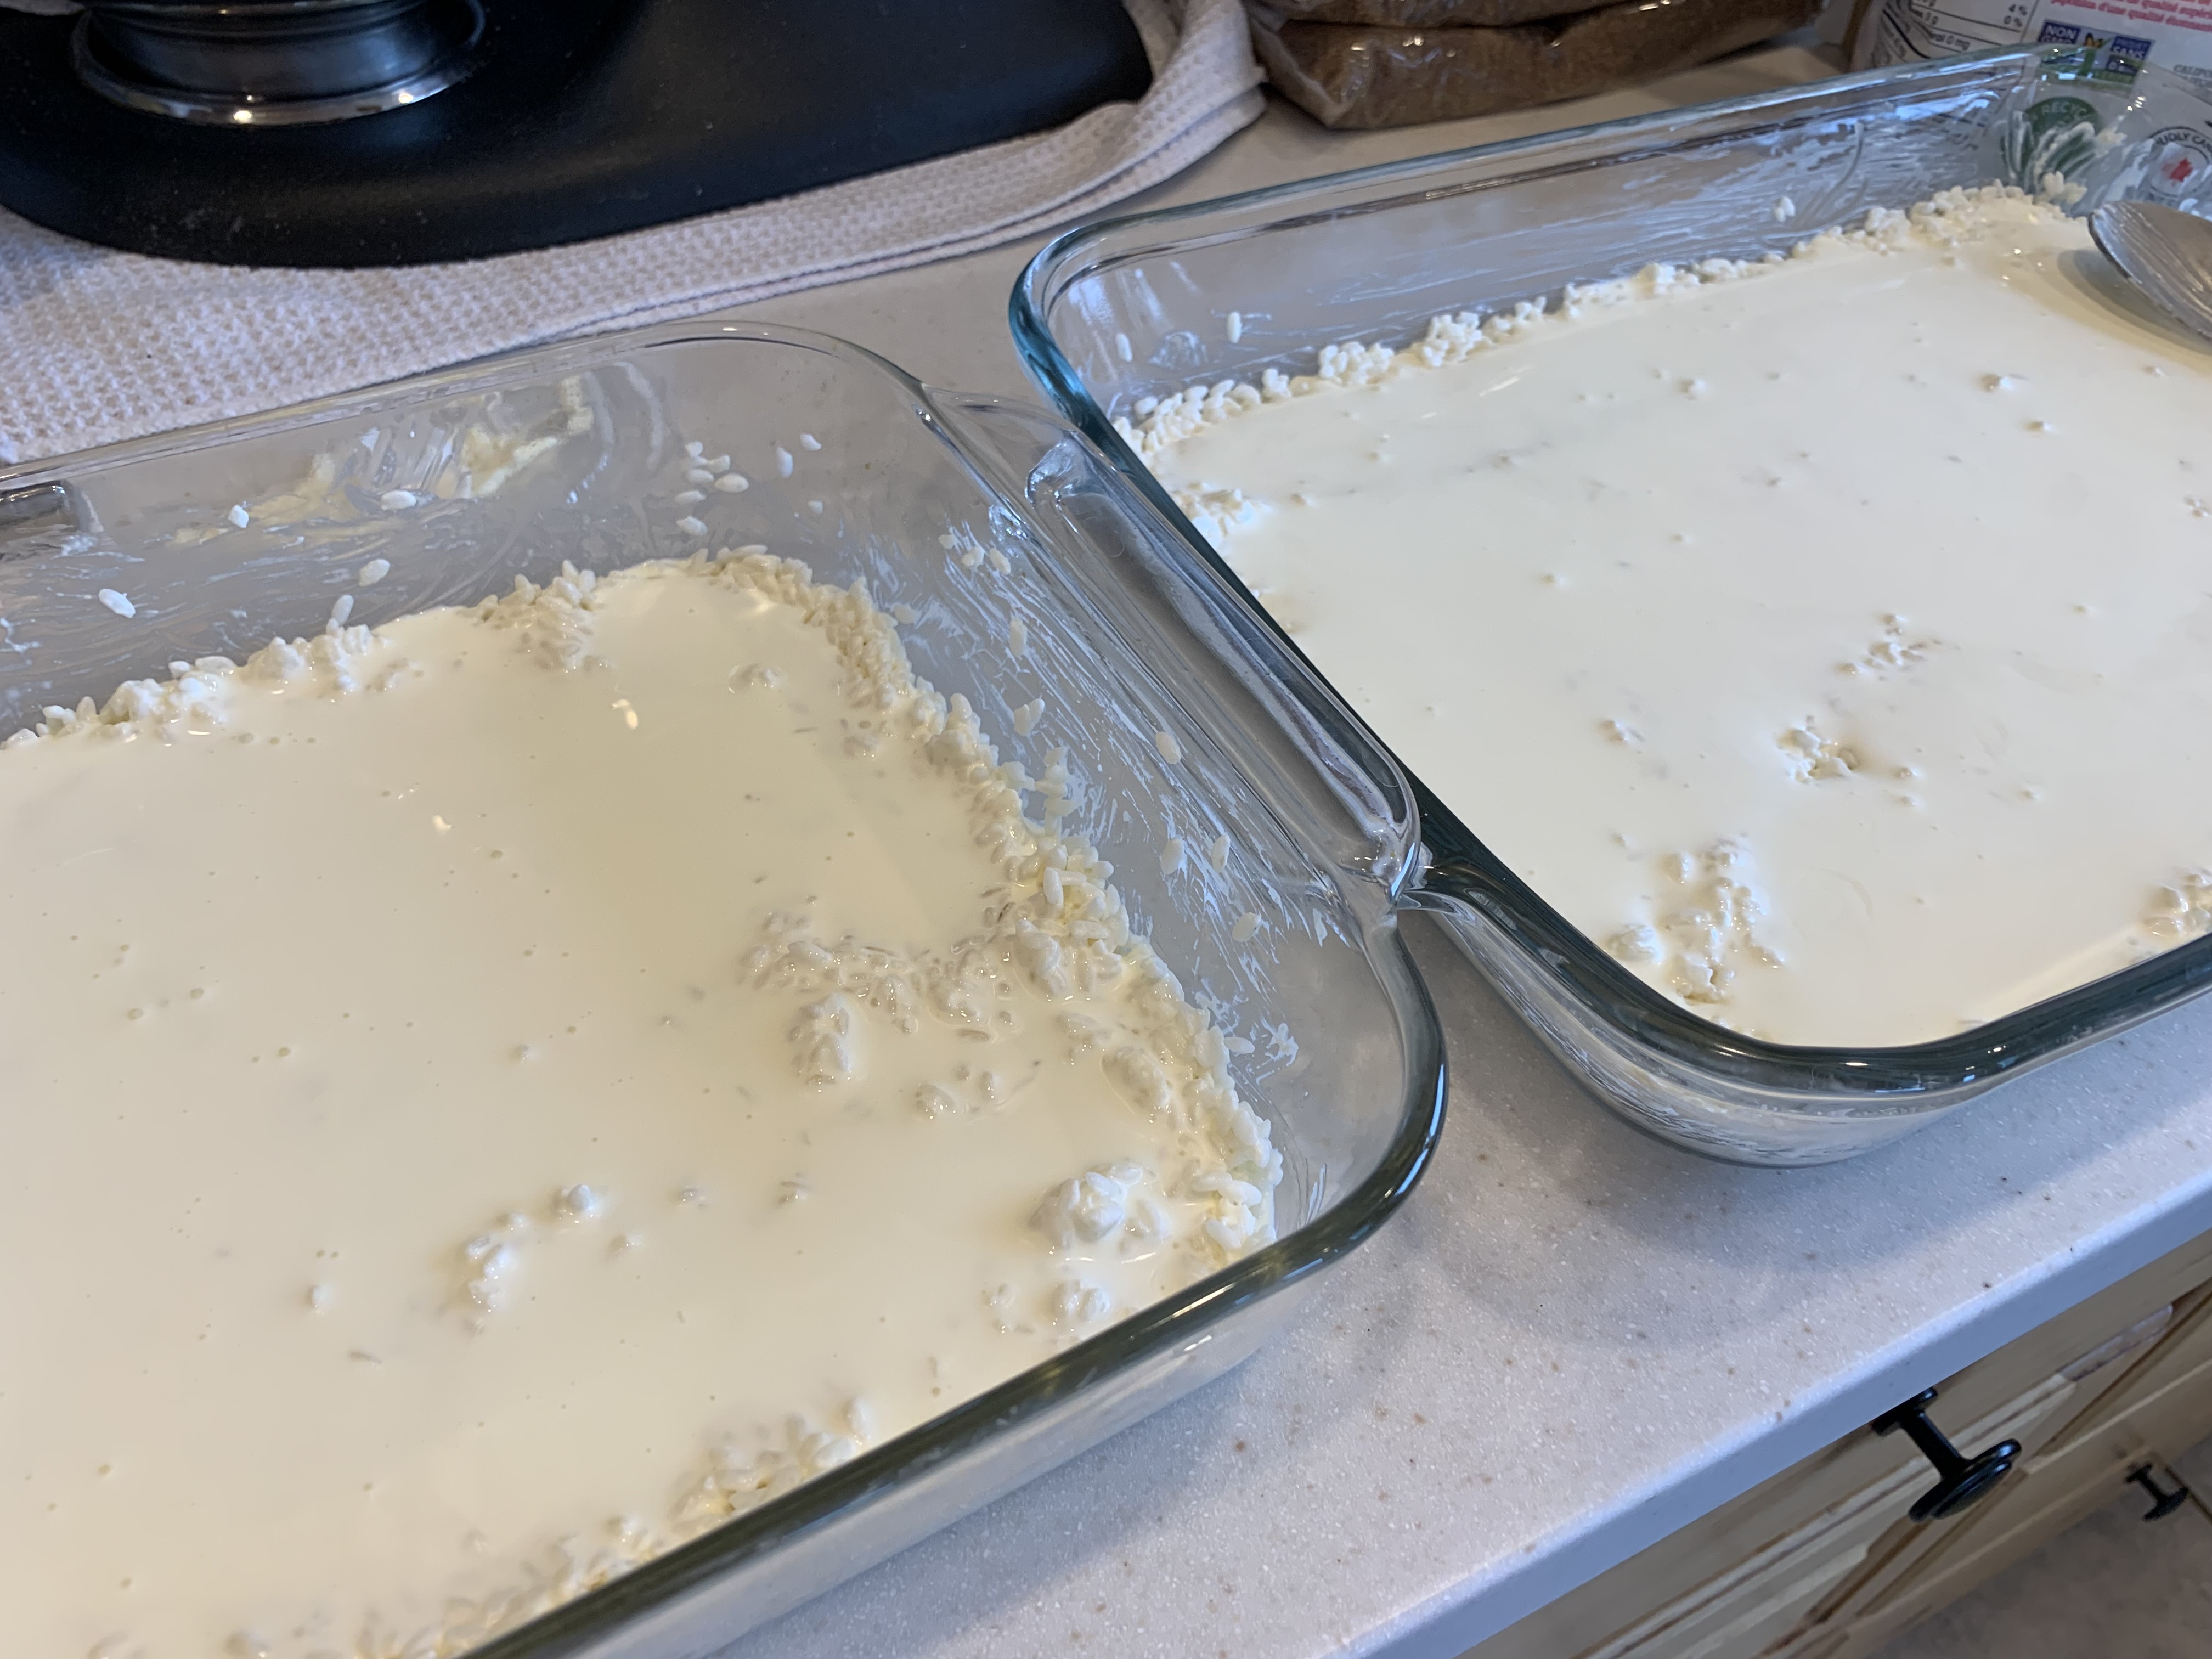
This is just showing the thin layer of cream when added - it just covers the rice in a thin layer, then add the milk and salt.
This is how it looks with the milk added - it's about a half and half rice to liquid ratio.

Cooking the Beef - takes ~60 minutes

In a large pot with well-fitted lid, cook over medium-high to high heat, stirring occasionally: 
2-3 Tbsp avocado oil 
~1 kg/2 lbs stewing beef, diced into medium or large bite size pieces 
Do NOT add any salt/pepper at this point

Keep the lid ON, except while stirring.  Let the beef cook, stirring occasionally, until ALL the liquid has been absorbed.  Initially, the pot will have quite a bit of liquid that is released from the beef, then it will slowly cook off/be absorbed by the beef.  When all the liquid is almost absorbed, add:
3/4-1 cup water

 Lower the heat to medium-low to continue simmering until the meat softens and you can cut it with the cooking spoon.  Most of the liquid should be gone at this point.  If the meat still isn't tender enough, you can add a little extra water and continue simmering.   
Make sure to keep the lid on while cooking, just removing it to stir occasionally.  Once you add the extra water, be sure to lower the heat. 

Once your meat is soft and there is very little liquid left, add, and stir, cooking a few minutes: 
salt & pepper
Egyptian spice blend - this is a lovely mix of regular or smoked paprika, cardamom, cumin, black pepper, ground coriander, nutmeg, cinnamon, and cloves (it's sometimes called a Lebanese 7 spice blend, but this doesn't always contain cardamom, which is a flavor I love in this blend)

The amount of seasoning depends on your taste - it can be light and mild, or you can season generously.  Personally, I like to season generously, since it will be within a creamy rice.  
Seasoned and ready to add to the rice. 

Divide the meat between the pans.  Any liquid left can be added as well, to add extra flavor to your dish.  

Divided evenly between the pans
Larger pieces of meat work well in this recipe, but I like smaller pieces since it spreads more evenly throughout the dish.  Just divide any leftover liquid from the meat dish over the rice.

Final prep before baking - & baking (baking time takes about 45-55 minutes)

Spoon small scoops around and spread gently over the top of the 8 x 8 pan: 
~3 Tbsp plain yogurt

Spoon small scoops around and spread gently over the top of the 9 x 13 pan: 
~6 Tbsp plain yogurt

Bake at 425 F for about 15 minutes, until rice is bubbling nicely.  Lower heat to 350 F and cook an additional 30-40 minutes, until nicely browned on top and light browned on the bottom.  

This is the sort of deep golden brown on top that you're looking to see.
The best thing about a pyrex baking dish is being able to see the light golden brown on the bottom, which is how it should look when baked.


Meammar - Creamy Egyptian-Style Rice with Beef Recipe adapted by Successfully Gluten Free!


Sunday, 13 November 2022

Faux Beef Pho (Pho-Inspired Beef Soup)

Here is my Pho-inspired Beef Soup - now titled Faux Beef Pho thanks to my sister-in-law's suggestion. ;)  I'm always looking for ways to pull inspiration from local ingredients that are easier for me to locate (While Asian markets are awesome, I can't always get to them).  I've always loved Pho soups, and I recently discovered that my kids LOVE them.  I've spent some time putting together a faux chicken pho and beef quick pho soup that I can whip together with easy-to-find ingredients.  Enjoy! 
A delicious bowl of fresh Faux Beef Pho. Yum!

Faux Beef Pho (Pho-Inspired Beef Soup)


Sauté until beef has browned over medium heat: 
2 Tbsp butter
2 Tbsp oil
1/2 onion, sliced or diced
1 lb stew beef, chopped into smaller pieces (or similar)

Add: 
8 cups water + 8 tsp GF beef bouillon paste (or 8 cups GF beef broth/stock)
8 thin slices fresh ginger
1/4 tsp cinnamon
2 Tbsp oyster sauce or fish sauce
1/2 tsp red pepper flakes
1 apple, peeled & thinly sliced (I've used pink lady and fuji, something that holds it shape is best)

Bring to a boil, lower heat and simmer for 30-40 minutes to soften the beef.  

While your faux pho is simmering, cook and drain/rinse:
GF ramen noodles OR GF rice vermicelli noodles

Serve your soup overtop of a bowl of cooked noodles. 

Top with the following, as desired: 
fresh bean sprouts
green onions, sliced

You don't have to serve the soup with the apple slices, but I we like them. 


Faux Beef Pho (Pho-Inspired Beef Soup) Recipe by Successfully Gluten Free!

Monday, 1 August 2022

Sloppy Joe's

 I spent a good portion of my childhood being very unhappy every time we had Sloppy Joe's for dinner.  Back then, the meat was cooked with a packet of spices and always incredibly salty.  It would be served on store bought rolls that always seem to fall apart under the weight of the soupy meat mixture.  However, when my dad decided to try the Pioneer Woman's recipe, we actually enjoyed it!  I've tweaked it a little bit and to make it just how I like it, and one of my kids requested it as their birthday dinner this year, so I'd say it's come a long way from the unpleasant stuff of my childhood.  Enjoy! 

My dad serving up sloppy joe's! He served it with a side of zucchini, chips, and a piece of one of our favorite family brownies, with a few mint chips thrown in. Yum!

Sloppy Joe's

Based on a recipe by Ree Drummond. Serves 8-12 

In a large deep skillet over medium heat melt: 
2 Tbsp butter

Add and cook until meat is fully browned (once cooked, you can drain it if needed, but I usually don't): 
2 lb ground beef (I prefer lean or extra lean)

Add, cooking a few minutes: 
1 large onion, diced
1 green bell pepper, diced
5-6 cloves garlic, minced

Add the following: 
14 oz can tomato sauce + add 1/4 - 1/3 cup water used to rinse out the can
1 cup ketchup
2-3 tsp Worchestershire sauce
2 Tbsp brown sugar
2 tsp chili powder
1 tsp dry mustard powder
1/2 tsp red pepper flakes
1/2 tsp pepper
1/4 - 1/2 tsp salt

Let the whole mixture come to a boil, then lower heat to simmer, uncovered for about 15 minutes.   You can taste it at this point and add an extra dash of Worchestershire sauce or salt & pepper, if needed.  

Serve the meat on top of homemade gluten-free rolls.  My versatile dinner rolls are a nice option.  We've also enjoyed it with my soft, buttery dinner rolls and my quick and delicious hamburger buns in a mixer recipes. 

Delicious with some favorite brownies for dessert! 

Sloppy Joe's Recipe by Successfully Gluten Free!


Tuesday, 10 March 2020

Homemade Cheesy GF Hamburger Helper

Sometimes, it's nice to make a comfort food meal on a chilly evening.  Packed with fresh ingredients, this homemade cheesy hamburger helper isn't the usual sort of thing I make, but it was a fun change and my kids loved it and have requested it several times since.  I based it loosely off a Bon Appetit recipe, then tweaked things a bit.  Enjoy!
Gluten Free Cheeseburger Hamburger Helper
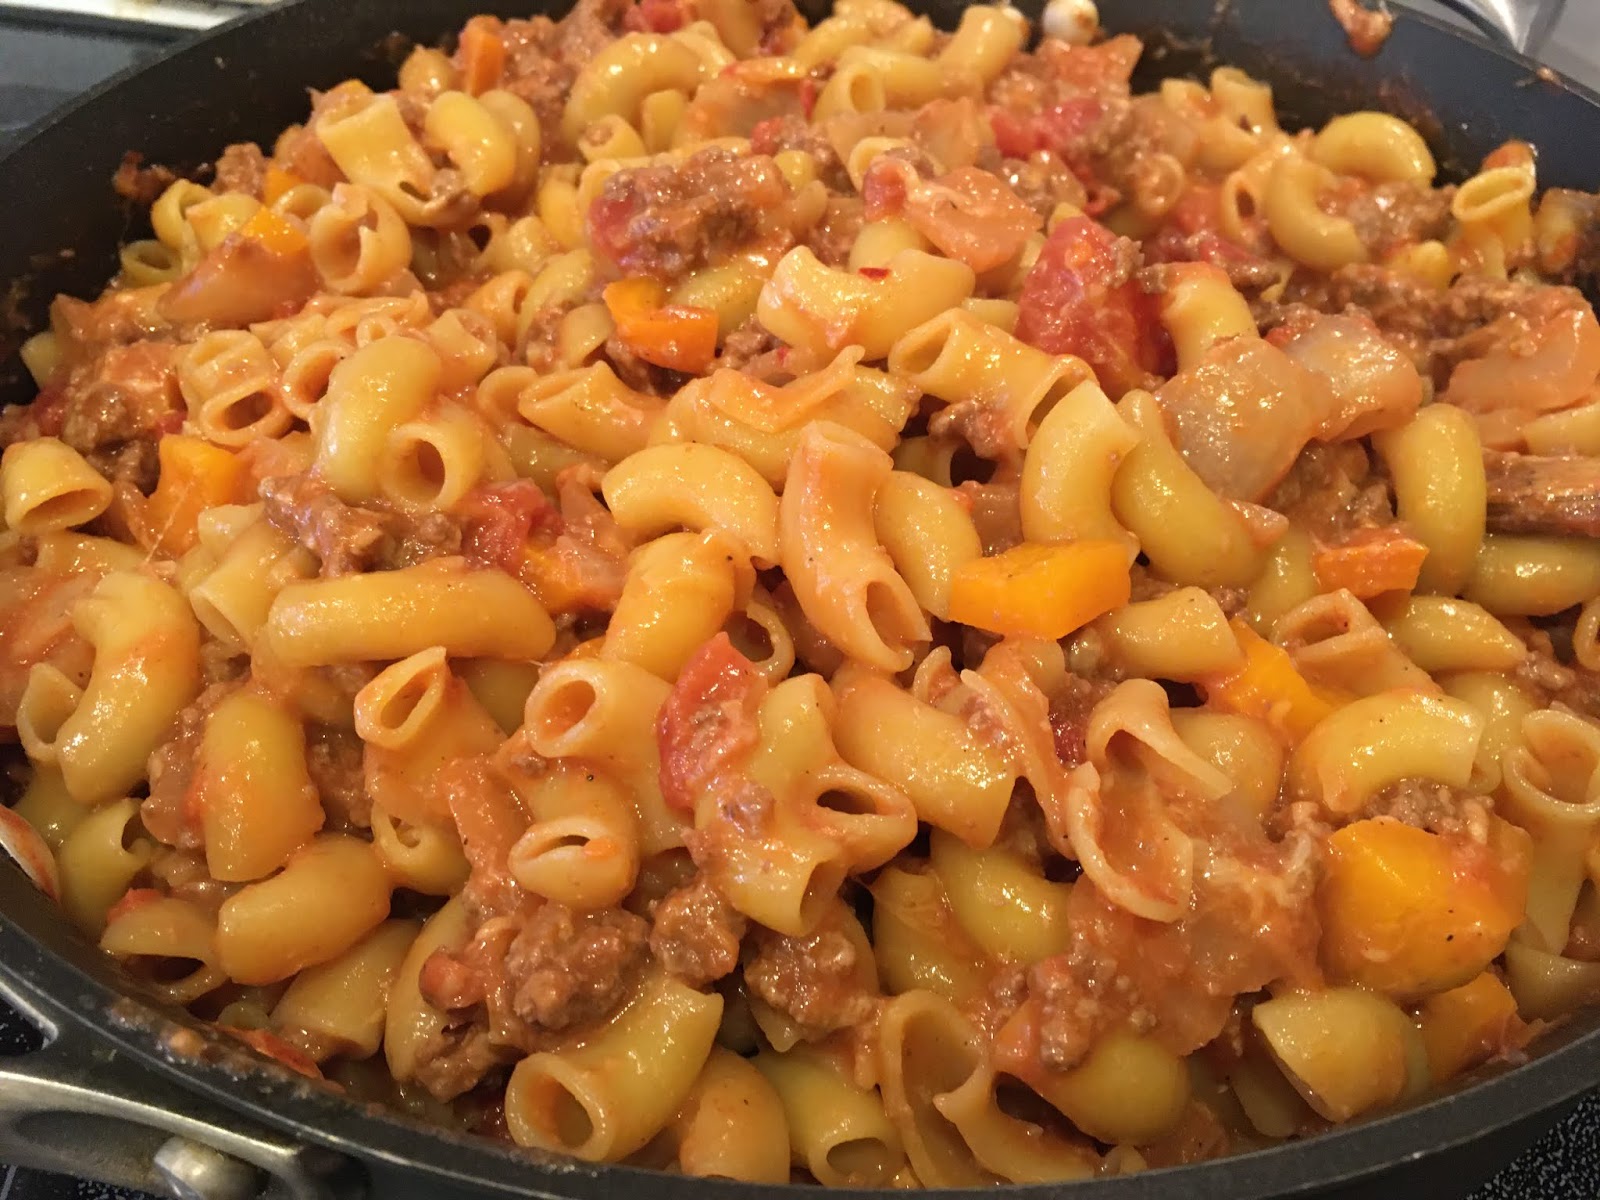
A comfort food dish - with plenty of leftovers for the next night, too!

Homemade Cheesy GF Hamburger Helper


(I like to start boiling my pot of water for the noodles now, so they're ready to throw in when the sauce needs to simmer)

Cook over medium heat 3-4 minutes:
1-2 Tbsp olive oil
1 large onion, diced

Add and cook until browned:
1 lb. ground beef
1/2 tsp salt
1/2 tsp pepper

Add and cook 3-4 minutes:
4 cloves garlic, minced
1 large orange bell pepper (yellow or red will work - green can be too bitter)

Add the following - once it's boiling lower to a simmer over medium-low heat for 10-15 minutes:
1 can tomato sauce
1 can diced tomatoes
1 Tbsp GF soy sauce (I like Bragg's Soy Seasoning)
1 tsp crushed red pepper flakes
1/2 - 1 tsp garlic powder

While your sauce is simmering, cook in salted water (1-2 Tbsp salt in your big pot of water), then drain and rise:
16 oz gluten-free pasta of your choice (I like ones made with a mix of brown rice, quinoa, and corn)

Once your sauce has simmered, remove from heat and stir in gently:
2 cups grated Mexican cheese blend OR grated cheddar cheese
1/3 - 1/2 cup grated Parmesan cheese
salt & pepper, to taste
Stirring the cheese into the sauce. 

Stir/fold cooked, drained & rinsed noodles into the sauce.  Serve and enjoy!
Tasty and filling - a comfort food type dish. 
A happy girl and her brother after cooking this dish mostly on her own! 

Homemade Cheesy Gluten Free Hamburger Helper by Successfully Gluten Free! 


Wednesday, 20 March 2019

Prime Rib Roast

Fancy roast dinner only - and ideally when someone else is buying the roast. (Thanks Dad!)  This easy, delicious roast recipe will result in a wonderfully tasty roast.  You definitely want a reliable meat thermometer.  I love my digital one.  We love it with homemade gravy (recipe below) and homemade Yorkshire puddings. Yum! Enjoy!
Prime Rib Roast, being sliced by my dad. :) 

Prime Rib Roast - gluten-free

Makes a 4-5 lb roast

Mix together in a small bowl:
2 tsp salt
1 tsp pepper

Place your 4-5 lb bone-in prime rib roast in a baking dish. (You can use a boneless roast, but lower the baking time).  You want to use a small baking dish that just barely fits the roast so you don't end up with drippings burning (like what can happen in a larger pan).   Rub the roast on all sides with the salt & pepper mixture.    Place the roast fat-side up.

Mix together:
1/4 - 1/3 cup mustard or Dijon mustard
1/2 cup finely cut shallots
6 tsp pressed fresh garlic or crushed garlic (from a jar)
3/4 - 1 tsp ground thyme

Place the mixture on the top and sides of the roast.  Let the roast rest for 1 hour at room temperature prior to baking.

After letting your roast rest 1 hour at room temperature, bake in 350 F oven for 2.5 - 3 hours until the internal temperature reaches 150 F. (for medium)  I recommend testing the temperature regularly. 
Remove roast from oven.

Transfer the roast to a new dish and cover loosely with foil for 15 minutes. 
Scrap out the drippings from your roasting pan into a small saucepan.

Add to saucepan with drippings:
2 cups water + 2 tsp GF beef bouillon paste

Whisk together:
1/2 cup milk
2-3 Tbsp cornstarch

Bring drippings and beef bouillon paste to a boil, then whisk in the milk/cornstarch mixture.  Season with salt & pepper, if needed.

Slice roast and serve with gravy, homemade gluten-free Yorkshire puddings, roasted potatoes, salad, or whatever else you like with a roast dinner. Enjoy!
Roast, sliced after resting 15 minutes under foil tent.  

Roast served with potatoes, Yorkshire puddings, gravy and salad. Yum!


Gluten Free Prime Rib Roast Recipe by Successfully Gluten Free!

Sunday, 16 October 2016

Shepherd's Pie

We love a tasty Shepherd's Pie around here-- or, as my kids call it en francais "Pâté Chinois", which is a terribly confusing name.  The end result is the same regardless of the name - a tasty, rich, meat and veggie-filled bottom covered by mashed potatoes and then baked.  I find there are two methods to go about making Shepherd's Pie - one that allows the meats and veggies to simmer for awhile, which lends a depth to the flavors, or you can just simmer it 5-10 minutes and then bake, which cuts down drastically on the cooking time and the end result is still scrumptious.   Just go with whichever version you have time for.  Enjoy!  
Gluten Free Shepherd's Pie
Gluten Free Shepherd's Pie, baking in the oven

Shepherd's Pie
Serves 6-8
Based on a recipe from one of my favorite cookbooks (brought back from England) 'Comfort Foods' by Bridget Jones
Makes enough for one 9x13 pan (or pan of equivalent volume).  

In a large frying pan/sauce pan cook over medium heat 2-3 minutes: 
2 Tbsp oil
1 onion, diced
2-3 carrots, sliced

Add and cook until meat is fully cooked:  
1 lb. ground beef

Add the following, then simmer covered for 30 minutes.  Uncover and simmer an additional 10 minutes. (make mashed potatoes, instructions below, while meat/veggies are simmering) - *NOTE: if you're short on time, just let this simmer for 10 minutes, uncovered.  However, I prefer the taste when the flavors have a change to simmer together for the full 40 minutes.*
2 Tbsp tomato paste 
2 cups beef broth 
2 tsp Worchestershire sauce 
1 tsp salt (unless broth has salt, then do NOT add) 
1/2 tsp pepper 
1/2 tsp garlic powder 
1/4 tsp thyme or 1 tsp fresh thyme, minced

Optional: during last 5 minutes of simmering uncovered, add 1/2 - 1 cup fresh or frozen corn kernels

Mix together, then add to bubbling meat/veggies: 
1/4 cup milk
2 tsp cornstarch

Pour into baking dish (I usually use a smaller, deeper dish than a 9x13 pan, but one similar in terms of total volume - I used a deep frying pan that is good for both oven and stovetop in the pictures).    Top as evenly as possible with mashed potatoes (from below, made while veggies/meat are simmering).  

Bake at 375 F for ~30 minutes, until bubbling nicely and top of potatoes are just browning.   Serve & enjoy your rich, delicious comfort food!  If you're not happy with how browned the mashed potatoes look on top, throw it under the broiler for a minute or two after baking, just to crisp the top of the potatoes.  

Mashed potatoes to top shepherd's pie: 

Boil in salted water ~10-12 minutes: 
3 lbs potatoes, diced (skins on if thin-skinned)

Strain and mash with:
 1/3 cup butter 
1/4 cup milk 
salt & pepper, to taste 
1/2 tsp dried tarragon (optional, but I LOVE it). 

Enjoy!!! 
Gluten Free Shepherd's Pie
I like to let it brown a bit extra on top, but it's just personal preference how lightly browned you let the potatoes get. Either way is great!

Tuesday, 3 November 2015

Rich Beef Stew

A perfect dish for the time of year when things are cooling down, and fall vegetables are plentiful and fresh.  I chopped everything coarsely in my stew, but you could make things smaller if you want to speed up the cooking time a bit.  However, the meat does need over an hour to simmer to allow it to soften and gain a lovely flavor and texture, so make this when you have a couple hours on a chilly afternoon or evening.  All the kids enjoyed this stew, happily digging into over-sized chunks of vegetables, too!  Delicious with homemade sourdough rolls, biscuits, wholesome bread, or crackers. Enjoy!
Gluten Free Beef Stew
Delicious Vegetable-filled Beef Stew
Gluten Free Beef Stew packed with vegetables
Colorful organic vegetables fill this beef stew. 
Rich Beef Stew
Serves 6

Heat over medium-high heat:
2 Tbsp olive oil

Add and cook until meat is browned on all sides:
1-2 lbs stew beef (large pieces) (I tend to use closer to 1 lb, because I like less meat/more veggies)

Add, then simmer, covered, 1 1/2 hours: you'll need to bring the pot to a boil over medium-high heat, then lower heat to a simmer)
2 cups water
1 onion, diced
1 - 2 cloves garlic, diced
1 Tbsp Worchestershire sauce
1/2 tsp pepper
1/2 tsp paprika
1 tsp salt

Add and simmer, covered, ~35-45 minutes, until vegetables have softened:  (you'll need to bring the pot to a boil over medium-high heat, then lower heat to a simmer)
2 cups hot water
1 tsp salt
1 tsp beef bouillon paste (make sure it's GF)
2 large tomatoes, chopped
4-5 small potatoes (thin peeled), chopped
2 carrots, sliced
1 parsnip, diced
1-2 stalks celery, sliced
1/8 - 1/4 cup fresh parsley, chopped
Organic Vegetables for Beef Stew
Beautiful veggies - potatoes, carrots, parsnips, celery
Organic Tomatoes & Parsley for Beef Stew
Colorful tomatoes & parsley
Once vegetables are softened, if you want a thicker stew, mix together in a small bowl:
1-2 Tbsp cornstarch
1/4 cup water

Mix into simmering stew, and allow to cook 1-2 minutes, until thickened, stirring regularly.  You can adjust at this point if it's still not as thick as you'd like it.  Serve & Enjoy!  

Saturday, 22 February 2014

Gluten-Free Lasagna

One of our favorite family meals is homemade lasagna.  The lasagna filling here is packed with flavor.  You can make your lasagna with or without ground beef, but here I add both ground beef and spinach into the sauce.  My absolute favorite mix of cheese in lasagna uses a mixture of ricotta, mozzarella and parmesan cheese.   I find this a perfect complement to the rich meaty and veggie-filled sauce.  Layering the lasagna, as described in the recipe below, means you get an even amount of filling throughout the lasagna in every bite! Yum! Enjoy!
A hot slice of lasagna, ready to be eaten. Mmmm... 

Gluten-Free Lasagna
Makes 9x13 pan

Preheat oven to 375F.

Cook 1 package brown rice lasagna noodles, using 1 minute below the lowest recommended cook-time. Once cooked, rinse under cold water and let sit until ready to assemble lasagna.  You should have ~12 noodles, enough for 4 layers, each with 3 noodles.

Prepare sauce:
Over medium heat, cook until meat is almost all browned:
2 Tbsp olive oil
1 onion, diced
1 lb ground beef

When beef is almost all browned add and cook 1-2 minutes:
2-3 tsp minced garlic

Add and cook until wilted:
3-4 handfuls baby spinach

Pour and let simmer until you're ready to assemble your lasagna:
2 jars spaghetti sauce (I prefer Classico b/c they don't add sugar to their sauce)
Sauce ready to go! Leave on low to simmer while you're preparing the other parts of the lasagna.

Prepare cheese filling:
In a bowl, mix together:
1 container ricotta cheese
1 cup fresh mozzarella, diced OR 1 cup grated mozzarella
1/4 - 1/3 cup grated parmesan cheese
salt & pepper

To assemble your lasagna, layer in the following order in a 9x13 pan:
Layering like this, you get a bit of cheese, meat, spinach & sauce in between each layer of noodles.  Delicious!
Layer 1: 
Generous layer of sauce
Layer of noodles
1/3 cheese filling, spread along the noodles
Light drizzle of sauce
Layer 2:
Layer of noodles
1/3 cheese filling
Light drizzle of sauce
Layer 3: 
Layer of noodles
1/3 cheese filling
Light drizzle of sauce
Top Layer:
Layer of noodles
Cover fully with sauce
Sprinkle with additional grated Parmesan cheese
On left, generous layer of sauce and layer of noodles.  On each layer add some ricotta filling and a little sauce.
Try to make each layer with even amounts of ricotta filling with a little sauce.  Top with layer of noodles.
Use remaining sauce generously over the top of the noodles.  Sprinkle with Parmesan before cooking.

Bake at 375F for 25-30 minutes.  Let sit 10 minutes before cutting and serving.  Wonderful served with a side of salad and GF garlic bread. Yes, leftovers either refrigerated or frozen are wonderful. Enjoy!
Fresh out of the oven. Let rest before cutting and eating! Yum!


Monday, 21 October 2013

Extreme Nachos

These came together as a sort of accident, since I was looking to do a little something extra to our taco meat since we planned to use it for nachos rather than tacos. They turned out so delicious we've been making them regularly ever since and calling them our "Extreme Nachos".  Yes, of course these are fancier nacho platters around, but the name seems to have stuck in our house. You could easily use the meat in tacos, and it would be great, too!  They are great with salsa on the side, particularly peach salsa. 


Extreme Nachos
Serves 4-6

In a large, low-sided pan over medium heat cook until meat is done:
1/2 Tbsp olive oil
1 Tbsp minced garlic
1/4 - 1/2 sweet onion, finely diced (optional)
3/4 - 1 lb lean ground beef

Add and mix in:
1 Tbsp chili powder
1/2 tsp cumin powder
1/2 tsp salt
3/4 tsp garlic powder
1/4 tsp ground cayenne powder
1 cup water
1 can (540ml/16oz) black beans, drained & rinsed
1/2 - 3/4 cup frozen corn kernels
1/2 cup fresh cilantro, finely diced (Optional)

Bring to a boil over medium-high heat.  Lower heat to low/med-low and simmer, stirring occasionally, 10-15 minutes.  

Serve over corn tortilla chips covered with melted shredded cheddar cheese.  (We pop the tortilla chips w/ cheese in the microwave 20-25 seconds to melt, then top with the meat).  Great with a side of peach salsa!  Yum!
My 7 yr old, Monty, who has been loving this meal - he requests it regularly.

Friday, 2 August 2013

Spicy Beef Samosas

Who doesn't love a good samosa.  I absolutely love my traditional potato, onion and pea samosa, but this lovely spicy beef version is a great addition to your samosa repertoire.  A quick and easy meal, and you can eat the filling on its own with rice instead of cooking into a samosa.  Nice and versatile!  I do find that I have to make my samosa filling a bit spicier than I want it at the end. It tends to not be as spicy once wrapped and fried.  So, if you're making the filling to just eat on its own, spice it as you want to eat it.  But if you're going to fry it up as a samosa, make it a bit spicier than you would normally.  Enjoy!!!

Gluten Free Beef Samosas
A fresh homemade gluten free beef samosa! 

Spicy Beef Samosas
Makes ~12-16 good sized Samosas
The beef filling can be eaten with rice as a main dish instead of used inside the samosas! Yum!

Beef Filling:
Heat in a frying pan over medium heat:
1 Tbsp olive oil
Add and cook until onions are tender:
1 onion, chopped
2 tsp minced garlic
1 tsp grated ginger
½ - 1 tsp grated/finely chopped red chili pepper (optional, but recommended to add the spicy kick)
* I like to buy frozen fresh ginger and red chili pepper. They have them in 1 tsp sized servings, ready to use.  I use 1 cube ginger and ½ - 1 cube red chili pepper in this recipe, but you can use fresh perfectly well.  I find that if you’re eating the beef filling on its own with rice, ½ cube is fine, but if you’re filling samosas use a whole cube since it’ll taste less spicy in the samosa.
Add and cook until browned:
½ lb. lean ground beef
Add and mix in:
1 – 2 Tbsp Madras Curry Powder, to taste
Add and mix in:
½ cup frozen peas
Stir a couple minutes, then remove from heat and serve over rice or use inside samosas. Let cool before you use it inside samosas.  


Mmmmm. Simple and delicious.

Samosa dough:
Mix in a large bowl:
1 cup brown rice flour
½ scant cup sorghum flour
½ scant cup tapioca starch
¼ cup potato starch
1 tsp xanthan gum
1 tsp baking powder
½ tsp salt
2 Tbsp sesame seeds (optional)
Add and mix with a spoon until thoroughly combined (use back of spoon to help smooth):
1 cup milk (lactose-free works great)
2 tsp extra light olive oil
Roll out plum-sized pieces of dough between two pieces of plastic wrap. You want them to make ovals, ideally with one long side a bit straighter than the other. 
Scoop filling into center of dough, pressing together so it stays in a pile.  Using the plastic wrap to help (the dough is a little sticky when so thin), pull up one side of dough at a time, so you have a triangle.  Then, pull up the last side and flatten onto the top.  (*use the plastic wrap to pull up and fold each samosa.)


You are essentially overlapping as much as possible when you fold in the first two parts of your triangle. The last fold should just help cover up the remaining gap. 

Set prepared samosas on a plate until ready to fry.
Heat ½ inch oil (I like canola oil for frying) in a large, low saucepan over med-high heat.  Fry the samosas on each side until golden brown, 4-5 minutes per side.


Gluten Free Beef Samosas
Place on either a wire rack or paper towel-lined baking sheet to cool.  You can store leftovers in the refrigerator and re-heat in a toaster oven.  Enjoy! 
Gluten Free Beef Samosas
Fresh GF beef samosas, ready to eat! 

Wednesday, 19 June 2013

Beef, Vegetable & Noodle Stir-Fry

A fun and easy dish to whip up.  It may look like there are a lot of steps, but the hardest thing about making a stir-fry is just getting all the ingredients together and chopped so you can whip it up in a hot wok or frying pan.   This is a fun version with rice vermicelli noodles that was a big hit here.  Enjoy!
Stir-Fry Beef, Veggies & Rice Noodles
Serves 4
 
Mix together marinade:
¾ cup water
4 Tbsp GF soy sauce (I like Bragg’s Liquid Soy Seasoning)
2 Tbsp white wine vinegar or white vinegar
2 Tbsp brown sugar
2 Tbsp cornstarch
2 tsp minced garlic
1 tsp grated ginger
Pinch of salt
½ tsp pepper
 
Pour marinade in a plastic container. Then add and marinate in refrigerator at least 30 minutes (no longer than 24 hrs):
¾ lb/.35kg sirloin-tipped beef, sliced thinly for stir-fry.
 
Prep the following (or you can use an Asian stir-fry veggie mix, which some grocery stores have ready-to-cook):
2-3 mushrooms
¼ - ½ red bell pepper, sliced
snow peas, a handful
1 small carrot, grated
¼ - ½ cup bean sprouts
 
Also prepare:
3 cloves garlic, minced
½ red onion, sliced thinly
 
When your meat has marinated for 30 minutes, set a pot of water on the stove to boil.  Once boiling, put in the boiling water and let cook 2 minutes:
½ pkg (125g) rice vermicelli noodles (spinach or regular)
You will want aim to put your noodles in to boil about the time you’ve finished the beef and mixed in the marinade and let it thicken a few minutes. I put another note below.
 
Heat wok/frying pan over high heat and add, cooking 2 minutes:
2 Tbsp oil
3 cloves garlic, minced
½ red onion, sliced thinly
 
Add prepared veggies to pan and cook 4-5 minutes, stirring regularly, until just beginning to soften.  Remove veggies and set aside.
 
Add and heat up:
1 Tbsp oil
 
Remove beef from marinade and cook, 2-3 minutes, until done.  Give the marinade a quick stir (cornstarch tends to settle). Then, add the marinade to the pan (with cooked meat) and mix, stirring constantly & scraping the bottom of the pan, until mixture begins to thicken and bubble, 3-4 minutes. 
 
Now would be a good time to pop your vermicelli noodles into your boiling water.
 
Add your cooked veggies to the beef and cook all together 2-3 minutes.
 
Add in cooked vermicelli noodles, mixing gently.  Serve immediately. 
Ready to serve!
Sprinkle with red pepper flakes overtop, if desired.
Enjoy!