Search for a Recipe

Showing posts with label chocolate cake. Show all posts

Monday, 7 August 2023

Blueberry & Chocolate Birthday Cake!

 My husband's favorite fruit is blueberry, so every summer we make something blueberry-filled to celebrate.  One of the favorites has been the little blueberry-banana cakes - or sometimes we go for lemon-blueberry or just straight blueberry flavors, but this summer I got to thinking that chocolate covered blueberries are tasty - so why not make a chocolate blueberry birthday cake!  This uses the blueberry filling from our favorite blueberry cream cheese pie, then has layers of a light spongy chocolate cake and chocolate ganache.  Yum!  It was absolutely delicious! And it slices up beautifully, too! Enjoy!
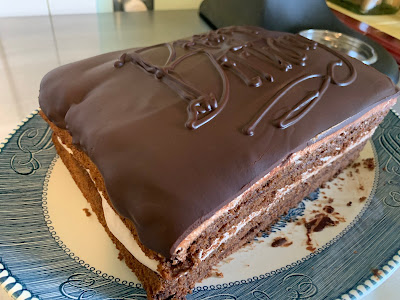
Blueberry & Chocolate Birthday Cake, ready for the ganache writing on the top!
Fancy ganache writing on top - if you time it right, the ganache just barely melts into the top layer, creating a beautiful look.
A slice of blueberry chocolate cake! 

Blueberry & Chocolate Birthday Cake!

Blueberry Filling:

In a medium saucepan, combine and heat over medium heat: 
300 g (11 oz) frozen wild blueberries
1/3 cup sugar
2 Tbsp water
pinch of salt
Let cook, stirring occasionally, until boiling.

Whisk together in a small bowl:
2 1/2 Tbsp water
2 1/2 Tbsp cornstarch

Add cornstarch mixture to boiling blueberries, stirring constantly.  Bring mixture back to a boil and let boil a few minutes until mixture has thickened (keep stirring).  Remove from heat and add: 
1 1/2 - 2 tsp butter

Scoop into a wide, low bowl and cover with plastic wrap on surface.  Set aside to cool.  

Chocolate Sponge Cakes:

Preheat the oven to 350 F.  Butter the edges and line 2 quarter sheet baking pans with parchment paper (quarter sheet baking pans are approx 8x12 inner dimension or 9x13outer dimension metal cookie sheets - I LOVE this size.  Perfect for the toaster oven, and perfect when you have multiple things you want to roast separately in the regular oven, and of course, opera-style cakes!)

Melt together, then set aside:
1/4 cup butter
1/4 cup dark chocolate chips

In a small measuring cup, combine to make a "buttermilk": 
2 Tbsp white vinegar
milk to equal 1 cup (lactose-free or milk substitutes work)

In a large bowl, whisk together: 
1/2 cup coconut flour
1/4 cup cocoa powder (extra dark works nicely in this recipe)
1/4 cup white rice flour
1 cup sugar
1/2 tsp baking soda
1/2 tsp salt

Add and whisk in until smooth: 
1 cup buttermilk, from above
melted butter & dark chocolate, from above
1/4 cup oil
6 large eggs
2 tsp vanilla bean paste or vanilla extract

Batter whisked and ready to put into the prepared pans.

Divide between the two parchment-lined pans.  Bake at 350 F for approximately 15-18 minutes.  These are nice and thin, so they cook quickly.  They should look nicely dried, but not burned or too dark on the edges. They should look no longer wet in the center.  Depending on your oven, they may need an extra minute or two.

Batter divided and ready for baking.
Out of the oven.  You can see how it's nicely dried out. Chocolate cake always smells so good. 

Remove from oven.  Let rest 5 minutes before flipping onto cooling racks to cool.  Once cool, carefully slice each cake in half so you'll have four even layers for your cake. 

When the cakes and blueberry filling are just about cooled, prepare the ganache. 

Chocolate Ganache

In a small frying pan, heat over medium heat until just starting to bubble nicely: 
1/4 cup heavy whipping cream
1/4 cup butter
1 tsp vanilla bean paste (or extract)

Remove from heat and pour over (in a bowl): 
5 oz high quality semi-sweet chocolate chips

Stir until ganache is smooth.  Let cool ~5 minutes before assembling cake.  

Assembling Cake

Layer cake in the following order:
1. Cake
2. 1/3 blueberry filling, gently spread over cake layer
3. Drizzle of chocolate ganache
4. Repeat 2 times (cake, blueberry, ganache drizzle)
5. Top with 4th layer of cake
6. Spread most of the remaining ganache gently over the top, reserving some for decoration
Chocolate cake, a layer of blueberry filling, and a drizzle of chocolate ganache. 
Repeated for each layer.
Finally, topped with the final layer of cake and drizzled with "most" of the remaining ganache - saving a bit for the final writing on top!

Let remaining ganache cool an additional few minutes, then put it in a ziploc bag.  Snip the corner and pipe desired decoration on top of your cake.  Serve immediately, or refrigerate until ready to serve.  Let rest at room temperature 20-30 minutes before slicing to let the ganache warm a bit before slicing.

Ganache decoration on top!
Once it's chilled, it looks like this. 
Yum yum yum!

Blueberry & Chocolate Birthday Cake Recipe by Successfully Gluten Free!

Saturday, 14 January 2023

Peppermint Chocolate Cake

Leftover candy canes?  No problem! This delicious Peppermint Chocolate Cake is just perfect for using them up!  A lovely 4 layer cake with peppermint-marshmallow filling and rich chocolate ganache in every layer.  Absolutely delicious! And perfect for one of our many winter birthdays. Enjoy!  Would you believe that I wrote out the instructions and my 8 year old and 11 year old made up the chocolate cake layers all by themselves while I went on a birthday walk?!  Extra special birthday treat! 
Beautiful and delicious slice of GF peppermint chocolate cake!
Yum! Freshly assembled with delicious flowing ganache filling and topping.

Peppermint Chocolate Cake!

Chocolate Sponge Cakes:

Preheat the oven to 350 F.  Butter the edges and line 2 quarter sheet baking pans with parchment paper (quarter sheet baking pans are approx 8x12 inner dimension or 9x13outer dimension metal cookie sheets - I LOVE this size.  Perfect for the toaster oven, and perfect when you have multiple things you want to roast separately in the regular oven, and of course, opera-style cakes!)

Melt together, then set aside:
1/4 cup butter
1/4 cup dark chocolate chips

In a small measuring cup, combine to make a "buttermilk": 
2 Tbsp white vinegar
milk to equal 1 cup (lactose-free or milk substitutes work)

In a large bowl, whisk together: 
1/2 cup coconut flour
1/4 cup cocoa powder
1/4 cup white rice flour
1 cup sugar
1/2 tsp baking soda
1/2 tsp salt

Add and whisk in until smooth: 
1 cup buttermilk, from above
melted butter & dark chocolate, from above
1/4 cup oil
6 large eggs
2 tsp vanilla bean paste or vanilla extract

Batter whisked and ready to put into the prepared pans.

Divide between the two parchment-lined pans.  Bake at 350 F for approximately 15-18 minutes.  These are nice and thin, so they cook quickly.  They should look nicely dried, but not burned or too dark on the edges. They should look no longer wet in the center.  Depending on your oven, they may need an extra minute or two.

Batter divided and ready for baking.
Out of the oven.  You can see how it's nicely dried out. Chocolate cake always smells so good. 

Remove from oven.  Let rest 5 minutes before flipping onto cooling racks to cool.  Once cool, carefully slice each cake in half so you'll have four even layers for your cake. 

Peppermint Marshmallow Frosting:

Once cakes have cooled, you can prepare your frosting, as it's time to assemble! 

Beat together in a mixer until light and fluffy - 2-3 minutes: 
1/2 cup butter, softened
1 1/2 cups powdered sugar
1 cup marshmallow fluff
1 tsp vanilla extract
1 tsp (or more if needed) cream or milk

When your frosting is nice and fluffy, gently mix in: 
~1/4 cup crushed candy cane (I find 2 large candy canes is about the right amount, but I like to crush 3 large candy canes so there is extra to sprinkle on top of the cake!)

Chocolate Ganache:

Once cakes are set to cool, prepare your chocolate ganache.  It will need a little time (5-10 minutes) to cool a bit on the counter before assembling the cakes, so timing-wise, I found this worked well.  

In a saucepan over medium heat combine and heat until bubbling gently: 
1/2 cup butter
1/2 cup whole cream/whipping cream
1/2 tsp vanilla bean paste or extract

Remove from heat and stir in until smooth (this takes a bit of patience, usually a few minutes): 
8 oz high quality semi-sweet or bittersweet chocolate

Once the ganache is nice and smooth, you can spoon it into a large freezer ziploc and set aside for assembling.  Just before assembling, snip a small corner of the bag for piping your ganache.  

Assembling your cake:

To assemble cakes: 
1. Layer of cake. 
2. Spread 1/4 of peppermint frosting on the layer. 
3. Drizzle a zigzag of chocolate ganache on top of the frosting.  
4. Repeat with 2nd cake layer, frosting, ganache drizzle.
5. Repeat with 3rd cake layer, frosting, ganache drizzle.
6. Top with 4th cake layer, and add frosting.  
7.  Gently spread the remaining ganache drizzle on top of the cake. 
8.  Top with fresh crushed candy cane. 
Chocolate cake with frosting and ganache drizzle
About to add the chocolate drizzle to this layer.
Complete! The smell is amazing.
Slice and serve!  If you want clean layers, let your cake chill for 2 or more hours in the refrigerator to firm up the frosting and ganache.  Using a large knife to cut will give you lovely, crisp slices.  Enjoy!!! 

Sliced fresh before it had a chance to cool - it'll look a little messy, but the taste is the best!  Chilled, you'll be able to get nice clean slices like the first picture.


Peppermint Chocolate Cake Recipe by Successfully Gluten Free! 

Saturday, 22 January 2022

Dark Chocolate Raspberry Opera-Style Cake (nut-free!)

 We have a lot of winter birthdays around here, so lots of experimenting with cakes.  My daughter wanted another opera cake, like her birthday last year, but I convinced her to let me tweak it a bit and turn it into a raspberry chocolate version for her 11th birthday.  The addition of chocolate to the sponge makes the recipe a little less straight-forward, but it isn't too tricky and can be mixed up in a bowl with a whisk.  Beautiful and delicious!  My youngest helped me make this cake for her sister, and we especially love how the raspberry frosting turned out (based on a strawberry frosting that's a favorite).  Enjoy! 
A pretty four layer chocolate opera-style cake! Hard to see some of the layers with the dark chocolate ganache & jam between the chocolate from this angle, but they're there! So yummy!
Slices of birthday cake for my now 11 year old served with a little ice cream on the side. 

Dark Chocolate Raspberry Opera-Style Cake (nut-free!) 

Chocolate Sponge Cakes:

Preheat the oven to 350 F.  Butter the edges and line 2 quarter sheet baking pans with parchment paper (quarter sheet baking pans are approx 8x12 inner dimension or 9x13outer dimension metal cookie sheets - I LOVE this size.  Perfect for the toaster oven, and perfect when you have multiple things you want to roast separately in the regular oven, and of course, opera-style cakes!)

Melt together, then set aside:
1/4 cup butter
1/4 cup dark chocolate chips

In a small measuring cup, combine to make a "buttermilk": 
2 Tbsp white vinegar
milk to equal 1 cup (lactose-free or milk substitutes work)

In a large bowl, whisk together: 
1/2 cup coconut flour
1/4 cup cocoa powder
1/4 cup white rice flour
1 cup sugar
1/2 tsp baking soda
1/2 tsp salt

Add and whisk in until smooth: 
1 cup buttermilk, from above
melted butter & dark chocolate, from above
1/4 cup oil
6 large eggs
2 tsp vanilla bean paste or vanilla extract

Batter whisked and ready to put into the prepared pans.

Divide between the two parchment-lined pans.  Bake at 350 F for approximately 15-18 minutes.  These are nice and thin, so they cook quickly.  They should look nicely dried, but not burned or too dark on the edges. They should look no longer wet in the center.  Depending on your oven, they may need an extra minute or two.

Batter divided and ready for baking.
Out of the oven.  You can see how it's nicely dried out. Chocolate cake always smells so good.

Remove from oven.  Let rest 5 minutes before flipping onto cooling racks to cool.  Once cool, carefully slice each cake in half so you'll have four even layers for your cake.  

Chocolate Ganache:

Once cakes are set to cool, prepare your chocolate ganache.  It will need some time to cool a bit on the counter before assembling the cakes, so timing-wise, I found this worked well.  

In a saucepan over medium heat combine and heat until bubbling gently: 
1/2 cup butter
1/2 cup whole cream/whipping cream
1/2 tsp vanilla bean paste or extract

Remove from heat and stir in until smooth (this takes a bit of patience, usually a few minutes): 
8 oz high quality semi-sweet or bittersweet chocolate

Once the ganache is nice and smooth, you can divide it into a couple bowls so it will cool down a bit faster.  If you use it right away, it'll just pour off and be too thin.  I find if I just let it rest on the counter while I prepare the chocolate-sugar syrup and frosting, it's perfect. 

Chocolate-Sugar Syrup: 

(This is in place of the traditional coffee syrup - which is coffee mixed with sugar - the cocoa powder gave a perfect bitterness to the syrup so it worked wonderfully to brush on the cake layers!)
In a mug, combine: 
1/2 cup boiling water
1 Tbsp cocoa powder
1/4 cup sugar

Stir until sugar is completely dissolved and you have a nice, smooth sugar syrup to use to brush on your cakes.

Raspberry Marshmallow Frosting:

Once cakes have cooled, you can prepare your frosting, as it's time to assemble! 

Beat together in a mixer until light and fluffy - 2-3 minutes: 
1/2 cup butter, softened
2 cups powdered sugar
1 cup marshmallow fluff
3 Tbsp good quality raspberry jam
1 tsp vanilla extract
1 tsp (or more if needed) cream or milk (I typically don't find I need it bc the jam adds some liquid)

Assembling your cake:

To assemble cakes: 
1. Brush each cake layer with your chocolate-sugar syrup

2. Spread one layer with 2/3 of the raspberry frosting.  Spread the remaining frosting on one layer (this will be your top layer). 

3. Gently spread some high quality raspberry jam on top of the two layers that have no frosting.  Then, carefully spread chocolate ganache on top of the jam.   Make sure you have at least 1/3 to 1/2 of the ganache remaining.

4. (Optional, but helps them stack a bit more neatly).  Place the frosted/ganache covered layers in the refrigerator for 10 minutes to help set just briefly.  

5.  Carefully, assemble your cake as desired  I like to assemble in the following order: Bottom - jam & ganache, Second to bottom - all frosting, Third layer - jam & ganache, and then the top layer with your frosting.  I like to add the last layer of ganache and decoration after assembling for a neater look.    
Starting to plate the cake.  Bottom layer with jam & ganache here, to be followed by the frosted layer, than another jam layer, then the top layer! 

6.  Once assembled, spread the remaining chocolate ganache on top of the layer with 1/3 icing (your top layer).  The ganache should be warm enough to spread and give a beautiful sheen to your layers. If the ganache isn't warm enough, you can gently heat for 10 seconds in the microwave to warm it up.   Save some extra ganache for decorating the top!!! Let rest briefly, then pipe decoration of your choice on top using extra ganache.  I like to place ganache in a ziploc bag with the corner snipped off.  If you pipe warm (not hot) ganache onto slightly cooled, but not set ganache, you can end up with a beautiful look that defines the top of most proper opera cakes.  
Layered and stacked with decoration piped on. Don't worry about drips or edges since those get trimmed off!
It always looks so neat when you can get the timing right and the ganache piping flows nicely into the rest of the ganache layer.

7.  Refrigerate 15-20 minutes.  *I find if you refrigerate it too long, you'll lose the beautiful sheen because the ganache sets too hard.  Although it does tend to warm up and still look nice once it's left at room temperature.*

8.  Using a large knife (you can heat it if you like, but I found just wiping it well with a paper towel between slices worked for me), slice off the edges to create the clean, beautiful edges that define a proper opera cake. 

Trimming the edges off the cake.  

We love how this ends up looking!  So neat! 

9.  Carefully wipe off the edges of your platter OR remove the parchment paper pieces.  Try to touch the cake as little as possible on the top to avoid messing up the beautiful sheen.   Leave at room temperature until serving.  Serve in thin slices or small squares to show off your pretty layers!  Yum! 

This cake is best served at room temperature and made on the day you're serving because of the beautiful shine on the ganache.  However, leftover cake stores perfectly sliced in the refrigerator in tupperware - and it tastes just as delicious a day or two after assembling.   You could even freeze slices, let them defrost in the bag and then serve at room temperature as well for leftovers! Enjoy !

One very happy 11 year old! 

Dark Chocolate Raspberry Opera-Style Cake by Successfully Gluten Free!

Tuesday, 5 May 2020

Delicious Chocolate Cake!

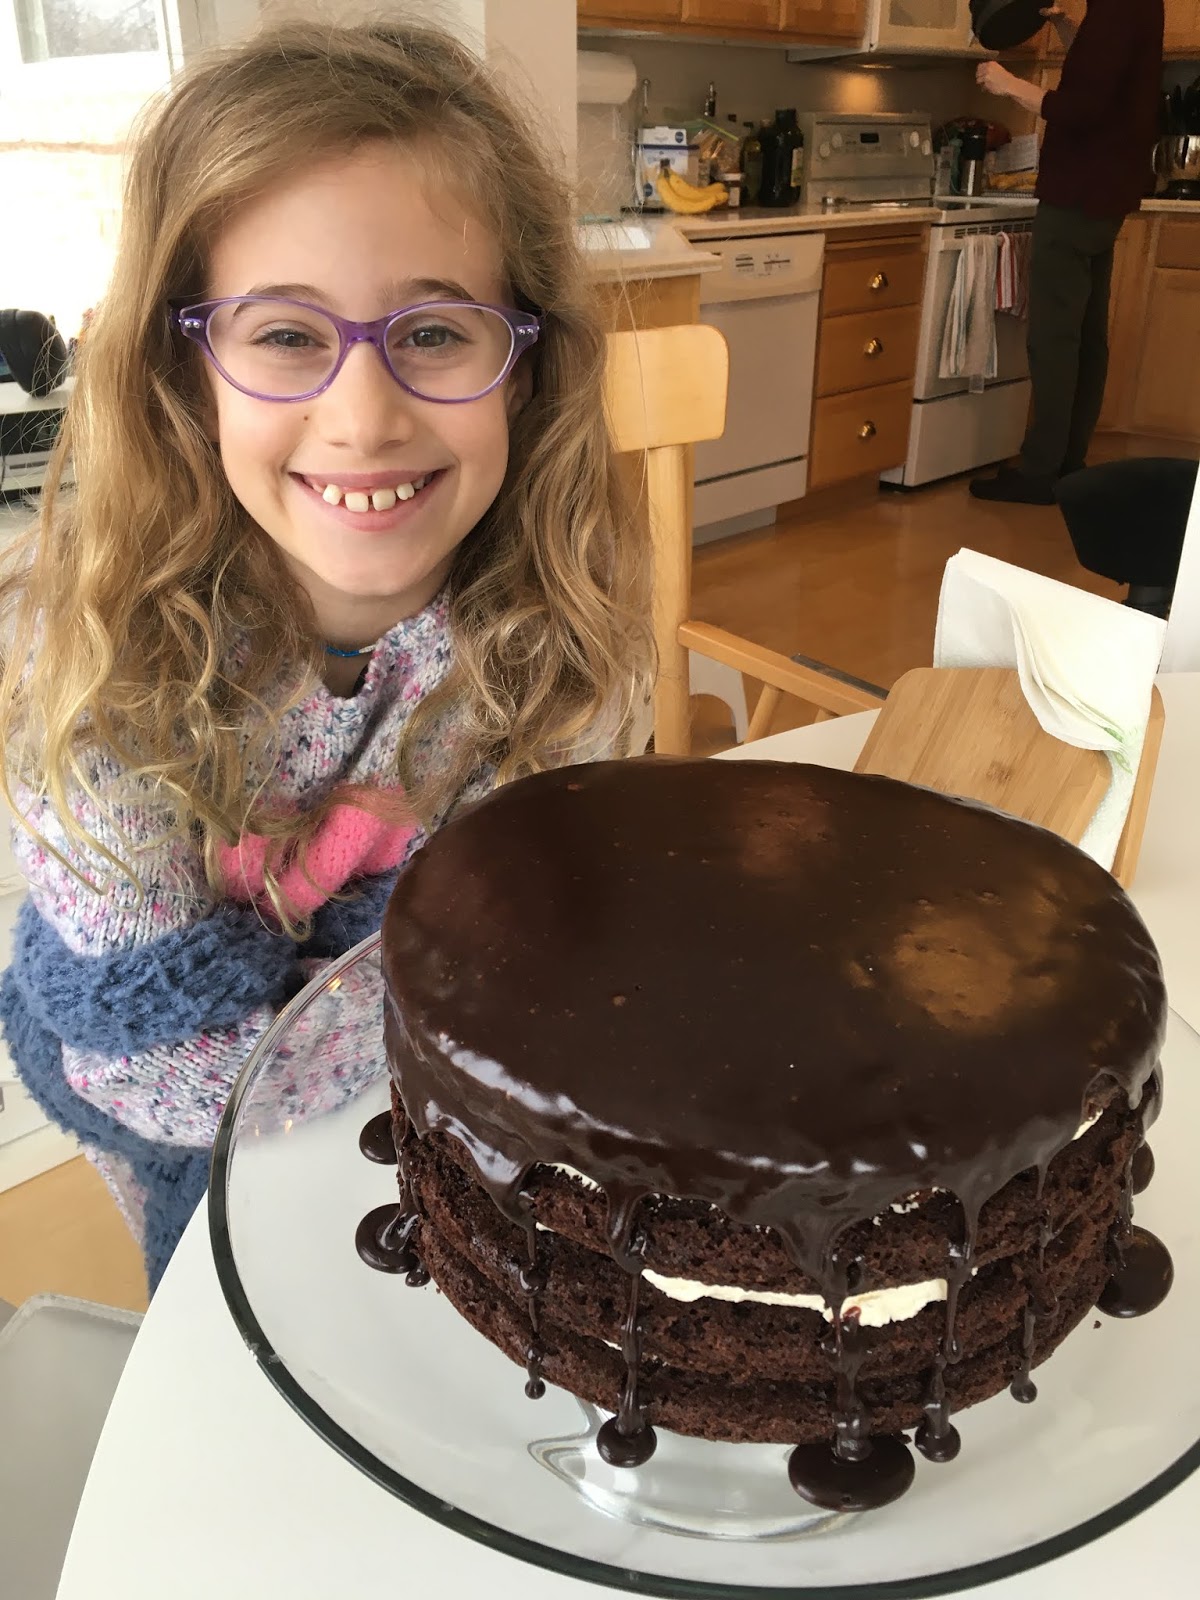
My now 9 year old requested a chocolate cake with vanilla frosting for her birthday.  I added a bit of dark chocolate glazing on top, and voila!  A beautifully light, delicious chocolate cake that everyone raved over.  I love making thin cake layers, too, because they cook up quickly and cool quickly, meaning the entire cake was finished within a couple hours (accounting for cooling time).  This particular cake ended up tasting like a bit light and fluffy whoopie pie, which we all love.  My parents thought it tasted like a chocolate whoopie pie in cake form. Yum!
Gluten Free Chocolate Cake with Vanilla Frosting and Chocolate Glaze
It was so beautiful and so delicious.  It tasted like a big, soft whoopie pie. 

Delicious Chocolate Cake!!!

Makes a four-layer 8"cake

Preheat oven to 350 F.  I find I need to use 325 F convection to fit all four pans in at the same time.
Butter & line pans with parchment paper OR butter and flour pans with a GF flour mix or just some rice flour.

Melt in a small pot over medium heat:
1 cup butter

Add and stir, just until bubbling and then remove from heat:
1/2 cup cocoa powder
1 cup boiling water

In a large bowl, whisk together:
3/4 cup brown rice flour
3/4 cup white rice flour
1/4 cup cornstarch OR arrowroot starch
2 Tbsp potato starch
2 Tbsp tapioca starch
1 tsp xanthan gum
1/4 tsp salt
2 cups white sugar

In a separate medium to large bowl, stir together: (This will expand a bit, so keep that in mind when choosing your bowl)
1/2 cup buttermilk (2 Tbsp apple cider vinegar + milk to equal 1/2 cup)
2 eggs
1 tsp vanilla extract or vanilla bean paste
1 tsp baking soda

In your large bowl, mix together:
dry ingredients, from above
cocoa powder mixture, from above
buttermilk mixture, from above

Divide batter evenly between four 8" round pans, buttered & lined or buttered and GF floured.
Bake at 350 F for 17-18 minutes.
Cakes, ready to bake! 

Let cakes rest 5-10 minutes before removing cakes from pans and putting them to wire racks to cool.
Out of the oven and resting a bit before removing from pans. 

Once cakes are fully cooled, fill layers of cakes with one batch of my favorite marshmallow fluff frosting, evenly divided between the four layers.
One batch of marshmallow fluff frosting divided in 3.  Four beautifully filled layers.  Yum! 

Top the cake with a Chocolate Glaze:

In a small pot over medium heat melt:
3/4 cup butter

Add, and let bubble 30 seconds:
1/3 cup cocoa powder

Remove from heat and mix in:
5 Tbsp milk (lactose free or dairy free work)
1 tsp vanilla extract

Whisk in, until nice and smooth:
2 3/4 cup powdered sugar

You may want to let this glaze cool just a bit before pouring over the cake.  Too warm and it will drip more than you'd like down the sides.  Carefully pour the glaze onto the top of the cake, gently spreading it toward the edges of the cake, just so a bit drizzles down the sides.   Serve this cake at room temperature for the best texture.  If you refrigerate it to serve later, it's best left to come to room temperature before serving, so let rest at room temperature 30-40 minutes before eating.

Enjoy your delicious cake!
We had one VERY happy 9 year old! 
It's so soft and light and fluffy. Mmmmm... 

Delicious Chocolate Cake by Successfully Gluten Free! 

Tuesday, 22 October 2019

Chocolate Chocolate Chip Muffins

Basically a dessert, but I'm still going to call it a muffin.  It's a fine line sometimes between cupcake and muffin, especially since these are pretty decadent.  Filled with a variety of chocolate chips and made with a dark cocoa powder, they're delicious!  Enjoy!
Chocolate Chocolate Chip Gluten Free Muffins
Chocolate Chocolate Muffins made with an extra brute dark amber cocoa powder
Chocolate Chocolate Chip Muffins
Chocolate Chocolate Muffins made with a lighter cocoa powder.  

Chocolate Chocolate Chip Muffins - Gluten Free

Makes 12-18

Preheat oven to 350 F.  Line 12-18 muffin tins with muffin liners.  This recipe makes 12 larger muffins or 18 regular-sized muffins.

Mix together, then set aside:
1/4 cup boiling water
1/4 cup dark cocoa powder

Mix together:
1/2 cup brown rice flour
1/4 cup + 2 Tbsp white rice flour
3 Tbsp arrowroot starch OR cornstarch
2 Tbsp potato starch
2 Tbsp tapioca starch
3/4 tsp xanthan gum
1/2 tsp salt
1 1/2 tsp baking powder
1 tsp baking soda

Mix in briefly:
2 eggs
1/3 cup sour cream (I love the lactose-free sour cream - can't use sour cream - an unsweetened, dairy-free yogurt will work, too!)
1/3 cup milk (any variety will work)
1/2 cup sugar
1/4 cup brown sugar
1/2 cup butter, softened

Add and beat 2 minutes, scraping occasionally, until smooth:
Cocoa/water mixture from above

Stir in chocolate chips:
1 - 1 1/2 cups chocolate chips (any combination of dark, semi, milk, white, or some of each!)

Scoop into 12 - 18 lined muffin tins.  These are fine resting on the counter 20-30 minutes before baking.  (It's not necessary, but sometimes it can help avoid any sinking in the center of your muffins, although I've tried these both ways (waiting before baking and baking right away) and both ways have worked out nicely).
These muffin liners are a bit larger than the normal ones, so these would look more like 2/3 full with a regular muffin liner.  

Bake at 350 F for 15-17 minutes for smaller muffins and 19-20 minutes for larger muffins.  Remove from pan and cool on cooling racks.  These are delicious still warm.  Leftovers can be frozen and warmed when you want to serve/eat.  Enjoy!!!
Fresh from the oven, before removing to the cooling rack. 
Very happy with her after school snack.
Eating with a fork to avoid spilling on her favorite Calvin & Hobbes comics.

Chocolate Chocolate Chip Muffins Recipe by Successfully Gluten Free!

Friday, 13 September 2019

Chocolate Whoopie Pies!

When I was growing up, a favorite special treat was when my dad would bring home whoopie pies from Bova's Bakery in the North End of Boston.  They were huge, with a soft fluffy cake-like top and bottom, filled with fresh whipped cream.  You needed to keep them cold or the inside would melt.  They were delicious.  I've tried myriads of recipes over the years, in my hopes of duplicating the taste that I remember from my childhood.  AND, we have a winner!!!  I made a non-GF version of these years ago, and the key to getting the right consistency in the cake was using mayonnaise.  While it might seem somewhat unusual, it gives the exact flavor and consistency to make what I feel is the perfect whoopie pie.  If you don't want to use fresh whipped cream, these are also delicious with marshmallow fluff frosting as a filling (recipe included below).  Enjoy!!!!!!!!!!
Yummy fresh homemade whoopie pies!!!

Chocolate Whoopie Pies! (Gluten Free)

Makes about 30 whoopie pie sandwiches (~60 individual fluffy cakes)

Mix together until smooth, then set aside to cool a few minutes while you mix together the rest of the ingredients:
1 cup boiling water
2/3 cup Dutch-processed cocoa powder (make sure it's a nice, dark, rich cocoa powder - a dark, amber cocoa powder will work nicely, too)

In a large bowl, whisk together:
1/2 cup white rice flour
1/2 cup brown rice flour
1/2 cup tapioca starch
3/4 tsp xanthan gum
1 1/4 cup white sugar
1 1/2 tsp baking powder
1/4 tsp salt

Add to the dry ingredients:
2 eggs
1 tsp vanilla bean paste or vanilla extract
3/4 cup mayonnaise
water/cocoa mixture from above (add a little first, to help temper the eggs, then add the rest)
Batter, ready to scoop onto cookie sheets. 

Place just smaller than 1 Tbsp scoops onto parchment paper-lined baking sheets.  You should be able to cook 15 cookies to a tray (3 x 5) on 4 trays.   Bake at 350 F for ~10 minutes. 
Whoopie pies fresh from the oven.  Rest a few minutes, then move to cooling rack.

Let whoopie pie cookies rest a few minutes on the tray before transferring to a cooling rack.  Once cool, sandwich with the whipped cream, below, or my favorite marshmallow frosting.  Yum!

Whipped Cream Filling
In a mixer with whisk attachment, whisk until nice and stiff peaks form:
2 cups whipping cream (also known as heavy cream, heavy whipping cream)
~1/3 cup powdered sugar (you can use less/more as desired for sweetness - I like to use only a little powdered sugar in the whipped cream, preferring a not very sweet filling to balance with the sweeter chocolate exterior)
1/2 tsp vanilla extract

Use the whipped cream filling to fill whoopie pies.  You can just add a scoop of whipped cream and sandwich together.  You will want to store these immediately in the refrigerator.  Keep refrigerated until ready to serve.   Enjoy!
Ready to pop into the refrigerator. Mmmm... 
*These are my FAVORITE way to enjoy whoopie pies, but they're also delicious with marshmallow fluff frosting and don't have to be refrigerated prior to serving.*

Optional Marshmallow Frosting Filling
In a mixer with a beat 2-3 minutes, until light and fluffy.
1 cup butter, softened
2 - 2 1/2 cups powdered sugar
1 - 2 tsp vanilla bean paste OR vanilla extract
1 - 2 cups marshmallow fluff

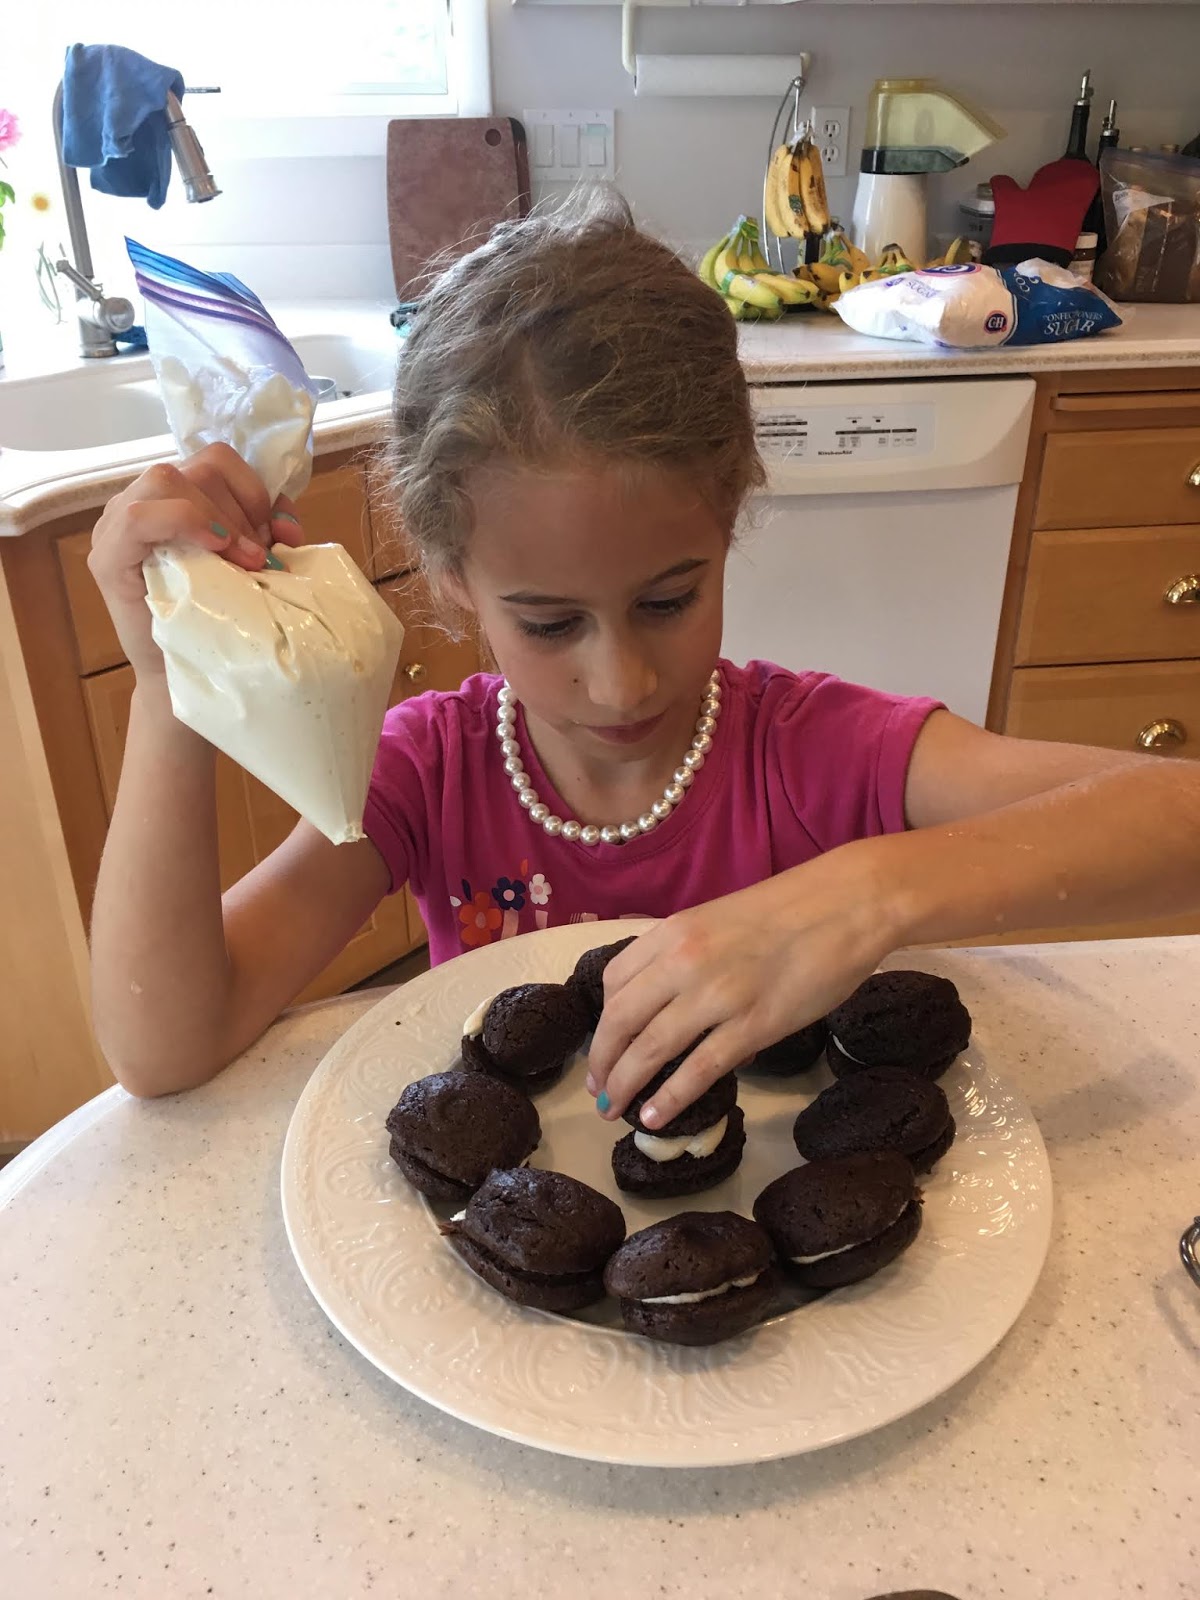
Place in piping bags or freezer ziplocs.  Snip the corner and use to pipe and fill the whoopie pies.   My girls loved helping out with these when we need to make a special dessert.
Eight years old and five years old, filling whoopie pies. 
My 5 year old LOVES to help cook, and these are a perfect treat to make together.
It's important to wear pearls when making whoopie pies. ;) 
Enjoy!!!


Gluten Free Chocolate Whoopie Pies Recipe by Successfully Gluten Free!