Search for a Recipe

Showing posts with label pudding. Show all posts

Tuesday, 21 February 2023

Chocolate Paris-Brest Birthday Cake!

 A Paris-Brest is like a giant cream puff or éclair, baked into a big ring, sliced open and filled.  We wanted something a bit different that incorporated a rich, dark chocolate pudding for my daughter's birthday, and this was a hit!  A few years ago, I made a Paris-Brest for my brother's birthday, and I've made that Paris-Brest filled with a vanilla pastry cream and homemade caramel sauce several times now.  This is a fun chocolate-filled alternative.  It's also a nice alternative to overly sweet birthday cakes, as there isn't much sugar in it. Enjoy! 

Assembled, ready for a bit of decorations and birthday candles. 
Such a fun birthday cake!

Chocolate Paris-Brest Birthday Cake!

Rich Chocolate Pudding:

In a separate small bowl, whisk together until smooth.  Set aside to add in later:
4 egg yolks
1/4 cup milk
1/4 cup cornstarch

Whisk together in a medium-size saucepan:
1/2 cup sugar
1/4 cup cocoa powder (I like to use an extra dark cocoa powder)
1/2 tsp salt

Add and whisk the following into the sugar/cocoa mixture:
2 1/2 cup milk (higher percentage of fat is best - you can even 10% cream for a really rich pudding)

Stir milk/cocoa mixture regularly while heating over medium heat until mixture almost comes to a boil **you don't want it to be at a boil, just very hot because you'll add a bit to the eggs and if it is boiling, you'll curdle the eggs a bit** 

Using your mixture of "almost" boiling hot chocolate milk, whisk 1/4 cup milk into your egg yolk mixture.  Add an additional 1/4 cup milk, whisking in.  Add a final 1/4 cup milk, whisking in.  This allows your eggs to heat up a bit slower, so you don't end up with lumps in your pudding.

Add egg mixture back into the pot.  Stirring constantly, mix until mixture comes to a boil and begins to bubble and thicken.  Keep on heat no more than 1 minute after mixture has begin boiling.

Remove from heat and add:
1/2 - 1 tsp vanilla extract or bean paste (optional)

Add and mix in: 
1/2 cup dark chocolate chips or diced dark chocolate

For a really smooth pudding, you can strain this in a sieve to remove any lumps, but I usually don't bother.  Put in a large bowl. Cover with plastic wrap (make sure plastic wrap is on the surface of the pudding to avoid any 'skin' being formed on top of your pudding).  Let cool.  I usually let it cool for a bit at room temperature before moving it to the refrigerator to fully cool. 

Choux Pastry (Pate a Choux):

Preheat oven to 360 F.  (I find somewhere between 350 - 375 works perfectly).  Line a baking sheet with parchment paper.  

In a medium sized saucepan (avoid non-stick coated pans), heat the following over medium heat just til starting to boil: 
1 1/4 cup water
1/2 cup salted butter
1 tsp sugar
1/4 - 1/2 tsp salt

Remove from heat and stir in quickly with a wooden spoon: 

Put the pot back on the heat and stir vigorously over the heat for 2 - 3 minutes.  It should smooth during this time.  

Remove from heat and place the dough into a mixer.  Turn on the mixer speed to low.  Let it mix for ~5-10 minutes, scraping occasionally.  Your dough should look nice and shiny and be quite thick.  

Add to the dough (one at a time or just all together): 
4 large eggs, room temperature

You want to let the dough mix on medium to medium-high speed until it's nice and smooth, scraping occasionally.  Scoop the dough into two freezer ziplocs (not absolutely necessary, but it's quite a thick dough and I find this helps avoid having a bag split while piping).  Snip ~1" - 1 1/2" from the corner of the bag.  

Using approximately 1/3 of the batter, pipe a large circle onto the parchment-lined paper.  Pipe a second circle just outside (or inside) of your first circle with the next 1/3 of the batter.  Using the last 1/3 of the batter, pipe a third circle on top of the first two circles.  
Two rings piped with approximately 2/3 of the batter. 
A final ring piped on top.  You can smooth it with just a little water on your fingers, if desired. 

Brush the top of your pastry with: 
1 egg, beaten

And sprinkle the top with: 
Sparkling sugar OR sliced almonds
We have nut allergies around here, so after brushing with egg I usually top it with coarse sugar crystals.  They end up looking beautiful.  However, you can top with slice almonds after adding the egg, if you prefer. 
Nothing more fun than learning to make Paris-Brest on your birthday!
Brushing on the egg wash before baking.

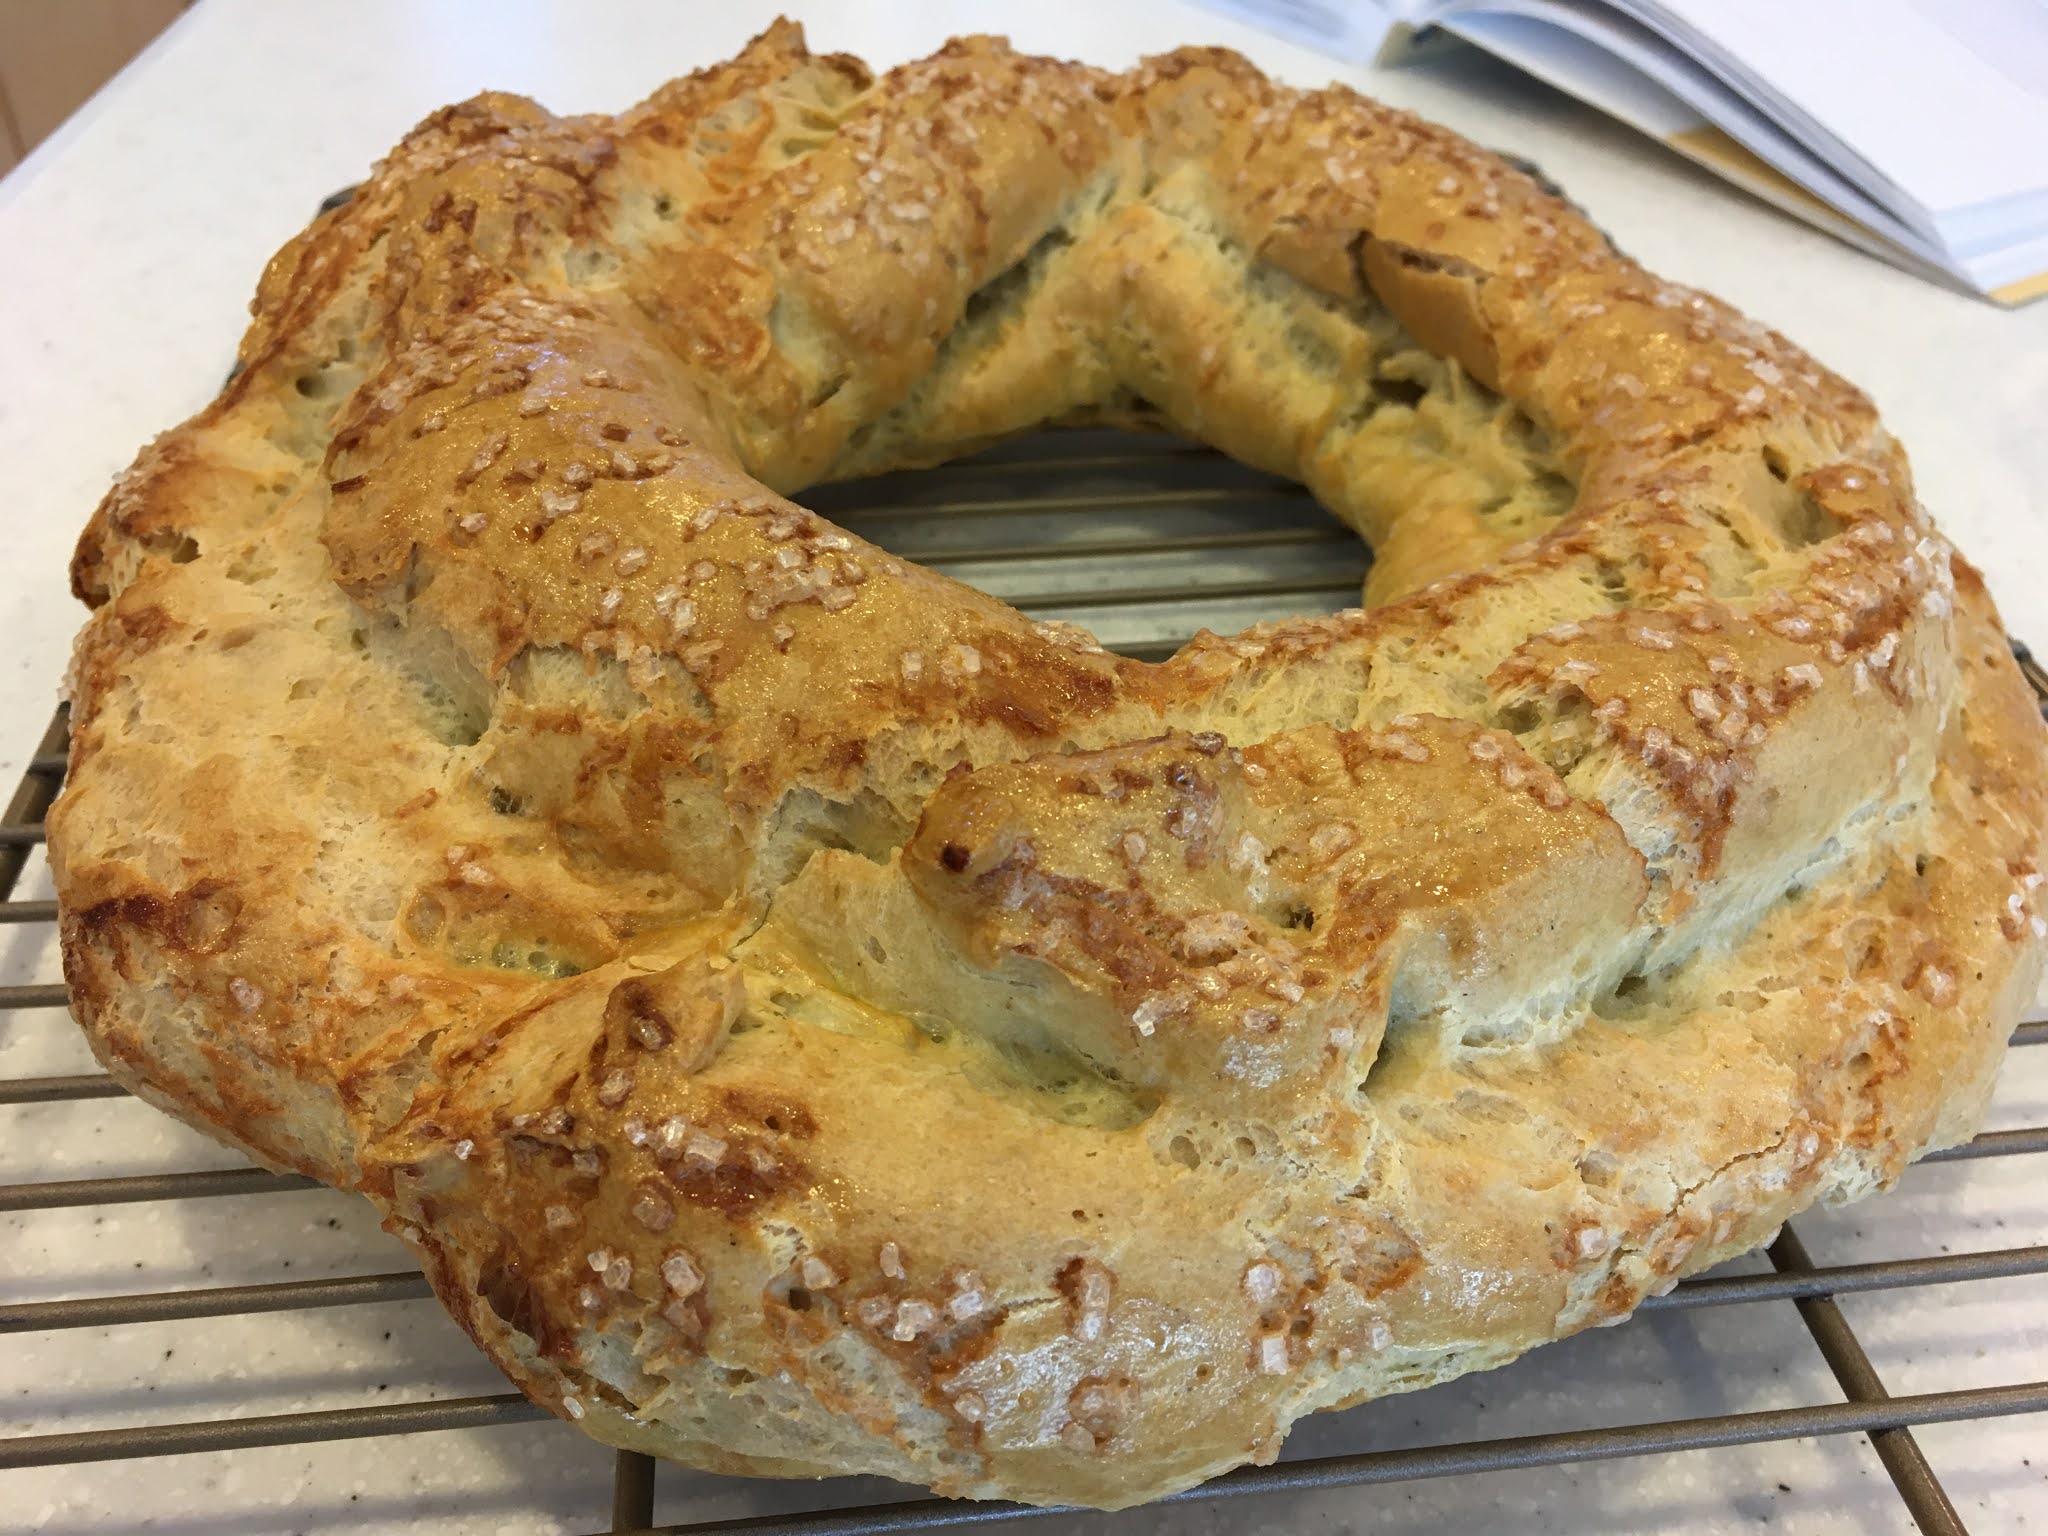
Immediately bake at 360 F for 50 - 55 minutes.  Remove from the oven and carefully slide your pastry onto a cooling rack.  Have a friend help hold the cooling rack up in the air and quickly poke 7-8 holes in the bottom of your pastry.  Poke a few holes around the edges of the pastry where you plan to slice it in half once cooled.  *Choux Pastry does best if you give the hot air somewhere it can release so the pastry doesn't collapse on itself while cooling.* 
Make sure to immediately slice holes in the sides and bottom to avoid any collapse during cooling. 

Whipped Cream:

In a mixer with a whisk attachment, beat until nice stiff peaks form: 
2 cups heavy whipping cream
~1/3 powdered sugar (more or less, to taste)
1/2 tsp vanilla extract or vanilla bean paste

Assembling:

This cake is best made, assembled and served fresh, but if you need to prepare in advance, store in the refrigerator until serving.

1. Carefully slice your Choux Pastry Ring in half.  Carefully set aside the top.
2. Pipe or spoon your cooled chocolate pudding into the pastry ring. 
3. Pipe or spoon your whipped cream on top of the pudding.
4. Carefully top with the Choux Pastry Ring. 
5. Decorate with extra whipped cream, as desired. 
6. Slice carefully with a serrated knife and serve! 

Store leftovers in the refrigerator.  
Sliced and ready to fill.
Piped with rich dark chocolate pudding.

Piped with whipping cream. 
Sliced and served! One happy Birthday girl!

Chocolate Paris-Brest Birthday Cake Recipe by Successfully Gluten Free!

Tuesday, 6 July 2021

A-maz-ing Sticky Toffee Pudding

I've loved sticky toffee pudding since I first tried it years ago in England.  Since going gluten-free, I've tried a couple experiments, but none of them turned out - until now!  Oh, my goodness, I'm so glad I got over my aversion to chopping up dried dates.  Turns out they are, thankfully, very different to the dried prunes my grandma used to offer me when I was a kid.  When soaked and baked into a sticky toffee pudding, dried dates add the perfect flavor.  I love this toffee sauce, too.  It's much more creamy than an ordinary toffee sauce, so I find it isn't as sweet.  Yum.  Leftovers store perfectly in the refrigerator and heat up perfectly with a bit of sauce drizzled on top.  Enjoy! 
Gluten-Free Sticky Toffee Pudding with Homemade Toffee Sauce on top!

Amazing Sticky Toffee Pudding

Inspired by and partially based on a recipe in the NYTimes.  
Makes a 9 x 13 pan that serves ~12  

Preheat oven to 350 F.  Butter a 9 x 13 glass baking dish. 

In a bowl, soak for 5-10 minutes: 
1 cup boiling water
1 cup chopped (pitted) dried dates (after chopping, press them into your 1 cup measuring cup so you have a nice, generous amount of dates)

In a food processor, blend together: 
1/2 - 2/3 cup dark brown sugar
1 tsp baking soda
1/4 tsp salt
2 eggs
1/4 cup butter
1 tsp vanilla extract or vanilla bean paste

Add your soaked dates and the liquid.  Blend just until smooth in the food processor.  

Pour into the buttered 9 x 13 baking dish.  Bake for 30-35 minutes at 350 F, until nicely set in the middle.  

While the pudding is baking, make the sauce. 
The date pudding, fresh from the oven.  

Toffee Sauce & Topping Recipe

In a medium-sized saucepan, heat together over medium heat, stirring occasionally: 
2 cups/473 ml heavy whipping cream (35%) (lactose-free whipping cream works perfectly, too)
1/2 cup/8 Tbsp butter
3/4 cup brown sugar
1/4 tsp salt

Heat until mixture is bubbling nicely, and is smooth and even.  Let it bubble for only a minute or two, then remove from heat.  
Toffee sauce, ready to use!

To finish your sticky toffee pudding:

After baking your cake, set oven to broil.  If you have an option, I recommend the broil "low" setting.  

Pour 1/2 of your toffee sauce slowly and evenly over the baked pudding.  
Cake covered with half of the toffee sauce.

Place the cake under the broiler, checking every minute until the top is nice and bubbly and you're just barely starting to see a few brown spots (I recommend checking every minute because some broilers are HOT and some are cooler).   Broiling the top of your sticky toffee pudding should take 2-4 minutes.  
Broiled until bubbling nicely and you're just seeing some browned spots.

Remove from the oven.  Serve warm in a bowl with additional sauce served overtop!  Leftovers can be stored separately (cake in one container, sauce in another).  Serving leftovers into a bowl and heating them up together works perfectly.  Enjoy!!!
This cake slices nicely.  I like to cut nice, even squares to serve.
Serve each square with extra toffee sauce on top.  Yum! Sticky Toffee Pudding at it's best! 

Amazing Sticky Toffee Pudding Recipe by Successfully Gluten Free!

Wednesday, 10 March 2021

Cream Puffs

Surprisingly, I don't make cream puffs terribly often, but every time I do I am reminded why they're such a fun dessert.  You can make these larger or smaller, depending on your preference, but you will have to adjust your baking time and make sure they're a nice golden brown.  Larger cream puffs definitely need longer in the oven to make sure they're firm and don't collapse on themselves during cooling.  An easy filling is just to use fresh whipped cream whipped with a spoonful of powdered sugar added to sweeten it a bit, but we especially love them with a vanilla or chocolate pastry cream.  Enjoy!
Make any size from this recipe!  Tiny cream puffs or larger ones.  Both work great!

Cream Puffs

Makes ~20 cream puffs, but it can make more/less depending on the size you pipe out

Make and cool filling of your choice.  I recommend a rich crème patissiere (vanilla pastry cream) (recipe below), or a rich chocolate pudding (chocolate pastry cream) (make it using 1/4 - 1/2 cup less milk for a bit thicker pudding). 

Crème Patissiere (Vanilla Pastry Cream): 

In a medium saucepan (avoid non-stick coated pans), heat over medium heat until just boiling: 
2 1/2 cup half & half OR whole milk
1/3 - 1/2 cup sugar
2 tsp vanilla bean paste OR vanilla extract
1/4 - 1/2 tsp salt

In a small bowl, mix together: 
1/4 cup cornstarch
4 egg yolks
1/4 cup half & half OR whole milk

Whisk the yolks/cornstarch mixture into the hot sugar/cream mixture.  Increase the heat to medium-high to speed up the process, but whisk constantly and rapidly.  Once the mixture thickens and starts to boil (I find it makes big, thick popping bubbles when done, and I quickly have to remove from heat to avoid getting burned), remove from heat and pour the pudding into a glass dish.  *If you find you have any lumps in your pudding, you can strain the pudding through a fine sieve to remove lumps as you put it into the glass dish. I find if I am trying to multi-task and forget to stir enough then this sometimes happens to me.*  

Cover the pudding with plastic wrap pressed directly on the surface of the pudding.  Let cool at room temperature until it's cool enough to place in the refrigerator to completely chill.  (I like to make this in the morning if I need it chilled by evening, or you can make it the day before.  If you're in a rush, you can place the bowl into a larger bowl of ice to speed the cooling process). 

Choux Pastry (Pate a Choux):

Preheat oven to 360 F.  (I find somewhere between 350 - 375 works perfectly).  Line a baking sheet with parchment paper.  

In a medium sized saucepan (I prefer to avoid non-stick coated pans), heat the following over medium heat just until starting to boil: 
1 1/4 cup water
1/2 cup salted butter
1 tsp sugar
1/4 - 1/2 tsp salt

Remove from heat and stir in quickly with a wooden spoon: 

Put the pot back on the heat and stir vigorously over the heat for 2 - 3 minutes.  It should smooth a bit during this time.  (I do find the bottom of the pot ends up coated with a thin layer of dough, but soaking the pot makes clean up easy)
Be prepared for an arm workout during this step.  The dough is thick and sticky. 

Remove from heat and place the dough into a mixer.  Turn on the mixer speed to low.  Let the dough mix for ~5-10 minutes, scraping occasionally.  Your dough should look nice and shiny and be quite thick.  This helps the dough cool before adding your eggs.  

Add to the dough (one at a time ideally, or just all together if you lack patience - the main thing is to let the dough beat until it's really nice and smooth): 
4 large eggs, room temperature

You want to let the dough mix on medium to medium-high speed until it's really nice and smooth, scraping occasionally.  Scoop the dough into two freezer ziplocs one inside the other (not absolutely necessary, but it's quite a thick dough and I find this helps avoid having a bag split while piping).  Snip ~1" from the corner of the bag.  
After scraping down the bowl.  It's hard to tell in a photo, but there's a glossy sheen to the dough.

Pipe small blobs onto a parchment-lined baking pan.  You can make these smaller or larger, depending on your preference.  They puff up during baking, so make sure they're spaced far enough apart from each other.  If desired, you can dip a finger in water to gently push down and smooth the tops of the choux pastry.  Use sparingly - you don't want them to be too wet on top. 

If desired, beat 1 egg and brush the tops of the choux pastry before baking.  If you don't brush the tops with beaten egg, they don't end up as dark golden browned during baking.  I've done it both ways - and it's really just a look thing.  I think the golden brown you get from the egg wash is lovely.  Bake at 360 F for 20 - 35 minutes, until the cream puffs are nicely browned.  I find smaller cream puffs need only 20 minutes, but the larger ones need significantly more time until they're puffed and golden brown.  *Yes, 360 F.  I find 350 too low and 375 too high.  If your oven runs cool then bake at 375 F.* 

These cream puffs were baked without being brushed with an egg wash, so they ended up paler, but are just as crispy on the outside and soft on the inside as the ones brushed with egg. 

Remove from oven and immediately poke a hole in the bottom with a sharp knife before placing on a cooling rack.  This helps steam escape, so the cream puffs won't collapse on themselves.  It also makes it easier to pipe in filling later, if you're wanting to pipe it in neatly.  

Once cool, fill cream puffs with filling of your choice - some people even prefer them filled whipped cream instead of a vanilla or chocolate pastry cream.  Whatever you prefer is great! To fill, it's neatest to pipe in the pastry cream from the bottom of each choux pastry using a long nosed metal piping tip.  However, I tend to aim for speed, so slicing the choux 1/2 or 3/4 through and piping the filling in from the side works well for me.  

These can be decorated with powdered sugar, or drizzled with a homemade chocolate ganache or homemade caramel sauce, like the one I used in my Paris-Brest Pastry recipe before serving.  Once the cream puffs are filled, store them in the refrigerator until serving.  Enjoy! 
Filled with chocolate pastry cream and topped with homemade caramel sauce. Yum! 


Cream Puffs Recipe by Successfully Gluten Free! 

Saturday, 3 October 2020

Paris-Brest Pastry filled with Creme Patissiere & Homemade Caramel Sauce

Amazing eclair dough piped in a large ring, filled with homemade creme patissier and caramel sauce.  It was absolutely amazingly delicious.  A stunning dessert.  My youngest brother has a tendency to "suggest" dessert ideas to me - knowing I almost always will create them.  This was his birthday request and it did not disappoint. Enjoy! 
A decadent dessert - but light and airy all at the same time. 
A slice of Paris-Brest pastry - delicious creme patissiere and caramel filling. Yum! 

Paris-Brest Pastry with Creme Patissiere & Homemade Caramel Sauce

Creme Patissiere (Pastry Cream): 

In a medium saucepan (avoid non-stick coated pans), heat over medium heat until just boiling: 
2 1/2 cup half & half OR whole milk
1/3 - 1/2 cup sugar
2 tsp vanilla bean paste OR vanilla extract
1/4 - 1/2 tsp salt

In a small bowl, mix together: 
1/4 cup cornstarch
4 egg yolks
1/4 cup half & half OR whole milk

Whisk the yolks/cornstarch mixture into the hot sugar/cream mixture.  Increase the heat to medium-high to speed up the process, but whisk constantly and rapidly.  Once the mixture thickens and starts to boil (I find it makes big, thick popping bubbles when done, and I quickly have to remove from heat to avoid getting burned), remove from heat and pour the pudding into a glass dish.  Cover the pudding with plastic wrap pressed directly on the surface of the pudding.  Let cool at room temperature until it's cool enough to place in the refrigerator to completely chill.  (I like to make this in the morning if I need it chilled by evening, or you can make it the day before). 

Homemade Caramel Sauce:

This makes twice as much as you'll need for this dish, so make half the recipe if you don't want extra caramel sauce. 

Butter an 8" x  8" glass dish and set aside on a cooling rack. 

In a medium-large saucepan (avoid non-stick coated pans) place the following, mixing just a tiny bit and very gently: 
4 Tbsp butter
1 1/2 c heavy/whole cream
2 cups white sugar
1/3 cup corn syrup
generous pinch or two of salt

Use a candy thermometer to keep track of the temperature.  Heat until 225 F.  
Immediately remove from heat and add: 
1 1/2 tsp vanilla bean paste

Pour the caramel into your prepared pan.  Let cool on the cooling rack until you need to use it.  Prior to using, mix the caramel around with a spoon.  Any extra caramel can be stored in the refrigerator in a covered glass container once cool.  Gently reheat before serving.      

Choux Pastry (Pate a Choux):

Preheat oven to 360 F.  (I find somewhere between 350 - 375 works perfectly).  Line a baking sheet with parchment paper.  

In a medium sized saucepan (avoid non-stick coated pans), heat the following over medium heat just til starting to boil: 
1 1/4 cup water
1/2 cup salted butter
1 tsp sugar
1/4 - 1/2 tsp salt

Remove from heat and stir in quickly with a wooden spoon: 

Put the pot back on the heat and stir vigorously over the heat for 2 - 3 minutes.  It should smooth during this time.  

Remove from heat and place the dough into a mixer.  Turn on the mixer speed to low.  Let it mix for ~5-10 minutes, scraping occasionally.  Your dough should look nice and shiny and be quite thick.  

Add to the dough (one at a time or just all together): 
4 large eggs, room temperature

You want to let the dough mix on medium to medium-high speed until it's nice and smooth, scraping occasionally.  Scoop the dough into two freezer ziplocs (not absolutely necessary, but it's quite a thick dough and I find this helps avoid having a bag split while piping).  Snip ~1" - 1 1/2" from the corner of the bag.  

Using approximately 1/3 of the batter, pipe a large circle onto the parchment-lined paper.  Pipe a second circle just outside (or inside) of your first circle with the next 1/3 of the batter.  Using the last 1/3 of the batter, pipe a third circle on top of the first two circles.  
Two rings piped with approximately 2/3 of the batter. 
A final ring piped on top.  You can smooth it with just a little water on your fingers, if desired. 

Brush the top of your pastry with: 
1 egg, beaten

And sprinkle the top with: 
Sparkling sugar OR sliced almonds
We have nut allergies around here, so after brushing with egg I topped with coarse sugar crystals.  They end up looking beautiful.  However, you can top with slice almonds after adding the egg, if you prefer. 

Immediately bake at 360 F for 50 - 55 minutes.  Remove from the oven and carefully slide your pastry onto a cooling rack.  Have a friend help hold the cooling rack up in the air and quickly poke 7-8 holes in the bottom of your pastry.  Poke a few holes around the edges of the pastry where you plan to slice it in half once cooled.  *Choux Pastry does best if you give the hot air somewhere it can release so the pastry doesn't collapse on itself while cooling.* 
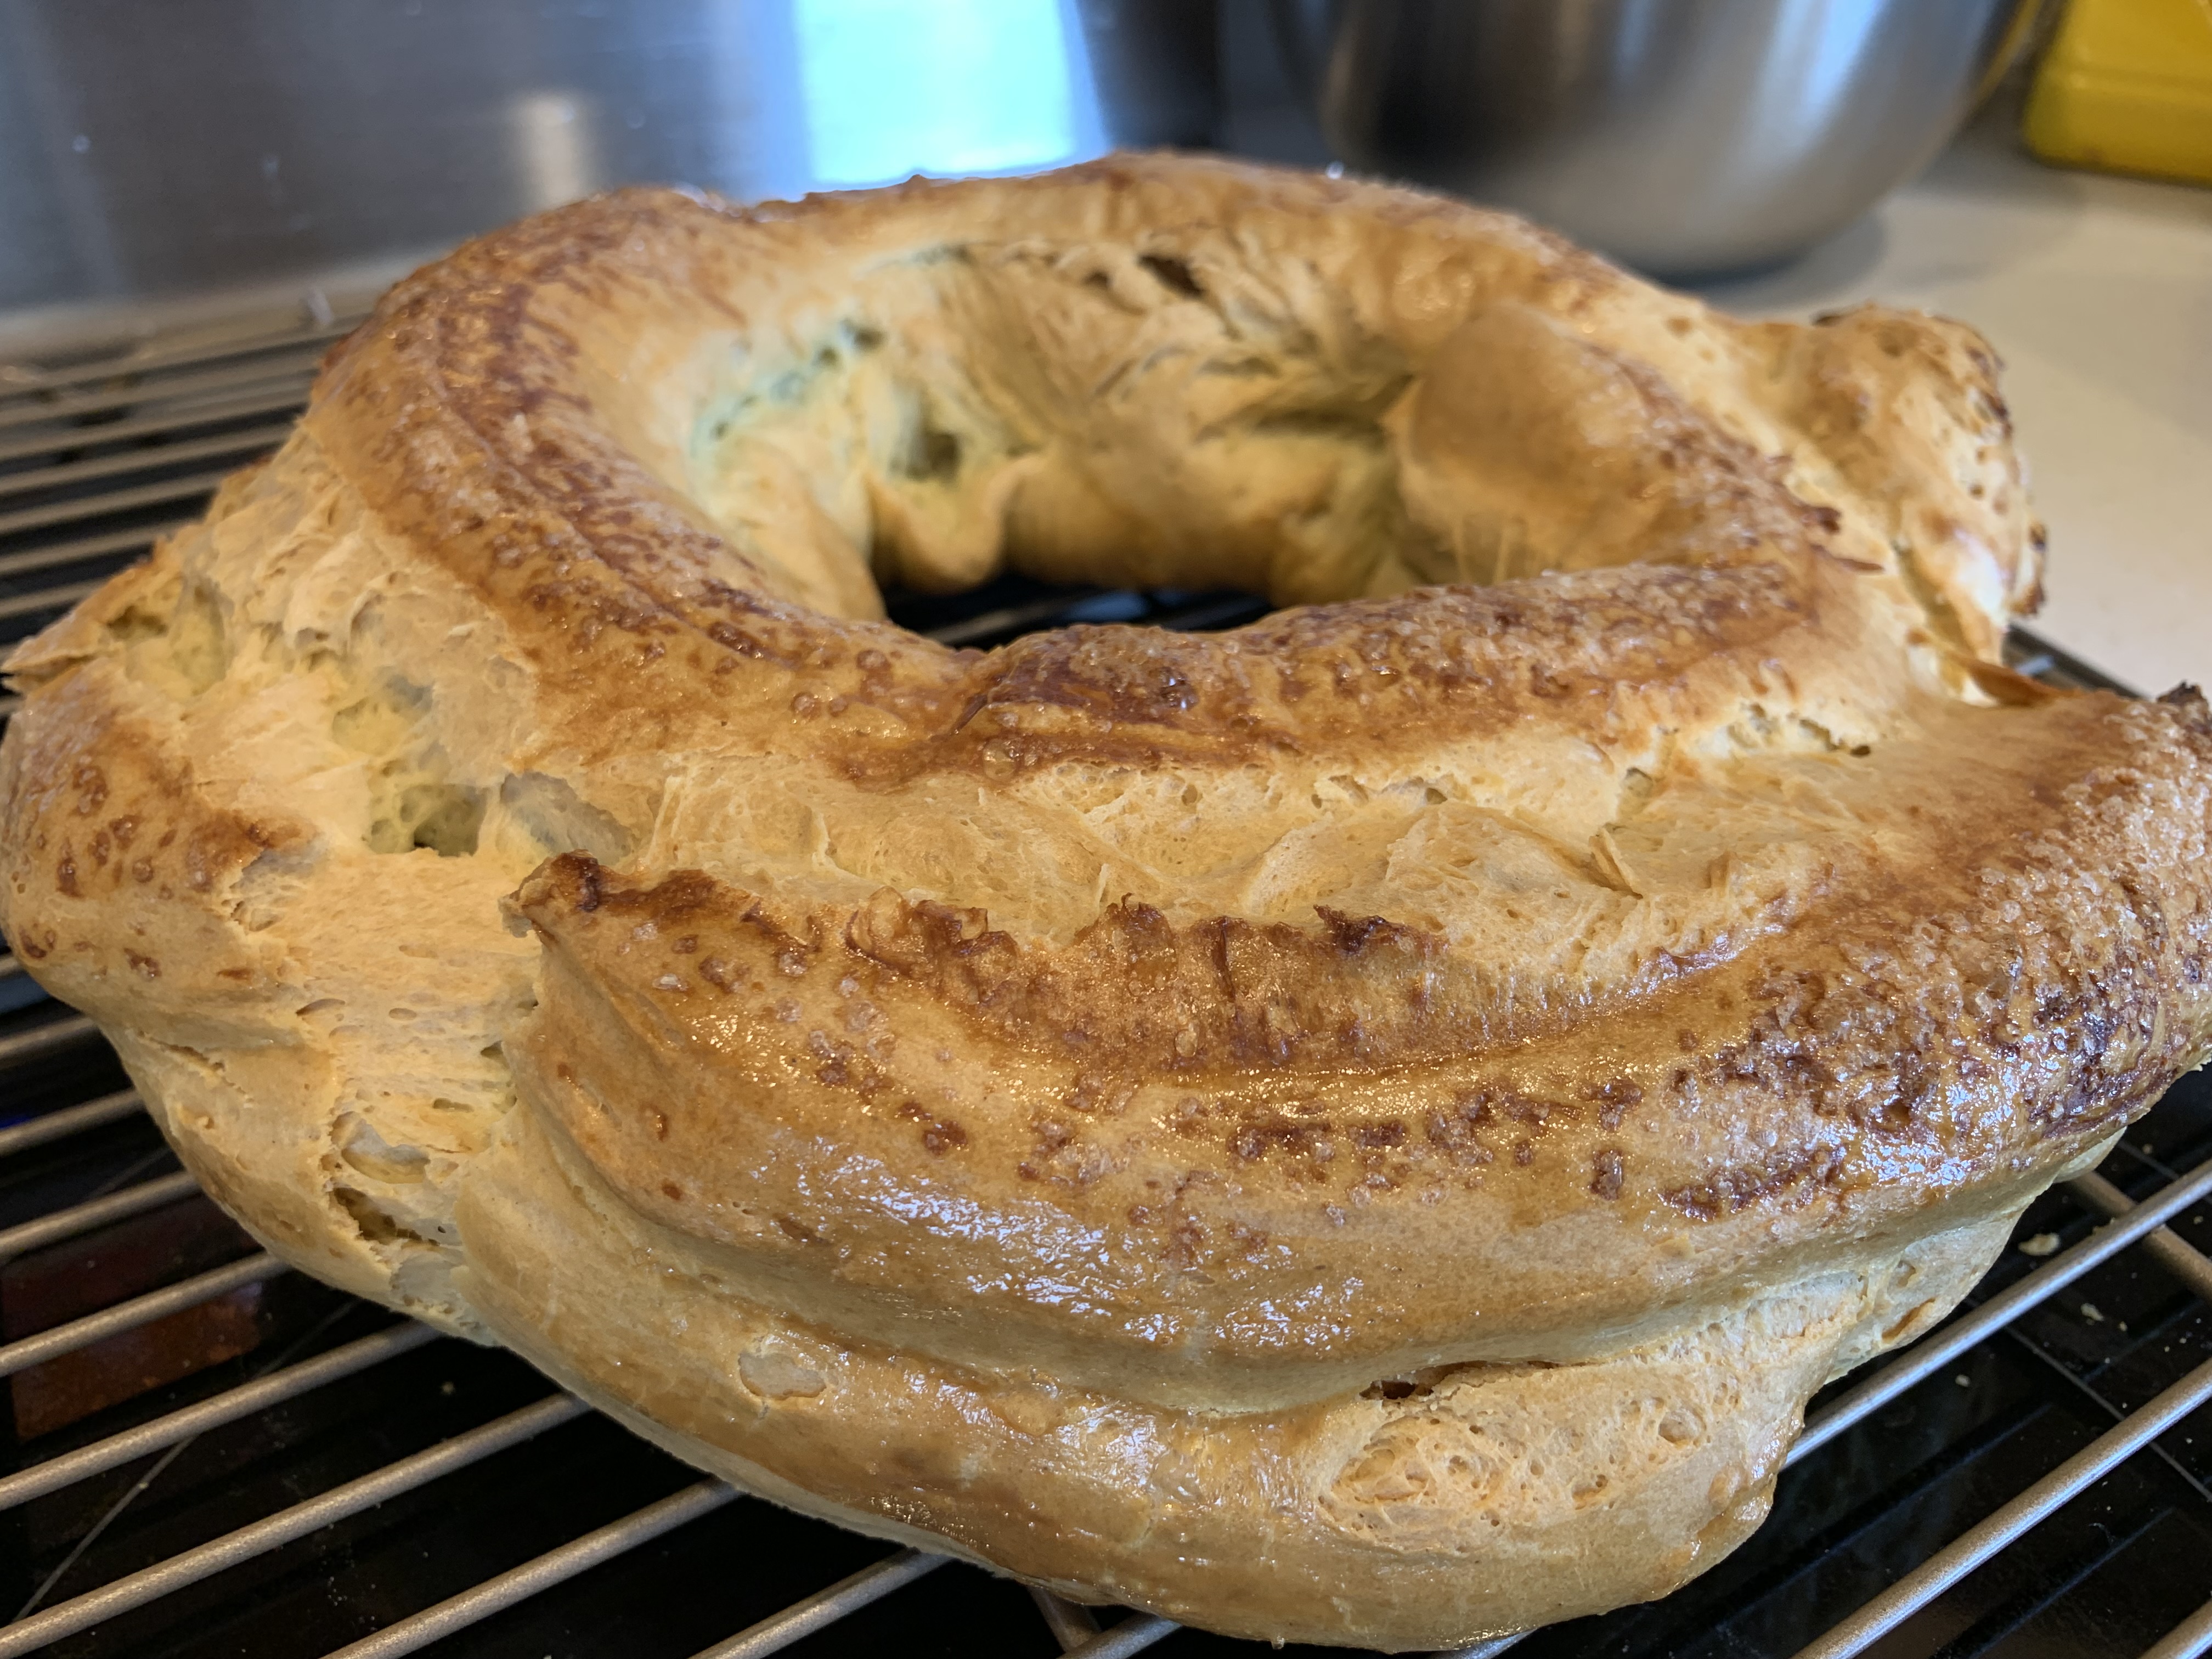
Fresh from the oven - make sure to immediately slice air holes in sides and bottom to allow steam to escape. 
I found it's easiest to get holes in the bottom by having someone hold the paris brest pastry up on a cooling rack and slicing little slivers from underneath. 


Assembling your Paris-Brest Pastry
Once your creme patissiere, caramel sauce, and choux pastry have fully cooled,you're ready to assemble your Paris-Brest Pastry! 

Carefully slice the Choux Pastry in half horizontally using a sharp bread knife.  Set the top to the side.  Place the bottom half of the choux pastry on the serving platter.   

Scoop your homemade Creme Patissiere (Pastry Cream) in a large freezer ziploc.  Cut the corner and pipe onto the bottom half of the pastry, ideally in a nice zigzag pattern.  
Filled with creme patissiere - pipe it as you prefer, but I liked the look this gives once the top is put on.

Generously drizzle the Caramel Sauce on top of the Creme Patissiere.  
A drizzle of homemade caramel sauce. Yum!

Place the top of the pastry back on, and dust generously with powdered sugar.   Drizzle the top with more homemade caramel sauce and serve!   


If you need to assemble in advance, keep refrigerated until serving - ideally assemble no more than a few hours before serving for the best results.  Although, leftovers a day after still tasted delicious and so you could potentially assemble it longer in advance, if necessary. 

Slice with a serated knife to serve.  SO delicious.  Enjoy!  
Happy Birthday Ben! Excellent choice of desserts! 
A slice of deliciousness. 
Served outside on a beautiful day. 
And another, just for fun. 
It was just stunning.  And delicious. Mmmmm... 

Paris-Brest Pastry filled with Creme Patissiere & Homemade Caramel Sauce by Successfully Gluten Free! 

Monday, 20 April 2020

Ginger Rice Pudding

The fresh ginger root added to this recipe makes a lighter, more refreshing dessert.  We've enjoyed it several times, and I love it because I can just make 2 cups of rice and use half the rice for this pudding and the rest for whatever dinner we happen to be having that evening.  I based it on a ginger & raisin pudding recipe on the side of a bag of jasmine rice, then modified it to my preferences. Yum! Enjoy!
Ginger Rice Pudding Gluten Free
Fresh Ginger Rice Pudding - yum!

Ginger Rice Pudding

In a medium pot, combine the following: 
1 cup white jasmine rice, well rinsed
1 1/2 cup water
pinch salt

Bring to a boil over high heat.  Stir once.  Immediately put on a lid and lower heat to between low and medium-low.  Simmer rice for 20 minutes.  Turn off heat and let rest 15 minutes. 

In the same pot, or in a new medium-sized pot, combine the following: 
cooked rice, from above (should be about 3 cups cooked)
2 1/4 cups coconut milk (for a richer pudding, you can use a mixture of 1 1/2 cups coconut milk, 1/2 cup milk, 1/4 cup cream OR use canned coconut milk, which is richer)
3 - 4 Tbsp white sugar
2 tsp fresh grated ginger (I have this frozen and it also works perfectly)
pinch salt

Cook over medium heat, stirring regularly, until your pudding bubbles and thickens.  This usually takes about 20 minutes.  

Remove from heat and stir in: 
1/2 tsp vanilla bean paste (OR vanilla extract)

Great served while hot, but this is also nice chilled.  Refrigerate leftovers in a bowl with plastic wrap tightly pressed to the surface. 


Ginger Rice Pudding Recipe by Successfully Gluten Free!

Monday, 28 January 2019

Small Pearl Tapioca Pudding

Tapioca pudding is a wonderful and easy pudding-style treat that everyone enjoys around here.  I like to use a mixture of canned coconut milk, regular coconut milk and lactose-free whole milk, but I've made it with all sorts of varieties of milks.  It's great warm and chilled. Enjoy!
A serving of small pearl tapioca pudding - enjoyed in my house by ages 4 to 87! 

Small Pearl Tapioca Pudding - gluten free!

Set tapioca pearls to soak either overnight to make tapioca in the morning or in the morning to make your tapioca at night by doing the following:

In a 2 cup measuring cup, combine and soak 8-24 hours:
1/2 cup small pearl tapioca 
1 1/2 - 1 3/4 cup water - to make 2 cups

In a saucepan mix together:
2 1/2 cups milk (using a combination of canned coconut milk and other milk varieties works great)
1/3 cup sugar
1 egg
1/4 - 1/2 tsp salt
1/4 tsp cinnamon (optional - it will give it more of a rice pudding flavor if you use it)
soaked tapioca pearls, drained and rinsed thoroughly


Tapioca cooking over medium heat - make sure to mix regularly or you'll end up with tapioca sticking/burning on the bottom of your pan! 

Bring to a boil over medium heat, stirring regularly.  Once tapioca comes to a boil, let thicken for a minute.  Remove from heat and add:
1 tsp vanilla extract or vanilla bean paste

Serve warm or put in a bowl with plastic wrap tight to the surface to cool.  Refrigerate once tapioca isn't piping hot.  Tapioca will thicken more as it cools.  Enjoy!

Gluten Free Small Pearl Tapioca Pudding Recipe by Successfully Gluten Free!

Thursday, 1 December 2016

Rich & Creamy Homemade Chocolate Pudding!!!

I've always preferred homemade pudding to any other type.  Chocolate pudding, while delicious, can be a bit temperamental compared to making vanilla pudding.  This method, where you add hot, but not yet boiling, milk to the eggs before adding them to the pot works perfectly to any lumpiness.  The result is a delicious, creamy pudding.  If you are a fan of pots de chocolats, you may enjoy making this with a light cream instead of milk.  I find the taste of your cocoa powder will completely change the taste of your final pudding.  I vary what I use depending on my mood, sometimes a dark, rich cocoa powder, other times a light, mild one.  If you use one that is a bit more on the bitter side, this recipe will need an extra 1/4 cup of sugar.  Enjoy!
Homemade GF Chocolate Pudding
Homemade GF Rich and Creamy Chocolate Pudding. Yum! 

Rich & Creamy Homemade Chocolate Pudding!!!
Makes ~ 6 servings

In a separate small bowl, whisk together until smooth.  Set aside to add in later:
4 egg yolks
1/4 cup milk
1/4 cup cornstarch

Whisk together in a medium-size saucepan:
1/2 cup sugar
1/4 cup cocoa powder (some cocoa powders are naturally sweeter, some are more bitter - you can use a little extra sugar if necessary)
1/2 tsp salt
pinch cinnamon (optional)

Add and whisk the following into the sugar/cocoa mixture:
2 3/4 cup milk (higher percentage of fat is best - you can even use a combination of 10% cream and milk for a really rich pudding)

Stir milk/cocoa mixture regularly while heating over medium heat until mixture almost comes to a boil **you don't want it to be at a boil, just very hot because you'll add a bit to the eggs and if it is boiling, you'll curdle the eggs a bit** 

Using your mixture of "almost" boiling hot chocolate milk, whisk 1/4 cup milk into your egg yolk mixture.  Add an additional 1/4 cup milk, whisking in.  Add a final 1/4 cup milk, whisking in.  This allows your eggs to heat up a bit slower, so you don't end up with lumps in your pudding.

Add egg mixture back into the pot.  Stirring constantly, mix until mixture comes to a boil and begins to bubble and thicken.  Keep on heat no more than 1 minute after mixture has begin boiling.

Remove from heat and add:
1/2 - 1 tsp vanilla extract or bean paste (optional)
Homemade chocolate pudding - just off the heat. 
Put immediately into desired cups or bowls.  Cover with plastic wrap (make sure plastic wrap is on the surface of the pudding to avoid any 'skin' being formed on top of your pudding).  Let cool.  Great hot, warm or chilled.  Enjoy! 

Homemade GF Chocolate Pudding

Monday, 21 December 2015

Eggnog Pudding (lactose-free option!)

This pudding is rich and delicious in flavor.  I served small cups of this pudding topped with a fresh gingerbread cookie decorated with icing to look like a snowflake at my brothers gluten-free wedding reception.  In hindsight, I should have made more because these delicacies went quickly once people tasted them.   The cookies were made by scooping and baking small cookies from my gingerbread house recipe, frosted with the royal icing from that recipe.  Served up on a gold platter in clear glasses, and they looked wedding-ready!  These are also absolutely delicious served with my chewy gingersnap cookies!  Enjoy!

Eggnog Pudding - Lactose and Gluten Free!
Eggnog pudding served up with homemade gingerbread cookies! Yum!

Eggnog Pudding
Makes ~2 1/2 cups pudding (Yes! You can double this recipe if you're serving a crowd.)

TWO methods for cooking: 

Method 1: 
In a medium saucepan, bring to a boil over medium-low to medium heat, stirring regularly with a whisk:
2 cups eggnog (lactose-free eggnog works!)
1/3 cup sugar
1/2 tsp salt
1/4 tsp nutmeg

In a small bowl, whisk together:
1/4 cup eggnog
3 egg yolks
3 Tbsp cornstarch

Once mixture has come to a boil, whisk in the egg yolk/cornstarch mixture.  Let mixture return to a boil for 1 minute, whisking constantly.  The pudding should thicken up nicely.

Remove from heat and add:
1 tsp vanilla extract

Place pudding in a bowl and cover tightly with plastic wrap to avoid a film forming on top.  Let cool a bit and then let cool completely in the refrigerator.

***Depending on the eggnog used in this recipe, you may find lumps forming.  Some eggnogs, like lactose-free versions, use thickener, like guar gum, within the eggnog, which can thicken into tiny lumps within your pudding.  No problem!  Just strain the pudding through a sieve (using a spoon to press it through) before serving to remove any lumps.

Method 2: 
In a medium saucepan, whisk together:
3 Tbsp cornstarch
1/3 cup sugar
1/2 tsp salt
1/4 tsp nutmeg

Whisk into dry ingredients:
2 - 2 1/4 cup eggnog
3 egg yolks

Whisking constantly (you can pause every so often, but you never want the bottom of the pan to heat too quickly), cook pudding over medium-low heat.   Once the pudding has warmed through, and is starting to get hotter, you can increase the heat a bit, but don't go hotter than medium heat or you can curdle your eggs.  Be patient! You don't want your pudding to cook too quickly.
Stir constantly until your pudding has thickened and is just starting to bubble.

Remove from heat and immediately stir in:
1 tsp vanilla extract

Place pudding in a bowl and cover tightly with plastic wrap to avoid a film forming on top.  Let cool a bit and then let cool completely in the refrigerator.

***Depending on the eggnog used in this recipe, you may find lumps forming (although I have not found that to be the case with Method 2, because of the slow and steady cooking).  Some eggnogs, like lactose-free versions, use thickener, like guar gum, within the eggnog, which can thicken into tiny lumps within your pudding.  No problem!  Just strain the pudding through a sieve (using a spoon to press it through) before serving to remove any lumps.

Great served with gingerbread cookies or chewy gingersnap cookies.  Enjoy!
 Extra gingerbread cookies, topped with snowflakes, served up nicely on a platter once all the eggnog pudding was gone. 

Thursday, 9 January 2014

Coconut Rice Pudding

This is a delicious and easy rice pudding to whip together.  Everyone loves it at my house - and it's great warm or cooled.  We find it's a nice snack to have in the refrigerator whenever someone wants a quick and filling snack.  Enjoy!
If you look closely, you can see tiny flakes of vanilla bean - I find using vanilla bean paste in place of vanilla extract in recipes like this really makes the flavor pop. 

Coconut Rice Pudding

Makes 6-8 servings (approximately - it kind of depends how much each person wants, since this is a rich pudding)

In a medium saucepan mix the following:
1/2 cup jasmine rice, rinsed thoroughly (or your pudding will thicken too quickly!)
1 cup 2% milk (lactose-free works well)
1 cup heavy/whipping cream (lactose-free works well)
1 can coconut milk

Bring to a boil over high heat, stirring occasionally.  Lower heat and simmer, uncovered for 30-40 minutes, stirring occasionally, until pudding thickens.

Once pudding is thickness you prefer, add and mix in the following:
1/4 - 1/3 cup sugar
1/2 tsp vanilla bean paste OR vanilla extract

Continue cooking for 5 minutes over low heat.  Remove from heat and put into bowls for serving or one larger bowl.  Great warm or cooled.  You can let this pudding cool uncovered.   Store in the refrigerator once it's cooled a bit.

To turn this into more of a Caribbean coconut pudding, add shredded or flaked coconut and raisins, if desired, when serving.

Enjoy!

Coconut Rice Pudding Recipe by Successfully Gluten Free!

Wednesday, 30 October 2013

Chocolate & Vanilla Parfaits (Halloween-style)

I loved the idea of using vanilla pudding layered with chocolate cookies for a fun, easy holiday parfait.  However, most recipes suggest using 'store-bought chocolate cookies' which I didn't want to do.  I came up with a less sweet chocolate chocolate chip cookie to use in combination with my homemade vanilla pudding in order to create a delicious and fun parfait.  You could easily make these in a more classy (black and white parfait instead of our festive green, orange and black version). 
This is a vanilla pudding/chocolate chip cookie parfait, despite the coloring.  And, yes, I plan to create a mint variety of these parfaits, since the green 'Halloween' version just screams to be turned into a lovely mint parfait.

Chocolate & Vanilla Parfaits
Enough to serve 4-8, depending on the size of your cups/parfaits

Make 1 batch of Kristin's Homemade Vanilla Pudding

To color pudding, if desired, separate into bowls and add liquid food coloring, as desired. 
Here, I split the pudding in half and used 3 drops green for the green pudding and 3 drops yellow + 1 drop red for the orange pudding. 
Top with plastic wrap and let fully cool.


Make 1 batch Chocolate Chocolate Chip cookies.  Let cool, crumble and layer carefully in glasses as desired. (Small, narrow juice glasses work really well here)
Our festive Halloween dessert.  It was a hit!

Enjoy!!!