Search for a Recipe

Tuesday 27 September 2016

Homemade Gluten-Free Thin Mint Cookies!

Delicious homemade thin mint cookies that are also gluten-free!  Yes, you can!  These are so easy to whip together, very similar to my sugar cookie recipe.    We have loved making these cookies, then freezing and crushing to add into homemade ice cream to making thin-mint ice cream.  It's been a favorite.  My 5 year old helped make and decorate these cookies, and we were all thrilled with the end result.  Enjoy!
gluten free thin mint cookies
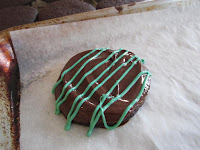
Homemade gluten-free thin mint cookies, ready for sampling! 
gluten free thin mint cookies
A happy little girl with her thin mint cookies! 

Homemade Gluten-Free Thin Mint Cookies!
Makes ~32 cookies

Preheat oven to 375 F.  Line cookie sheets with parchment paper or silicon baking mats.

In a bowl, mix: (it's important to mix dry ingredients first in GF baking to avoid clumping)
1/2 cup cocoa powder
1 cup Kristin's Gluten Free Flour Mix
1/2 tsp baking soda
1/2 tsp cream of tartar

In a mixer, beat until light and creamy: (a few minutes)
1/2 cup butter, softened
3/4 cup powdered sugar

Add and mix in:
1 egg yolk
1/2 tsp vanilla extract
3-4 drops peppermint essential oil*

Add and mix in flour/cocoa mixture.  Mix until dough holds together nicely, scraping sides of bowl regularly.

Place 1-2 teaspoon-sized scoops onto parchment paper-lined pan.  With plastic wrap or a plastic bag over your hand, flatten each scoop of dough.

Bake cookies at 375 F for 6-8 minutes. (6 for softer cookies, 8 for crispier cookies).  Let cookies cool completely on a cooling rack.  

In a bowl, melt at 50% power in your microwave: 
1 1/2 cups semi-sweet chocolate chips

Add to chocolate: 
A touch of peppermint oil (add by dipping a toothpick into the peppermint oil, so you add less than 1 drop)
1 tsp light olive oil, only if melted chocolate is too thick to dip (Often chocolate chips when melted are a bit too thick to dip in, so this can help without affecting flavor). 

Dip cookies in melted semi-sweet chocolate with just a touch of peppermint oil added OR you can use the back of a spoon to spread chocolate on the tops and bottoms of the cookie (we found this was a great way for little hands to dip the cookies in chocolate with ease).  

You can either decorate as described below, or chill in the refrigerator until chocolate has hardened for plain chocolate-covered thin mint cookies.  Enjoy!  

To decorate:
Sprinkle cookies with crushed peppermint OR add stripes or swirls of melted green mint chips (I find I need to add 1-2 tsp oil for 1/2 cup melted chips, again melted slowly at 50% power in the microwave). 

My 5 year old helped dip and decorate the cookies, she even piped on the green mint onto many of them, then swirled it with a toothpick.  
gluten free thin mint cookies
Dipping and swirling her first thin mint cookie. 
gluten free thin mint cookies gluten free thin mint cookies
Pipe on zigzags of melted green mint chips, then swirl with a toothpick for a fun design! 
decorating gluten free thin mint cookies
One happy chocolatier!  

Chill thin-mint cookies in the refrigerator until chocolate has set.  These store well at room temperature.  We love to freeze leftovers, then crush them to add to homemade ice cream!


* I really like the Doterra peppermint oil.  It has a lovely taste while cooking.  My friend Christine has an online shop where you can order food grade essential oils. 

Tuesday 20 September 2016

Rich and Flavorful Chicken Broth with Fennel

This hearty chicken broth is very flavorful, thanks to the addition of fennel tops - it's tasty enough to eat just as a broth if someone is sick, or to add sauteed vegetables and rice to quickly turn it into a soup.  Use in your favorite soup, chicken pot pie, or risotto recipes.  Broth just doesn't look great in pictures - at least not from what I can tell - so no pictures.  Enjoy!

Chicken Broth w/ Fennel

After roasting your chicken and removing/eating the meat, place chicken carcass plus roasted skin in a large pot.  Cover with water, just barely. (I find this fills 1/2 my large pot typically).

Add to pot:
fennel tops (the nice green dill-like stems that grow from the fennel bulb)
2 carrots, coarsely chopped
5-6 coarsely diced green onions (tops & bottoms)
1 tsp ground pepper
1 Tbsp salt

Bring to a boil.  Lower heat, cover and simmer for 2 hours.   Cool for ~20 minutes off the heat.  Strain and store or use, as desired.

Wednesday 14 September 2016

Buckwheat Waffles! Gluten & Dairy-free!

This is a light and crispy waffle with a hearty flavor.  Perfect for adding blueberries into the batter, too!  We also love these with homemade jam slathered on top.   I find you don't even need maple syrup because there's already some added into the batter.  The recipe can easily be doubled or tripled to feed a crowd.  Cool your leftovers on a cooling rack, bag and freeze for easy breakfasts you can reheat in the toaster! Enjoy!
Buckwheat Waffles - gluten free and dairy free
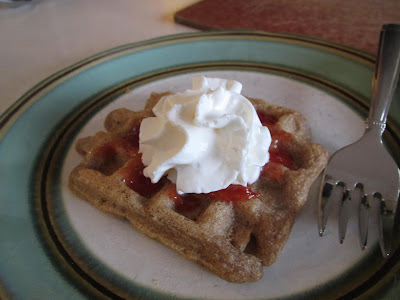
Fresh gluten and dairy-free Buckwheat Waffle topped with homemade strawberry-mango jam and whipped cream. Yum! 

Buckwheat Waffles
Makes ~18 pancakes

Preheat waffle iron.

Mix together dry ingredients in a large bowl: (It's important to mix dry ingredients first in gluten-free cooking).
1/3 cup brown rice flour
1/3 cup potato starch
1/3 cup white rice flour
1/3 cup tapioca starch
1/4 cup buckwheat flour
1/4 tsp xanthan gum
4 - 5 tsp baking powder
1/2 tsp salt
1 tsp cinnamon

Add and stir just until combined:
1 1/4 cup water
5 Tbsp oil
2 Tbsp maple syrup

Let batter rest ~5 minutes before cooking.  Cook waffles on lightly buttered waffle iron until desired crispiness is achieved.

For extra deliciousness, add:
1/2 - 1 cup fresh blueberries
GF Buckwheat WafflesGF Buckwheat Waffles
Waffles before and after cooking. Yum! 

Place on wire racks after cooking to avoid waffles getting soggy. (This also makes it easy for waffles to cool nicely so extras can be frozen!  Frozen waffles reheat perfectly in the toaster oven.)

Serve with toppings, as desired.  Some ones we like are: maple syrup, homemade strawberry-mango jam, whipped cream, butter.  Enjoy!  

Thursday 8 September 2016

Pumpkin Bagels made with REAL pumpkin!

Fall and pumpkins are starting to arrive!  What a great way to combine two of my favorite foods. Anyone who knows me knows I love bagels.  I've posted eleven bagel posts so far. This pumpkin bagel recipe will make a dozen, and one more, which is sure to come, will make a proper baker's dozen.   This recipe works best for making small-sized bagels, because of the combination of fresh pumpkin with the other ingredients.  They're great with a pumpkin pie cream cheese (recipe below), too.  Enjoy the fresh fall pumpkin by making up your own pumpkin puree, or use 100% canned pumpkin in this recipe.
I also include a list of all my pumpkin recipes linked from the pumpkin puree & pumpkin seeds post. Enjoy!

Gluten Free Pumpkin Bagels
Fresh gluten-free pumpkin bagels, ready to eat!
Gluten Free Pumpkin Bagels with Pumpkin Pie Spice Cream Cheese
Pumpkin Bagel with Spiced Pumpkin Cream Cheese (below)
Pumpkin Bagels made with REAL pumpkin (cream cheese recipe follows)
Makes 8 - 12 bagels (depending on size you make them)

Preheat oven to 350F.  Line two baking sheets with parchment paper or silicon mats.

Mix dry ingredients in a mixer:
1 1/2 cup brown rice flour
1 1/2 cup tapioca starch
1/2 cup potato starch
1/4 cup brown sugar
2 tsp quick/rapid-rise yeast
2 1/2 tsp xanthan gum
2 tsp cinnamon
1 tsp baking powder (optional, but I find it really helps the rise)
1 tsp salt

Add and beat mixture for 4 minutes (it will look crumbly initially, and then hold itself nicely together after it mixes a couple minutes): 
1 cup 100% pumpkin puree (canned or fresh)
3 eggs
4 Tbsp oil
1 tsp apple cider vinegar

*** This dough will be a lot thicker than my ordinary bagel recipe, but resist the temptation to add more liquid.  The pumpkin puree adds quite a bit of water to the dough, and if you add extra water the bagels will flatten while cooling.***

Use wet hands, form plum sized balls and then make a hole in the center.  You can use extra water to smooth these nicely.  Depending on the consistency of my pumpkin (some are wetter, some thicker), I've sometimes been able to pipe these into large bagels.  It's easiest to just form by hand wetting hands between each bagel.  
Gluten Free Pumpkin Bagels before rising
Let bagels rise 30-40 minutes in a warm location.  You can place an upside down cookie sheet on top of your cookie sheet to help them while rising. (I put mine on top of the oven).
Gluten Free Pumpkin Bagels after rising
Bake at 350F for 20-28 minutes (depending on size).
Gluten Free Pumpkin Bagels after baking
Cool on a cooling rack.  These are great hot fresh, or toasted with pumpkin pie cream cheese (below).  Slice and freeze any extras.  They reheat perfectly in a toaster oven.  Enjoy!

Pumpkin Pie Cream Cheese
You can adjust the spices to your personal taste.  Either use pumpkin pie spice, or a little of the spices listed here plus the brown sugar and pumpkin puree.
Mix together:
1/2 container cream cheese (~4 oz.)
3-4 Tbsp 100% pumpkin puree (canned or fresh)
2 Tbsp brown sugar
1/2 tsp cinnamon
pinch nutmeg
pinch cloves
pinch allspice
pinch ginger