Search for a Recipe

Tuesday 30 April 2013

Chocolate Marshmallow Fluff Frosting

I do love marshmallow fluff frosting.  I'm not really a fan of any other kind, actually. It's just so light and fluffy.  But sometimes it's nice to have a bit of chocolate frosting as well, and this works nicely for those times when you don't want a heavy chocolate frosting (like whipped chocolate ganache), but a lighter one.

For these, I just used the Betty Crocker GF yellow cake mix. I don't like the Betty Crocker GF chocolate cake mix, but the yellow is nice, especially paired with chocolate marshmallow frosting! Oh, and my son put on the sprinkles - hence the copious amounts of them on each cupcake.

Chocolate Marshmallow Fluff Frosting

Beat:
1 cup butter
Add by ½ cups the following:
½ cup cocoa powder
1 ½ - 2 cups powdered sugar
Add:
1 – 2  tsp. vanilla
Add:
1 - 2 cups (8 - 16 oz) marshmallow fluff (2 cups = fluffiest icing)

Allow frosting to beat 2-3 minutes, scraping occasionally, until nice and smooth and fluffy.  Depending on whether I'm spreading with a knife or piping onto something, I add more/less powdered sugar, vanilla and/or fluff. You'll have to play around, but it'll be delicious with any/all variations of amount!
You can spread with a knife, scoop into a ziploc and snip the corner and pipe, or put in a proper icing bag with tips and use like you would buttercream frosting. 

Is she not adorable!? This was her first birthday... and first look at a proper cupcake, slathered in sprinkles.

Veggie Quiche w/ Hearty Buttermilk Biscuit Crust

This is a great all-in-one meal that packs a lot of veggies and gets fiber and protein into your diet as well!  Whenever I find myself making a delicious veggie pizza, I always end up with leftover peppers, mushrooms and onions.  What I find is if you chop up your veggies and layer them together in a tupperware, they'll stay fresh in the fridge for several days and you can whip up this recipe later in the week (or make this first and the pizza later).  It's a fun, easy recipe that tastes delicious warm or cold. Enjoy!  
Yes, I made two. There's a broccoli bacon quiche in the background. What can I say, we love them!
 
Veggie Quiche w/ Buttermilk Biscuit Crust

Makes 4-6 servings
 
Heat oven to 400F - 425F.  Get yourself out a pie pan.
 
I tend to make a full batch of buttermilk biscuits and use half for the crust and just cook the other half as biscuits.  But, if you just want to make the quiche, mix the crust as in the recipe below. In this case, it's nice to use the recipe below with the modifications, because it makes a heartier crust.
 
First, we’ll prepare the veggie filling:

Heat 1 Tbsp olive oil in large saucepan over medium heat.
 
Add and sauté 5-6 minutes:
¼ - ½ cup green bell pepper
¼ - ½ cup yellow bell pepper
¼ - ½ cup orange bell pepper
3-4 mushrooms, diced
1 small red onion, diced
½ tsp salt
¼ - ½ tsp pepper
½ tsp dried oregano
½ tsp ground coriander
Veggies ready to cook.

Set veggies aside and prepare the rest of the quiche.

To ready the crust:
 
First, make your buttermilk (or just use ¼ cup buttermilk)
In a measuring cup place:
1 ½ tsp lemon juice OR white vinegar
Fill so you have total of:
¼ cup milk
 
Mix in a bowl:
¼ cup brown rice flour
¼ cup tapioca starch
2 Tbsp cornstarch OR corn flour (not cornmeal) for a heartier crust
2 Tbsp potato starch
1 Tbsp flaxseed meal (optional, but a nice addition in a veggie quiche)
1/8 tsp xanthan gum
¾ tsp sugar
1 tsp baking powder
¼ tsp salt
pinch of baking soda
 
Add and dice in with a pastry cutter:
2 ½ Tbsp butter
 
Add and mix with a spoon, just until combined:
¼ cup buttermilk (from above)
 
Press biscuit dough gently into pie pan.  If the batter is sticky, put a tiny bit of water on your fingertips to help.


Spread on the bottom of the biscuit crust:
3-5 slices herb Havarti cheese (or similar)


On top of cheese put:
Cooked veggies
 
Mix together in a separate bowl:
4-6 eggs (4 cooks faster, but you’ll have a smaller quiche, I prefer 6 myself)
1/3 - ½ cup milk (lactose free works great)
Salt
Pepper (be generous)
 
Pour egg mixture carefully and evenly over the top of the bacon.   Pop in the oven!
This quiche had 4 eggs and 1/3 cup milk. It still puffs up and over the veggies once cooked.
 
Bake 10 min at 400-425F. Lower heat to 350F and cook 20-25 minutes more, until center is set (doesn’t jiggle when you gently shake the pan).
Remove from oven. Let cool 10-15 minutes before cutting.  Great warm or cold!   Enjoy!

Monday 29 April 2013

Kristin's Favorite Marshmallow Fluff Frosting

This is, by far, my favorite frosting in the whole wide world.  It's light and creamy, with a delicious marshmallow flavor that is perfect with cupcakes, cakes or whoopie pies. There are many similar versions, but I've found this works the best.   I'll have to get the chocolate version of it up here at some point, which, too, was delicious!   A mint marshmallow fluff frosting option is included below.

Gluten Free Marshmallow Fluff Frosting
This was my speedy piping where I pop it into a ziploc, snip the end, and pipe swirls onto the cupcake. They're imperfect, but absolutely delicious!

Marshmallow Fluff Frosting
Beat:
1 cup butter
Add by ½ cups the following:
2 – 2 ½ cups powdered sugar  - Note: to be able to pipe frosting more easily, use 2 ½ cups.
Add:
1 – 2  tsp. vanilla
optional mint flavor: Add 1 (or 2) drops peppermint essential oil OR crush peppermint candies, to taste
Add:
1 - 2 cups (8 - 16 oz) marshmallow fluff (2 cups = fluffiest icing)

Allow frosting to beat 2-3 minutes, scraping occasionally, until nice and smooth and fluffy.  You can color as desired using food coloring.
You can spread with a knife, scoop into a ziploc and snip the corner and pipe, or put in a proper icing bag with tips and use like you would buttercream frosting. 

Gluten Free Marshmallow Fluff Frosting
Easy swirled icing.  I used a half recipe for 12 cupcakes in this case, using less frosting overall.

Mini Spongecakes (Great for Strawberry Shortcake)

I needed to create a low-sugar spongecake for my mom, and here it is! Everyone has their own opinion of what spongecake, particularly for strawberry shortcake should taste like.  I enjoy strawberry shortcake made with either biscuits or cake.  The main this is that your cake isn't too sweet, because the berries bring that all on their own.  The great thing about this recipe is that it's nice and moist, fluffy, and not too sweet.  Perfect for strawberry shortcake.  Or, you can frost and use them like cupcakes or just pop on some jam for a quick dessert.  They've gotten two thumbs up from the family and friends who have tried them.  Enjoy!
They went so quickly, I only managed to get a picture of one before they were eaten.

Mini Spongecakes (Great for Strawberry Shortcake)
(These aren’t really sweet all on their own, but when served with fresh berries, jam, or topped with frosting, they’re great!)
Set oven at 375F.  Line 6-8 muffin cups with paper liners.
Mix the following in a bowl:
¼ cup coconut flour
¼ cup white rice flour (this helps them be lighter in texture, but brown rice flour works as well)
¼ tsp salt
¼ tsp baking soda
¼ tsp stevia powder (This is a natural sweetener that is quite strong, so you only need a little. If you don’t have it available or want to use it, you can just use ½ cup honey and no water, or ¼ cup agave + ¼ cup honey and no water)
Add and whisk until smooth:
¼ cup honey
¼ cup water
¼ cup oil (extra light olive oil works) OR ¼ cup melted butter (butter makes a more dense cupcake)
Add and whisk in:
3 eggs
Pour into 6-8 muffin cups. Fill ~ 2/3 full.   Bake in oven ~15 minutes, until lightly browned around edges. 
Let cool.
There are a few different serving options:
  1. Serve with sliced strawberries & whipped cream.
  2. Serve with jam & whipped cream.
  3. Serve with frosting, like a cupcake.   
Enjoy!
A jam-filled spongecake with ample whipped cream on top (as requested my my son). 
Whip Creamed Strawberry Shortcake - made by my little brother.

Friday 26 April 2013

Kristin's Mini Blueberry Bagels

We love bagels!   There's nothing like re-creating some of your favorite (and longed-for) bagel flavors, especially for the little kids who may not even remember enjoying a delicious blueberry bagel.  This recipe is easy and delicious!  It's very similar to my cinnamon-raisin bagel recipe, which has also been a big hit.  Enjoy!

Mini Blueberry Bagels
Note: It’s best to make these with sweet, fresh blueberries. Depending on type of berry (and time of year), some berries are tasty, but rather bitter.  The sweeter ones work the best for flavor in this recipe because there is no sugar and only a little honey to sweeten the dough.

Line cookie sheet with silicon mat or parchment paper.
 
In a 1 cup measuring cup mix and let rest 5 minutes:
1/3 cup warm water
2 Tbsp honey
1 tsp rapid rise yeast (quick-rise yeast)
 
Add to yeast mixture:
1 egg
2 Tbsp oil
 
Set liquids aside, and mix together in a mixer:
2/3 cup tapioca starch
½ cup brown rice flour
2 Tbsp potato starch
1 ¼ tsp xanthan gum
½ tsp salt
 
Add liquids to mixer.  Mix on low, until combined.  Then mix on medium speed, scraping occasionally, for 2-3 minutes.  Batter will be nice and smooth.
 
Fold in gently:
½ cup fresh & sweet blueberries (thawed or canned & drained would be okay, but you’ll end up with very swirled/blue bagels – you’ve probably seen some like this before)
 
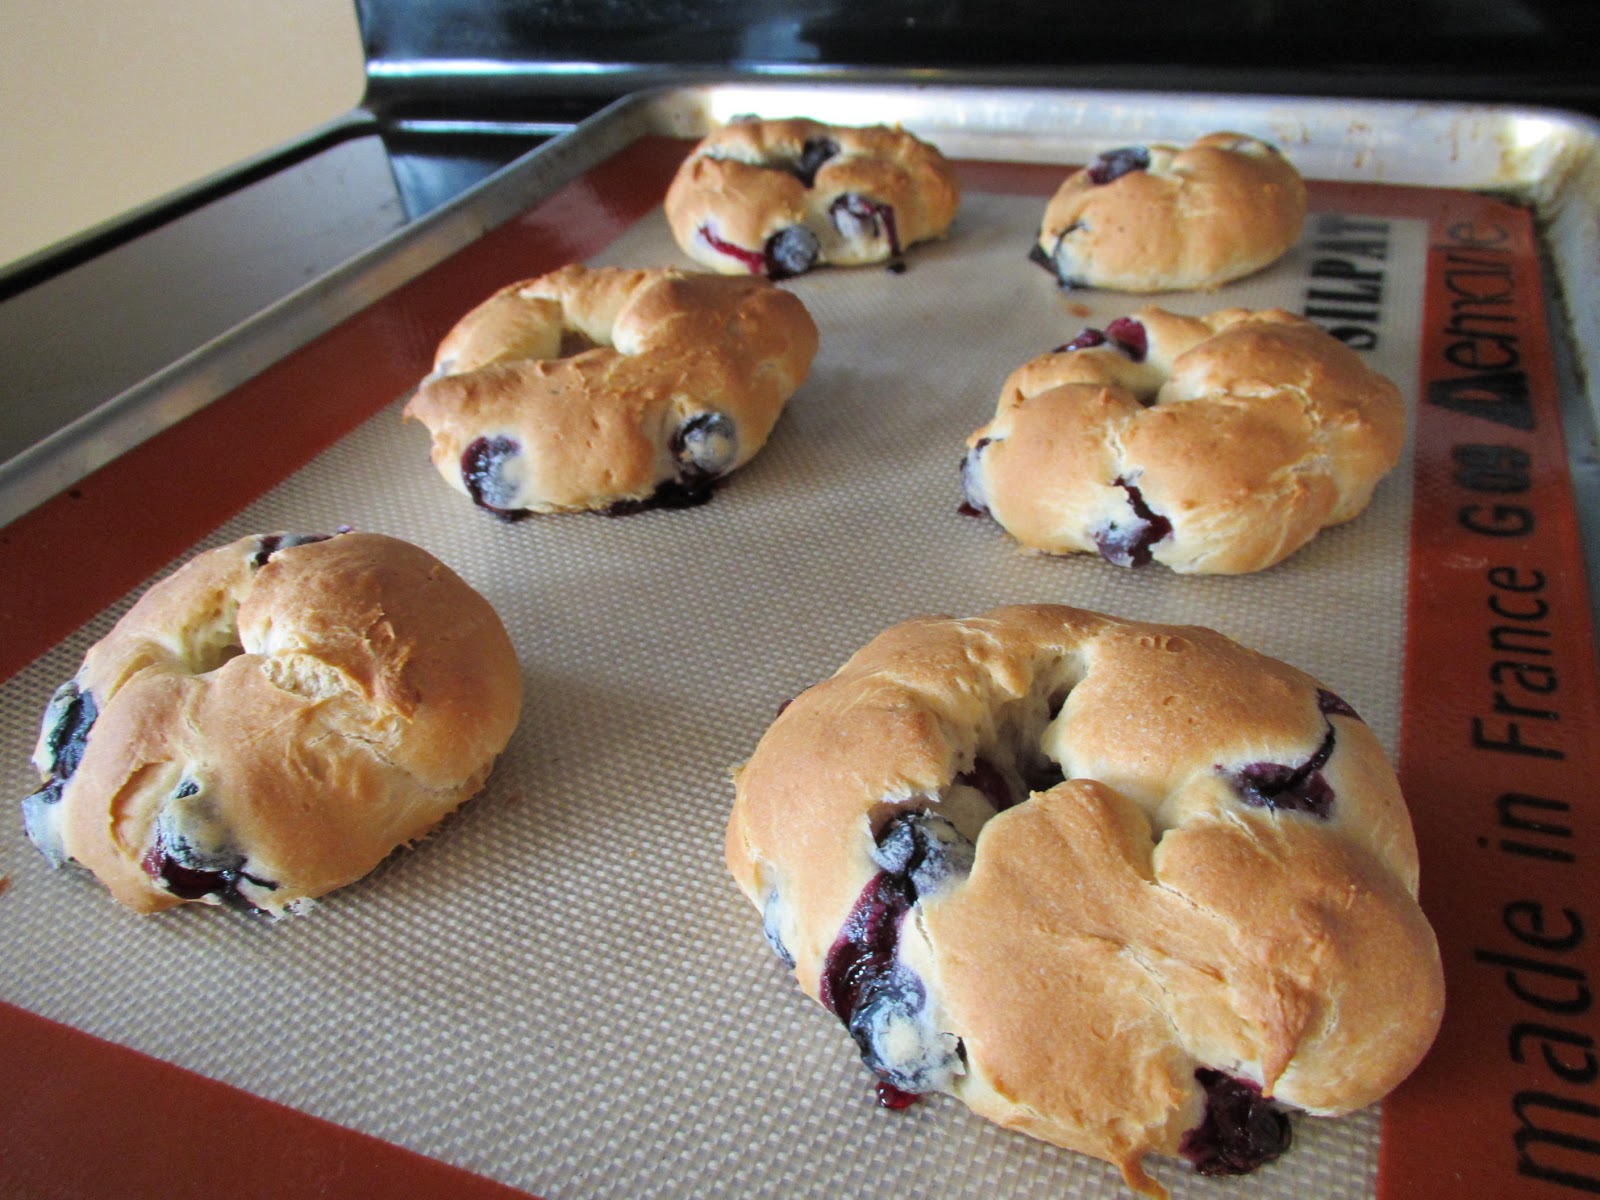
Put batter into a Ziploc (I like the freezer bags because they’re stronger).  Cut ½”- ¾” off one corner.  Pipe 7-8 mini bagels onto prepared cookie sheet, leaving big holes in the center to account for rising and puffing up during baking.  You can wet your fingers to help smooth any areas that need fixing.  (If you have large blueberries, you may find you need to cut a larger hole and can make only 6-7 bagels. This is OK, but try to make no fewer than 6 bagels or it affects the final state of the bagel)
 

Let rise in a warm location, uncovered, for 30 minutes.  They may not look like they’ve risen much, but they’ll rise more in the oven.
 
Seriously, this is the bagels after 30 minutes of sitting on top of the warm oven.  I find they look a bit smoother, but not noticeably bigger. (and I had rotated the pan a few times, so you're looking at the ones that were in the back compared to the picture above)
 

Bake at 350F for 20-25 minutes until browned.  Cool on cooling rack.  Once cooled, you can slice and freeze if you aren’t planning to eat them right away. Enjoy!
 
Fresh out of the oven! Amazing how much they rise, right!?
 
Cooled, sliced and ready for cream cheese (or whatever you enjoy on your blueberry bagel).


Kristin's Fantastic Mini Cinnamon Raisin Bagel Recipe

Bagels are such a popular snack in our house.  However, gluten-free bagels are terribly expensive and usually not that tasty.  After lots (and lots) of experimentation, I've come up with a great AND easy recipe for mini bagels!  Hooray!  These are SO awesome because you literally pipe them onto your cookie sheet using a ziploc bag.  You don't even have to cover them while they rise. Awesome! While properly boiled and baked bagels are fantastic, I think you'll find these are just as tasty. They've got a chewy inside and crispy outside. They toast up well, too!  Enjoy!!!


Mini Cinnamon Raisin Bagels
 
Line cookie sheet with silicon mat or parchment paper.
 
In a 1 cup measuring cup mix and let rest 5 minutes, until yeast mixture looks nice and frothy:
1/3 cup warm water
2 Tbsp honey
1 tsp rapid rise yeast (quick-rise yeast)
 
Add to yeast mixture:
1 egg
2 Tbsp oil
 
Set liquids aside, and mix together in a mixer:
2/3 cup tapioca starch
½ cup brown rice flour
2 Tbsp potato starch
1 ¼ tsp xanthan gum
½ tsp salt
½ tsp cinnamon
 
Add liquids to mixer.  Mix on low, until combined.  Then mix on medium speed, scraping occasionally, for 2-3 minutes.  Batter will be nice and smooth.
 
Fold in:
¼ cup raisins
 
Put batter into a Ziploc (I like the freezer bags because they’re stronger).  Cut ½”- ¾” off one corner.  Pipe 7-8 mini bagels onto prepared cookie sheet, leaving big holes in the center to account for rising and puffing up during baking.


You could go even a little bigger with the holes, but this works pretty well.
 

Let rise in a warm location for 30 minutes, uncovered! They may not look like they’ve risen much, but they’ll rise more in the oven.
 
Bake at 350F for 20-25 minutes until browned.  Cool on cooling rack.  Once cooled, you can slice and freeze if you aren’t planning to eat them right away. Enjoy!


Wednesday 24 April 2013

Oven Roasted Potato Wedges & Sweet Potato Fries


Sweet Potato Fries & Potato Wedges Ready to be Cooked! Yum!

I often make half a tray of potato wedges/half a tray of sweet potato fries.  They both cook the same amount of time, so just halve each recipe.  Note: sweet potato fries use a lot less oil than regular potatoes, so you can’t just mix them all together in one bowl.
Potato Wedges

Makes 4-6 servings
Preheat oven to 425F.  Take out a cookie sheet.  
Mix in a large bowl:
4-6 Tbsp olive oil
1 tsp salt
½ tsp pepper (optional)
One of the following spice options:
A)
½ - 1 tsp ground cumin
½ - 1 tsp ground chili powder
B)
½ - 1 tsp dried rosemary
1 tsp oregano
The oil should look nice and filled with spices. This is w/ oregano and rosemary.
Chop into wedges:
10 thin-skinned potatoes, chopped in wedges (size varies greatly, so try to make your best estimate as how many will fit on one cookie sheet when chopped into wedges)
Mix wedges in olive oil mixture until thoroughly coated.
Bake 30-40 minutes, until browned, turning once midway through cooking time.
Sweet Potato Fries

Makes 4-6 servings
Preheat oven to 425F

Mix in a large bowl:
2 Tbsp olive oil
½ - 1 tsp salt
¼ - ½ tsp pepper (optional)
One of the following spice options:
A)
½ - 1 tsp ground cumin
½ - 1 tsp ground chili powder
B)
½ - 1 tsp dried rosemary
1 tsp oregano

Peel and chop sweet potatoes into pieces.  They need to be thinner than regular potato wedges in order to crisp.
Mix sweet potatoes in olive oil until thoroughly coated. 
Place on cookie sheet.  Bake 30-40 minutes until crispy on edges, turning once midway.
Enjoy!

Crispy & Tender Roast Chicken

Another fun alternative for a roasted chicken.  It's baked on top of veggies, which can be eaten as a side dish.  The butter under the skin keeps the chicken tender and the butter on top of the skin helps make the skin nice and crispy.  Enjoy!

You can always tie the legs together, if you like, but the taste is great whatever way you bake it! This awesome chicken was made by my brother who lives 4500 miles away for the fam. It was a hit!

Crispy & Tender Roast Chicken

Preheat oven to 425F.
 
Mix the following and then place on bottom of a roasting pan (8x8, 9x13 work fine, too):
1 onion, coarsely chopped
3-4 carrots, coarsely chopped
1-2 potatoes, in wedges
½ tsp salt
½ tsp pepper
Sprigs of herb of your choice (oregano, rosemary, thyme, marjoram)
2 Tbsp olive oil
 
Prepare chicken as follows:
 
Salt & pepper the inside of your chicken before stuffing with:
2 halves of lemon
1 tsp garlic, chopped
A few sprigs of herb of your choice

Mix in a small bowl:
½ tsp salt
¼ tsp pepper
¼ tsp garlic powder
2 Tbsp butter, softened
 
Rub spices underneath skin of breast/legs as best as possible.
 
Melt an additional 2 Tbsp butter and spread over chicken.  Salt and pepper outside of chicken.
 
Put chicken on top of the vegetables in the roasting pan.
 
Roast for approx. 1 ½  hours.  Remove from oven and cover with foil for 15 minutes, until slicing and serving.
 
Enjoy!