Search for a Recipe

Showing posts with label ginger. Show all posts

Wednesday, 1 December 2021

Gingerbread (chocolate chip) Bagels

 Oh my goodness, these are SO delicious.  I've shared them with several friends now, and they all have raved over them.  The fresh ginger grated into the dough adds a wonderful extra bite to the bagels.  I even made a batch to trade for some fresh eggs with my pregnant friend since she found the fresh ginger helped her feel better.  You can make them with or without chocolate chips, as you prefer.  An absolutely delicious bagel! Enjoy!
Fresh Gingerbread Bagels - just out of the oven! 
Fresh Gingerbread Chocolate Chip Bagels - a new favorite!!!

Gingerbread (chocolate chip) Bagels

Makes ~18-24 depending on size

Line 2 baking pans with parchment paper or silicone liners.  Preheat oven to 350 F (you can wait and do this later, but I like to do it now because it helps the top of the oven become a nice, warm location for the bagels to rise).  

Combine in a 2 cup measuring cup and set aside to rest 5-10 minutes: 
1 1/4 cup warm water
1/4 cup molasses
2 Tbsp maple syrup
1 Tbsp rapid-rise/quick yeast

In a large mixer, combine the following (it's important to mix the dry ingredients first in gluten-free baking to avoid clumps): 
2 cups tapioca starch
1 1/2 cup brown rice flour
6 Tbsp potato starch
1 Tbsp xanthan gum
1 1/2 tsp salt
2 tsp fresh grated ginger
1 tsp ground ginger
2 tsp ground cinnamon
1/2 tsp ground allspice
1/4 tsp ground cloves

Once your yeast mixture is ready, add to the dry ingredients: 
yeast mixture, from above
6 Tbsp oil
3 eggs

Beat on low, then medium speed 3-4 minutes, until batter is nice and smooth.   Add and mix in, if desired: 
1/4 - 1/2 cup mini chocolate chips (optional)

Scoop the batter into a large freezer ziploc bag.  Cut off 3/4" - 1" off of a corner of the bag and pipe bagels onto prepared parchment-lined baking sheets.  You can make them as small or large as you like.  I tend to have a few oval-shaped bagels, just to make them fit.  You can use 3 baking sheets, if preferred. 

Wipe/brush the top of the bagels with warm water.  Let rise ~30 minutes until nicely puffed, but not doubled in size.  
After piping, smooth the tops with water and let rise.
Chocolate chip bagels, piped and ready to have some water smoothed on top.
They puff, but don't fully double in size.  Make sure to wet them before rising or the tops can dry out too much and inhibit the rise.

Bake at 350 F for ~25-30 minutes, until you can tell they've gotten a bit browned on the top.  It's always tricky when there is molasses in the batter, but I find they're usually done in this period of time.   Let rest a minute before moving onto cooling racks to cool.  

These gingerbread chocolate chip bagels are delicious warm.  We love them plain, or toasted with a little cream cheese.  Slice and freeze leftovers.  They reheat perfectly in a toaster oven.  Enjoy!!!
Fresh from the oven!  I let them rest on the racks a minute or two before transferring to cooling racks. 
Slicing before freezing.  These are so yummy!

Gingerbread (Chocolate Chip) Bagels Recipe by Successfully Gluten Free!  

Monday, 20 April 2020

Ginger Rice Pudding

The fresh ginger root added to this recipe makes a lighter, more refreshing dessert.  We've enjoyed it several times, and I love it because I can just make 2 cups of rice and use half the rice for this pudding and the rest for whatever dinner we happen to be having that evening.  I based it on a ginger & raisin pudding recipe on the side of a bag of jasmine rice, then modified it to my preferences. Yum! Enjoy!
Ginger Rice Pudding Gluten Free
Fresh Ginger Rice Pudding - yum!

Ginger Rice Pudding

In a medium pot, combine the following: 
1 cup white jasmine rice, well rinsed
1 1/2 cup water
pinch salt

Bring to a boil over high heat.  Stir once.  Immediately put on a lid and lower heat to between low and medium-low.  Simmer rice for 20 minutes.  Turn off heat and let rest 15 minutes. 

In the same pot, or in a new medium-sized pot, combine the following: 
cooked rice, from above (should be about 3 cups cooked)
2 1/4 cups coconut milk (for a richer pudding, you can use a mixture of 1 1/2 cups coconut milk, 1/2 cup milk, 1/4 cup cream OR use canned coconut milk, which is richer)
3 - 4 Tbsp white sugar
2 tsp fresh grated ginger (I have this frozen and it also works perfectly)
pinch salt

Cook over medium heat, stirring regularly, until your pudding bubbles and thickens.  This usually takes about 20 minutes.  

Remove from heat and stir in: 
1/2 tsp vanilla bean paste (OR vanilla extract)

Great served while hot, but this is also nice chilled.  Refrigerate leftovers in a bowl with plastic wrap tightly pressed to the surface. 


Ginger Rice Pudding Recipe by Successfully Gluten Free!

Friday, 14 June 2019

Ginger Pear Upside Down Cake

I was inspired to make several varieties of upside down cakes after watching the British Baking show with my kids.   Since discovering it years ago, I have always loved the rich flavor combination of fresh pears baked with tangy ginger.   In this case, I wanted to try to create a ginger-pear cake that really packed a lot of ginger flavor.  It was such a success, I've since made it several more times, not including the other experiments I've tried with other fruits.  A new family favorite around here! Enjoy!
A fresh Ginger Pear Upside Down Cake, ready to eat! Yum! 
A pretty slice of Ginger Pear Upside Down Cake. 

Another picture, just because it's just so visually appealing. 
Still whipping this up 5 years later... It's just as delicious!


Ginger Pear Upside Down Cake (Gluten Free)

Makes 10" - 11" diameter cake

In a 10" oven-proof skillet (*I have a nice oven-proof non-stick pan - a cast iron would work well, too), over medium-low to medium heat melt completely:
1/4 cup butter

Remove butter from heat, then add:
1/2 cup brown sugar
2 tsp ground ginger
1 tsp cinnamon
pinch cloves
2 Tbsp corn syrup (optional, but will help keep the syrup from crystallizing when cooled)

You do NOT want to let this cook or heat much at all, or you'll end up with it seizing up and turning into a lump of hard sugar you need to throw away.  Just stir off the heat to help it become nice and smoothed.
Melted butter with sugar and spices mixed in, ready to add the fresh fruit on top.

Arrange on top of syrup:
2 - 3 Bosc pears, just ripe, so they're still firm and aren't mushy, peeled and sliced ~1/4" thick (fanning them out ends up looking pretty)  *If you don't have Bosc pears - apples will work well, too.  Make sure you use a variety that is good for cooking, so it keeps its shape as it cooks.
You don't have to add the random little extra pieces, but I just love the fruit.  I've made this all pear and a mixture of pear and apple.  It's worked great both ways! 

In a large bowl, mix together with a whisk:
1 1/2 cup Kristin's Gluten-Free Flour Mix
1/2 cup brown sugar
1 tsp baking powder
1/4 tsp baking soda
1/4 tsp salt
1 tsp ground ginger
2 tsp fresh, crushed ginger (they sell this in the freezer in 1 tsp frozen cubes, which makes it easy to have on hand if you don't have any fresh ginger root)
1/2 tsp cinnamon
pinch allspice
pinch cloves

Add and whisk until smooth:
3/4 cup milk
6 Tbsp butter, melted
2 eggs
1 Tbsp molasses
1 tsp vanilla bean paste or vanilla extract

Pour/spread carefully over the pears.  Bake at 350 F 33-37 minutes, until cooked through and nicely browned on top.   Let the cake rest on a cooling rack for only 5 minutes.
Skillet in the oven, about to bake.
Fresh out of the oven. 

Working carefully and quickly, place your serving platter on the top of the pan, holding it tight against your skillet.  Flip the cake upside down onto the serving platter. 
After resting 5 minutes, it was flipped onto the serving platter. 
It smells SO good. Mmmmm... 

You can eat this right away, or let it cool and then eat.  The first time I made it, this cake did not last a day at my house, it was melt-in-the-mouth delicious.  Store any leftovers in the refrigerator.  I recommend reheating any leftovers before serving, although my son likes it best chilled. :)   Enjoy!
The cake ends up moist, with a lovely texture.  

Gluten Free Ginger Pear Upside Down Cake Recipe by Successfully Gluten Free

Monday, 17 September 2018

Apple & Ginger Sour Cream Cake

Apple season is upon us!  This is a lovely, rich cake filled with apple, ginger, and just a hint of lemon.  It's best served warm, and perfect for a chilly day. Enjoy!

GF Apple Ginger Sour Cream Cake
Gluten Free Apple and Ginger Sour Cream Cake! 

Apple & Ginger Sour Cream Cake
Based on a recipe by Donna Hay

Preheat oven to 350 F.  Line 8 x 8 pan with parchment paper.

Beat until light and fluffy:
1/2 cup butter
3/4 cup sugar
1 tsp vanilla
1 tsp grated lemon rind

Add and beat well:
1 egg

Add and mix in, just until combined:
1 1/2 cup Kristin's Gluten-Free Flour Mix
1 tsp baking powder
1/2 tsp salt
1 1/2 tsp ground ginger
1/3 cup sour cream

Spread the batter in the prepared pan.

Toss together:
2 apples, peeled and sliced thinly
2 Tbsp butter, melted
1 Tbsp honey

Layer apples on top of the batter.
Ready to bake! 
Bake at 350 F for ~55 minutes.   Cool ~ 10 minutes.  Serve warm, drizzled with extra honey, if desired.  Leftovers can be sliced and frozen or refrigerated. Just reheat to serve. Enjoy!
GF Apple Ginger Sour Cream Cake
Fresh out of the oven - drizzled with just a touch of honey

Thursday, 19 December 2013

Gingerbread House Recipe & Frosting - Gluten-Free!

Making homemade gingerbread houses lathered with frosting and an excessive amount of candy has been a family tradition for years.  It turned out to be one of those really easy recipe conversions - and I find I don't even need to bother chilling the dough to press it out in a buttered cookie sheet.  It is easier to work with if I chill the dough first, but I'm generally looking for ways to cut corners.  Either way you do it, this cooks up wonderfully tasty and nice and firm. Perfect for making sturdy gingerbread houses that can hold a great quantity of candy. There's always little extra bits that we snack on.  You can even chill, roll and cut for shaped gingerbread cookies.  I've posted my instructions for gingerbread cookies here.  Same batter, just cooked for less time.  Have fun and enjoy! 

The instructions here make mini gingerbread houses, but you can easily scale up the measurements and make one big house instead.  We love making little houses since it means everyone gets to decorate their own gingerbread house.  

Gingerbread House Recipe & Frosting (another family recipe)

Makes 3-4 small gingerbread houses - yes, you can make larger houses with this recipe.  Give the dough an extra 5 minutes of baking if you're going to make larger houses.

Gingerbread:

Butter a cookie sheet OR line it with parchment paper and butter the edges (MY Favorite way).  Preheat oven to 300F/130C.  (If you'd rather chill your dough, you can wait and preheat your oven later)

Prepare the dough as followings and chill for an hour or two (chilling dough is optional!)  I find if I work quickly I can just press it in the pan and cook right away, which saves me time - but it is easier to work with and not as sticky if you chill it first)

In a mixer, combine with a paddle attachment (not a whisk attachment!): 
2 3/4 c Kristin's Gluten-Free Flour Mix (OR  1 ½ cup brown rice flour, ½ cup corn starch, ½ cup tapioca starch, ¼ cup potato starch + 1 tsp xanthan gum – OR your favorite GF flour mix (provided it contains some xanthan gum))
1/3 cup brown sugar
3 tsp baking powder
1/2 tsp salt
1 tsp cinnamon
1 tsp ginger
1/8 tsp cloves

Add and mix in until nicely combined: 
1/2 cup oil
2/3 cup molasses
1 egg:

Press out dough on greased cookie sheet (no thicker than ½ inch) and bake for 25-30 minutes.  (You can use buttered hands to help press down if you find it sticky)

After removing the pan from the oven, place house patterns on hot gingerbread and cut immediately!  (House pattern below)

Carefully lift out pieces and cool on cake rack.   The gingerbread will be very hard when cool (if not, the pieces can be put back on the cookie sheet and baked another 5-10 minutes).  Note: the roof sections can break off if the dough is not thoroughly baked.

House pattern: make out of card stock or cardboard (I usually just cut apart a cereal box)
Roof: 3 x 2 ½ inches (cut 2)
Front: 3 x 2 ½ inches (cut roofline and door)
Back: same as front but without door
Sides: 2 x 2 ½ inches (cut 2)

Royal Icing:

Beat the following in a grease-free bowl until stiff: (If needed, add a bit more confectioner’s sugar (very slowly) until desired thickness)

3 egg whites (make sure NO yolk is in whites)
1 lb. confectioner’s sugar
½ tsp cream of tartar
1 tsp vanilla

Keep bowl covered at all times with damp cloth because this icing dries fast and becomes hard (the better to hold houses covered in candy together!)  You can pipe this frosting on, or you can just use a knife to apply (which we tend to do since we're working with little kids). Enjoy!
Candy ready for decorating!
Eating is the best part.
We love making tiny houses so everyone gets to decorate their own mini gingerbread house!

Gingerbread House Recipe & Frosting - Gluten Free! By Successfully Gluten Free!


Wednesday, 20 November 2013

Chewy Gingersnap Cookies

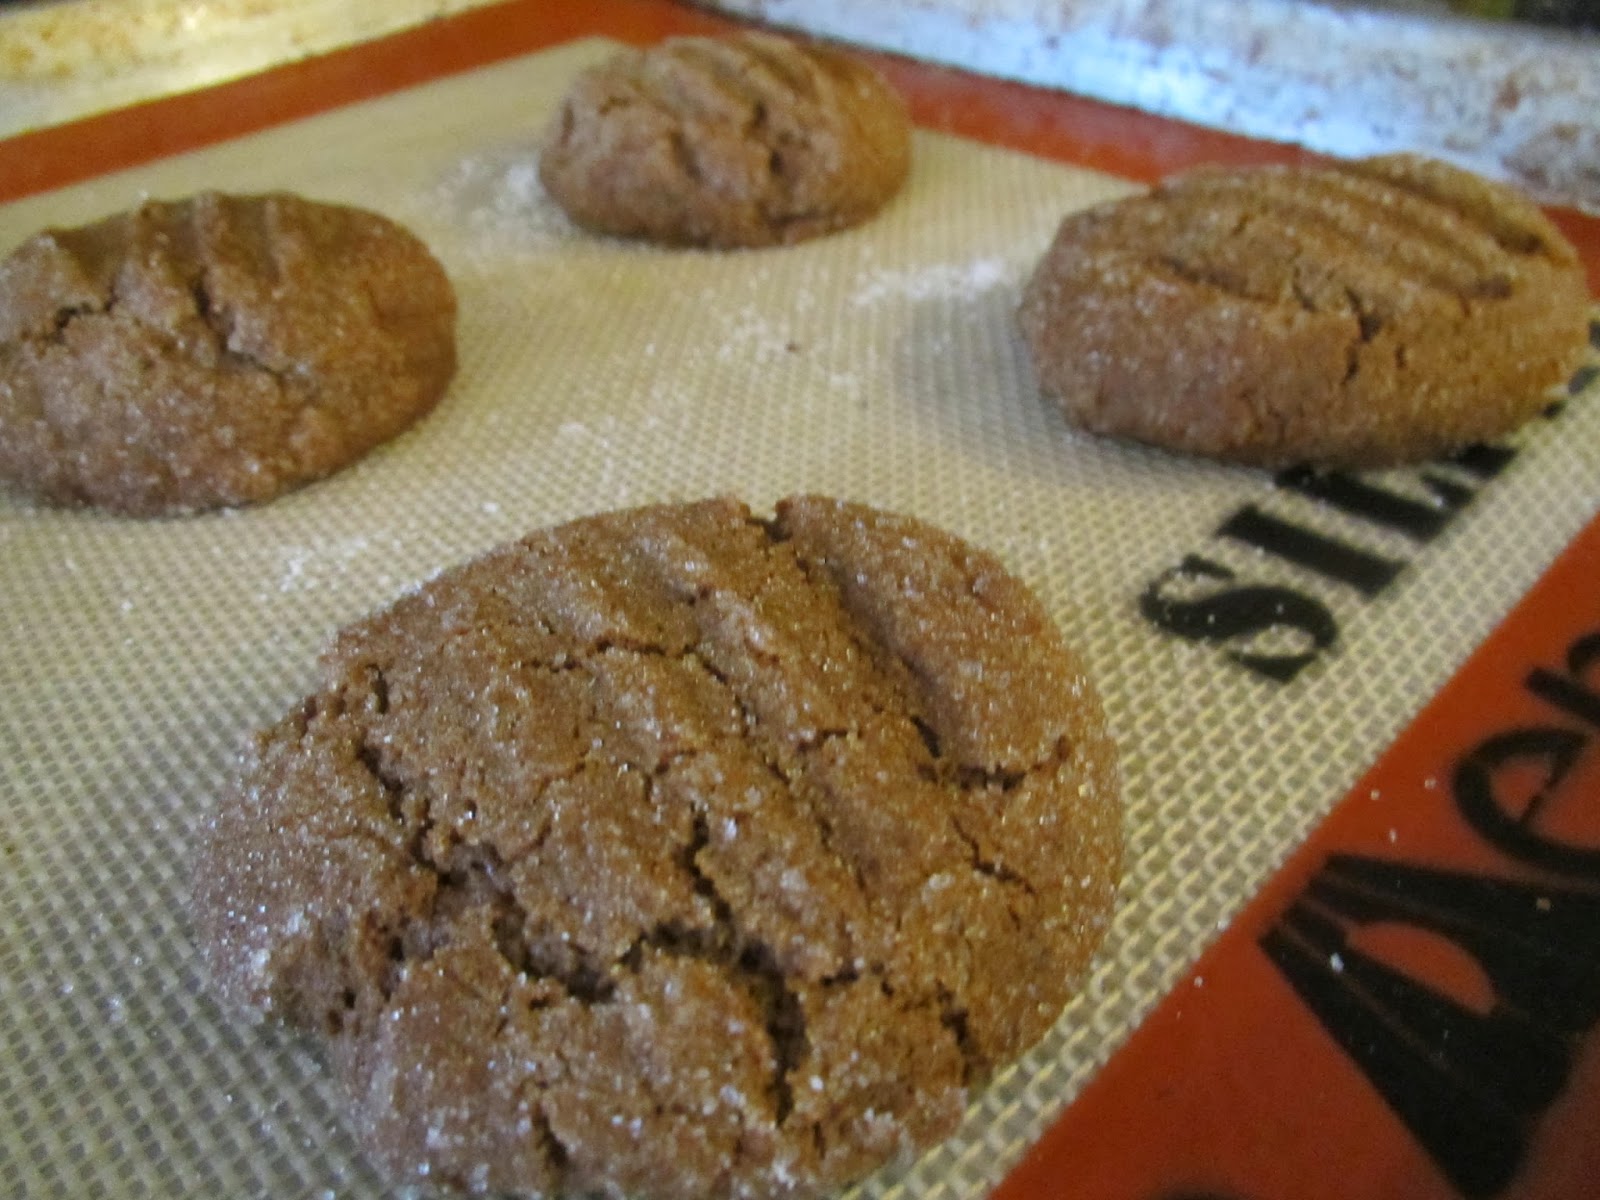
These are delicious, chewy, and puffy gingersnap cookies - perfect for the winter season.  And, the best part about them is you don't have to refrigerate the dough before you roll it in sugar and bake it!  This turned out to be a happy side-effect of turning my friend Julie's recipe into a gluten-free version of her favorite chewy gingersnap cookies.  One thing I love is converting long-loved recipes into gluten-free versions so they can still be happily enjoyed.  You can make these cookies flatter (just flatten a bit more) or keep them puffier (don't flatten as much).   Perfect for the holidays, too! Enjoy!

Julie's favorite Chewy Gingersnaps (now Gluten-Free!) fresh from the oven!

Chewy Gingersnap Cookies
Makes 48 small (1Tbsp) or 24 large (2 Tbsp) cookies

Preheat oven to 375F.  Line 2-3 cookie sheets with parchment paper or silicon lining.

In a large bowl, mix dry ingredients: (it is important to mix dry ingredients separately in GF baking to avoid clumping/uneven cooking)
1 cup white rice flour
1/2 cup brown rice flour
1/4 cup tapioca starch
1/4 cup potato starch
3/4 tsp xanthan gum
2 tsp baking soda
1/2 tsp salt
1 tsp ground cinnamon
1/2 tsp ground ginger
1/4 tsp ground cloves

Beat in a mixer until fluffy:
1/2 cup + 2-3 Tbsp brown sugar
1/2 cup butter
3-4 Tbsp oil

Add an mix in:
1/4 cup molasses
1 egg

Mix dry ingredients into wet ingredients until thoroughly combined.

Prepare a plate or bowl with white granulated sugar. 

Scoop 1 Tbsp or 2 Tbsp scoops of cookie dough into the sugar and roll until evenly coated.  Place on prepared cookie sheets.   Press lightly with a fork to flatten a bit. 

Bake at 375F 5-7 minutes for smaller cookies and 7-9 minutes for larger cookies.  (If you cook the cookies longer than this, you'll end up with crispier cookies instead of chewy ones)
1 Tbsp sized cookies pre- and post-baking.

Cool on cooling rack.  These cookies store really well in a tupperware at room temperature for several days.  We found they tasted even better the next day!
Enjoy!