This rice is so creamy and rich and delicious. It's basically a savory version of a rice pudding. Yum! My sweet friend, Haidy, served this for us when we went to their house for dinner, and we loved it. She learned how to make it from her mother-in-law - meaning tried and true. Haidy was kind enough to have me over and teach me how to make it! I took lots of notes, and then worked on figuring out measurements so it's easy to follow and bake when you don't have years of experience just eyeballing things. Technically, Haidy makes even more at a time, using ~5 cups of rice and doing things by eye, but I've played around with it to get measurements (for myself and you all) since we can't all be lucky enough to have a friend over our shoulder telling us how it should look. My family loves this new addition to our repertoire of dinner meals.
You can cover and freeze one of the pans to heat up later for another meal, which works great! Just cover it loosely with foil and place it in the oven, then turn on the heat to 350 so the pan slowly heats up as your oven does. In case you're wondering about the thin layer of yogurt spread on the top - this gives the beautiful rice brown color and crust to the top of the dish when baking. Enjoy!

A yummy serving of delicious Egyptian Rice! Yum!
Meaamar (Maamar, M'ammar, M'armer) - Creamy Egyptian Style Rice with Beef
NOTE: This recipe has ~1.5 hour prep and ~45-55 minutes baking time.
*You will start by soaking the rice (it soaks 1 hour). After 30 minutes (or sooner) you want to start cooking your beef. You'll finish soaking the rice and prepping it in the pans while your beef cooks.*
Prepping the Rice (takes ~90 minutes - start cooking your beef after 30 minutes)
Soak fully immersed in cool water, giving a little stir occasionally:
3 cups Calrose rice (Egyptian-style or sushi-style)
***About half an hour after the rice starts soaking, begin cooking the beef.***
After soaking 1 hour, drain and rinse the rice. Divide into a 9 x 13 pan and 8 x 8 pan so there are even layers of rice on the bottom. I'll include amounts to add to both pans, to avoid confusion.

After soaking & rinsing, divide between pans

It fills the pans about like this.
Add to the 8 x 8 pan, and mix in thoroughly:
1/4 - 1/3 cup mascarpone cheese
Add to the 9 x 13 pan, and mix in thoroughly:
1/2 - 2/3 cup mascarpone cheese

This is a very forgiving recipe, so you can use more or a bit less as you prefer - but I find this amount works well.

Mascarpone mixed in thoroughly. This takes some patience.
To the 8 x 8 pan, add and mix gently:
~ 160 ml / 5.5 oz heavy cream
~ 300 ml / 1 1/4 cup milk
1/4 tsp salt
To the 9 x 13 pan, add and mix gently:
~ 320 ml / 11 oz heavy cream
~600 ml / 2 1/2 cup milk
1/2 tsp salt
Let sit and soak until beef is ready.
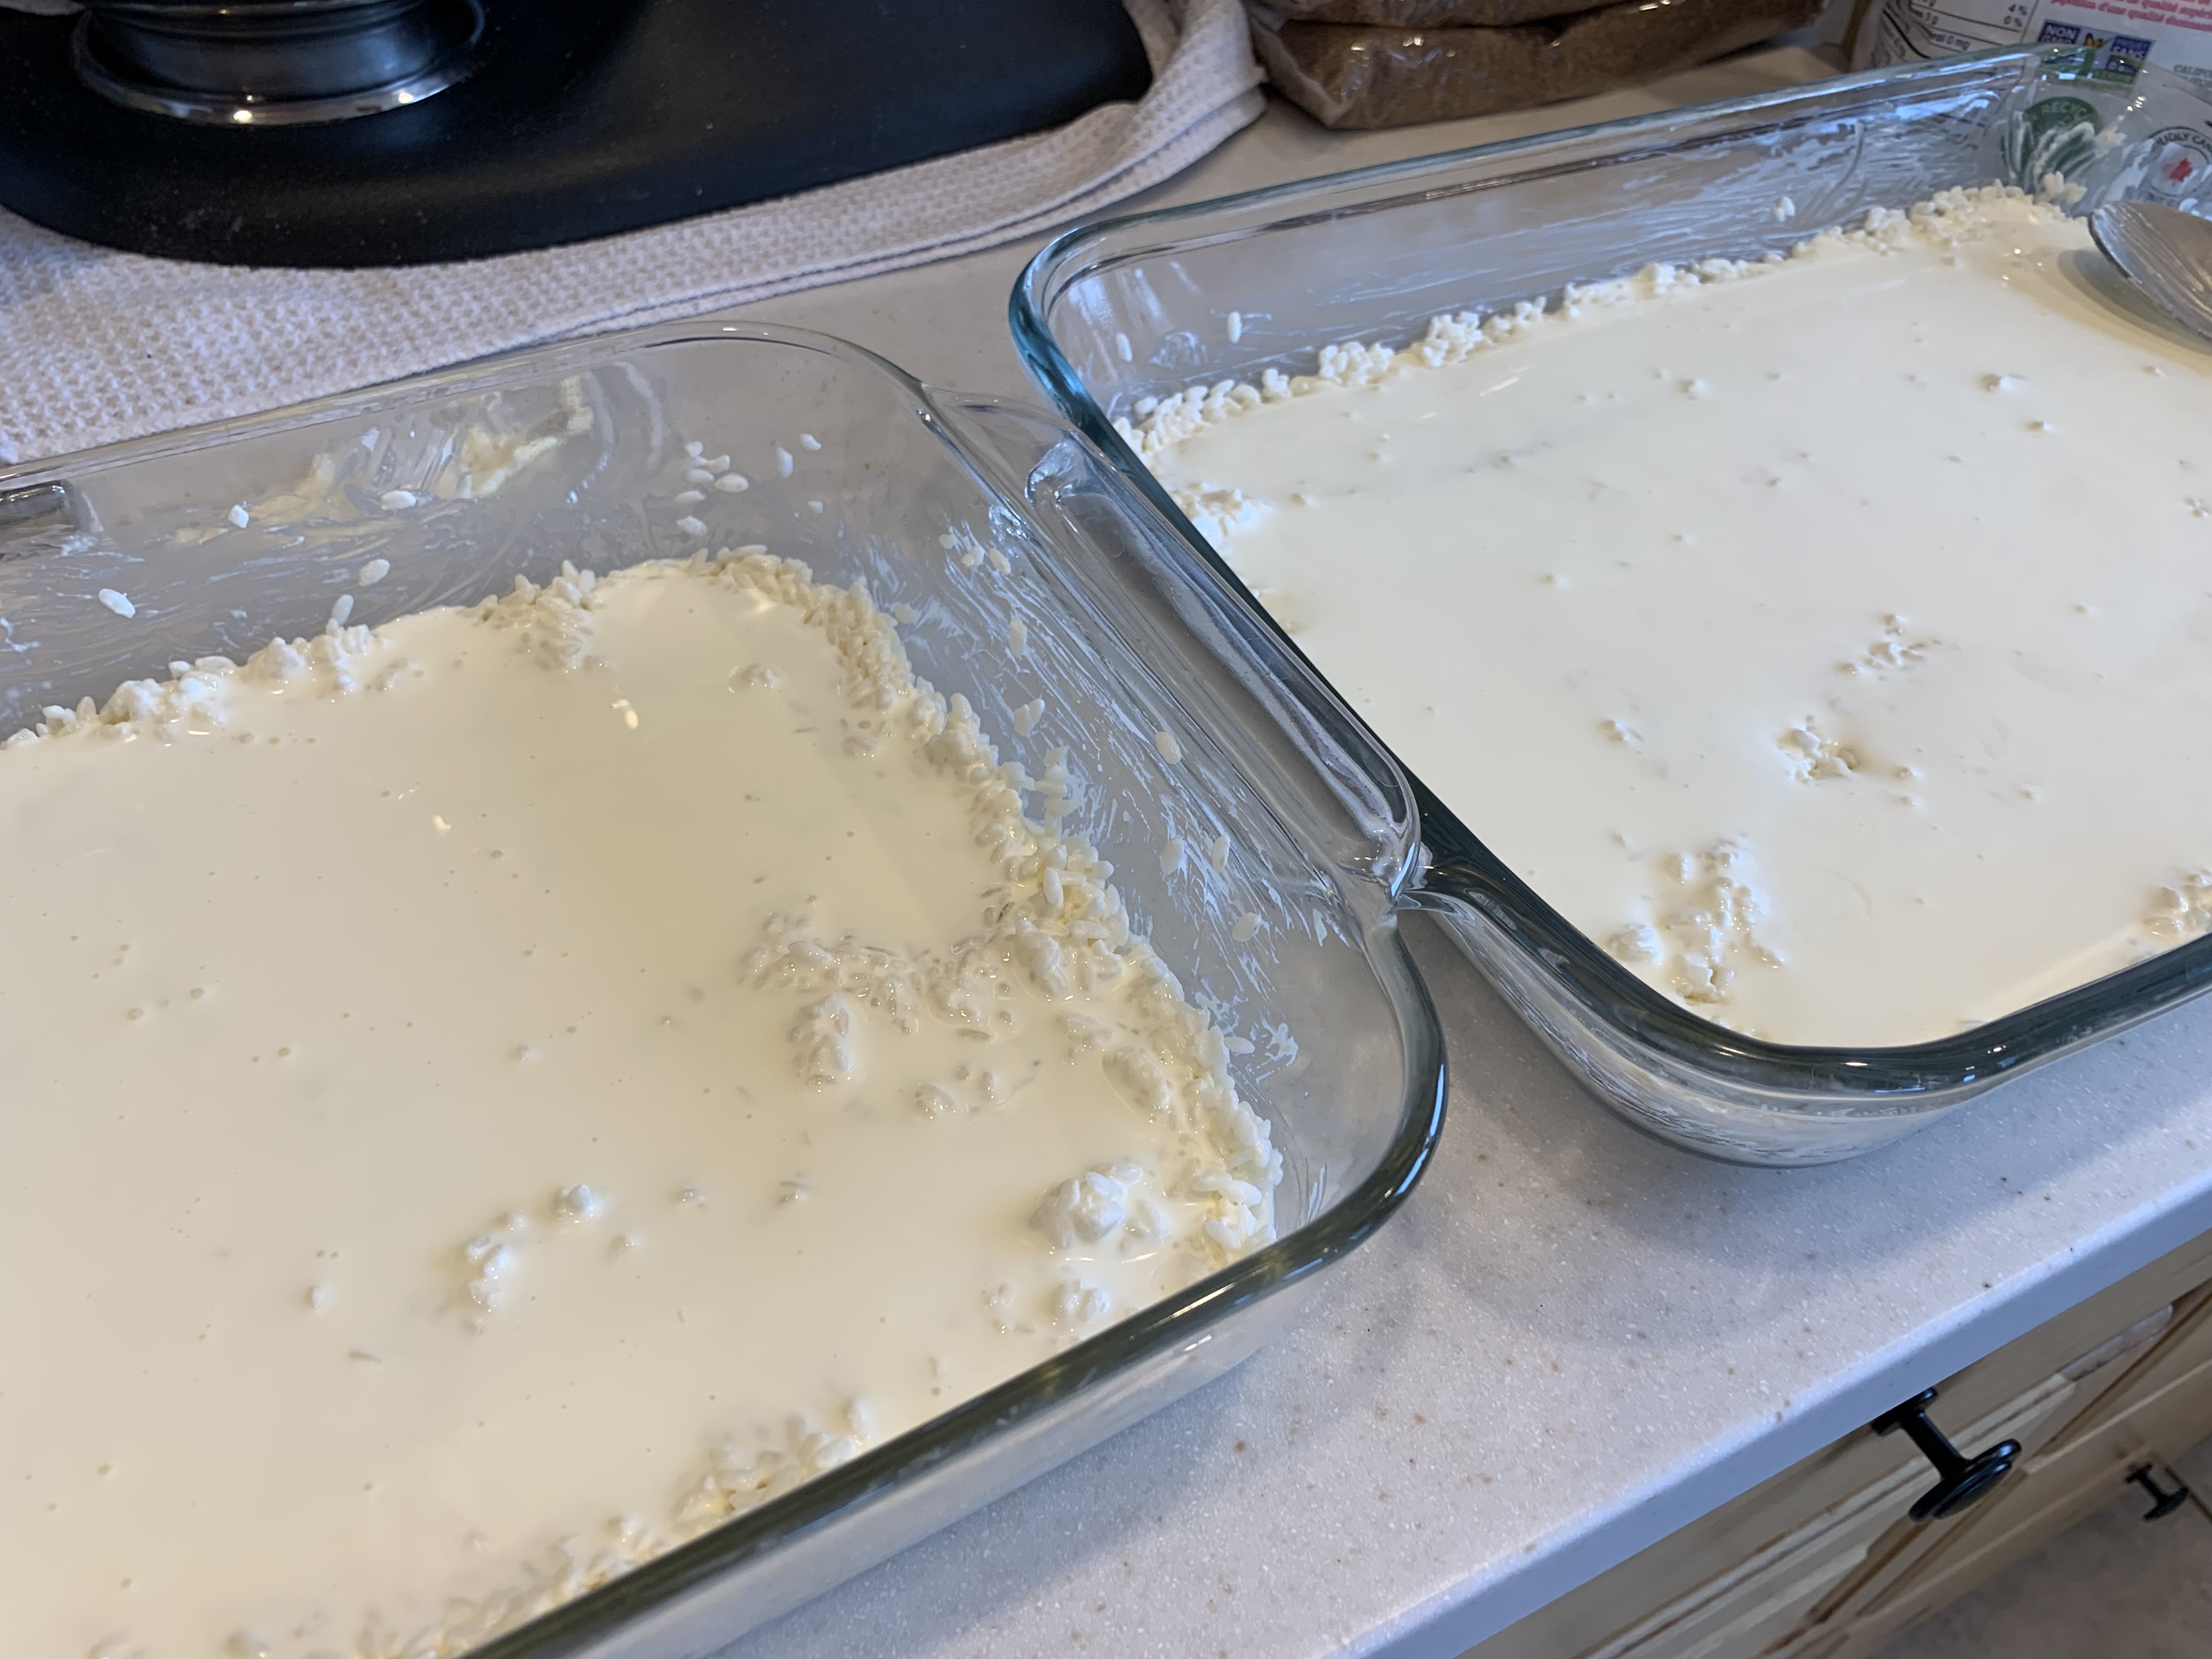
This is just showing the thin layer of cream when added - it just covers the rice in a thin layer, then add the milk and salt.

This is how it looks with the milk added - it's about a half and half rice to liquid ratio.
Cooking the Beef - takes ~60 minutes
In a large pot with well-fitted lid, cook over medium-high to high heat, stirring occasionally:
2-3 Tbsp avocado oil
~1 kg/2 lbs stewing beef, diced into medium or large bite size pieces
Do NOT add any salt/pepper at this point
Keep the lid ON, except while stirring. Let the beef cook, stirring occasionally, until ALL the liquid has been absorbed. Initially, the pot will have quite a bit of liquid that is released from the beef, then it will slowly cook off/be absorbed by the beef. When all the liquid is almost absorbed, add:
3/4-1 cup water
Lower the heat to medium-low to continue simmering until the meat softens and you can cut it with the cooking spoon. Most of the liquid should be gone at this point. If the meat still isn't tender enough, you can add a little extra water and continue simmering.

Make sure to keep the lid on while cooking, just removing it to stir occasionally. Once you add the extra water, be sure to lower the heat.
Once your meat is soft and there is very little liquid left, add, and stir, cooking a few minutes:
salt & pepper
Egyptian spice blend - this is a lovely mix of regular or smoked paprika, cardamom, cumin, black pepper, ground coriander, nutmeg, cinnamon, and cloves (it's sometimes called a Lebanese 7 spice blend, but this doesn't always contain cardamom, which is a flavor I love in this blend)
The amount of seasoning depends on your taste - it can be light and mild, or you can season generously. Personally, I like to season generously, since it will be within a creamy rice.

Seasoned and ready to add to the rice.
Divide the meat between the pans. Any liquid left can be added as well, to add extra flavor to your dish.

Divided evenly between the pans

Larger pieces of meat work well in this recipe, but I like smaller pieces since it spreads more evenly throughout the dish. Just divide any leftover liquid from the meat dish over the rice.
Final prep before baking - & baking (baking time takes about 45-55 minutes)
Spoon small scoops around and spread gently over the top of the 8 x 8 pan:
~3 Tbsp plain yogurt
Spoon small scoops around and spread gently over the top of the 9 x 13 pan:
~6 Tbsp plain yogurt
Bake at 425 F for about 15 minutes, until rice is bubbling nicely. Lower heat to 350 F and cook an additional 30-40 minutes, until nicely browned on top and light browned on the bottom.

This is the sort of deep golden brown on top that you're looking to see.

The best thing about a pyrex baking dish is being able to see the light golden brown on the bottom, which is how it should look when baked.


