Search for a Recipe

Showing posts with label BBQ. Show all posts

Thursday, 19 July 2018

BBQ Teriyaki Chicken

This is a favorite of my family, although we usually have made it with very thinly sliced beef.  You can use this same marinade sauce with beef, if you prefer.  But I absolutely love it made with chicken.  It's easy to whip together, and because the chicken is nice and thin, it cooks up quickly on the BBQ.  It's delicious served alongside brown jasmine rice, cooking instructions below, too.  Enjoy!
Gluten Free BBQ Teriyaki Chicken
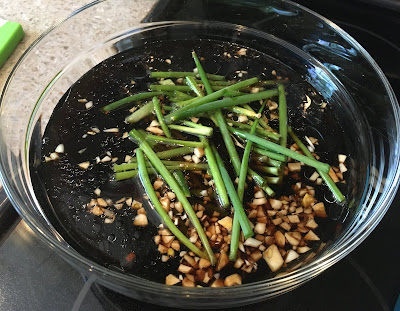
Marinade sauce, ready for meat! 
Gluten Free BBQ Teriyaki Chicken
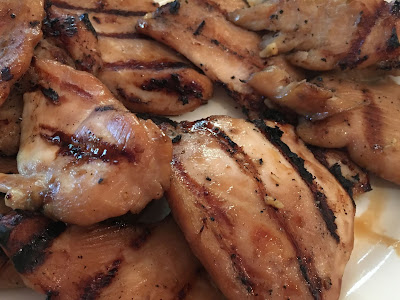
BBQ Teriyaki Chicken, fresh off the barbecue! 

BBQ Teriyaki Chicken

2 - 3 lbs chicken, thinly sliced or pounded flat
(The best is if you can find scallopini-style, very thinly sliced breasts)

In a large bowl, mix together marinade:
3/4 cup Bragg's soy seasoning sauce (substitute for soy sauce, which is not GF)
3/4 - 1 cup water
1/4 cup sugar
2 Tbsp honey
1 - 1 1/2 Tbsp fresh ginger, grated
4 cloves garlic, minced
3-4 green onions, chopped into 4" pieces

Marinate chicken for 2-3 hours, stirring/rotating pieces once or twice.

BBQ chicken pieces over medium heat, about 5 minutes per side, or until they are cooked through in the thickest parts of your chicken pieces.

This BBQ Teriyaki chicken is fabulous served with brown jasmine rice, cooking instructions below or another rice of your choice. Enjoy!

Brown Jasmine Rice
For about 3 cups cooked rice, thoroughly rinse:
1 cup jasmine rice

In a pot with a tight lid, place:
1 cup rinsed jasmine rice
2 cups water
1-2 tsp oil

Heat, uncovered over high heat until boiling.  Lower heat to low, cover, and simmer 45 minutes.  Remove from heat and let rest 10-15 minutes before serving.

Sunday, 20 May 2018

Flavorful Foil-Wrapped Potatoes on the BBQ (or oven)

This is one of my favorite potato recipes for the BBQ in warm months.  The best part is that it cooks relatively quickly because the potatoes are all diced.   You want to make sure to tightly seal the wrapped potatoes by pinching foil together well, then double wrapping the entire package.  This helps avoid leaks from the oil or butter onto the grill if you prefer to flip your potato packages over for even browning, though this isn't necessary.
twice wrapped potatoes on the BBQ
Potatoes and toppings, ready for the BBQ! 

Flavorful Foil-Wrapped Potatoes on the BBQ (or oven)

The amount of potatoes you dice and fill in packages is entirely up to you.  I would aim for a small handful of potatoes per package, so you have something like what looks like the picture above.  You want to be able to pull together the foil and pinch and roll it tightly to seal well along all ends.   Then, double-wrap your entire package in another layer of heavy duty foil.  If you've done this well, you can flip your package during cooking to get even browning on your potatoes.

*Don't overfill. You want your layer of potatoes to lie relatively flat, even when the foil has been pinched/sealed together.

Place on pieces of foil:
potatoes, diced
shallots, sliced
green onions, sliced
drizzle of olive oil
topped with a couple thin slabs of butter
salt (lightly, if your butter is salted)
pepper


Tightly wrapped packages can be cooked on a barbeque that's heated to approximately 400 F over direct heat.  Cook for 25-30 minutes, then slice open and cook an additional 5-10 minutes, until desired crispness. You can stir them around a bit at this time, if necessary.  If desired (and your package is well sealed) you can flip after ~15-20 minutes of cooking, but it's not necessary.   Sometimes I open the packages and let them cook a bit longer on the BBQ to get a little more crispiness to the potatoes.

You can also cook these in a regular oven at 400 F for ~30 minutes, or until desired crispness.

Open carefully, as foil packets will be hot!  Enjoy!
I usually make between 2-3 foil packages if we have company.  Otherwise two is plenty for a hearty family meal.  Great alongside any summer BBQ meal! 

Thursday, 3 May 2018

Tasty Herb & Spice Shrimp (or Scallop) Parcels

This is a wonderfully easy recipe, with lots of delicious flavors - ginger, cilantro, lime, chili.  The hardest part of the recipe is putting together all the ingredients for the sauce.  But it's definitely worth it!  You can make them in packets in the oven OR on the BBQ OR just pan fry the shrimp and sauce on the stove-top.  ** I've made these shrimp packets scampi-style, too, with large amounts of fresh minced garlic, parsley, and butter in packets, too. **  These are deliciously flavorful and an easy dinner to whip together.  Enjoy!

Tasty Herb & Spice Shrimp Parcels

based off a recipe from Fresh Indian by Sunil Vijayakar (a wonderful little Indian cookbook)
Serves ~6

Preheat oven to 400F.  Make enough rice for 6 servings.

Put the following in a food processor and blend until you have a coarse puree:
3 - 4 garlic cloves, minced
1 - 2 tsp grated fresh ginger root
5 - 6 green onions, coarsely chopped
6 Tbsp chopped fresh cilantro OR 2 Tbsp cilantro puree
1 cup coconut milk
1 - 2 red chili peppers (for spice), chopped
1 1/2 tsp ground cumin
3/4 tsp garam masala
1/2 tsp turmeric
zest and juice of 1 lime
1 1/2 tsp brown sugar
pinch salt

To cook in the oven or on the BBQ: 
Mix sauce with 2 1/2 - 3 pounds raw jumbo shrimp (shells removed).  You can also mix with scallops or just make scallops instead of shrimp.  

Separate mixture onto four 12"  double-layered foil squares.  Crimp the tops and sides to make an enclosed parcel.

Lay the parcels on a baking sheet and bake at 400F for about 15-20 minutes OR place packets on pre-heated BBQ and bake 15-20 minutes, until your shrimp have turned pink and are cooked through.

Remove the parcels.  Open and serve immediately over basmati rice.  Enjoy!

To cook on the stove-top:
Heat over medium-high heat:
1 Tbsp oil

Add  2 1/2 - 3 pounds raw jumbo shrimp (shells removed) and cook 1-2 minutes.  Add herb/spice sauce from above, lower heat to medium and cook, stirring regularly until shrimp are cooked through and sauce has had a chance to bubble nicely for about 5-10 minutes.

Serve immediately over basmati rice. Enjoy! 

Friday, 23 June 2017

BBQ Salmon with roasted garlic, herbs and lemon

A wonderfully light and flaky salmon, made easily on the barbecue! The rich flavours from the garlic, herbs and lemon infuse the salmon spits packed with flavour.  I like to cut the pieces so they're narrow, meaning they cook evenly and quickly.  Try these with a side salad, rice or potatoes. Enjoy!

A gorgeous tray of salmon, fresh off the BBQ.  It is as tasty as it is aesthetically pleasing. 

BBQ Salmon topped with roasted garlic, herbs & lemon

I like to cook my salmon on the BBQ, but off direct heat.  On a small grill, you'd have one half on about medium and cook the salmon on the other half.  On a larger grill, I like to have the outer heat going and have the salmon cooking off the direct-heat in the middle of the BBQ.   To prepare the BBQ, I put all burners on high-heat, then turn off the ones where I want to put the salmon, and lower the others to medium/medium-low.  I like to aim for a temperature of about 400 F.

Line a BBQ-safe pan with foil.  On foil, place:
8 small slices of salmon (each ~1 1/2 - 2" wide)

Drizzle salmon with olive oil and sprinkle with salt & pepper.

In a small bowl, mix together:
10 cloves of roasted garlic, chopped
2-3 Tbsp minced chives
2-3 Tbsp minced dill
3-4 Tbsp mayonnaise
1/2 tsp pepper
1/4 tsp salt
1/4 tsp paprika

Spread the garlic & herb mixture on the top of the salmon slices.   Top salmon with lemon, thinly sliced.
Just gorgeous - ready to pop onto the BBQ.

Bake salmon at ~400 F on the BBQ for 15 minutes for small slices and 20 minutes for larger pieces of salmon.  Check with a fork to make sure the thickest part is cooked thoroughly and nice and flaky.   Enjoy!!!


Wednesday, 17 February 2016

Delicious Cheesy Grits & BBQ Shrimp with homemade BBQ sauce!

My sister pointed out to me that I was lacking a cheesy grits recipe on my blog.  Grits, made from a coarse cornmeal, are naturally gluten-free.   I have posted a tasty polenta recipe we love, but cheesy grits are definitely something that needed it's very own recipe!  BBQ shrimp (made either on the BBQ or in the oven if your BBQ is covered in snow) are a perfect accompaniment to fresh, homemade grits.  Served alongside a salad and it's a delicious meal.  Enjoy!

Cheesy Grits and BBQ Shrimp with homemade BBQ sauce, served with salad on the side. Yum! 


Delicious Cheesy Grits & BBQ Shrimp (with homemade BBQ sauce!)
Serves 6

Prepare Homemade BBQ Sauce (can be made in advance and refrigerated up to a week): (or have your own favorite BBQ sauce at the ready)

Cook over medium heat ~ 5 minutes:
2 Tbsp butter
1 small onion, diced finely

Add and cook ~1 minute:
2 tsp minced garlic

Mix in:
1 cup tomato sauce
6 Tbsp apple cider vinegar
2 Tbsp vanilla extract
2 Tbsp water
2 Tbsp molasses
2 Tbsp honey
1 Tbsp Worcestershire sauce
2 Tbsp brown sugar
2 tsp Tabasco sauce
1/2 tsp dried thyme
1/2 tsp dried ground mustard
pinch cloves
salt & pepper, to taste (I used about 1/2 tsp of each - adding a little extra pepper at the end)

Simmer over low to medium-low heat for 30-40 minutes, stirring occasionally.  BBQ sauce will thicken as it cooks.  Store in the refrigerator until ready to use, up to 1 week.
My batch of BBQ sauce - a little over 1 1/2 cups after simmering.

Delicious Cheesy Grits
Preheat oven to 425 F or prepare your BBQ to heat (and/or cook) shrimp.

Bring to a boil:
4 cups chicken broth/stock (Asian mushroom seasoning works nicely in lieu of broth/stock)

Add, then lower heat to medium-low to cook:
1 cup grits (I used white grits, but yellow or white are both fine. Just don't use quick-cooking grits).
3/4 tsp garlic powder

Cook over medium-low heat, stirring regularly for 20 minutes. Start cooking shrimp (instructions below) when there are about 5-10 minutes remaining on your grits, so everything finishes at the same time.

After 20 minutes, grits will be tender at this point and the mixture will have thickened.
Remove grits from heat.  Stir in the following:
1/4 cup butter
2 Tbsp milk
1 - 1 1/2 cups grated cheese (sharp cheddar, Mexican cheese blend, cheddar blend)
salt & pepper, to taste (i use more pepper than salt, because of the salt in the butter and cheese)

Serve immediately with BBQ shrimp, below.
Cheesy Grits - Is there a way to take a nice picture of the entire pot?  I'm not sure there is, but they were wonderfully creamy and delicious.

BBQ Shrimp
You can use either the cooked shrimp or raw shrimp (allowing longer cooking time).  I like to use the peeled, deveined, pre-cooked shrimp bought frozen.  I thaw it and then use it as directed below:

Oven:
Spread shrimp on a baking sheet.  Drizzle with BBQ sauce.  Bake at 425 F for about 5-7 minutes, until hot through and BBQ sauce is bubbling nicely.
OR
BBQ:
Skewer shrimps for the BBQ or put them in a BBQ-proof cooking tray.  Heat on the BBQ, brushing a few times with additional sauce, about 5-7 minutes.

Serve with cheesy grits and extra BBQ sauce on the side.  Nice with a big side salad, too!  Enjoy! 

Saturday, 14 February 2015

Easy Pulled Pork w/ Homemade BBQ Sauce

This is a great meal we all enjoy eating.  It's a delicious cold-weather meal, although we'll happily eat it anytime! My sister loves to serve her pulled pork Texas-style on tortillas with dill pickles. We love it!  Usually, unless I've made some tortillas, I just whip together some sort of roll or biscuit to serve with the pulled pork.  The cheddar biscuit-style recipe is *below* for the buns I whipped together here.  They're little biscuits - which the kids loved. The nice thing about this pulled pork recipe is that you make your own BBQ sauce, but you don't have to cook it in advance since it's cooked thoroughly in the crock pot at the same time as the pork.  A nice hearty meal that's also easy to whip together.  If you prefer, you can include the onion and add in a jar of your any BBQ sauce instead of mixing together your own sauce. That will work just as well. Enjoy!
Easy delicious pulled pork, served on homemade little cheddar biscuit-style rolls (recipe below)

Easy Pulled Pork w/ Homemade BBQ Sauce

Serves ~6-8

In a crock pot, mix together quickly (don't worry about mixing it well, it'll combine nicely as it cooks):
1/2 - 1 onion, diced
1 cup ketchup
1/2 cup apple cider vinegar
1/4 cup honey
1/3 cup sucanat sugar (or brown sugar)
1 Tbsp worchestershire sauce
1 Tbsp dark molasses
1 Tbsp GF soy sauce
1 Tbsp hot sauce (the spiciness level depends on what kind you use - I used a local habanero sauce which gave it a nice kick)
2 tsp dry mustard
1 tsp garlic powder
1/2 - 1 tsp ground pepper

Add in, mixing so the meat is coated:
2-3 lbs boneless pork loin roast, chopped into a few large pieces (best to remove any large pieces of fat)

If you feel like you need a little more liquid, you can always add a bit of apple cider/juice to the mixture. It'll cook right in nicely. 

Cook on 'high' in your crockpot for 5-6 hours. (You can also cook it on low 10-11 hours). Shred with two forks and let cook another 20-30 minutes on high in the crock pot.

Serve on rolls, biscuits, baked potato, or GF tortillas of your choice and enjoy!!!
(I served these on quick cheese biscuit-style rolls I threw together, recipe below).

Serving ideas/options:
Hamburger buns
Buttermilk biscuits
Homemade corn flour tortillas
Sourdough Rolls

*Easy Biscuit-type Rolls: 
Makes ~30-36 small biscuit rolls

Preheat oven to 375F.

Mix together (by hand or in a mixer):
1 1/2 cup tapioca starch
1 cup brown rice flour
1/2 cup potato starch
1/2 cup cornstarch
1 tsp salt
1/2 tsp xanthan gum
1 Tbsp baking powder
1 Tbsp sugar
1/2 tsp baking soda

Add and mix in just until combined:
3/4 cup milk
1/2 cup butter, melted
2 eggs
1 cup grated cheese

Scoop by large cookie scoops onto parchment lined cookie sheets.  Bake at 375F for ~20 minutes, until lightly browned on bottom and just starting to brown on top.  They should puff a bit from the cheese.

Let cool briefly on a cooling rack and enjoy! These are best warmed so the cheese is nice and soft.

Pulled Pork is particularly great on days that look like this:
PEI in winter - Trees coated in ice (thank you frozen fog), multiple feet of snow and a view of the frozen bay near our house. Brrrrrr... 

Easy Pulled Pork with Homemade BBQ Sauce and Gluten-Free Cheese Biscuits by Successfully Gluten Free! 


Friday, 10 October 2014

Quick BBQ (or oven) Naan Bread

This isn't proper Naan, but it's wonderfully thin and crispy with a lovely flavor.  And so quick and easy to whip up, which is important in my house.  I love that you can cook it up outside on the BBQ, too! Or you can pop it in the oven.  Brushed with butter before cooking, it has a lovely flavor that cooks right into it.  It's even egg-free! Enjoy!
Fresh off the BBQ, and still sizzling.  

Quick BBQ (or oven) Naan Bread
Makes 3 large pieces of Naan

Preheat grill to medium to medium-high heat (~450-475F) OR preheat oven to 475F, place 2 cookie sheets in the oven that you'll put your naan bread onto.

Mix in a large bowl with a spoon:
1 1/2 cup Kristin's Gluten-Free Flour Mix
1 tsp ground chia seed
1/4 tsp ground coriander
1/4 tsp dried cilantro, optional
1/2 tsp salt
1 tsp xanthan gum
1 tsp quick/rapid-rise yeast

Add in slowly, mixing with a spoon just until mixture holds together nicely:
1 to 1 1/4 cup milk (lactose-free works great)

Melt 1/4 cup butter in a small bowl.  Have a brush handy to brush the dough after rolling it out.

Divide the dough into thirds.

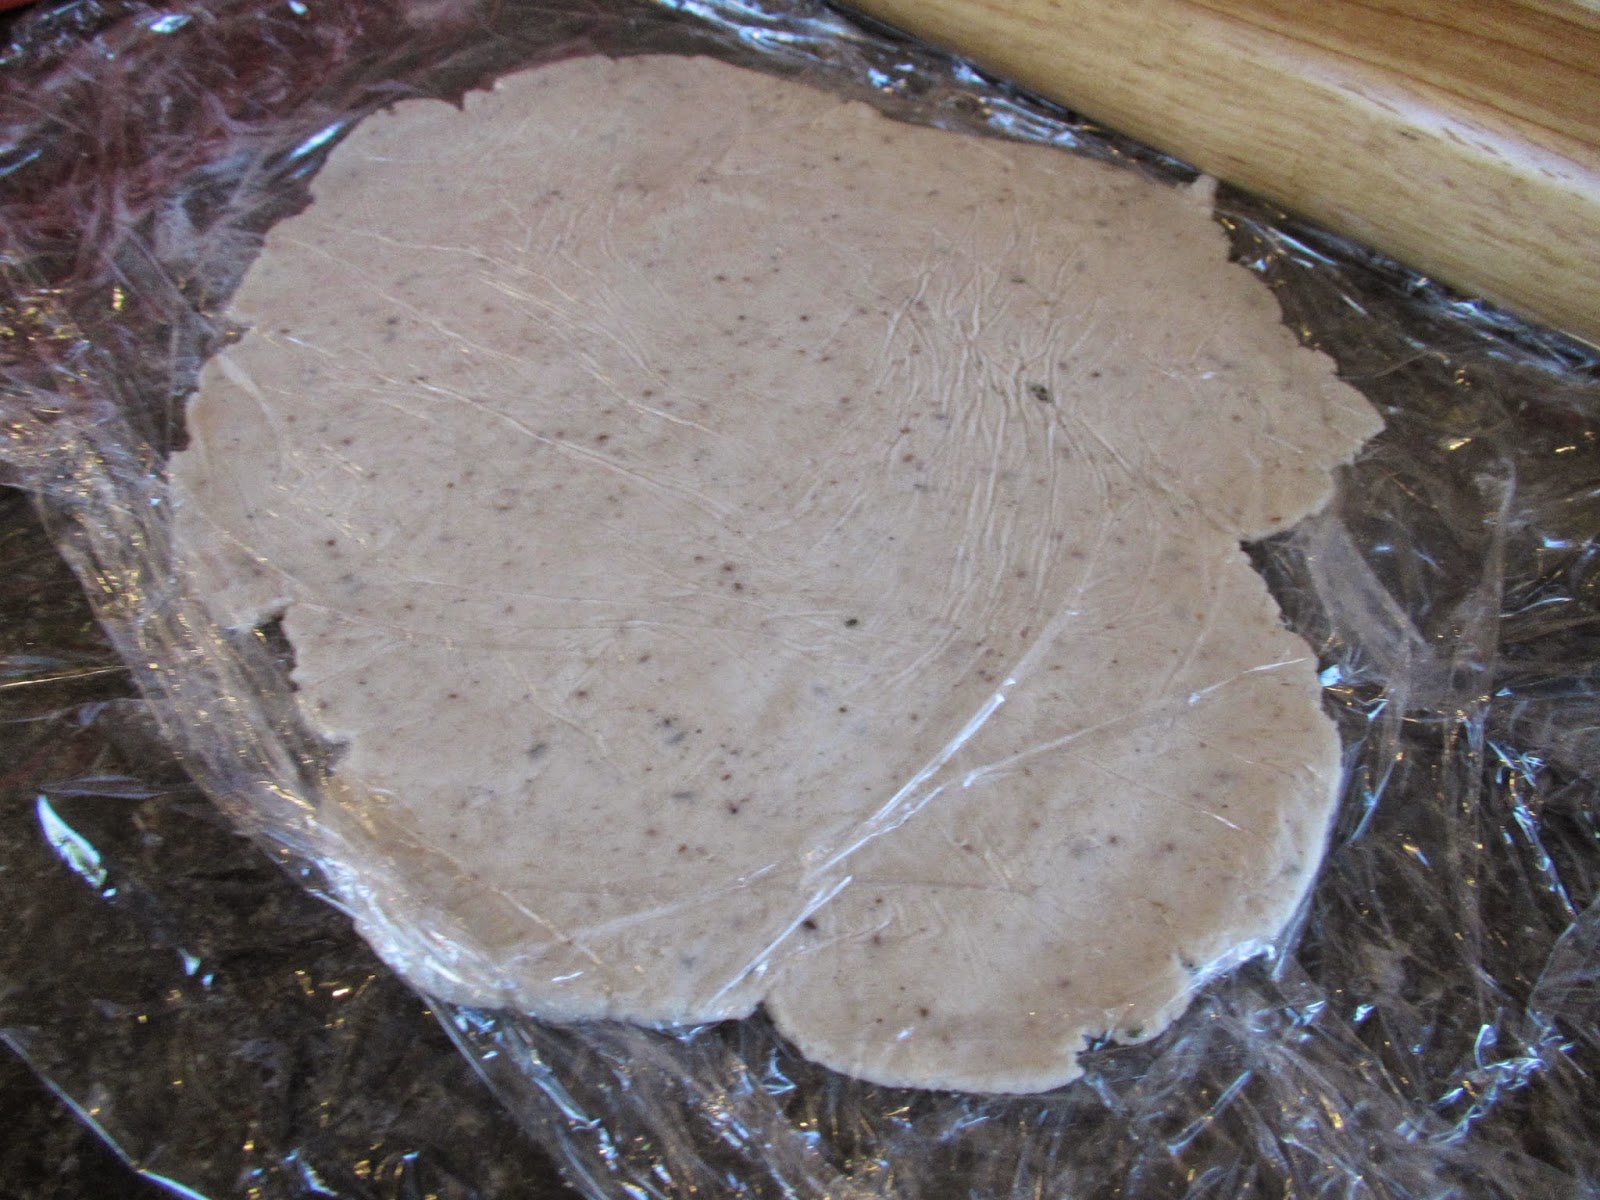
Roll 1/3 of the dough between two pieces of plastic wrap until it's nice and thin, between 1/4" and 1/2" thick.  Brush one side with butter.  Flip onto a piece of parchment paper and butter the other side.  Repeat with the remainder of dough.
 If you want a slightly puffier naan, you can let it rest at this point ~15 minutes.  But I find it's wonderful thin and crispy, so I don't bother (not to mention, I want this to be fast!)
Roll between plastic wrap.  Butter one side, then flip onto parchment paper to butter the other side.

Flip quickly onto heated BBQ, using tongs to help straighten it out if it gets folded on itself.  Cook ~5-7 minutes, checking regularly.  Cook until they're a nice dark brown on the bottom.  You can flip these over if you want a bit of browning on both sides, but these are so thin they're nice as-is.

If you want to cook your Naan in the oven, carefully put them on your preheated sheets and cook ~5 minutes, checking regularly.  They may puff up during baking (this is okay!).  Cook until they've got some browned spots.  Remove from oven and serve!

Friday, 12 September 2014

Baby Back Ribs on the BBQ

These ribs are amazing and SO easy.  I've made them several times now and am constantly amazed by a couple things, 1. how fast they are to BBQ, and 2. how delicious they are.  I based them off a Weber recipe, but I don't bother with the wood chips.  And yet, they are still fantastic! Yay!  You can use whatever your favorite BBQ sauce is, or I've included a recipe for one you can whip together while the ribs are doing their 1 hour cooking time.
Cooking these wrapped in foil eliminates burning and gives a tender meat, but watch closely once you remove from the foil and add the BBQ sauce - the sugars in the sauce on top of the flame are what can burn quickly.

Baby Back Ribs on the BBQ
Based off this recipe by Weber.com  Takes ~1 hour 20 minutes start to finish.
Serves 4-6

You can use whatever BBQ sauce you like, or you can whip up your own while the ribs are doing their 1 hour cook on the BBQ.  I've put my version of an easy BBQ recipe below.*

Preheat your BBQ to medium heat. I aim to ~400F.

Mix together the following to dry rub on the front and back of the ribs:
1 Tbsp salt
2 tsp paprika
2 tsp garlic powder
1/2 tsp ground thyme
1 tsp ground pepper

Remove the membrane from the back of 2 racks of baby back ribs (~2 lbs).  These are great, clear picture of how to remove the membrane.

Rub the front and backs of the ribs generously with the dry rub.

Wrap each rack of ribs in their own foil packet.  Then, wrap them again in another foil packet, so they have a good double wrap on them.

Cook the packets on the BBQ directly over the medium heat (with the lid closed) for 1 hour total, turning the rib packets over every 15 minutes so they cook evenly.   Remove from heat.  Take the ribs out of the foil packets, brush with BBQ sauce and return to the grill for 10 minutes.   I like to turn them every 2-3 minutes, basting with extra BBQ sauce for each turn.

Remove from the grill, let rest 5 minutes and ENJOY!!!!

BBQ Sauce Recipe

In a small pot, combine the following over medium heat.  Simmer ~25 minutes.
1/4 cup honey
1/2 cup apple cider vinegar
1 cup ketchup
1 Tbsp hot sauce (I use a locally made habanero sauce, which adds a nice kick - adjust depending on how spicy you want your sauce).  
1 Tbsp worcestershire sauce
1 Tbsp GF soy sauce (Bragg's works well)
1 Tbsp dark molasses
2 tsp dry mustard
1/3 cup sucanat sugar OR brown sugar
ground pepper, to taste (optional)

Use for any BBQ sauce needs.  You can store the extra in a tupperware in the refrigerator for several weeks.