Search for a Recipe

Showing posts with label dinner ideas. Show all posts

Monday, 1 August 2022

Sloppy Joe's

 I spent a good portion of my childhood being very unhappy every time we had Sloppy Joe's for dinner.  Back then, the meat was cooked with a packet of spices and always incredibly salty.  It would be served on store bought rolls that always seem to fall apart under the weight of the soupy meat mixture.  However, when my dad decided to try the Pioneer Woman's recipe, we actually enjoyed it!  I've tweaked it a little bit and to make it just how I like it, and one of my kids requested it as their birthday dinner this year, so I'd say it's come a long way from the unpleasant stuff of my childhood.  Enjoy! 

My dad serving up sloppy joe's! He served it with a side of zucchini, chips, and a piece of one of our favorite family brownies, with a few mint chips thrown in. Yum!

Sloppy Joe's

Based on a recipe by Ree Drummond. Serves 8-12 

In a large deep skillet over medium heat melt: 
2 Tbsp butter

Add and cook until meat is fully browned (once cooked, you can drain it if needed, but I usually don't): 
2 lb ground beef (I prefer lean or extra lean)

Add, cooking a few minutes: 
1 large onion, diced
1 green bell pepper, diced
5-6 cloves garlic, minced

Add the following: 
14 oz can tomato sauce + add 1/4 - 1/3 cup water used to rinse out the can
1 cup ketchup
2-3 tsp Worchestershire sauce
2 Tbsp brown sugar
2 tsp chili powder
1 tsp dry mustard powder
1/2 tsp red pepper flakes
1/2 tsp pepper
1/4 - 1/2 tsp salt

Let the whole mixture come to a boil, then lower heat to simmer, uncovered for about 15 minutes.   You can taste it at this point and add an extra dash of Worchestershire sauce or salt & pepper, if needed.  

Serve the meat on top of homemade gluten-free rolls.  My versatile dinner rolls are a nice option.  We've also enjoyed it with my soft, buttery dinner rolls and my quick and delicious hamburger buns in a mixer recipes. 

Delicious with some favorite brownies for dessert! 

Sloppy Joe's Recipe by Successfully Gluten Free!


Tuesday, 10 March 2020

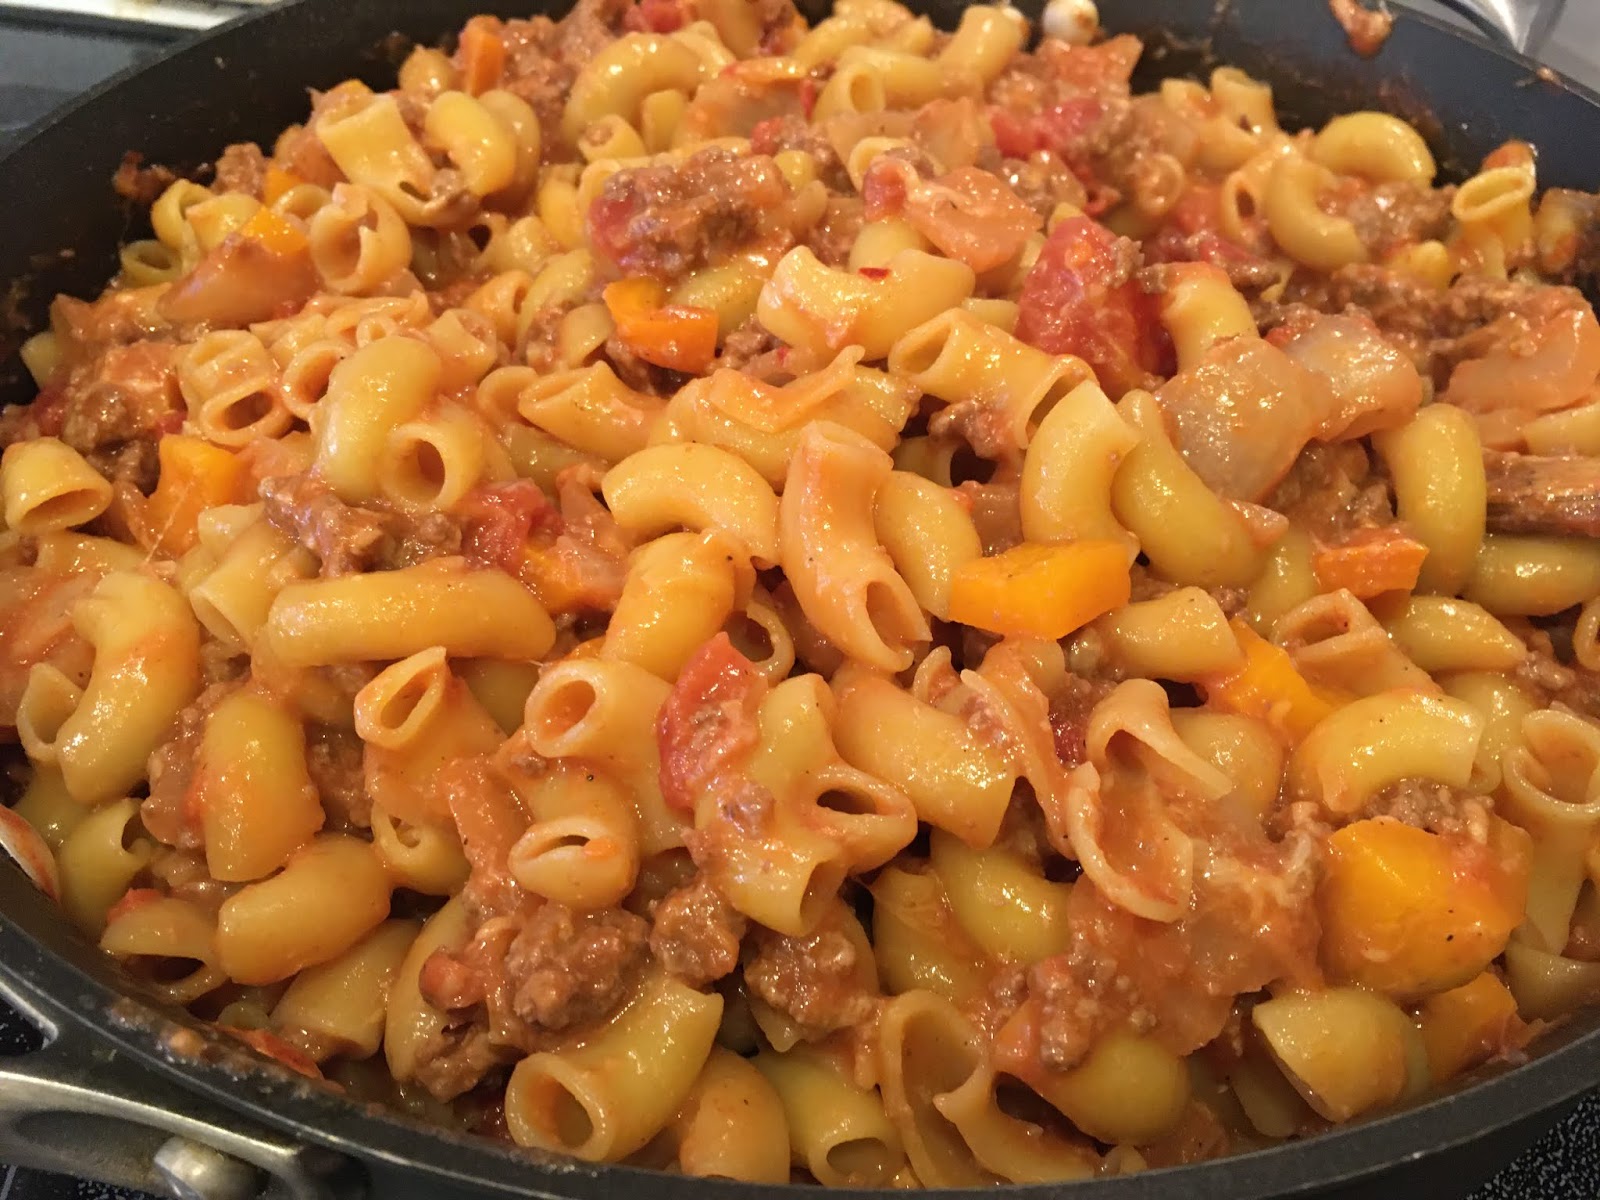
Homemade Cheesy GF Hamburger Helper

Sometimes, it's nice to make a comfort food meal on a chilly evening.  Packed with fresh ingredients, this homemade cheesy hamburger helper isn't the usual sort of thing I make, but it was a fun change and my kids loved it and have requested it several times since.  I based it loosely off a Bon Appetit recipe, then tweaked things a bit.  Enjoy!
Gluten Free Cheeseburger Hamburger Helper
A comfort food dish - with plenty of leftovers for the next night, too!

Homemade Cheesy GF Hamburger Helper


(I like to start boiling my pot of water for the noodles now, so they're ready to throw in when the sauce needs to simmer)

Cook over medium heat 3-4 minutes:
1-2 Tbsp olive oil
1 large onion, diced

Add and cook until browned:
1 lb. ground beef
1/2 tsp salt
1/2 tsp pepper

Add and cook 3-4 minutes:
4 cloves garlic, minced
1 large orange bell pepper (yellow or red will work - green can be too bitter)

Add the following - once it's boiling lower to a simmer over medium-low heat for 10-15 minutes:
1 can tomato sauce
1 can diced tomatoes
1 Tbsp GF soy sauce (I like Bragg's Soy Seasoning)
1 tsp crushed red pepper flakes
1/2 - 1 tsp garlic powder

While your sauce is simmering, cook in salted water (1-2 Tbsp salt in your big pot of water), then drain and rise:
16 oz gluten-free pasta of your choice (I like ones made with a mix of brown rice, quinoa, and corn)

Once your sauce has simmered, remove from heat and stir in gently:
2 cups grated Mexican cheese blend OR grated cheddar cheese
1/3 - 1/2 cup grated Parmesan cheese
salt & pepper, to taste
Stirring the cheese into the sauce. 

Stir/fold cooked, drained & rinsed noodles into the sauce.  Serve and enjoy!
Tasty and filling - a comfort food type dish. 
A happy girl and her brother after cooking this dish mostly on her own! 

Homemade Cheesy Gluten Free Hamburger Helper by Successfully Gluten Free! 


Monday, 22 April 2019

Mediterranean Meatballs, Rice, Veggies & Tzaziki Sauce

My entire family, young to old, have enjoyed this meal, even with the spicy rice.  Although, the little ones prefer to mix some of the meatballs and tzaziki sauce into the rice to cool it down a bit.  You can always ease up on the seasoning, if you don't want it quite as strong, but I'd recommend it like this.  It was a yummy, easy family dinner to whip together.  Leftovers were great, too! Enjoy!
Gluten Free Mediterranean Meatballs
Seasoned rice, sauteed vegetables, homemade Mediterranean-style meatballs, and homemade tzaziki sauce.  The best is that everything can be whipped together in about 30 minutes! 


Mediterranean Meatballs, Rice, Veggies & Tzaziki Sauce


Spicy Rice 


This can have a bit of a kick to it, but combined with the tzaziki sauce, it's great!

In a medium-sized pot with tight-fitting lid, combine:
2 cups white basmati rice
3 cups water
1 tsp salt
1 tsp ground coriander
1 tsp cinnamon
1/2 tsp cumin
1/2 tsp nutmeg
1/2 tsp pepper
1/2 tsp turmeric

Bring to a boil, uncovered.  Stir once, cover and lower heat to low to medium-low.  Simmer for 15 minutes, until liquid has absorbed.  Remove from heat, leaving the lid on.  Let rest 10 minutes before stirring and serving.

Mediterranean meatballs - begin preparing once you've started your rice

Preheat oven to 400 F.  Line cookie sheet with aluminum foil.

Mix together in a large bowl:
2 tsp cumin
1 tsp paprika
1 tsp ground coriander
1/2 tsp salt
1/2 tsp pepper
1/2 tsp cinnamon
1/2 tsp allspice
pinch ground cloves
1 lb ground beef
4 mushrooms, minced 
1 medium onion, minced
1 egg
2 Tbsp cream
1/2 cup breadcrumbs (optional, but they absorb a lot of the liquid that otherwise floods the pan when these bake)

Form into meatballs, flatten slightly, if desired.
For medium-sized meatballs, bake ~18-20 minutes at 400 F.

Meatballs made without breadcrumbs - they still work and taste great, but have a lot more liquid on the pan when they're done. 
Meatballs made with the 1/2 cup gluten-free breadcrumbs/panko.  You can see they end up with a lot less juice on the pan.  Either method will work! 

Sauteed Vegetables - begin preparing once you have put meatballs into the oven

In a large frying pan, over medium-high heat, cook, stirring every couple of minutes until vegetables are tender, but not soft:  (you can use whatever variety of vegetables you like - but we enjoyed onion, pepper and zucchini with this meal)
2-3 Tbsp olive oil or avocado oil
1 onion, sliced
1 green pepper, sliced into sticks
1 yellow pepper, sliced into sticks (optional)
1 yellow zucchini squash, sliced into sticks (optional)
1 green zucchini, sliced into sticks (optional)

Add the following seasons to the vegetables as they're cooking, a dash or two each works great.  You can adjust, to taste:
salt
pepper
cinnamon
cumin
coriander


Quick Tzaziki Sauce (double if you like extra sauce!)


Mix together:
1 cup plain yogurt
juice of 1/2 lemon
pinch or two dried dill (I love the freeze-dried dill, but fresh is obviously ideal if you have it!)
dash of salt & pepper
a big dash of garlic powder

Mince and add, though if you don't have a cucumber, this still tastes nice without it:
1/4 - 1/2 cucumber, finely diced


Missing the tzaziki sauce in this picture, but everyone, kids included, loves this meal.

Gluten Free Mediterranean Meatballs, Rice, Vegetables and Tzaziki Sauce Recipe by Successfully Gluten Free!

Wednesday, 28 November 2018

Family-style Lemon-Dill Topped Salmon

Delicious salmon recipe and easy as can be!  Perfect when feeding a crowd.  You can serve alongside rice, homemade potato wedge fries, potato salad, coleslaw-type salad, or salad of your choice. I made this recently for a larger family dinner alongside the BBQ style salmon (for some variety), and it was a hit. Enjoy!
Lemon-Dill Topped Salmon
Lemon-Dill Topped Salmon, ready for baking! 
Lemon-Dill Topped Salmon

Lemon-Dill Topped Salmon - gluten free!


Preheat oven to 425 F.

Mix together a saltwater brine:
2 quarts water
5 Tbsp salt

Soak/brine 1.5 lb salmon filet for 15- 20 minutes.  (Yes, you can use a smaller or larger size salmon filet, just adjust cooking time and toppings a bit).   Pat salmon dry (use paper towels) and set on foil-lined baking tray.

Mix together in a bowl, then spread on top of salmon:
1/4 - 1/3 cup mayonnaise
1 Tbsp fresh dill, minced
1 Tbsp fresh chives, minced
1-2 tsp minced garlic (optional)
1/4 - 1/2 tsp salt
1/4 - 1/2 tsp pepper
1/4 - 1/2 tsp paprika

Salmon topped with mayonnaise spread 

On top of mayonnaise spread, place:
lemon slices

Ready for baking! (or you can BBQ off-heat aiming for a similar overall temperature in your BBQ)

Bake salmon at 425 F for 20-22 minutes, or until nicely cooked at thickest point. (Thinner cuts may take less time, thicker may require a few extra minutes).

It was delicious served with rice, seasoned generously with garlic, onions, parsley, squeeze of fresh lemon, salt and pepper during cooking. 


Gluten free Family-Style Lemon-Dill Topped Salmon Recipe by Successfully Gluten Free!

Sunday, 21 October 2018

Easy meal of Tuna fish salad and Naan Bread

One thing I love is having leftover gluten-free naan bread around the house.  It heats up perfectly in our toaster oven and is versatile for using for a quick lunch or dinner.   Here is one way I like it - served alongside a tuna fish salad that is packed with fresh veggies.  Enjoy!
Naan and homemade tuna fish salad
Naan bread with homemade tuna salad, packed with veggies!

Make up a recipe of my all-time favorite naan bread recipe!

My favorite things to mix in with canned tuna are the following.

For each tin of tunafish, add and mix in:
one carrot, grated
one stalk celery, finely diced
1-2 Tbsp traditional relish or zucchini relish (dill style, sweet and sour, whatever you're in the mood for - or use 1-2 Tbsp finely diced pickle, if you don't have relish)
1-2 Tbsp minced fresh onion
1/4 cup mayonnaise (more/less, to taste)
1-2 tsp mustard
salt & pepper (to taste)

Other things that are nice to add, if desired:
fresh chives, finely diced
fresh dill, finely diced
1-2 Tbsp fresh lemon juice
pinch cayenne pepper
dash paprika
GF Naan and homemade tuna fish salad
A tasty, easy meal when you want something light. 

Serve a few pieces of delicious naan bread with a scoop of fresh tuna fish salad.  Enjoy! 

Friday, 17 August 2018

BBQ Style Topped Salmon

I whipped a couple big salmon dishes together for a recent family dinner, and both were a hit.  This one was a spicier, more BBQ-style topped salmon.  When you brine the fish, I find it keeps it moist and really flavorful upon cooking.  Yum!
BBQ Style Salmon
BBQ Style Topped Salmon, ready for baking! 
BBQ Style Salmon
Flavorful BBQ Style Topped Salmon, ready to eat! 

BBQ Style Topped Salmon

Preheat oven to 425 F.

Mix together a saltwater brine:
2 quarts water
5 Tbsp salt

Soak/brine 1.5 lb salmon filet for 15- 20 minutes.   Pat salmon dry and set on foil-lined baking tray.

Mix together in a bowl, then spread on top of salmon:
1/4 - 1/3 cup mayonnaise
1/4 - 1/2 tsp salt
1/2 tsp pepper
1-2 tsp chili powder
3/4 tsp ground cumin
1-2 tsp minced garlic
Salmon topped with mayonnaise spread - yes, it kind of has a cinnamon-sugar look, but definitely a nice spicy taste! 

On top of mayonnaise spread, place:
1/2 vidalia onion or red onion, thinly sliced
drizzle of favorite BBQ sauce (make sure it's gluten-free)
Ready for baking! (or you can BBQ off-heat aiming for a similar overall temperature in your BBQ)

Bake salmon at 425 F for 20-22 minutes, or until nicely cooked at thickest point. (Thinner cuts may take less time, thicker may require a few extra minutes).

Delicious served with white or brown rice - ideally seasoned with garlic, onions, parsley, squeeze of fresh lemon, salt and pepper during cooking.  

Tuesday, 30 January 2018

Easy Herb & Garlic Chicken - perfect over pasta

A tasty, easy chicken recipe that my whole family has enjoyed.  The kids are happy I serve it with pasta, and the adults are happy because it's packed with basil, chives and garlic.   The drippings get tossed into the pasta, with or without the chicken, depending on your preference.  A nice, easy meal, that makes you feel like you're eating something fancy despite it's simplicity.  Enjoy!
Herb and Garlic Chicken - GF
Herb and garlic covered chicken, ready to pop into the oven! 

Herb & Garlic Chicken - perfect over pasta
Makes 5 chicken breasts

Preheat oven to 425 F.

In a bowl, mix together:
1/2 cup olive oil 
5-6 cloves garlic, minced
1/2 small onion, minced finely
3-4 Tbsp minced fresh chives
4-5 Tbsp fresh basil, sliced
1/2 - 1 tsp salt
1/2 tsp pepper

Drizzle a little of the mixture on the bottom of a 9 x 13 pan.   Place chicken breasts in pan, slicing thick areas, if needed, so all the chicken is at a similar height/thickness in the pan.  Spread the olive oil/garlic/herb mixture evenly over all the chicken breasts.

Bake at 425 F for ~25 minutes, until the chicken measures ~170 F at the thickest spot.
Herb and Garlic Chicken - GF
Fresh from the oven - ready to dice and toss with pasta - or collect drippings and toss and serve the chicken over-top! 

The chicken can be served directly over GF pasta*, using the olive oil and drippings to toss with your GF noodles.

OR

You can dice/slice up the chicken and toss the chicken and olive oil drippings with GF pasta to serve.

* My favorite GF noodles are the ones made from a mixture of brown rice, white rice, quinoa, and corn.   My ultimate favorite noodles are homemade gluten-free pasta, but these do take a bit more effort and mess, though not too much overall time because the boiling time for fresh noodles is so short. 

Wednesday, 10 May 2017

Homemade Butter Chicken

This easy gluten-free butter chicken recipe is wonderful!  Despite the name, there's very little butter in it, but it's nice and creamy and not too spicy, being a family-friendly Indian dish.  I've made several renditions of butter chicken over the years, but never been satisfied until now.  Make sure you start a day ahead, so you can marinate your chicken overnight, allowing the flavors to have ample time to sink into the meat.  None of the steps in this recipe are tricky, but it doesn't require quite a bit of simmering time, so make sure to read through the recipe ahead of time.   This was a perfect dish for my brother's birthday dinner, served alongside chicken saag, in which we used paneer in place of chicken (wonderful) and fresh, homemade GF naan bread.  Enjoy!

Gluten Free Butter Chicken
A delicious meal of butter chicken and paneer saag (made with diced paneer in place of chicken) over rice 

Homemade Butter Chicken
based off a NYTimes recipe
Serves ~8, about 1 hr 15 minutes cooking time (most of it simmering time)

In a large tupperware, mix together the night before you want to make this dish to marinate chicken thighs: (aka, ~24 in advance)
1 1/2 cup plain yogurt (lactose-free works great)
2 Tbsp fresh lemon juice
2 Tbsp garam masala
2 Tbsp ground cumin
1 1/2 Tbsp ground tumeric
3 lbs boneless chicken thighs

In a large pan over medium heat, melt butter, then cook 2-3 minutes:
1/4 cup butter
1-2 Tbsp oil
1 large onion

Add to onions and cook an additional 3-4 minutes, until onions are just starting to brown:
2 Tbsp minced fresh garlic
2 Tbsp grated fresh ginger
1 Tbsp cumin seeds

Add to the pan, and cook about 10 minutes, lowering heat to just below medium heat:
16 oz. can diced tomatoes
1 jalapeno, minced OR 1 tsp red pepper flakes
1 cinnamon stick
1 tsp salt

Add to pan and cook 5 minutes:
Chicken, marinated plus marinade sauce

Add to pot and cook, simmering over medium-low heat for 30 minutes:
3/4 cup GF chicken stock (or 3/4 cup water + 1 tsp Asian mushroom seasoning)

After simmering, add and simmer an additional 15 minutes to thicken:
1 - 1 1/2 cups coconut cream (OR thick part of canned coconut milk if you can't find canned coconut cream)

Serve over fresh basmati rice.  If desired, you can sprinkle with fresh cilantro before serving.  Absolutely wonderful served alongside homemade gluten-free naan bread, too!  Enjoy!

GF Butter Chicken
A delicious meal of butter chicken and paneer saag (made with diced paneer in place of chicken) over rice with GF key lime cookies and key lime curd (recipe to be posted soon) on the side! 

Update!  Another option for your butter chicken meal!  Add some fresh spinach during the last five minutes of simmering.  Top your dish with thinly sliced oven roasted carrots and potatoes.  It was a hit at my house! To make your roasted veggies, thinly slice carrots and potatoes. Toss in a drizzle of olive oil, sprinkle with salt and pepper, spread out evenly and roast on a cookie sheet at 425F until just browning.  My kids especially loved this addition to our butter chicken.  Enjoy! 
Butter chicken with spinach added, topped with roasted carrots and potatoes. Yum!

Saturday, 25 February 2017

Salmon topped with Feta & Red Onion

This recipe is a perfect accompaniment to delicious homemade Greek salad.  Salmon topped with herbs, feta and red onion is a healthy, delicious dinner that is easy to put together for a quick mid-week meal.  To top it off, it looks lovely when being served.  Use even slices of salmon for the best, most even cooking.  Enjoy!

GF Salmon topped with Feta & Red Onion
Freshly baked salmon topped with herbs, feta & red onion, then drizzled in olive oil before baking.

Salmon topped with Feta & Red Onion

Preheat oven to 425 F.  Line cookie sheet with foil.

On foil-lined pan, place 3-4 salmon pieces skin side down.

Sprinkle the tops of each salmon slice with:
salt
pepper
garlic powder
oregano
basil

Drizzle the top with olive oil.

Top with:
thinly sliced red onion
crumbled feta

Drizzle tops again with a little extra olive oil.
GF Salmon topped with Feta & Red Onion
Salmon prior to cooking.  If desired, you can use even more herbs sprinkled on top - as in the salmon shown below. 

Bake salmon pieces at 425 F for 20-25 minutes until cooked through.  I find thinner pieces cook in ~20 minutes and thicker pieces take more like 25 minutes.  Check the thickest point with a fork to make sure it flakes nicely and is cooked through. Salmon turns from a darker pink to a lighter pink when cooked.

Delicious served with a homemade Greek Salad on the side.

Enjoy!!!
GF Salmon topped with Feta & Red Onion
Salmon fresh out of the oven, with a bit thicker layer of herbs.  Both methods are delicious. Enjoy! 


Saturday, 25 June 2016

Tasty Chicken Saag

We just love Indian food around here.  I love that it's always packed with vegetables, and leftovers are fun to use on top of things like pizza or in sandwiches.  We get creative.  This dish has several steps, though many are short and easy.  I've written it out so directions and ingredients are interspersed.  All ingredients are in bold, making it easy to skim through and make sure you have all you need to prepare this tasty dish.  Every time I've whipped this together, I get cheers - which I find entertaining coming from a 2, 5 and 10 year old (plus my husband).  I'll be posting a fun pizza recipe to make with leftovers soon, too.  Enjoy!
GF Chicken Saag served with basmati rice!  

Tasty Chicken Saag
Based off a recipe from "Best Ever Indian" by Baljekar, Fernandeze, Husain & Kanani 
Serves 4-6

Mix together in a small bowl, set aside:
250 g/8 oz frozen spinach, thawed (OR fresh spinach,  diced and wilted in a pot with lid w/ no extra water)
2 tsp grated ginger
2 tsp minced or grated garlic
1 finely minced chili OR dried, finely chopped chili ~1 tsp

In a large, low side frying pan with lid cook over medium to medium-high heat for 2 minutes:
1 Tbsp oil (olive oil or similar will work)
1/4 tsp peppercorns
1-2 bay leaves (REMOVE before serving, but leave in while cooking)

Add and cook 5 minutes:
1 onion, diced
1 cup mushrooms, sliced (optional)
Nicely sauteed, just browning mushrooms and onions
Add and cook 2 minutes:
2 cups diced canned tomatoes
2-4 tsp curry powder (this adjusts the spice level, depending on your curry powder)
1 tsp salt
1 tsp chili powder

Stir in spinach mixture from above, lower heat to medium-low and simmer 5 minutes.
Ready to add yogurt, milk and broth
Add the following and continue simmering, covered for 15 minutes:
3 Tbsp plain yogurt
3 Tbsp milk or cream
1/2 - 3/4 cup GF chicken broth or stock OR water + 2 tsp Asian Mushroom seasoning

Add the following and then simmer an additional 5 minutes, uncovered if you'd like to thicken it up a bit:
1 - 2 cups cooked, diced chicken
OR
1-2 cups diced paneer (an Indian cheese)
Fresh Chicken Saag, ready to eat! 
Serve the tasty chicken saag over fresh brown or white basmati rice.   Enjoy!
Delicious chicken saag, served with basmati and a lentil, potato, rice dish I'd whipped up, too.

Monday, 20 June 2016

Our Favorite Fried Noodles with Vegetables (and shrimp or chicken)

This is a dish I experimented with many times until I came up with a version I was really happy with.   You can use white or brown rice vermicelli noodles (although the white noodles tend to hold together better during frying).  We always loved getting fried noodles at the farmer's market, but I wanted a way to make them gluten-free and with more vegetables.  You can throw in any sort of meat you like, but I tend to use either shrimp or chicken when I whip this up.  The fried noodles have gotten rave reviews (and requests) since I first served them up.  It's a great summer dish when a wide variety of fresh vegetables are in season.  Enjoy!
Fried Noodles with Veggies - you can serve as-is or add shrimp or chicken! 

Fried Noodles with Vegetables (and Shrimp)

Bring water to a boil in a large pot.
Add:
1/2 - 1 package white or brown rice vermicelli noodles (depending on how many you want to serve. I make 1/2 package to serve ~4)
Let noodles boil for 1 minute at a rolling boil.  Remove from heat.  Drain and rinse well with water to remove starch.

Place noodles in a large bowl and mix with:
4 Tbsp avocado oil (or similar oil good for high-heat cooking)
4 Tbsp GF soy sauce (liquid Bragg's soy seasoning)

Set noodles aside while you cook the vegetables.

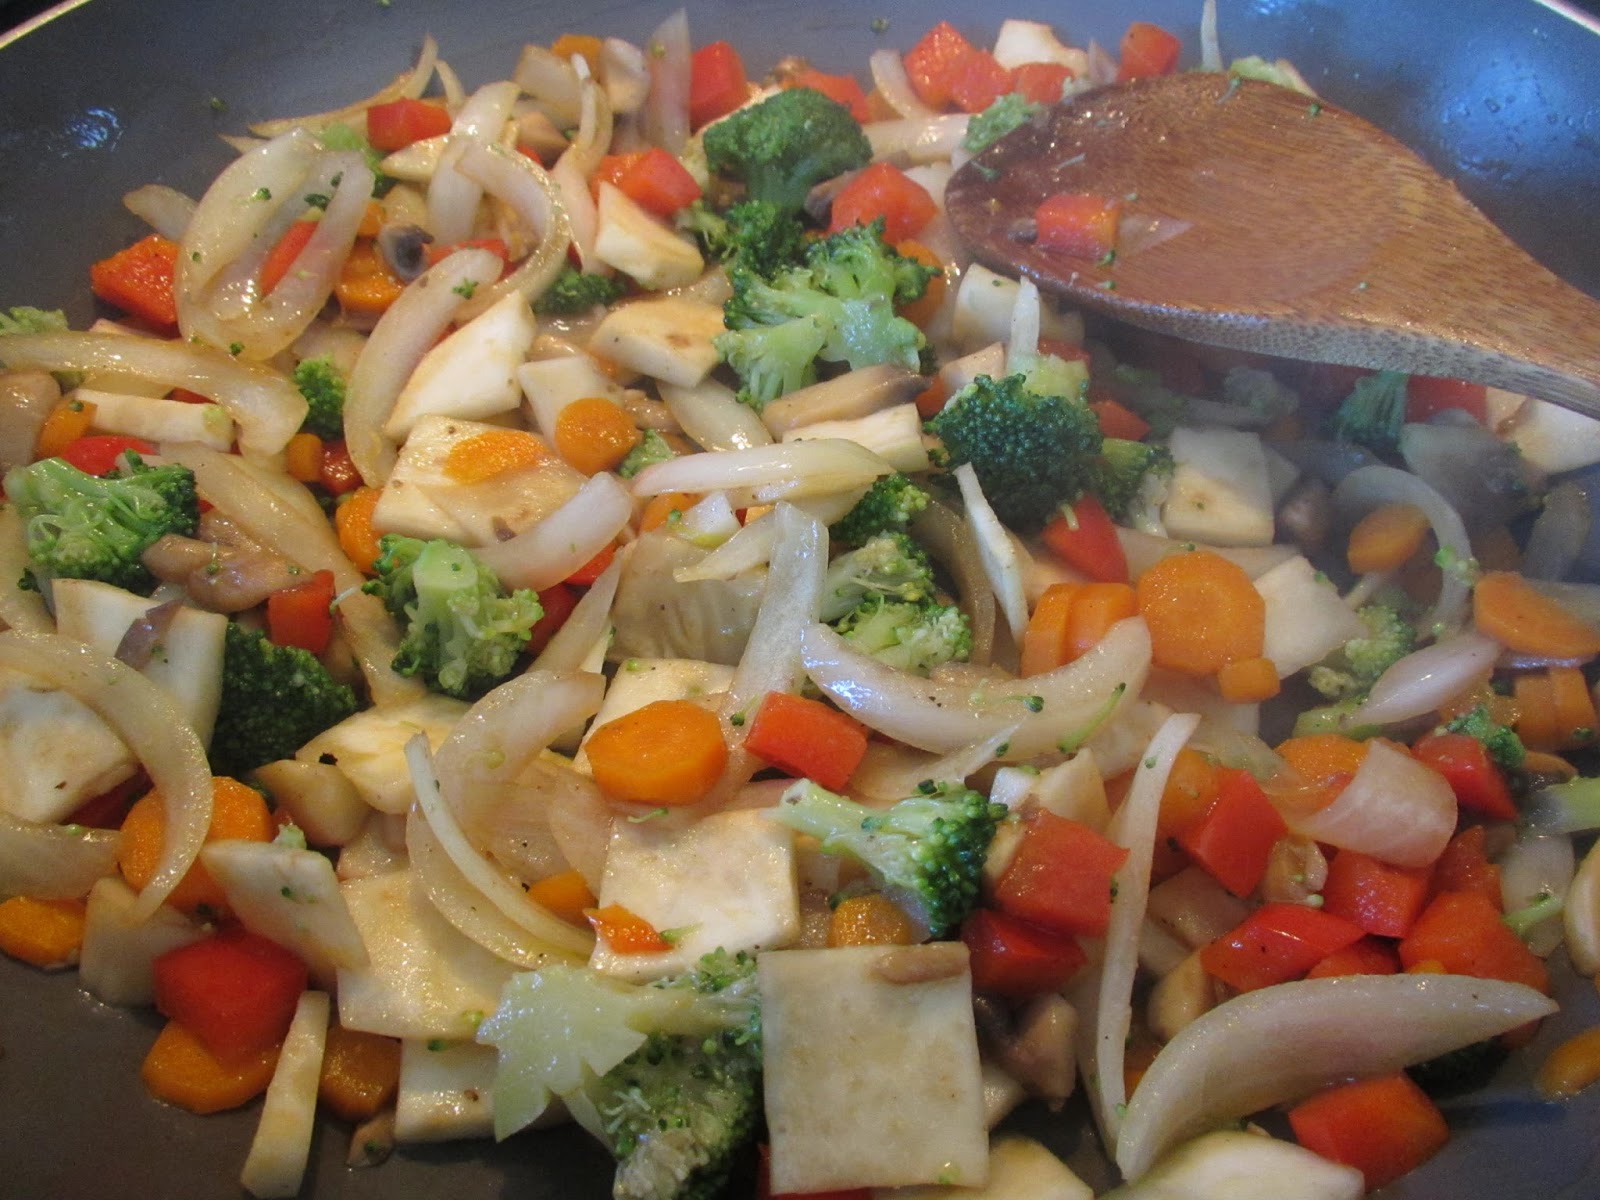
In a wok or similar large frying pan, saute over medium-high to high heat for 2-3 minutes:
2-3 Tbsp avocado oil (or similar oil good for high-heat cooking)
1/2 - 1 onion, sliced
1-2 carrots, thinly sliced

Add, and saute an additional 2-3 minutes:
1/2 celery root, thinly sliced & chopped to bite size pieces
1/2 red bell pepper, diced
1/2 - 1 cup mushrooms, finely diced

Add and cook 1 minute:
1 cup broccoli, chopped to bite-sized pieces.

Place vegetables in a large serving dish.

In small batches, fry noodles in additional oil 2-3 minutes.  Once fried, place noodles on top of hot vegetables.
Once all noodles are fried, in pan heat 1-2 minutes:
1 Tbsp oil
1-2 Tbsp GF soy sauce
1-2 cups cooked chicken, diced 
OR
1-2 cups cooked shrimp (thawed, deveined, no shell)

Put shrimp or chicken on top of noodles.  Toss together.  Serve immediately.  Enjoy!!!

Monday, 11 April 2016

Chicken Vegetable Pie and Biscuits

This dish is packed with veggies - leeks, mushrooms, onions, carrots, celery, peas topped with flaky biscuits.  I have listed this recipe in such a way that while things are cooking, you can stir occasionally and chop the remaining vegetables while things are simmering/cooking.  I, personally, find it helpful to have recipes listed in such a way that the ingredients and instructions are intertwined rather than having a large list of ingredients at the top followed by instructions at the bottom.  I hope you'll agree it's a helpful way to have a recipe, even if you have to skim through it all to find all the ingredients needed.  Ingredients are always in bold to help with this.  In this recipe, the addition of leeks adds wonderful flavor to the chicken vegetable pot pie taste.  The biscuits that cook right on top are wonderful! Light, soft, delicious.  A perfect accompaniment to this dish.  Enjoy!!!
A delicious biscuit topping a pile of tasty vegetables & chicken. Yum! 

Chicken Vegetable Pie & Biscuits


Preheat oven to 400 F.


Melt in large, heavy pan:
½ cup butter

Stir vegetables occasionally, so you can chop veggies & cook at the same time! 

Add & cook for 5 minutes:
1 onion, coarsely chopped
3 carrots, sliced thinly

Add & cook 2-3 minutes: 
1 leek, sliced and rinsed

Add & cook 5 minutes:
3 celery stalks, diced
1 cup sliced mushrooms

Add & cook until bubbling, lower heat to medium-low and let simmer 5 minutes:
2 1/2 cups hot chicken broth/stock
Season w/ salt & pepper

Mix together first and then mix into bubbling vegetables to thicken:
1/3 cup milk
2 Tbsp cornstarch

Stir in and let simmer over low to medium-low heat for 5-10 minutes:
1 cup cooked chicken, chopped
½ cup frozen peas

While chicken and vegetables are simmering, prepare the biscuits for the top:

Make buttermilk in a measuring cup.  In a measuring cup place:
1 Tbsp lemon juice

Fill so you have a total of:
1/2 cup milk

Mix in a large bowl: 
1/2 cup brown rice flour
1/2 cup tapioca starch
1/4 cup corn flour (or corn starch, if you don't have corn flour)
1/4 cup potato starch
1/4 tsp xanthan gum
2 tsp baking powder
2 tsp sugar
1/2 tsp salt
1/4 tsp baking soda

Dice in with a pastry cutter:
5 Tbsp butter

Add & mix in just until a dough is formed:
1/2 cup buttermilk, from above

Put vegetables/chicken in large dish (9x13 size).  Cover with small scoops of biscuit dough pressed into little flat circles using your hands.  Bake at 400 F for 15-17 minutes until golden brown.   Serve and enjoy! 
Chicken Pot Pie & Biscuits, ready to cook! 
This dish is absolutely beautiful coming out of the oven with those golden biscuits.  

Tuesday, 18 August 2015

Summer Veggie & Mushroom Fried Rice

I love whipping up fried rice in the summertime.  The addition of mushrooms cooked in butter and garlic gives some extra oomph to the dish.  In fact, it doesn't really need any hot sauce on the side, but I like a little kick.  This was an absolute hit with my little girls. They inhaled it!  Use any fresh summer greens, just dice them up.  You can toss in extra fresh herbs, too. It's versatile! Enjoy!
Gluten Free Vegetable and Mushroom Fried Rice
Fresh mushrooms and greens make for a quick, easy summer fried rice dish.

Summer Veggie & Mushroom Fried Rice
Serves 2

Use a large frying pan or wok over medium-high heat.
In 2-3 Tbsp butter, cook 2-3:
handful of fresh Chanterelle mushrooms, washed, dried and diced
1 tsp minced garlic
2-3 Tbsp fresh parsley, finely diced

Remove mushrooms from pan.

Add 2 Tbsp avocado oil (or another oil good for high-heat cooking) to the pan.

Add and cook 3-4 minutes:
2 cups cooked day-old rice (brown basmati worked well - you want your rice a little dried out, so if you make it fresh, cook it a bit extra to dry it out a little)
1 cup mixed baby greens (swiss chard, kale, spinach, fresh beet greens), diced
1/2 cup frozen peas OR handful sugar snap peas

Move rice/veggies to the outer edges of the pan.
Add, then stir to scramble the eggs:
1 Tbsp avocado oil
2 eggs, whisked

Add the mushrooms back into the pan.

Add and cook 1-2 minutes:
1-2 Tbsp GF soy sauce (Bragg's liquid soy seasoning works well) OR another flavorful sauce of your choice

Serve immediately with srarachi hot sauce (or a little ketchup if your eaters are 4 years old).  Enjoy!

Friday, 3 July 2015

Easy Homemade Pasta!!!

You can make delicious homemade gluten-free pasta at home with just a few simple kitchen items - a bowl, a rolling pin, a pizza cutter (or knife).   I used the recipe in the 'Artisanal Gluten-Free cook book' by Bronski & Bronski as inspiration, but made some alterations along the way in terms of measurements, mixing and cooking.  However, it was a great starting point, and led me to this delicious recipe.  I have (and will continue) to play around with the pasta maker I received as a gift, but at present I find the best noodles are still the ones made by rolling out the dough as thinly as possible and then slicing with a pizza cutter.   The egg in the recipe gives the pasta a rich flavor which is tasty to eat on it's own, or with a light topping like butter and Parmesan cheese.  It was a big hit with the whole family. Enjoy!
Gluten Free Homemade Pasta!!!
Homemade gluten-free pasta noodles, ready to boil
GF Homemade Pasta and Pesto
Homemade gluten-free pasta with homemade spinach (nut-free) pesto! Delicious!

Homemade Pasta!
Serves 4

Have an extra 1/2 Kristin's Gluten-Free Flour Mix set aside for kneading and rolling out your dough.

Combine in a bowl:
2 1/2 cups Kristin's Gluten-Free Flour Mix
1 tsp xanthan gum
1 tsp salt
4 eggs, whisked
It's best to incorporate the flour slowly to avoid lumps.  You can use your fingers or a spoon or fork (I tend to just use the fork I whisked the eggs with - less to clean!)

Remove the dough from the bowl and knead on a floured surface 1-2 minutes, adding a bit more flour if it gets sticky.

Roll 1/3 - 1/2 batch of dough at a time on a flour surface until the dough is as thin as you can make it (I tend to use a back and forth rolling motion to get the dough extra thin).  You'll need to add a little extra flour to the top and bottom of the dough occasionally to avoid sticking since you'll be rolling the dough very thin (~1/16").

Once you have the dough rolled as thinly as possible, slice strips of dough using your pizza cutter (or knife).  You can use a ruler if you're picky about how evenly sized your noodles are, but I tend to just ballpark it.   Set noodles aside either on a pasta hanger or just neatly in small piles until you're ready to boil your pasta.
Gluten-free pasta dough rolled really really thin and then sliced fairly evenly with a pizza cutter. It's so quick! 
Gluten Free Homemade Pasta!!!
While waiting to boil, I hung the pasta on a pasta rack, but because it's floured if you put it in small piles, it will be perfectly fine before boiling.

Bring water to boil in a large pot over high heat (I fill halfway).  Add 1 Tbsp salt to the water.   Once water is at a rolling boil, you can add the pasta.  Stir occasionally to avoid sticking to the pot.   Once the water is back to a boil (~30-45 seconds), set a timer for 2-4 minutes.  You may need to lower the heat slightly so it doesn't boil over. Watch closely! The pasta cooks rapidly, so start taste-testing after 2 minutes to make sure you get the texture you want.  Fresh pasta has a chewier taste than the dried stuff, but don't let it cook more than 5 minutes or it can get sticky.

Drain pasta and rinse in cold water to remove extra starch.  Serve with your favorite sauce, pesto, or butter & Parmesan.

Some suggestions are below:
Kale & Basil Pesto (nut free)
Spinach Pesto (nut free)
Light Bolognaise Sauce
Red & Green Sauce with Meatballs
Meaty Sauce with Spinach, Garlic & Basil
Spaghetti Sauce with Veggies
Alfredo Cream Sauce

Friday, 26 June 2015

Thin-cut Pan-fried Herb Chicken with Mushrooms

Delicious and gorgeous meals can be made in one large frying pan in a tiny kitchen!  This was a delicious dish I whipped together while visiting Rome recently with my family (hence the gorgeous plates and platters - I don't think the pictures do them justice).  I used fresh mushrooms and shallots from the local market and fresh thinly sliced chicken.  The great thing about this dish is the chicken cooks up quickly because it's so thinly sliced!  It's flavorful and delicious while using a minimum number of ingredients - important while travelling.  You can serve it alongside salad, rice, or GF bread.  It's also a great dish for summer when you don't want to stand for long over a hot stove. Enjoy!
Gluten Free Pan-Fried Herb Chicken and Mushrooms
Ready to eat, with mushrooms spread across the tops of the chicken.  A delicious meal in Rome after a day of sight-seeing.  We served it alongside leftover risotto and salad, and some pizza from around the corner for those without gluten-allergies.

Pan-fried Herb Chicken with Mushrooms
Serves 4

Ask butcher to slice two chicken breasts 1/4" thick.  You can do it by hand, but I find it's hard to get it evenly thin everywhere.

Mix together marinade in a large platter: (you can adjust the amounts of each ingredients, the measurements give a place to start)
4-5 Tbsp olive oil
2-3 Tbsp vinegar (apple cider or white wine)
1/2 - 1 tsp salt
1/2 tsp pepper
1/2 - 1 tsp dried oregano
1/2 - 1 tsp dried basil

Place thinly sliced chicken breast in marinade, turning to coat all sides.  Let rest 10-15 minutes while you prep and cook the mushrooms.
Chicken in marinade on left and after cooking on right.
Saute in 1 Tbsp butter and 1 Tbsp olive oil:
1 cup mushrooms, thinly sliced
1-2 shallots, sliced or diced
3 cloves garlic, minced

After cooking mushrooms, remove them from the pan and set them aside while you quickly pan-fry the chicken.

Using just enough olive oil to coat the bottom of the frying pan.  Fry each slice of chicken on both sides until the chicken is fully cooked.  The thinner the chicken, the faster it cooks.  If your slices of chicken are too thick, you can let it sear on each side and remove to a baking pan. Then bake 15 minutes at 375F until your chicken is fully cooked.  
Mushrooms set aside, with chicken frying in the pan.

Serve on a platter with the mushrooms and shallots drizzled overtop.  Enjoy!!!