Search for a Recipe

Wednesday, 21 December 2016

Garlic (& Poppyseed) Bagels & Bagel Sticks - Gluten-Free and Easy!

Gluten Free Garlic and Poppyseed Bagel Sticks and Bagels are a hit around here!  I have little kids, and little kids can sometimes be picky.  They will suddenly refuse to eat things they ordinarily love.  This pickiness is how I ended up piping what were going to be mini bagels into bagel sticks.  Identical in taste, the new shape transformed them into something fabulously new.  The bagel sticks were raved over!  I've been making them regularly ever since.  They even work well for little lunchtime sandwiches when we're not in the mood for some delicious smoked salmon and cream cheese (we are usually in the mood for smoked salmon and cream cheese, but it's not always in the refrigerator).   These bagels/bagel sticks are SO easy to whip together in your mixer and pipe out on a pan.  Enjoy!

A fresh toasted mini garlic poppyseed bagel with cream cheese. Yum! 
This recipe can make a lot - I often lose count because it depends on how you pipe them out, but I love making a mix of mini bagels and bagel sticks.  My little girls and my mom LOVE the bagel sticks. 


Garlic (& Poppyseed) Bagels and Bagel Sticks! 
Makes ~30 bagel sticks

Preheat oven to 350 F.  Line 2-3 cookie sheets with parchment paper or silicon mats.

In a small bowl, combine and let rest 5 minutes, until nice and puffy:
1 1/4 cup warm water
6 Tbsp honey
1 Tbsp rapid-rise yeast

Add to yeast mixture:
3 eggs
6 Tbsp oil

In a mixer, combine:
2 cups tapioca starch
1 1/2 cups brown rice flour (or sprouted brown rice flour)
6 Tbsp potato starch
3 3/4 tsp xanthan gum
1 1/2 tsp salt
1 1/2 - 2 Tbsp dried garlic flakes
1 Tbsp poppyseeds (optional) 

Beat dough for 2-3 minutes, until nice and smooth.   The dough should be thick, but still soft enough that you would be able to pipe in a ziploc bag - if necessary, add an extra tablespoon or two of water.  I find when I make larger batches of bagels, sometimes I end up with more flour when measuring a cup at a time than when I use a 1/3 or 1/2 cup measuring cup in smaller batch recipes.
Put bagel dough in a large freezer ziploc and cut off about 1/2" from a corner.  Pipe sticks or mini bagels onto parchment paper lined pans.  I usually make the bagel sticks about 4-5" long and bagels of a similar size. I find two pans works for making all bagel sticks, and you'll need 3 pans if you make both bagels & bagel sticks.

Using your hands or pastry brush, gently brush/wipe tops of bagels/bagel sticks with warm water.  Let rise in a warm location ~30 minutes, until puffed up, but not quite doubled in size.

Bake at 350 F for ~20 minutes, until nicely browned.   Remove to a cooling rack.  Once cooled, you can slice and freeze any you won't eat right away.  They reheat perfectly in a toaster oven.  Enjoy!!!

A delicious garlic bagel stick with cream cheese.  

Monday, 12 December 2016

Crepes - w/ a delicious maple apple pie filling

Crepes with a delicious maple-apple compote filling are a perfect wintry breakfast to make using those late fall apples.  (Any apples good for pie or apple sauce are good to use in this recipe).   Crepes are wonderfully versatile, and you can fill them with sweet or savory fillings.  My kids love to have a small vegetable omelet inside a crepe followed by a sweet-filled crepe for breakfast.  We even make them for dinner on special occasions! Enjoy!
GF Crepes with Maple Apple Filling
Maple-Apple filling warming while the crepes are cooking

Crepes - with a maple-apple pie filling

Makes 24, 10" crepes

Preheat 10" crepe pan over medium-high heat.

Blend together with a stick blender:
4 eggs
2 cups milk (lactose-free works great)
2/3 cup cold water
3/4 cups cornstarch
3/4 cups arrowroot starch (if you don't have arrowroot starch, you can use extra cornstarch)
1/2 cup brown rice flour
1/2 tsp baking soda
1/2 tsp salt
2 tsp cinnamon

Add and blend in:
4 Tbsp butter, melted

Butter pan only for 1st crepe.  Pour ~1/4 cup batter into pan, quickly pick up and rotate the pan around so the batter spreads out thinly.

Cook until batter appears dry, then flip crepe.  Cook briefly on the other side.  Each side should be lightly browned.  They cook up quickly, so keep a close eye on things.

Put on plate, then repeat.  They can be stacked right on top of one another.  To save leftovers, cover plate with crepes with plastic wrap and refrigerate.  Warm briefly in the microwave if they are sticking to each other. (I find they only stick together a bit after being refrigerated. Fresh crepes won't stick together and are a great make-ahead for a meal or dessert)

Serve with your choice of apple pie-type filling in the crepes.  A delicious option - which can be refined-sugar free, too, is my maple-apple compote, retyped here for convenience.  It's great with small scoops of ice cream, too! Enjoy!
GF Crepes with Maple Apple Filling over Ice Cream
A delicious crepe topped with ice cream and maple-apple compote for dessert! 

Maple-Apple Compote

Saute over medium heat about 8 minutes:
1-2 Tbsp butter
3 cups sliced or diced apples (peeled & cored)

Add an cook briefly:
1/4 cup maple syrup OR 1/4 cup brown sugar OR 1/4 cup honey
1/2 tsp cinnamon
1/4 tsp nutmeg (optional)

Serve your maple-apple compote over crepes, pancakes, puffy oven pancakes, oatmeal, etc.!


Crepes with a maple apple filling by Successfully Gluten Free!

Thursday, 1 December 2016

Rich & Creamy Homemade Chocolate Pudding!!!

I've always preferred homemade pudding to any other type.  Chocolate pudding, while delicious, can be a bit temperamental compared to making vanilla pudding.  This method, where you add hot, but not yet boiling, milk to the eggs before adding them to the pot works perfectly to any lumpiness.  The result is a delicious, creamy pudding.  If you are a fan of pots de chocolats, you may enjoy making this with a light cream instead of milk.  I find the taste of your cocoa powder will completely change the taste of your final pudding.  I vary what I use depending on my mood, sometimes a dark, rich cocoa powder, other times a light, mild one.  If you use one that is a bit more on the bitter side, this recipe will need an extra 1/4 cup of sugar.  Enjoy!
Homemade GF Chocolate Pudding
Homemade GF Rich and Creamy Chocolate Pudding. Yum! 

Rich & Creamy Homemade Chocolate Pudding!!!
Makes ~ 6 servings

In a separate small bowl, whisk together until smooth.  Set aside to add in later:
4 egg yolks
1/4 cup milk
1/4 cup cornstarch

Whisk together in a medium-size saucepan:
1/2 cup sugar
1/4 cup cocoa powder (some cocoa powders are naturally sweeter, some are more bitter - you can use a little extra sugar if necessary)
1/2 tsp salt
pinch cinnamon (optional)

Add and whisk the following into the sugar/cocoa mixture:
2 3/4 cup milk (higher percentage of fat is best - you can even use a combination of 10% cream and milk for a really rich pudding)

Stir milk/cocoa mixture regularly while heating over medium heat until mixture almost comes to a boil **you don't want it to be at a boil, just very hot because you'll add a bit to the eggs and if it is boiling, you'll curdle the eggs a bit** 

Using your mixture of "almost" boiling hot chocolate milk, whisk 1/4 cup milk into your egg yolk mixture.  Add an additional 1/4 cup milk, whisking in.  Add a final 1/4 cup milk, whisking in.  This allows your eggs to heat up a bit slower, so you don't end up with lumps in your pudding.

Add egg mixture back into the pot.  Stirring constantly, mix until mixture comes to a boil and begins to bubble and thicken.  Keep on heat no more than 1 minute after mixture has begin boiling.

Remove from heat and add:
1/2 - 1 tsp vanilla extract or bean paste (optional)
Homemade chocolate pudding - just off the heat. 
Put immediately into desired cups or bowls.  Cover with plastic wrap (make sure plastic wrap is on the surface of the pudding to avoid any 'skin' being formed on top of your pudding).  Let cool.  Great hot, warm or chilled.  Enjoy! 

Homemade GF Chocolate Pudding

Friday, 25 November 2016

Curry Chicken Salad

Curried chicken salad has grown on me over the years, although (sorry mom), I still despise ones with grapes in them.  I find this version hits the spot with a nice mix of spicy, sweet, crunchy and smooth.  Funny story: We have all enjoyed this salad so much, I thought I'd whip some up for dinner when we had a couple guests.  After all, it is a favorite.  In my hurry to prepare things, I mistook the metal canister of Old Bay Seasoning for Curry Powder, using half Old Bay with half of another container of curry powder (Do Not make this mistake).  Oops!  It was so ridiculously salty with the added Old Bay.  Thankfully, we all had a good laugh.   If you make it properly, using curry powder (which should have no added salt), you'll be good to go!  Enjoy!
GF Curry Chicken Salad
Delicious curry chicken salad - great on sandwiches, on top of salads, or with easy to make homemade focaccia bread.

Curry Chicken Salad

Mix together:
1/3 - 1/2 cup dill pickles, diced (fermented dill pickles are wonderful, if you can find them)
1/4 - 1/3 cup green onions, sliced
1 apple, diced
2-3 cups cooked chicken, diced
1/4 - 1/3 cup mayonnaise
~4 tsp curry powder (add 1 tsp at a time, to taste)
~3/4 tsp ground pepper, more/less to taste

Serve the tasty curry chicken salad with toast or crackers, homemade breadhomemade focaccia bread and/or a side salad.  Enjoy!

Monday, 21 November 2016

Toffee Covered Donut Holes! (with dairy-free option)

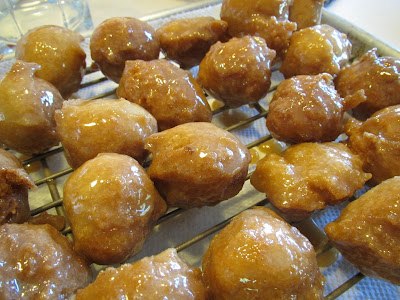
These toffee-covered donut holes are divine.  I have to admit, I sometimes find things made with coconut oil or coconut milk to overpower the flavor I'm going for, but in this case, the dairy-free version works just as well.  It has more of a light toffee glaze taste, where the regular one has more of a caramel type flavor.  Both were delicious.  Both were eaten with gusto.  All were heartily enjoyed by gluten-free and non-gluten-free eaters at a church activity where I brought them to share.  I try to space out how frequently I make up donut holes, but these are such a perfect fall treat, I may have to whip some up again soon!   Happy eating! Enjoy!

Gluten Free Toffee Covered Donut Holes
Fresh toffee covered donut holes, ready to eat! 

Toffee Covered Donut Holes! (with dairy-free option)
Makes ~36 donut holes

Mix together in a large bowl:
2 cups Kristin's Gluten-Free Flour Mix
1/2 cup brown sugar (dark is best)
3 tsp baking powder
1 tsp cinnamon
1/2 tsp salt
1 cup coconut milk (or regular or lactose-free milk)
1 egg
1 tsp vanilla bean paste OR vanilla extract

Let rest 5-10 minutes while your frying oil heats.

In large high-sided frying pan, heat 1" avocado oil (or similar frying oil, but I love the crunch and flavor of avocado oil for donuts) over medium-high heat.   Cook donut holes using a mini cookie scoop, or by small spoonfuls (like you would to make cookies if you had two teaspoons to use).   Cook 2-3 minutes per side.

Remove donut holes to a paper towel-lined pan.  Allow them to fully cool.  Once they are cooled, dip the donut holes one by one in the toffee glaze, below, then place dipped donut holes on wire racks.  I like to use a slotted spoon to dip. The toffee coating hardens as it cools, making for a lovely combination with the donut hole.

Toffee Glaze
This makes a generous amount - you could definitely halve this recipe and still cover all the donut holes.  

Heat over medium heat in a saucepan or frying pan until sugar has fully dissolved:
4 Tbsp butter OR coconut oil
1/2 cup brown sugar

Once sugar has dissolved, add and bring to a boil:
2/3 cup whole milk or light cream (lactose-free works) OR canned coconut milk

Remove from heat and add, mixing well to fully incorporate the sugar:
3 cups powdered sugar

I like to put the toffee glaze back over medium heat briefly, just until bubbles form, stirring constantly.  If you have any clumps of powdered sugar that aren't breaking up, it really helps.

Use delicious toffee glaze while hot/warm to dip your donut holes!    Below, I made two types of toffee glaze, making a half recipe of each.  I used two small frying pans and made one batch of dairy-free (using coconut oil & canned coconut milk) and one batch of lactose-free (using butter + 10% lactose-free cream).


The darker glaze on the left is the dairy-free one, the lighter glaze on the back/right were the regular glazed donut holes. 
On the left are the dairy-free, (toffee glazed made with coconut oil & coconut milk substitutes), on the right are the regular glazed donut holes.  Both were delicious!  And, best of all, no one could tell the difference, they were both inhaled! 

Monday, 14 November 2016

Butternut Squash, Garlic & Shallot Risotto

Fall is the perfect time of year for butternut squash, garlic & shallot risotto.  Often, I whip it this type of squash up into one of our favorite soups: butternut squash soup.  But it's nice to have an all-in-one meal, too, such as the one here!  Add in some delicious seasonal garlic and shallots with your squash and you have a tasty, rich meal.  I recommend dicing the squash into small bite size pieces, so it cooks quickly, but doesn't end up mushy by the time the risotto rice has cooked.  I also prefer to slice the garlic and shallots, so you get flavorful bites throughout.   Enjoy!
GF Butternut Squash, Garlic & Shallot Risotto
Delicious Butternut Squash, Garlic & Shallot Risotto, ready to eat! 

Butternut Squash, Garlic & Shallot Risotto

In a large frying pan, cook for 1-2 minutes over medium heat:
2 Tbsp olive oil
1-2 shallots, sliced
5 garlic cloves, sliced

Add an cook 5-6 minutes:
1/2 butternut squash, peeled & diced into small pieces

Move vegetables to the edges of the pan, add and cook 1 minute in the center of the pan:
1 Tbsp olive oil
1 cup arborio risotto rice
GF Butternut Squash, Garlic & Shallot Risotto

Add the spices and the liquid slowly over 15-20 minutes of cooking, to allow the liquid time to be absorbed as it cooks, stirring occasionally, but not allowing the rice to stick to the bottom of the pan.
3 cups chicken broth OR 3 cups water + 3 tsp Asian Mushroom Seasoning OR GF chicken bouillon/paste
1/4 - 1/2 tsp ground nutmeg
pinch crushed rosemary
salt & pepper (start with 1/4-1/2 tsp of each and adjust at the end, if necessary)
Butternut Squash, Garlic & Shallot Risotto

Once all liquid has been absorbed, remove from heat and add:
1/4 - 1/2 cup parmesan romano or similar cheese.

Salt & Pepper, to taste.  Serve and enjoy!  

Tuesday, 8 November 2016

Gluten Free Potstickers!

Homemade Gluten Free Potstickers!!!!  These are also known as pork dumplings. This gluten-free recipe was inspired by a lovely woman, Ao, who taught me how to make proper Chinese potstickers with a variety of fillings.  This recipe is based off the type she typically makes with pork, but you can substitute in leeks or zucchini for the cabbage.  You can use diced shrimp, scambled eggs (cooked, then finely diced), beef w/ onion or celery, or any other fillings in place of the pork.  The important thing is to have all fillings finely diced/minced.  A food processor can help with this, although with leafy things, like the leaves of the bok choy, I found it necessary to dice by hand.   Ao doesn't typically measure anything, even when making her dough - but I paid close attention to the amounts of each ingredient she added in order to create a recipe similar to what she makes.   Here it is for your enjoyment!  It's best if you have a few people that can work together to make these, similar to what a family would do for Chinese New Year, it can be lots of fun.    These were eaten so quickly at my house, we may have to double the batch next time!  Happy eating!
Gluten Free Chinese Potsticker Dumplings
Piping hot GF potstickers, ready to eat! 

Gluten Free Potstickers
Makes ~30 potstickers

Finely mince/dice:
1 small bok choy or 1/2 cabbage 
Place bok choy in a colander and add 1-2 tsp salt.  Let sit to drain ~20-30 minutes.  Rinse and squeeze as much liquid out as you can before adding to the filling, below.

Mix together in a large bowl the dough:  I had a bit of extra filling which you can pan-fry to eat later wrapped like spring rolls in rice wrappers, but if you don't want extra filling, just double this dough recipe so you don't run out of dough.
Mix first:
1 cup brown rice flour
scant 1/2 cup sorghum flour
scant 1/2 cup tapioca starch
1/4 cup potato starch
1 tsp xanthan gum
1/2 tsp baking powder (for no puffiness in your dough, you can leave this out, but I like the taste)
1/2 tsp salt
Then add and mix with a spoon until smooth (use the back of the spoon to smooth out, if needed):
1 cup milk
2 tsp oil

Set aside dough and mix together the filling:
In a large bowl, combine:
3/4 lb ground pork
bok choy or cabbage, from above, liquid squeezed out
6-7 green onions, finely minced OR 1-2 large shallots, finely diced
1-2 Tbsp minced garlic
4 tsp grated ginger (thawed, if frozen)
2 tsp agave syrup OR 1 tsp sugar
1/2 tsp pepper
1/2 tsp salt
1-2 Tbsp GF soy sauce (like Bragg's soy seasoning)
1 Tbsp oil, heated in a pan until hot (it brings out the flavor of the oil)

Line a cookie sheet with parchment paper.  Have a small bowl of water nearby in case your dough sticks to your fingers at all - you can dip your fingers in the water and the dough won't stick to you.

In a small bowl, mix together and place next to your stove:
1/2 cup water
1 Tbsp GF flour (a flour mix works, or you could just use rice flour)
A couple tablespoons of this mixture will be added to the pan with the cooking potstickers. 

Roll out a small 2 Tbsp sized balls into an oval between two pieces of plastic wrap.  Place 1-2 tsp filling in the center, and use the plastic wrap to fold your potsticker in half and press edges together.
Rolled out dough topped with a dollop of filling.  Use the plastic wrap to fold in half, as shown on the right. 

Place filled potsticker on a pan lined with parchment paper.   Repeat until you have 8-10 potstickers folded and ready to cook.
Gluten Free Chinese Potsticker Dumplings
Filled dumplings are placed on a parchment paper-lined pan, in preparation for cooking.

In a large pan with lid, heat over medium-high heat, 2 Tbsp oil (I like avocado oil, but any vegetable or canola oil will work).  Add potstickers to pan, making sure they aren't touching each other.   Pour in ~2-3 Tbsp of flour/water mixture from above.  Cover the pan and cook without opening for 7 minutes.  This steams and fries the potstickers simultaneously.
Gluten Free Chinese Potsticker Dumplings
Potstickers after 7 minutes of cooking (covered), nicely browned on the bottoms. Make sure to wipe the pan clean between batches! 

I fill/fold up more potstickers while a batch is cooking.   *Wipe the pan clean between batches, then add fresh oil, potstickers & GF flour/water mixture before covering to cook again.*

Potstickers will be nicely crispy and browned on the bottom.  The tops will be steamed and the filling will be cooked through.  Remove to a serving dish and serve with additional GF soy sauce, or a mixture of GF soy sauce, rice vinegar & sesame oil.  

Enjoy!!!
Gluten Free Chinese Potsticker Dumplings
These were eaten happily by all! 

Thursday, 3 November 2016

Hempseed & Chia Bread - Fluffy & Delicoius

A nice, fluffy hearty gluten free bread.  Hempseed has a slightly nutty sort of taste, which adds a lovely flavor to this bread.  I like to use the white chia seeds in the bread, but you can use the black ones, too.   This bread is easy to whip together, too.   Just mix the dry ingredients, then add the wet, beat for a few minutes - rise and bake!  It's quick and delicious!  Enjoy!

*** Updated: just realized this didn't list the oil!  Please use the oil or your bread will greatly lack in texture and will be an epic fail (as the poor woman below discovered).   When making GF breads, I find it's very important to have enough fat or they often won't rise enough and will lack the wonderful taste you're hoping for!

Gluten Free Hempseed and Chia Bread
Fresh Gluten Free Hempseed & Chia seed bread, sliced and ready to eat! 

Hempseed & Chia Bread - fluffy & delicious
Makes 3 loaves (2 large, 2 mini is what I usually make)

In a mixer, mix the following: (it's important to mix GF flours before adding liquids to avoid clumping)
2 cups brown rice flour
1 cup white rice flour
1/2 cup sorghum flour
1 cup potato starch
1/2 cup tapioca starch
4 Tbsp sugar
5 tsp xanthan gum
4 tsp rapid-rise yeast
2 1/2 tsp salt

Add and then beat 3-4 minutes, until nice and smooth:
2 cups warm water
3 eggs
1/2 cup hempseeds
6 - 8 Tbsp oil 
3 Tbsp chia seeds + 9 Tbsp water
4 tsp apple cider vinegar

Butter bread pans with coconut oil (or another oil/butter).  Fill pans halfway with batter, spread tops to smooth.  Let rise in a warm location until the bread is even with the top of the pan (about 30 minutes).
Gluten Free Hempseed and Chia Bread
The pans get filled halfway, then are left to rise until they reach the height of the top of the pan.

Bake at 350 F for 40 minutes for a large loaf and 25-30 minutes for a mini loaf.   Remove from pan and cool on wire rack.  Slice and enjoy!
Gluten Free Hempseed and Chia Bread
The large loaves turn out nicely. I've made this bread many times. I like to use large silicon bread pans.

Cooled bread can be sliced and frozen to be used later.  I find with gluten-free breads it's best to freeze on the day you make the bread.  This will retain the fresh flavor after freezing.  Enjoy!!!
Gluten Free Hempseed and Chia Bread
Fresh large and mini loaves, cooling.

Friday, 28 October 2016

Tasty Pumpkin Cookies

These are a nice, light and fluffy pumpkin cookie.  All those "pumpkin pie" flavors are piled into each little cookie, making these a fun fall treat!  I am a firm believer that if something says "pumpkin" on it, it should contain real pumpkin.  These have plenty of delicious pumpkin puree packed inside - you can use homemade pumpkin puree or canned.  Enjoy!
Tasty Pumpkin Cookies with Glaze! Yum! 

Tasty Pumpkin Cookies
Makes 36

Preheat oven to 400 F.  Line 3 baking sheets with parchment paper or silicon mats.

Mix together, then set aside:
3/4 cup Kristin's Gluten-Free Flour Mix
3/4 cup sweet white rice flour (or plain white rice flour)
1 tsp baking soda
1/2 tsp salt
1/2 tsp ground cinnamon
1/4 tsp ground nutmeg
1/4 tsp ground allspice
1/4 tsp ground ginger
pinch ground cloves

Beat together:
6 Tbsp butter, softened
1 cup sugar

Add and mix until combined:
1 cup homemade pumpkin puree or 100% canned pumpkin
1 egg
1 tsp vanilla extract or vanilla bean paste

Add dry ingredients and mix until combined. (don't overmix).

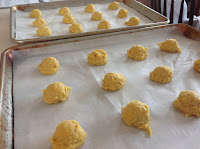
Scoop small scoops (I use a 1 Tbsp mini cookie scoop) onto prepared pans.  Bake 8-10 minutes.
Pumpkin cookies before and after baking.

Cool on cooling rack.  If desired, mix together and use to glaze the tops:
1/2 cup powdered sugar
1 Tbsp milk

Leftover cookies can be frozen.  These cookies can be stored for a day at room temperature, but they do get more moist/sticky over time, so don't layer them unless you don't mind if they stick together a bit.  Enjoy!
Fresh pumpkin cookies made with homemade pumpkin puree! 

Sunday, 16 October 2016

Shepherd's Pie

We love a tasty Shepherd's Pie around here-- or, as my kids call it en francais "Pâté Chinois", which is a terribly confusing name.  The end result is the same regardless of the name - a tasty, rich, meat and veggie-filled bottom covered by mashed potatoes and then baked.  I find there are two methods to go about making Shepherd's Pie - one that allows the meats and veggies to simmer for awhile, which lends a depth to the flavors, or you can just simmer it 5-10 minutes and then bake, which cuts down drastically on the cooking time and the end result is still scrumptious.   Just go with whichever version you have time for.  Enjoy!  
Gluten Free Shepherd's Pie
Gluten Free Shepherd's Pie, baking in the oven

Shepherd's Pie
Serves 6-8
Based on a recipe from one of my favorite cookbooks (brought back from England) 'Comfort Foods' by Bridget Jones
Makes enough for one 9x13 pan (or pan of equivalent volume).  

In a large frying pan/sauce pan cook over medium heat 2-3 minutes: 
2 Tbsp oil
1 onion, diced
2-3 carrots, sliced

Add and cook until meat is fully cooked:  
1 lb. ground beef

Add the following, then simmer covered for 30 minutes.  Uncover and simmer an additional 10 minutes. (make mashed potatoes, instructions below, while meat/veggies are simmering) - *NOTE: if you're short on time, just let this simmer for 10 minutes, uncovered.  However, I prefer the taste when the flavors have a change to simmer together for the full 40 minutes.*
2 Tbsp tomato paste 
2 cups beef broth 
2 tsp Worchestershire sauce 
1 tsp salt (unless broth has salt, then do NOT add) 
1/2 tsp pepper 
1/2 tsp garlic powder 
1/4 tsp thyme or 1 tsp fresh thyme, minced

Optional: during last 5 minutes of simmering uncovered, add 1/2 - 1 cup fresh or frozen corn kernels

Mix together, then add to bubbling meat/veggies: 
1/4 cup milk
2 tsp cornstarch

Pour into baking dish (I usually use a smaller, deeper dish than a 9x13 pan, but one similar in terms of total volume - I used a deep frying pan that is good for both oven and stovetop in the pictures).    Top as evenly as possible with mashed potatoes (from below, made while veggies/meat are simmering).  

Bake at 375 F for ~30 minutes, until bubbling nicely and top of potatoes are just browning.   Serve & enjoy your rich, delicious comfort food!  If you're not happy with how browned the mashed potatoes look on top, throw it under the broiler for a minute or two after baking, just to crisp the top of the potatoes.  

Mashed potatoes to top shepherd's pie

Boil in salted water ~10-12 minutes: 
3 lbs potatoes, diced (skins on if thin-skinned)

Strain and mash with:
 1/3 cup butter 
1/4 cup milk 
salt & pepper, to taste 
1/2 tsp dried tarragon (optional, but I LOVE it). 

Enjoy!!! 
Gluten Free Shepherd's Pie
I like to let it brown a bit extra on top, but it's just personal preference how lightly browned you let the potatoes get. Either way is great!

Wednesday, 12 October 2016

Fennel & Green Onion Omelet

This is a nice, quick little meal that uses a couple tasty fresh, fall vegetables.   This omelet is almost like a frittata in the sense that you saute the vegetables before adding the eggs.    I didn't snap a picture of it since it was eaten so quickly.  You can easily make this omelet with other fresh seasonal vegetables, sauteed just until crisp-tender before adding the egg.  I prefer cutting or slicing the vegetables very thinly for omelets.  Enjoy!

Fennel & Green Onion Omelet

Melt over medium heat:
1-2 Tbsp butter

Add and saute in butter 3-4 minutes:
1/4 - 1/3 cup fennel bulb, thinly sliced
2 green onions, sliced
salt & pepper

Add to pan:
2-3 eggs, whisked

I like to flip the entire omelet over - very carefully - before adding the cheese.  This helps avoid any brown outer edges.  (Sometimes this requires that I slice it in half and flip one half then the other if I'm using 3 eggs instead of 2).

Add to omelet, and cook until you're happy with how well cooked the egg is looking, usually not more than a minute:
grated sharp cheddar, or another cheese - feta, gouda, etc. 

Fold omelet in half and serve!   Great with gluten-free toast & a side of fruit.   Enjoy! 

Monday, 3 October 2016

Zucchini Fritters with fresh Tomato Salsa

These zucchini fritters are delicious!  They are a wonderful way to take advantage of all the variety of colors and shapes that make up delicious fall zucchini.  These zucchini fritters have extra oomph, in my opinion, thanks to the addition of fresh dill and crumble feta cheese.  (Feel free to add a little extra feta if you like).  I have enjoyed eating the fritters on their own, but they're fun with fresh homemade minty tomato salsa.  Add a little hot pepper for an extra kick.
zucchini fritters with fresh tomato salsa
Homemade gluten free zucchini fritters with fresh tomato salsa

Zucchini Fritters with Fresh Tomato Salsa
based off a recipe on foodnetwork.com by Milliker & Feniger

In a large bowl, mix and let sit 20-60 minutes (longer is better) to allow water to leach out:
3-4 medium zucchinis
2-3 tsp salt

In a large bowl, mix together:
1/2 cup crumbled feta
1 Tbsp fresh dill, diced
1 tsp dried parsley
1/4 onion, finely diced
2 eggs
1/4 cup Kristin's Gluten-Free Flour Mix (or regular flour, if not GF)
1/2 - 1 tsp ground pepper

Heat in a large frying pan, over medium-high heat avocado oil, enough to just cover the bottom of the pan. (If you don't have avocado oil, you can use another oil that is good for high-heat cooking)

While oil is heating, squeeze handfuls of zucchini to remove as much water as possible, then add handfuls of zucchini to the feta mixture.  Mix thoroughly.

Scoop small 1-2 teaspoon sized scoops of mixture onto hot oil.  Flatten each scoop with a spoon.   Cook 2-3 minutes per side, until nicely browned.  Put on paper towel-lined pan after frying.
Frying the zucchini fritters in just a thin layer of oil. 
zucchini fritters
They disappear quickly around here!  I love them nicely browned for an extra bit of crunch.

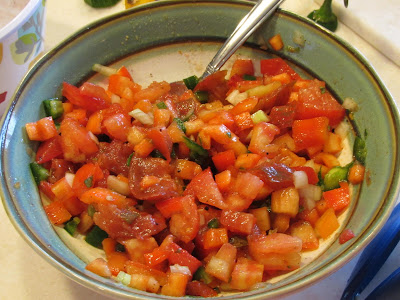
These are delicious on their own, or paired nicely with something like a fresh tomato salsa, such as the one below (seasoned with mint instead of cilantro).

Tomato Salsa
based off a recipe on foodnetwork.com by Milliker & Feniger
Mix in a bowl:
2-3 tomatoes, seeded and diced (this helps so it's not as liquid-filled)
1/2 bell pepper, diced
1 jalapeno, seeded and finely chopped
1 small onion, diced
1 Tbsp olive oil 
1-2 Tbsp apple cider vinegar or similar vinegar
5 fresh mint leaves, finely diced
1/4 tsp paprika
salt & pepper, to taste


fresh tomato salsa with mint and jalapeno
Fresh tomato salsa with mint & jalapeno 

Tuesday, 27 September 2016

Homemade Gluten-Free Thin Mint Cookies!

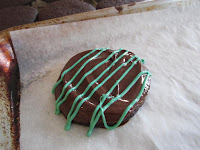
Delicious homemade thin mint cookies that are also gluten-free!  Yes, you can!  These are so easy to whip together, very similar to my sugar cookie recipe.    We have loved making these cookies, then freezing and crushing to add into homemade ice cream to making thin-mint ice cream.  It's been a favorite.  My 5 year old helped make and decorate these cookies, and we were all thrilled with the end result.  Enjoy!
gluten free thin mint cookies
Homemade gluten-free thin mint cookies, ready for sampling! 
gluten free thin mint cookies
A happy little girl with her thin mint cookies! 

Homemade Gluten-Free Thin Mint Cookies!
Makes ~32 cookies

Preheat oven to 375 F.  Line cookie sheets with parchment paper or silicon baking mats.

In a bowl, mix: (it's important to mix dry ingredients first in GF baking to avoid clumping)
1/2 cup cocoa powder
1 cup Kristin's Gluten Free Flour Mix
1/2 tsp baking soda
1/2 tsp cream of tartar

In a mixer, beat until light and creamy: (a few minutes)
1/2 cup butter, softened
3/4 cup powdered sugar

Add and mix in:
1 egg yolk
1/2 tsp vanilla extract
3-4 drops peppermint essential oil*

Add and mix in flour/cocoa mixture.  Mix until dough holds together nicely, scraping sides of bowl regularly.

Place 1-2 teaspoon-sized scoops onto parchment paper-lined pan.  With plastic wrap or a plastic bag over your hand, flatten each scoop of dough.

Bake cookies at 375 F for 6-8 minutes. (6 for softer cookies, 8 for crispier cookies).  Let cookies cool completely on a cooling rack.  

In a bowl, melt at 50% power in your microwave: 
1 1/2 cups semi-sweet chocolate chips

Add to chocolate: 
A touch of peppermint oil (add by dipping a toothpick into the peppermint oil, so you add less than 1 drop)
1 tsp light olive oil, only if melted chocolate is too thick to dip (Often chocolate chips when melted are a bit too thick to dip in, so this can help without affecting flavor). 

Dip cookies in melted semi-sweet chocolate with just a touch of peppermint oil added OR you can use the back of a spoon to spread chocolate on the tops and bottoms of the cookie (we found this was a great way for little hands to dip the cookies in chocolate with ease).  

You can either decorate as described below, or chill in the refrigerator until chocolate has hardened for plain chocolate-covered thin mint cookies.  Enjoy!  

To decorate:
Sprinkle cookies with crushed peppermint OR add stripes or swirls of melted green mint chips (I find I need to add 1-2 tsp oil for 1/2 cup melted chips, again melted slowly at 50% power in the microwave). 

My 5 year old helped dip and decorate the cookies, she even piped on the green mint onto many of them, then swirled it with a toothpick.  
gluten free thin mint cookies
Dipping and swirling her first thin mint cookie. 
gluten free thin mint cookies gluten free thin mint cookies
Pipe on zigzags of melted green mint chips, then swirl with a toothpick for a fun design! 
decorating gluten free thin mint cookies
One happy chocolatier!  

Chill thin-mint cookies in the refrigerator until chocolate has set.  These store well at room temperature.  We love to freeze leftovers, then crush them to add to homemade ice cream!


* I really like the Doterra peppermint oil.  It has a lovely taste while cooking.  My friend Christine has an online shop where you can order food grade essential oils. 

Tuesday, 20 September 2016

Rich and Flavorful Chicken Broth with Fennel

This hearty chicken broth is very flavorful, thanks to the addition of fennel tops - it's tasty enough to eat just as a broth if someone is sick, or to add sauteed vegetables and rice to quickly turn it into a soup.  Use in your favorite soup, chicken pot pie, or risotto recipes.  Broth just doesn't look great in pictures - at least not from what I can tell - so no pictures.  Enjoy!

Chicken Broth w/ Fennel

After roasting your chicken and removing/eating the meat, place chicken carcass plus roasted skin in a large pot.  Cover with water, just barely. (I find this fills 1/2 my large pot typically).

Add to pot:
fennel tops (the nice green dill-like stems that grow from the fennel bulb)
2 carrots, coarsely chopped
5-6 coarsely diced green onions (tops & bottoms)
1 tsp ground pepper
1 Tbsp salt

Bring to a boil.  Lower heat, cover and simmer for 2 hours.   Cool for ~20 minutes off the heat.  Strain and store or use, as desired.

Wednesday, 14 September 2016

Buckwheat Waffles! Gluten & Dairy-free!

This is a light and crispy waffle with a hearty flavor.  Perfect for adding blueberries into the batter, too!  We also love these with homemade jam slathered on top.   I find you don't even need maple syrup because there's already some added into the batter.  The recipe can easily be doubled or tripled to feed a crowd.  Cool your leftovers on a cooling rack, bag and freeze for easy breakfasts you can reheat in the toaster! Enjoy!
Buckwheat Waffles - gluten free and dairy free
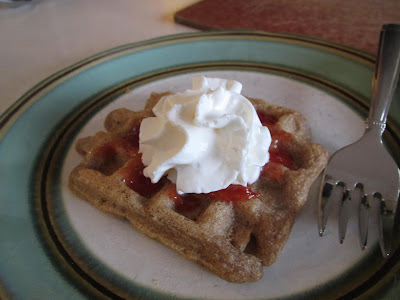
Fresh gluten and dairy-free Buckwheat Waffle topped with homemade strawberry-mango jam and whipped cream. Yum! 

Buckwheat Waffles
Makes ~18 pancakes

Preheat waffle iron.

Mix together dry ingredients in a large bowl: (It's important to mix dry ingredients first in gluten-free cooking).
1/3 cup brown rice flour
1/3 cup potato starch
1/3 cup white rice flour
1/3 cup tapioca starch
1/4 cup buckwheat flour
1/4 tsp xanthan gum
4 - 5 tsp baking powder
1/2 tsp salt
1 tsp cinnamon

Add and stir just until combined:
1 1/4 cup water
5 Tbsp oil
2 Tbsp maple syrup

Let batter rest ~5 minutes before cooking.  Cook waffles on lightly buttered waffle iron until desired crispiness is achieved.

For extra deliciousness, add:
1/2 - 1 cup fresh blueberries
GF Buckwheat WafflesGF Buckwheat Waffles
Waffles before and after cooking. Yum! 

Place on wire racks after cooking to avoid waffles getting soggy. (This also makes it easy for waffles to cool nicely so extras can be frozen!  Frozen waffles reheat perfectly in the toaster oven.)

Serve with toppings, as desired.  Some ones we like are: maple syrup, homemade strawberry-mango jam, whipped cream, butter.  Enjoy!  

Thursday, 8 September 2016

Pumpkin Bagels made with REAL pumpkin!

Fall and pumpkins are starting to arrive!  What a great way to combine two of my favorite foods. Anyone who knows me knows I love bagels.  I've posted eleven bagel posts so far. This pumpkin bagel recipe will make a dozen, and one more, which is sure to come, will make a proper baker's dozen.   This recipe works best for making small-sized bagels, because of the combination of fresh pumpkin with the other ingredients.  They're great with a pumpkin pie cream cheese (recipe below), too.  Enjoy the fresh fall pumpkin by making up your own pumpkin puree, or use 100% canned pumpkin in this recipe.
I also include a list of all my pumpkin recipes linked from the pumpkin puree & pumpkin seeds post. Enjoy!

Gluten Free Pumpkin Bagels
Fresh gluten-free pumpkin bagels, ready to eat!
Gluten Free Pumpkin Bagels with Pumpkin Pie Spice Cream Cheese
Pumpkin Bagel with Spiced Pumpkin Cream Cheese (below)
Pumpkin Bagels made with REAL pumpkin (cream cheese recipe follows)
Makes 8 - 12 bagels (depending on size you make them)

Preheat oven to 350F.  Line two baking sheets with parchment paper or silicon mats.

Mix dry ingredients in a mixer:
1 1/2 cup brown rice flour
1 1/2 cup tapioca starch
1/2 cup potato starch
1/4 cup brown sugar
2 tsp quick/rapid-rise yeast
2 1/2 tsp xanthan gum
2 tsp cinnamon
1 tsp baking powder (optional, but I find it really helps the rise)
1 tsp salt

Add and beat mixture for 4 minutes (it will look crumbly initially, and then hold itself nicely together after it mixes a couple minutes): 
1 cup 100% pumpkin puree (canned or fresh)
3 eggs
4 Tbsp oil
1 tsp apple cider vinegar

*** This dough will be a lot thicker than my ordinary bagel recipe, but resist the temptation to add more liquid.  The pumpkin puree adds quite a bit of water to the dough, and if you add extra water the bagels will flatten while cooling.***

Use wet hands, form plum sized balls and then make a hole in the center.  You can use extra water to smooth these nicely.  Depending on the consistency of my pumpkin (some are wetter, some thicker), I've sometimes been able to pipe these into large bagels.  It's easiest to just form by hand wetting hands between each bagel.  
Gluten Free Pumpkin Bagels before rising
Let bagels rise 30-40 minutes in a warm location.  You can place an upside down cookie sheet on top of your cookie sheet to help them while rising. (I put mine on top of the oven).
Gluten Free Pumpkin Bagels after rising
Bake at 350F for 20-28 minutes (depending on size).
Gluten Free Pumpkin Bagels after baking
Cool on a cooling rack.  These are great hot fresh, or toasted with pumpkin pie cream cheese (below).  Slice and freeze any extras.  They reheat perfectly in a toaster oven.  Enjoy!

Pumpkin Pie Cream Cheese
You can adjust the spices to your personal taste.  Either use pumpkin pie spice, or a little of the spices listed here plus the brown sugar and pumpkin puree.
Mix together:
1/2 container cream cheese (~4 oz.)
3-4 Tbsp 100% pumpkin puree (canned or fresh)
2 Tbsp brown sugar
1/2 tsp cinnamon
pinch nutmeg
pinch cloves
pinch allspice
pinch ginger