Search for a Recipe

Monday, 4 August 2014

Tasty Gluten-Free Garlic Fingers

Garlic fingers, similar to the ones in this recipe, are popular in Atlantic Canada - although most people like them with Donair sauce.  I think they're great plain, or dipped in spaghetti sauce, or served alongside pretty much any dish that you'd enjoy with garlic bread.  They freeze really well, too, and can be quickly re-heated in the toaster oven!  They're also great since they can be whipped up quickly and require just a short rising time - just the few minutes it takes to spread and add toppings is close to all they need.  

Garlic Fingers, ready for eating!

Tasty Garlic Fingers
Makes 1 large size garlic fingers


Turn your cookie sheet upside-down. (This makes it easier to slide your pizza directly onto the rack to crisp the bottom). Line with parchment paper OR silicon mat.  
Preheat oven to 425F. 

In a mixer, combine: 
1 ½ cups Kristin’s gluten-free flour mix *(see note below for measurements just for this recipe)
2 tsp xanthan gum
½ tsp salt
2 tsp rapid rise yeast (quick-rise yeast)
1 tsp sugar OR 1 heaping tsp honey

Add and beat 2-3 minutes, scraping regularly:
¾ cup warm water
1 egg (OR 1 Tbsp chia seeds soaked in 3 Tbsp water for 5-10 minutes)
1 Tbsp olive oil

Scoop onto pizza pan lined with parchment paper.  Wet your hands with water and use wet hands to spread the dough over the sheet.  Keep getting more water on hands, as needed. 
Smooth dough into a large oval, shaping the crust with higher edges around the outside.  

Spread on dough, trying not to get too close to the edges - as this can cause dripping during baking: 
2 Tbsp garlic butter
1/2 - 3/4 cup shredded mozzarella cheese

Let rest/rise for 10 minutes. 
Bake ~ 15 minutes, until browned nicely. 
Slide the pizza from the parchment paper/baking sheet directly onto the oven rack for 3-4 extra minutes of baking.  The bottom crust will be browned already, but this helps it get crispier. If you're worried about dripping, you can place foil on the bottom of your oven for easy clean-up. 

Fresh from the oven!

Carefully remove from oven onto a wooden cutting board or wire rack.  Slice the garlic fingers, then slide them back onto a wire rack (This keeps the crust crispier since steam accumulating under the crust can make it not as crispy).
Serve and Enjoy!!!

Note: Gluten-free crusts have a tendency to be cooked, but not crisped.  Using a pizza-stone helps, but I’m all about practical meals I can whip together and remembering to heat a pizza stone for an hour isn’t on my to-do list.

* To measure flour just for this recipe use:
¾ cup brown rice flour
¼ cup sorghum flour
¼ cup cornstarch
2 Tbsp potato starch
2 Tbsp tapioca starch
½ tsp xanthan gum

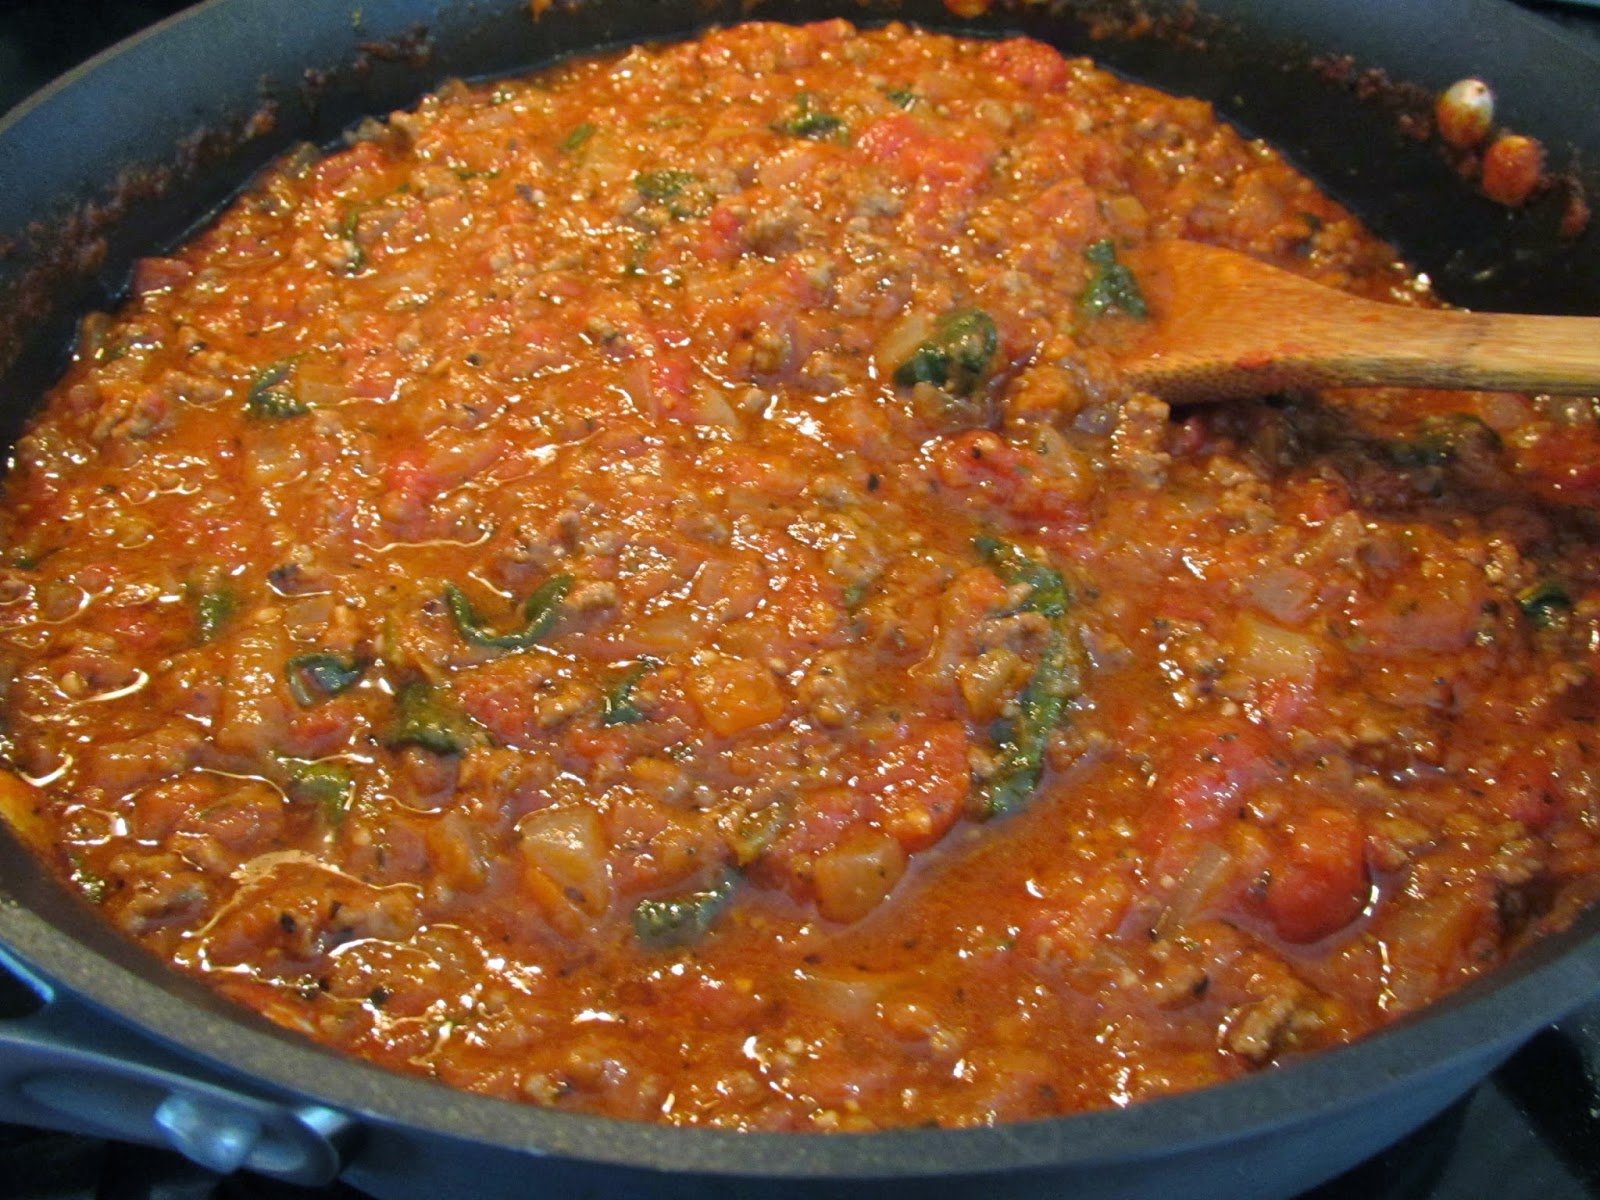
A Lighter Flavored Homemade Veggie Bolognaise Sauce

This is a wonderful, and easy meaty pasta sauce you can throw together in no time!  It's perfect for summer, since it's lighter than a traditional bolognaise sauce.  It's packed with veggies, too!  It's great with any GF pasta, or you can even use it on top of pizza in lieu of regular spaghetti sauce.
Served over gluten-free penne pasta.

Homemade Veggie-filled Bolognaise Sauce
Serves 6-8

Heat in a large pot or large high-sided saucepan over medium heat:
1/4 - 1/3 cup olive oil

Cook until just starting to soften:
1 large onion, finely diced

Add, cooking 3-4 minutes:
1-2 large carrots, grated

Add, cooking until browned:
1 lb. lean ground beef

Mix in, cooking 1 minute:
1 Tbsp dried oregano
1 Tbsp dried basil

Push beef/veggies to the side of the pan.  Cook in the middle 1-2 minutes, until fragrant:
2 tsp minced garlic

Add, stirring til combined:
1 can tomato sauce
1 large can diced tomatoes
1 Tbsp Worcestershire sauce
1-2 tsp pepper
1 tsp salt (best to adjust to desired taste near the end of cooking)

Mix in:
2-3 big handfuls baby spinach (diced, if desired)

Once boiling, lower heat and simmer for 1/2 hour.  You can let this simmer longer, but the taste is great after 1/2 hour.  Salt and pepper, to taste before serving. 

Packed with veggies, and full of taste! 

Serve over a gluten-free pasta of your choice.  Great with Parmesan cheese. Enjoy! 

Friday, 1 August 2014

Fabulous Blueberry Cream Cheese Pie

We love a good pie here in our house. My husband's favorite pie is blueberry, so it seemed proper to make a delicious blueberry pie on his birthday this year.  I've made raspberry cream cheese pie a number of times - it's definitely a favorite based off the famous pie from the PEI Preserve Company, so I thought I'd try turning the raspberry cream cheese pie into a blueberry cream cheese pie.  It was an even bigger hit!  Absolutely delicious with the lemony cream cheese mixture under the thick blueberry topping. Yum! This recipe is a cinch to whip together, and you could even use any pre-baked crust if you're not GF and use the fillings here.  Enjoy!

Freshly made blueberry cream cheese pie!
A slice served with a bit of whipped cream on top. 

Fabulous Blueberry Cream Cheese Pie

Serves 8

Preheat oven to 425F.  Have a pie dish available.
Make Kristin’s buttermilk pie crust (retyped here for convenience - although there is an option in the original recipe to measure out a slightly different flour blend than what is in my flour mix).

For crust: (This makes 2 crusts, so you can save half the recipe for later!)

Mix together in a bowl:
1 tsp salt

Chop in with a pastry cutter:
2/3 cup + 2-3 Tbsp butter

Add and mix in with the pastry cutter:
2 tsp oil
1/3 cup buttermilk (can make by mixing 2-3 tsp vinegar + milk)

To fully get the dough to form, mix by hand as quickly as possible (so you don’t warm up the dough).   Separate into two pieces.  You’ll use one for this recipe, and can wrap the other half in plastic wrap and stick in the refrigerator to use for another recipe, like a quiche or pie.


Roll out a nice big circle between pieces of plastic wrap.  I use two pieces overlapping for the bottom and two pieces, overlapping, on top.   Make sure you’ve got a piece as big as your pie dish, plus a little extra.
Remove the plastic from the top.  Flip over the dough into the pie dish.  Press down on the plastic wrap to get the dough to stick to the pie plate.  Remove plastic wrap and carefully shape edges, as desired.


Remember to use the plastic wrap to press down and then use fingers to crimp the edges.

Bake at 425F for 15-17 minutes, until nicely browned.  Remove from oven and cool on a cooling rack.


Fresh baked and cooling pie crust.

Make blueberry filling:

In a medium-sized pot over medium heat place the following:
600 g (21 oz) frozen blueberries, thawed (not drained) (or you can use fresh!)
2/3 cup sugar
1/4 cup water
pinch of salt

Let cook, stirring occasionally, until boiling.

Whisk together in a small bowl:
1/3 cup water
1/3 cup cornstarch

Add cornstarch mixture to boiling blueberries, stirring constantly.  Bring mixture back to a boil and let boil a few minutes until mixture has thickened (keep stirring).  Remove from heat and add: 
1 Tbsp butter

Let pot cool on cooling rack 15-20 minutes. (you don’t want to pour it on top of the cream cheese mixture while boiling hot, so it’s best to make this part first, then whip up the cream cheese mixture).
Cooked filling - yum!

Make cream cheese filling:

Beat together in a mixer (or by hand), until light and creamy:
6 oz cream cheese, softened
½ cup powdered sugar
2 tsp fresh lemon juice
Zest of ½ lemon

Once cream cheese filling has been whipped, spread it on the bottom of your cooled pie crust.  Place in the refrigerator until your blueberry filling has cooled 15-20 minutes.   


Cooked piecrust with cream cheese filling in the bottom.  Chill until your blueberry topping has cooled 15-20 minutes.
Carefully pour the blueberry mixture over the cream cheese filling.  Let the pie chill in the refrigerator ~ 2 hours, until fully cooled.   

Slice and serve with whipped cream.  Enjoy!!!


Fabulous Blueberry Cream Cheese Pie Recipe by Successfully Gluten Free!

Wednesday, 30 July 2014

Lobster Mac N' Cheese

This is a wonderful sauce, which works great over a gluten-free pasta.  It's so easy to whip together, too, but the result is a fabulous gourmet meal! Delicious!  It's wonderful served with toasted GF sourdough bread topped with garlic butter with a side salad for a restaurant-worthy meal.  We made this delicious dish when my mom and brother were visiting and it was a hit with everyone. Enjoy!!!

We made this dish with bacon-wrapped scallops for a delicious PEI feast!

Lobster Mac N' Cheese
Serves 4-6

Boil a large pot of water and cook 1 box Gluten-Free Pasta in salted water.  Rinse with cold water, and mix with cheesy lobster sauce.

While water is boiling/pasta is cooking, prepare the sauce:

In a large frying pan or medium saucepan over medium heat, cook until tender:
1/4 cup butter
1/4 vidalia (sweet) onion, chopped finely

Add, stirring constantly for 1 minute:
1/8 - 1/4 cup Kristin's Gluten-Free Flour Mix (less flour makes a runnier sauce, more makes a thicker one)
1 tsp salt
1/2 tsp dry mustard
1/4 - 1/2 tsp ground pepper

Add in slowly, stirring constantly
2 cups milk (2% lactose-free works great)

Once mixture has thickened and is nice and smooth (about 5-7 minutes), add:
1/2 cup grated cheddar cheese
1/8 cup Parmesan cheese

Add:
1/3 lb cooked lobster meat, chopped 
sprinkle of paprika (optional)
Just so you can see the lovely lobster meat... 

Mix sauce with cooked, drained pasta and serve. Enjoy!

Tuesday, 22 July 2014

Blueberry-Plum Fried Fruit Pies

I was totally lame with picture-taking when I made these fried fruit pies.  But, they also went so quickly I really didn't get a chance!  The recipe is similar to my blueberry fried fruit pie recipe, but this time they have a yummy (and easy!) homemade pie filling packed with fresh blueberries and plums.  You'll love them. Enjoy!!!
A few piping hot pies ready to travel for a fun dessert after lunch with my friend Julie, who enjoyed them thoroughly :)

Blueberry Plum Fried Fruit Pies
With delicious homemade filling!
Makes ~8 pies

To prepare filling:
Mix together in a large bowl:
1 – 1 ¼ cup blueberries, rinsed and drained
1 – 1 ¼ cup sliced, ripe plums (~4 plums)
¼ cup sugar
1 tsp fresh lemon juice
½ tsp ground cinnamon
¼ cup cold water

Pop the filling into a large skillet over medium heat.   Cook, stirring occasionally, until mixture starts to cook and thicken.  At this point, you’ll want to add more water (¼  – ½ cup) so it’s not too thick.  You’re aiming for a final consistency similar to the pie pudding filling from a can.  Cook, stirring, until blueberries have started bubbling and you’re happy with the consistency.   Remove from heat and let cool completely before using in fried fruit pies. I found it didn’t need covering. I’d give it a stir now and then as it cools.   Your filling will end up a lovely pink/purple color from the mixture of blueberries and plums.

To finish the fried fruit pies, follow the dough recipe and instructions from the blueberry fried fruit pie recipe, using your wonderful fresh blueberry-plum fruit filling to fill your pies.  Let cool, sprinkle with powdered sugar and enjoy!
Fresh fried pies - ready sprinkle with powdered sugar and devour!

Saturday, 12 July 2014

Spinach Basil Pesto! (Nut-Free!!!)

Most times, when I use pesto, I just use the tasty pre-made kind.  Most of the time it's because I just don't have enough basil leaves, though.  But when family or friends visit that are allergic to nuts, I think it's nice (and so easy!) to whip up homemade pesto.  Our fabulous organic veggie CSA (community supported agriculture) program Heartbeet Organics provided us with some wonderful basil plants and plenty of delicious spinach the past couple weeks, so it was only appropriate to whip together a nut-free spinach-basil pesto to be used on pasta, pizza, or in recipes like the tasty pesto pasta salad.   I love that if you make a spinach-basil pesto you don't need quite as much basil, which is great early in the season when basil plants are still small.  You can easily make this recipe with nuts by adding in 1/4 - 1/2 cup pine nuts when you're blending things together, but I personally don't think it needs them at all.  Enjoy!
Freshly made!

Spinach Basil Pesto (Nut Free!)
Makes ~ 1 1/4 cups pesto

Blend together in a food processor:
2 cups fresh spinach
1/2 cup fresh basil leaves
1 Tbsp minced garlic
1 - 2 tsp dried basil (optional, but nice if you don't have a heaping 1/2 cup of basil leaves)
1 tsp dried oregano
1/3 cup grated romano cheese
1/4 cup grated parmesan cheese
1 Tbsp fresh lemon juice
1/2 tsp salt
1/2 - 1 tsp ground pepper
1/3 - 1/2 cup extra virgin olive oil (adjust as desired, since it tends to depend on how you packed/measured your spinach & basil leaves)

Store in the refrigerator 1 - 2 weeks, or freeze up to a month.  

Saturday, 5 July 2014

Easy & Delicious Gluten-Free Focaccia Bread

This tasty focaccia bread is so easy to whip up.  You can use it as a side-dish, or slice/pull it apart to use it as tasty sandwich bread.  My 3 year old loves helping me make this because I let her brush the dough with olive oil, and she gets to help sprinkle on the toppings, too.

We used it here for breadsticks.  I cut these in half again to make the a bit shorter, and they were great dipped in spaghetti sauce.
An easy sandwich whipped together on focaccia bread. Yum!

Focaccia Bread
based on a recipe from the only GF cookbook I'd recommend, "Artisanal Gluten-Free Cooking"
Makes 1 large cookie-sheet sized focaccia

Preheat oven to 400F. Line cookie sheet with parchment paper.  Butter edges and anywhere the parchment paper might not cover.

In a mixer, combine the following dry ingredients:
3 cups Kristin's Gluten-Free Flour Mix
2 tsp xanthan gum
1 tsp salt
2 Tbsp quick-rise yeast
2 Tbsp sugar

Add in, mix slowly, then increase speed to medium. Beat 2-3 minutes:
2 cups warm water
2 eggs
4 Tbsp olive oil

Spread in prepared baking pan.

Brush with 2 Tbsp olive oil.
My 3 year old brushing the focaccia with olive oil.  She loves making this bread! 

Sprinkle with:
fresh ground salt
dried oregano
dried basil

Let rise 15-20 minutes in a warm location.
The focaccia ready to bake after a 15-20 minute rise.

Bake at 400F for ~20 - 25 minutes, until nicely browned.  Remove from oven.  Let sit a few minutes before removing to a cooling rack (remove parchment paper, too).  You can cut warm or cool with a bread knife.  

Fresh out of the oven. 
Cut into strips for breadsticks OR cut into squares to use for sandwiches.  Enjoy!