My friend Julie has a brown bread recipe that she likes to make every year for the holidays. She cooks it up in large metal tins (like the kind a large pineapple juice may come in), so it ends up round. It's both tasty and fun! Since Julie has a wheat allergy and feels better eating a gluten-free diet, so I thought it was important to convert her favorite bread recipe into a delicious gluten-free version! I made the recipe for 2 large regular bread loaves here, but you can make this recipe into round loaves, too. Just butter your large tin cans - and I'd use 3 cans in place of 2 loaves of bread. *Update: you can also make it in 6 mini loaf pans, too! Shortens your rising and baking time, too!
.JPG)

Butter 2 large bread pans or 6 mini loaf pans. (Or line with parchment paper) Preheat oven to 350F.
In a 4 - 6 cup bowl or measuring cup, pour 1 1/2 cups boiling water over:
1 cup whole oats (Use gluten-free oats for Celiac or if you are sensitive)
1/4 cup butter, chopped
Mix together and set aside to soak/cool.
In a large bowl, mix dry ingredients: (It's important to mix dry ingredients separately from wet ingredients in gluten-free cooking)
2 Tbsp rapid-rise/quick yeast
2 Tbsp xanthan gum
2 tsp salt
3 cups brown rice flour
2/3 cup sorghum flour
1/2 cup arrowroot starch (or cornstarch)
In a mixer, mix together:
1/2 cup milk
2 tsp apple cider vinegar
5 Tbsp sugar (OR 2 Tbsp sugar + 3 Tbsp honey)
4 Tbsp molasses
6 eggs (or 4 eggs + 4 egg whites)
Add in dry ingredients + oats/butter mixture. Mix 3 minutes on medium speed. Separate between two bread pans, smoothing tops as best you can. I find it best to wet your hands and use them to smooth the tops of the loaves nicely. Pans should be 3/4 full.
A large loaf, fresh out of the oven!
Mini loaves, fresh from the oven. Yum! (I removed them from the pan just after taking this picture).
Julie's Brown Bread - Gluten Free!
Makes 2 large loaves or 6 mini loaves.Butter 2 large bread pans or 6 mini loaf pans. (Or line with parchment paper) Preheat oven to 350F.
In a 4 - 6 cup bowl or measuring cup, pour 1 1/2 cups boiling water over:
1 cup whole oats (Use gluten-free oats for Celiac or if you are sensitive)
1/4 cup butter, chopped
Mix together and set aside to soak/cool.
In a large bowl, mix dry ingredients: (It's important to mix dry ingredients separately from wet ingredients in gluten-free cooking)
2 Tbsp rapid-rise/quick yeast
2 Tbsp xanthan gum
2 tsp salt
3 cups brown rice flour
2/3 cup sorghum flour
1/2 cup arrowroot starch (or cornstarch)
In a mixer, mix together:
1/2 cup milk
2 tsp apple cider vinegar
5 Tbsp sugar (OR 2 Tbsp sugar + 3 Tbsp honey)
4 Tbsp molasses
6 eggs (or 4 eggs + 4 egg whites)
Add in dry ingredients + oats/butter mixture. Mix 3 minutes on medium speed. Separate between two bread pans, smoothing tops as best you can. I find it best to wet your hands and use them to smooth the tops of the loaves nicely. Pans should be 3/4 full.

Batter scooped in and ready to rise. Let it rise until it's even or just puffing over the top of the pan. 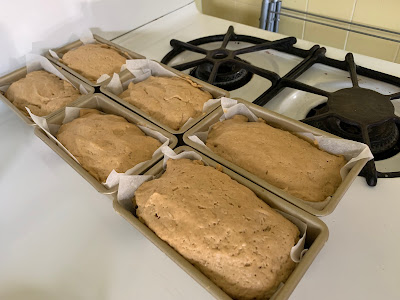
Bake at 350F ~45 minutes for large loaves, ~30 minutes for mini loaves. Remove from pan to wire rack to cool. Mini loaf pans were also filled 3/4 full, flatted with wet hands, then sat to rise uncovered on top of the warm stove. Just after they reached the height of the pan, they went in the oven.

I used silicon bread pans here, so they widen a bit during cooking.
Slice and serve with butter (or butter + molasses, a New Brunswick tradition and a PEI favorite). It is also nice for sandwiches, too!
Enjoy!

Freshly sliced and ready for butter!
No comments:
Post a Comment