Search for a Recipe

Thursday, 1 October 2015

Gluten-Free Real Pumpkin Cinnamon Rolls!

October, month of pumpkins and winter squash is here!!! After quite a bit of trial and error, I finally discovered a way to make pumpkin cinnamon rolls that were fluffy and similar to regular cinnamon rolls!  Absolutely delicious, and approved by my friend Julie (who is an excellent cook, and I depend on her approval of baked goods often), in addition to the approval of my family, who inhaled them as quickly as possible.  The dough here is a bit trickier to work with than my normal fantastic cinnamon roll recipe, but it is also much EASIER than my normal cinnamon rolls, since you essentially just beat it all in a mixer.  Despite looking a bit messy in the pan, I found that, once cooked, they puffed up and looked like proper swirled cinnamon rolls.  They were so delicious, we ate most of them without frosting, too!

For both savory and sweet gluten-free pumpkin recipes, I have links to all my tasty pumpkin recipes here! Enjoy!
Gluten-Free Pumpkin Cinnamon Rolls
Gluten-Free Pumpkin Cinnamon Rolls!

Gluten-Free Pumpkin Cinnamon Rolls
Makes 12 (9x13 pan)

Butter a 9x13 baking pan.

Mix the dry ingredients in a big bowl and set aside:  It is important to mix dry ingredients first in gluten-free cooking. *Note: I have made this recipe with Kristin's GF flour mix, but I found I needed to use extra flour to keep things from sticking too much, and I did not find the end product to be as fluffy as this version.
3/4 cup brown rice flour
1 cup white rice flour
3/4 cup tapioca starch
2 tsp xanthan gum
1 tsp ground cinnamon
1/2 tsp ground ginger
1/4 tsp ground cloves
1/4 cup brown sugar
1 tsp salt
4 1/2 tsp rapid-rise/instant yeast

In a stand-mixer, mix together the following:
1 cup canned pumpkin or homemade pumpkin puree
1 egg
1/4 cup water (warm or cold work fine) ***see below***
1/4 cup softened butter

Add the dry ingredients into the wet ingredients.  Beat 4 minutes at medium/medium-high speed. 

While the dough is mixing, prepare the filling by mixing together:
2 tsp ground cinnamon
1/2 tsp ground allspice
1/2 tsp ground nutmeg
1/4 tsp ground cloves (optional)
3/4 cup brown sugar
1/4 cup butter, melted

Line two large sheets of plastic wrap side by side on the counter, overlapping a bit. 2 foot long pieces work well.
Spoon out large scoops of the dough and place along the middle of the plastic wrap.
Pull out another two large sheets of slightly overlapping plastic wrap to cover the dough. You’ll then flatten out the dough between the sheets until you have – more or less – a piece of dough that is flattened to somewhere near 15"x20". Try to make it nice and even. You have to slightly adjust the plastic wrap as you’re doing this, since it sometimes gets caught underneath the dough. But, you’ll find the dough doesn’t stick too much to the cling wrap, which is fantastic!  Use damp fingers to help un-stick dough, when necessary.
Carefully remove the top layer of plastic wrap. (NOTE: This dough IS stickier than my regular cinnamon rolls, raspberry-lemon swirl rolls OR lemon-blueberry rolls.  However, I have found that beating the dough 4 minutes, while making it a bit stickier to work with, results in a fluffier end result in the pumpkin cinnamon rolls, which I find is necessary since the pumpkin makes the rolls naturally more dense otherwise.)
Spread filling evenly over the dough. 
Carefully roll up the dough, so you have one 20" long roll of dough. Pulling up the plastic wrap can help you get the dough to roll over, since it will definitely stick to your hands if you try to use your hands!  This dough DOES get messy a bit, but it is worth it! 
One happy little girl making pumpkin cinnamon rolls. 
Once you have your long roll of dough, cut into 12 pieces as evenly as you can with a serated knife.  You can use slightly wet hands to help you lift each roll into the prepared pan.  I just tend to try to do it as quickly as possible and not worry that it is a little messy looking initially.  They will look fine once they rise and cook, but you can use slightly wet hands to fix any messy bits, if you like.  

Use a bit of saran wrap or damp hands to press down the tops of your pumpkin rolls a bit. 
Before and after rising uncovered.
Leave in a warm place uncovered to rise ~ 1 hour, or until your rolls looks significantly puffier, nearly doubled in size.

Bake at 375F for 25-30 minutes, until lightly browned at edges. 

Eat as-is, or top with a cream-cheese frosting, below.
Enjoy!!!


Cream Cheese Frosting (this is a very generous amount, so halve the recipe if you want a lighter bit of frosting/glaze):
In a bowl, warm in the microwave 20 seconds, or let sit to come to room temperature:
3 oz cream cheese
2 Tbsp butter
Add, and mix with a spoon until smooth (ish):
1 ½ tsp vanilla extract OR vanilla bean paste
Carefully add, ½ cup at a time:
2 cups powdered sugar
Milk, to desired consistency (add 1-2 tsp at a time)
Some people like a runny glaze, so they’ll find they end up adding more milk, others like a thick topping for cinnamon rolls, so you’ll just leave out the milk or add very little. Enjoy!

***If you want slightly fluffier rolls, you can use a bit of extra water - 1-3 Tbsp.  The dough will be stickier and harder to work with, but if you use wet hands, you can help undo any extra stickiness.  

Tuesday, 29 September 2015

Delicious Gluten-Free Blueberry Crisp!

When I make blueberry crisp, it disappears quickly.  I make it in a 9" x 13" pan in the hopes it lasts more than one night - and it usually does!  However, you can easily halve the recipe and make it in an 8" x 8" pan.   Blueberry crisp is delicious when made with fresh berries, but you can use frozen berries, too.  I recently learned that if you let them defrost in the refrigerator rather than out on the counter, they will retain their shape and not become a juicy mess.  However, I have made this dish using berries straight from the freezer and it works just as well.  Enjoy!
Gluten Free Blueberry Crisp
Fresh, hot gluten-free blueberry crisp.  A perfect fall treat! 

Delicious Gluten-Free Blueberry Crisp!
Makes 9x13 pan.

In a 9x13 pan put:
8 cups fresh blueberries, washed & drained
These are tiny low-bush berries, small but sweet. This works just as well with the larger high-bush berries, too! 
Chop in a bowl using a pastry cutter:
3/4 cup oats (make sure they're gluten-free if you're celiac or sensitive)
3/4 cup Kristin's Gluten-Free Flour Mix
2/3 - 3/4 cup brown sugar
1/2 cup butter (chilled, not softened)
1 tsp ground cinnamon
1 tsp ground nutmeg

Mix topping JUST until crumbly there are still chunks of butter that haven't been mixed in.  Do not overmix!  You'll lose the crumbly texture and end up with a more cookie-like topping rather than crumbly crisp texture.   Sprinkle topping over blueberries.
Bake at 375F - 425F for ~25-30 minutes. *See note below regarding cooking temperatures.*
Serve hot, warm or cooled.  Great with whipped cream, vanilla ice cream, or vanilla yogurt.  Enjoy!


* Note on Cooking Temperatures: 375 F makes a topping that is more crumbly and sits on top of the berries.  425 F makes the berries cook and bubble more, so the topping can sink a bit into the berries during cooking.  Either work great and taste great, and it's just up to you.  I usually have made crisps at 375, but ended up cooking it one time alongside a roast chicken and so discovered that 425F works just as well, but ended up with less crumbly topping remaining on top of the blueberries.  I've since experimented many times and discovered that it 375, 400 or 425 all work well, they just give a different end result in terms of the topping.*

Thursday, 24 September 2015

Szechuan-style Stir-Fry over Rice

This recipe is a fun and allergy-friendly dish that uses large amounts of delicious vegetables.  You can add in a handful of cooked chicken or shrimp, if desired.  The light sauce has a bit of a kick, thanks to the addition of Sriracha sauce.  We found it was a great way to use the piles of delicious fresh bok choy and kohlrabi from our vegetable CSA.  If you don't have kohlrabi, you can easily substitute in other crispy vegetables, like snap peas or sweet peppers.  Even vegetables like zucchini or delicata squash would work.  Enjoy!
Gluten Free Szechuan-Style Stir-Fry over Rice
Szechuan-style Stir-Fry over Rice made with bok choy and kohlrabi! Yum! 

Szechuan-style Stir-Fry over Rice
Serves 4

Cook 1 1/2 cups of your favorite rice.  Start this first, and then prepare all your vegetables and sauce.  If using a white basmati or white jasmine, these typically cook in 15-20 minutes, so everything will end up being ready about the same time, allowing 5-10 minutes for the rice to rest after cooking.  Give yourself some time if using brown or wild rices, as they take closer to 40-50 minutes to cook.

Mix sauce together in a small bowl:
1 tsp Sriracha chili sauce (this controls the level of spice in your dish - use less if you want it more mild)
2 tsp rice vinegar
3 tsp Bragg soy seasoning (GF soy sauce)
2 tsp grated ginger (frozen cubes work great)
1 tsp tomato paste
1 tsp cornstarch
1 tsp sugar or agave or honey
1/4 cup water

Over medium-high heat cook 1 minute:
2 Tbsp avocado oil (or another oil good for high-heat cooking)
2 tsp minced garlic
1/4 cup finely chopped celery

Add and cook 2-3 minutes:
3-4 cups sliced bok choy (it shrinks a lot during cooking)
1/2 - 1 kohlrabi, peeled, thinly sliced, then sliced in 1/2" pieces
1 minced hot pepper (optional, only add if you like it hot)

Add and cook 1-2 minutes, until just thickening:
Sauce, from above
1/2 cup cooked chicken or shrimp (optional)

Serve hot over rice.  Enjoy! 

Thursday, 17 September 2015

Fresh Vegetable-Filled Chili

This chili was delicious, filled with brightly colored organic vegetables, abundant this time of year.  It was just gorgeous to watch cook.  And, of course, tasted delicious.  It's a wonderful fall recipe when the nights are getting cooler.  Filled with fresh fall vegetables - carrots, onions, peppers, turnips, zucchini, tomatoes, garlic and corn.  It was a hit with all the kids. Enjoy!
Gluten-Free Vegetable Chili and Cornbread
Gluten-free Vegetable Chili, served with homemade Gluten-Free cornbread

Delicious Vegetable Chili
Serves 6

Over medium heat, cook until tender (2-3 minutes):
1 onion (yellow or red), diced
1 handful fresh onion greens or green onions, sliced
2-3 tsp minced garlic

Add, cooking 4-5 minutes:
2-3 small carrots, thinly sliced (I used yellow, orange and purple carrots)
1 small yellow zucchini, diced
handful turnips, chopped into small pieces (I used a handful of small white turnips)
1 small green bell pepper, diced
1 small red bell pepper, diced
Colorful vegetables are a delight to cook.
Once veggies have just started to soften, but are still crisp, add and cook 4-5 minutes:
4-5 heirloom variety tomatoes (varying colors and taste blend together nicely during cooking)


After adding colorful tomatoes to the chili.  
Once tomatoes have softened a bit, add:
1 can tomato sauce
1/2 - 1 cup water
1 tsp beef boullion paste or powder (make sure it's GF)
1 Tbsp chili powder
1/2 - 1 tsp cumin (optional - consider leaving out if you want to taste more of the veggie flavors)
1 tsp garlic powder
1 tsp salt
pepper, to taste

Lower heat and simmer uncovered 20 minutes, or until carrots and turnips soften, stirring occasionally.  (The thicker pieces of carrot and turnip will take longer to soften.  You can always add a little more water if you need to simmer it longer).

Add, and simmer 10 minutes:
1/2-1 cup fresh corn kernels or frozen corn kernels
1/2 - 1 can kidney beans, drained
1/2 - 1 can black beans, drained

GF Vegetable Chili
Vegetable Chili, ready to serve! 
Delicious served with freshly grated sharp cheddar cheese.   Serve alongside easy to make, gluten-free homemade cornbread. Enjoy! 

Friday, 11 September 2015

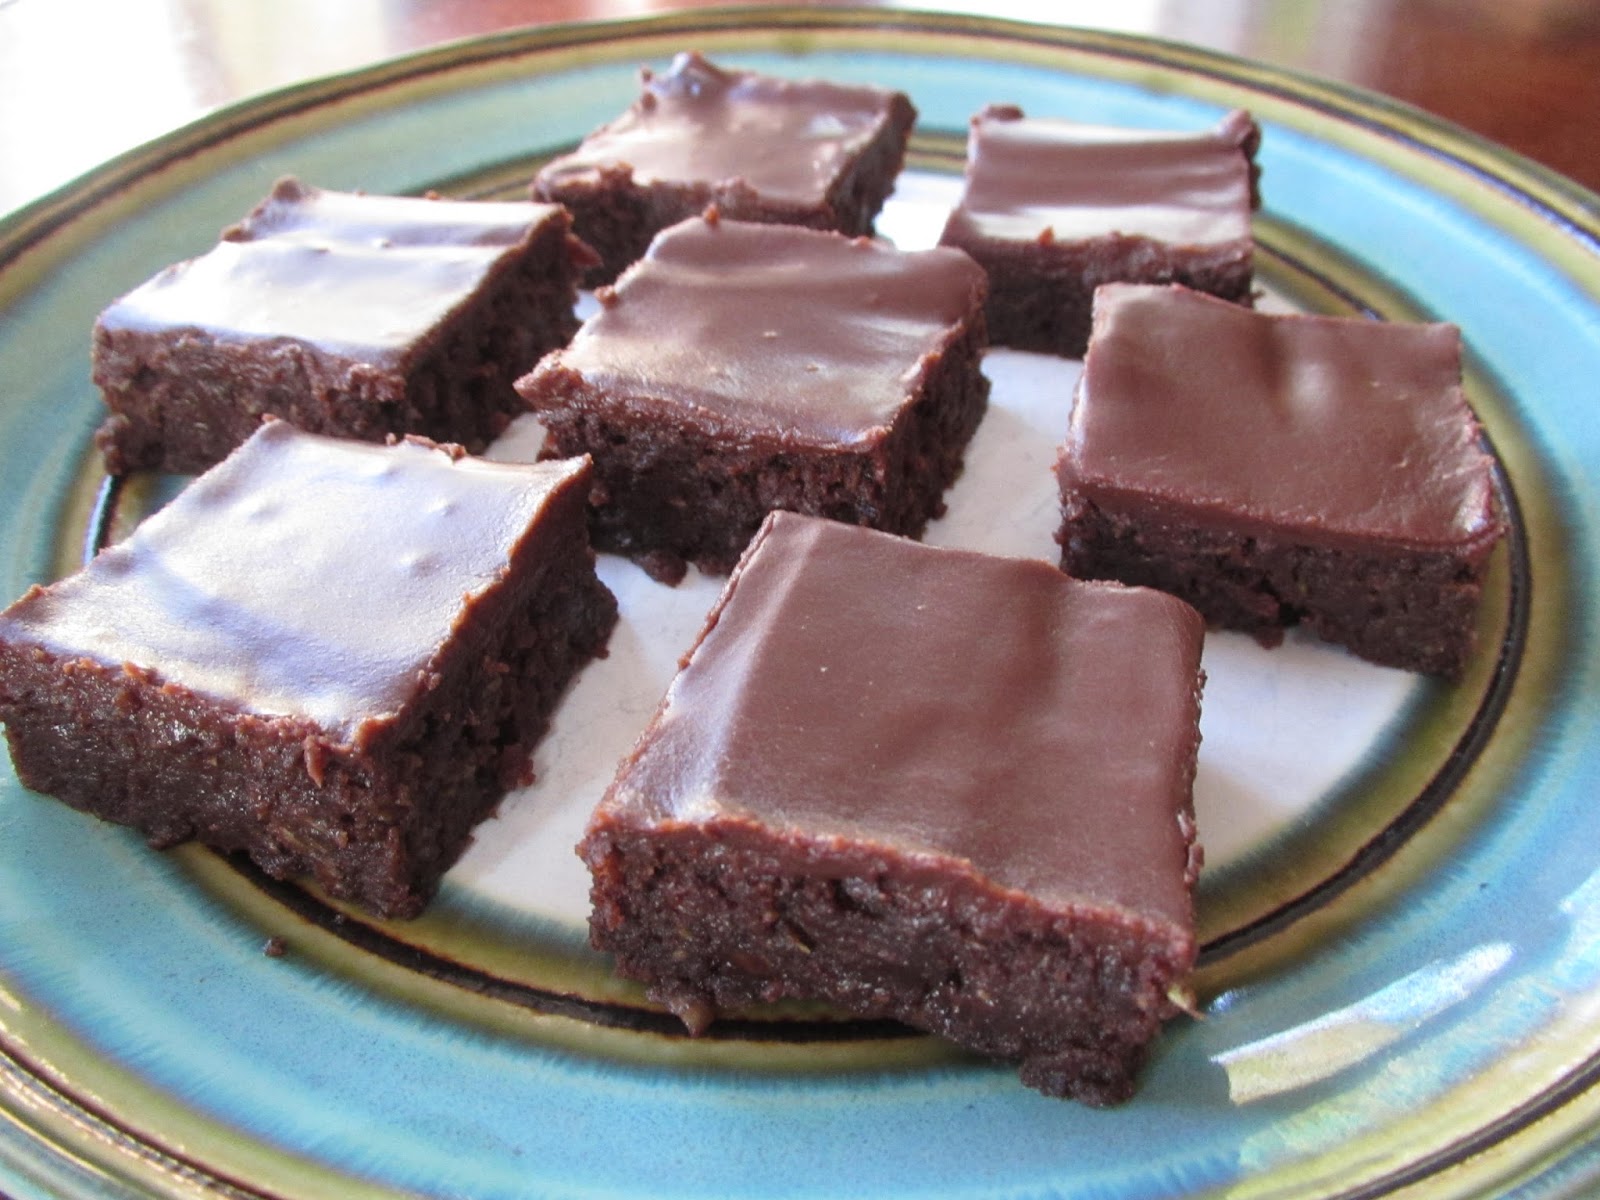
Fudgy Gluten-Free Zucchini Brownies

It's that time of year when zucchini's are plentiful!  You can grate and freeze zucchini to use through the winter, too.  I grate and freeze in sizes according to the recipes I use most.  Usually I aim for 1 cup sizes, but I will have to throw in a few 1 1/4 cup amounts for this tasty recipe.  I prefer using a fine grater for zucchini brownies and using a thicker grater when making things like delicious zucchini muffins.  The nice thing about these brownies is that they're very thin, so they cook up quickly.  They cut nicely into small pieces if you need to bring a treat somewhere and want enough to go round.  Enjoy!
Gluten Free Zucchini Brownies
Fresh gluten-free zucchini brownies with a thin chocolate frosting on top. Yum! 

Frosted Gluten-Free Zucchini Brownies
Makes 9x13 pan

Preheat oven to 350 F.  Line a 9x13 pan with parchment paper, to avoid sticking.

Mix together:
1 1/4 cup finely grated zucchini
1/2 cup coconut oil (room temperature, not melted)
1 tsp vanilla bean paste (or 1 tsp vanilla extract)

Add and mix in:
1 egg

Add, stirring until thoroughly combined:
1 cup Kristin's Gluten-Free Flour Mix
1 cup sugar (I used raw, organic)
1/2 cup cocoa powder
1/4 cup mini chocolate chips
1/2 tsp salt

Spread brownie batter evenly on the bottom of the pan.
Bake at 350 F for 18-20 minutes.  Remove and cool on a wire rack.
Once brownies have cooled, mix together the following frosting:
1/4 cup butter, melted
1/4 cup cocoa powder
1 cup powdered sugar
2-3 Tbsp milk (to desired consistency)
Let frosting sit a few minutes to set, then slice and serve!  They can be cut into small pieces very neatly.  Store any extras in the refrigerator.  Enjoy!
Freshly cut brownies, ready to eat! 

Tuesday, 8 September 2015

Corn on the Cob in a BBQ or Oven (without husks)

It's corn season!  Delicious sweet corn is here! Often, when we corn on the cob it comes half-peeled so you can see how the corn looks.  This makes it rather difficult to BBQ the corn in the husks as so many recipes suggest.  So, after a bit of testing, I discovered that you can, indeed, successfully cook corn on the cob on the BBQ by wrapping it in foil - and after our BBQ ran out of propane, I discovered you can also cook it in the oven! Boiling is still an easy corn on the cob cooking solution, but I love making corn on the cob in the BBQ using this method. Your corn is pre-buttered and can be seasoned any way you like! Enjoy!
BBQ Corn on the Cob without Husk
Corn on the cob, fresh off the BBQ

Corn on the Cob in a BBQ or Oven (without husks)
Makes however many you want!

Remove husks and silks from corn.  Using a large piece of extra wide foil (piece should be ~12" x 24"), place the corn on one side of the foil.  Put 1/2 Tbsp butter in with the corn.  Sprinkle the corn with salt & pepper, or any spices you desire.

Wrap the corn so it's wrapped 2-3 times around with foil (to avoid butter leaking out).  Twist the ends to seal, like on hard-candies OR fold edges onto ends of corn first, then roll (like a burrito wrap).
Corn on the cob, with edges folded inward first rather than twisted on the ends after rolling. 
Cook on the BBQ over medium to medium-low heat (~400F) for 20 minutes, to allow corn to properly steam.  Rotate corn 3-4 times to allow an even cooking.
OR
Cook in the oven at 400F for 20 minutes.  No need to rotate.

Carefully open your hot foil packets.  Enjoy!!!

Tuesday, 1 September 2015

Amazing Summer Vegetable Pasta Sauce

The veggies are rolling in!  We love it! We've been so lucky to have an amazing and wide variety of vegetables each week from Heartbeet Organics on PEI.  They are fabulous! You can get their stuff at the farmer's market Wednesdays and Saturdays if you're on PEI.  However, with a bit of searching, I hope you'll be able to locate a mix of fresh vegetables wherever you are.  You can tweak ingredients, if necessary, but the mix of fresh zucchini, eggplant, cherry tomatoes and onions really makes this dish burst with flavor.  Leftover pasta and sauce (mixed together) was great even when we had it as leftovers the next day! Enjoy!
Amazing Summer Vegetable Pasta Sauce
The sauce is packed with fresh vegetables that cook and then simmer together to create a wonderfully rich sauce.  We had multi-colored cherry tomatoes, which added an extra bit of color into the mix.
Amazing Summer Vegetable Pasta Sauce
Serves ~6

In a large frying pan over medium to medium-high heat, cook the following for 2-3 minutes:
2-3 Tbsp olive oil
1 onion, diced
handful onion greens (or green onion), diced
1-2 tsp garlic, minced

Add and cook 7-10 minutes over medium heat:
1-2 Tbsp olive oil
1 small green zucchini, diced
1 small yellow zucchini/summer squash, diced
1 very small eggplant, diced
1 small purple bell pepper (or other colored small bell pepper), diced
1 cup cherry tomatoes, sliced in half
1 tsp salt
1 tsp pepper
1 tsp garlic powder
1-2 tsp dried oregano
1-2 tsp dried basil
Fresh color veggies, being sauteed.  The smell was divine!
Add then lower heat and simmer 10-15 minutes:
1 cup organic canned tomato sauce
1/2 cup water
1/2 - 1 tsp beef bouillon paste (make sure it's GF)
2 tsp Worchestershire sauce
Summer Vegetable Pasta Sauce
Delicious, fresh sauce ready to eat!
Serve over gluten-free pasta (boiled and rinsed) or mix pasta into sauce.
Great on its own or served with fresh grated Parmesan cheese.
Enjoy!