Search for a Recipe

Monday, 25 May 2020

Sugar Cookie Bars

I'm in the mood for sugar cookies about once a year, which is about how often I end up making sugar cookies with my kids.  We absolutely love my regular favorite frosted sugar cookie recipe, topped with my marshmallow fluff frosting, but I was inspired to make something a little different after seeing a recipe for sugar cookie bars in the New York Times.   I've tweaked and modified the recipe so we have a delicious, gluten-free sugar cookie bar.  Yay!  These are delicious and definitely give that sugar cookie vibe, but in bar form.  The added cream cheese in the dough gives them a light texture, more reminiscent of what I have in my hamentashen dough.  It was a hit around here.  I sliced extras into small pieces and froze them, which works well for small treats.  Enjoy!

Yummy sugar cookie bars, ready to eat!  I gave the frosting a pale green tint, but you can tint it whatever color you prefer! 

Gluten Free Sugar Cookie Bars

Based on a recipe from the NYTimes

In a large bowl, whisk together: (it's important to mix dry ingredients separately in GF baking to avoid lumps)
2 cups Kristin's Gluten Free Flour Mix
3/4 cup white rice flour
1/2 tsp xanthan gum
1/2 tsp baking soda
1/2 tsp salt

In a mixer, cream together:
1 cup butter, softened
8 oz cream cheese, softened
1 1/2 cup white sugar

Add and mix in, scraping down a few times:
1 egg
2 tsp vanilla bean paste (or vanilla extract)

Mix the dry ingredients into the wet.  Spread in 8 1/2" x 12" metal baking pan lined with parchment paper OR 9" x 13" pan lined with parchment paper.

Bake at 350 F for 22-30 minutes, until light browned on top and wobbles slightly in the center.  These are best not overdone so they're nice and soft.  I gave a wide time range because I find different ovens cook something like this dramatically differently.  Also, if you like them a bit gooier, so for the shorter time and a bit drier, go for the longer time.  
Lightly browned and wiggles a bit in the center.  Ready to cool. 

Remove from oven and cool completely in pan on wire rack.   This will take a couple hours. 

Frosting:
Mix together frosting in a mixer, beating well until light and fluffy:
6 Tbsp butter, softened
2 cup powdered sugar
1/2 cup marshmallow fluff
2 drops lemon essential oil OR 2 tsp fresh lemon juice
1 tsp vanilla bean paste (or vanilla extract)
1/4 tsp salt
drops food coloring, if desired (I used some green and a little yellow for a light green frosting)

Slowly add heavy cream OR milk 1 tsp at a time until you have a smooth consistency.  I find 1 - 2 Tbsp cream or milk works well.

Spread overtop the cooled bars.  Add sprinkles, if desired. 
Slice into squares and enjoy!
Yum! Ready to eat!

Gluten Free Sugar Cookie Bars Recipe by Successfully Gluten Free! 

Wednesday, 13 May 2020

Homemade Fish Cakes

Homemade gluten-free fish cakes!  The fish and potatoes are cooked first, then mixed with some seasoning before being breaded.  Pre-prepared fish cakes can be frozen after chilling to cook later.   They're fully cooked, they just need pan-frying to reheat.  However, my kids love them so much, they like to eat them for breakfast and snacks if I cook them all at once and keep leftovers in the fridge.  We like them with oven-roasted broccoli (drizzle lightly with olive oil, salt & pepper, mix well, and roast at 400-425 F until browned at the edges.  You can cook fresh broccoli or frozen, straight from the freezer. :) ) Enjoy! 

Gluten Free Fish Cake
Homemade Gluten-Free Fish Cakes with a side of oven-roasted broccoli

Homemade Fish Cakes

Based off a recipe from The Fish and Seafood Cookbook - from ocean to table

*I like to make the potatoes and fish at the same time on the stovetop. 

Boiled Potatoes
In a large pot, put the following and cover with cold water: 
1 lb red (or white) thin-skinned baby potatoes, coarsely chopped
1 Tbsp salt

Bring to a boil over high heat, then lower to medium heat and continue boiling for about 15 minutes, until potatoes are tender.  Drain and put potatoes in a large bowl.  Mash potatoes until mostly smooth (some chunks are fine).  

Simmered Fish
In a low wide skillet that has a lid you can use, place: 
1 lb cod fish fillets (Make sure the skin and bones are removed.  You can use salmon OR a mix of both fish, if you prefer)

Cover the fish with water, until JUST covered.  Place over medium heat and bring to a boil.   Once boiling, cover with a lid.  Lower heat to low and simmer gently for 5 minutes.  Remove fish with a slotted spoon (to drain gently) and place on a plate.  Use a fork to flake apart the fish, double checking for any bones (remove and discard if you find them).  

Cooked fish, flaking apart nicely.  Ready to remove with a slotted spoon and flake apart. 

To Assemble the Fish Cakes
Line one cookie sheet with parchment paper (if desired), to place your fish cakes prior to baking.  

In your large bowl that has the mashed potatoes, add and mix together: 
cooked, flaked fish, from above
2 Tbsp cream OR whole milk (thick coconut milk will work, too)
zest of 1 lemon
2 tsp fresh lemon juice
1-2 tsp freeze dried chives OR 1 - 2 Tbsp fresh chives, finely diced
2 tsp dried tarragon
1 tsp dried parsley
1 tsp salt
1 tsp pepper

Taste a sampling of your fish and potato mixture and add extra salt and pepper, to taste.   

In three separate bowls, place: 

Bowl 1:  
1/4 - 1/3 cup gluten-free flour (can just use brown or white rice flour or Kristin's Gluten-Free Flour Mix)

Bowl 2: 
2-3 eggs, beaten

Bowl 3:
1-2 cups gluten-free breadcrumbs (I prefer the ones made from rice flour)

*This next part is easiest if you have TWO people helping.  One to make the fish cakes and dip in flour and dip in the egg.  Then another person to dip them in the breadcrumbs and place them on your parchment-lined pan.  I find it keeps from getting egg/breadcrumbs all over fingertips. 

Make round cakes with your hands by scooping out small, plum-sized balls and flattening them, rounding the edges with your fingers.  Dip each flattened fish cake in flour, then egg, then breadcrumbs.  Place the fish cake on your parchment paper lined baking tray.  Repeat until finished.   I find it makes about 1 full tray of fish cakes.  
Fish cakes dipped in flour, egg, and gluten-free breadcrumbs, then placed on a cookie sheet to chill. 

Gently cover the tray with plastic wrap.  Place your coated fish cakes in a refrigerator and let chill 30-60 minutes.  This will help them hold together really nicely.  You can easily flatten them with a spatula to make them neater looking once they've chilled.   At this point, you can freeze extras in a flat layer in a ziploc bag, then cook them later straight from frozen - they'll just need an extra couple minutes per side.  Just make sure your fish cakes are nicely flattened and aren't too thick, so they won't take too long to heat thoroughly.  

Heat 1/4 - 1/2" oil in the bottom of a frying pan over medium heat.  Cook the fish cakes ~5 minutes per side, until nicely golden brown.   Remove to a paper-towel lined baking tray after frying.  

Flattened after chilling, these fish cakes fry up nicely in a bit of oil.  About 4-5 minutes per side, until nicely browned.  They're already cooked, so they just need to heat and crisp. 
Cooked and placed on paper towels.  Yum!

These fish cakes are delicious served with fresh lemon wedges, tartar sauce, and a side salad.  The kids, of course, like them with kethcup.  Enjoy!  

Isn't that a nice looking fish cake.  My kids even ate leftovers for breakfast the next morning.  

Gluten Free Homemade Fish Cakes by Successfully Gluten Free!

Tuesday, 5 May 2020

Delicious Chocolate Cake!

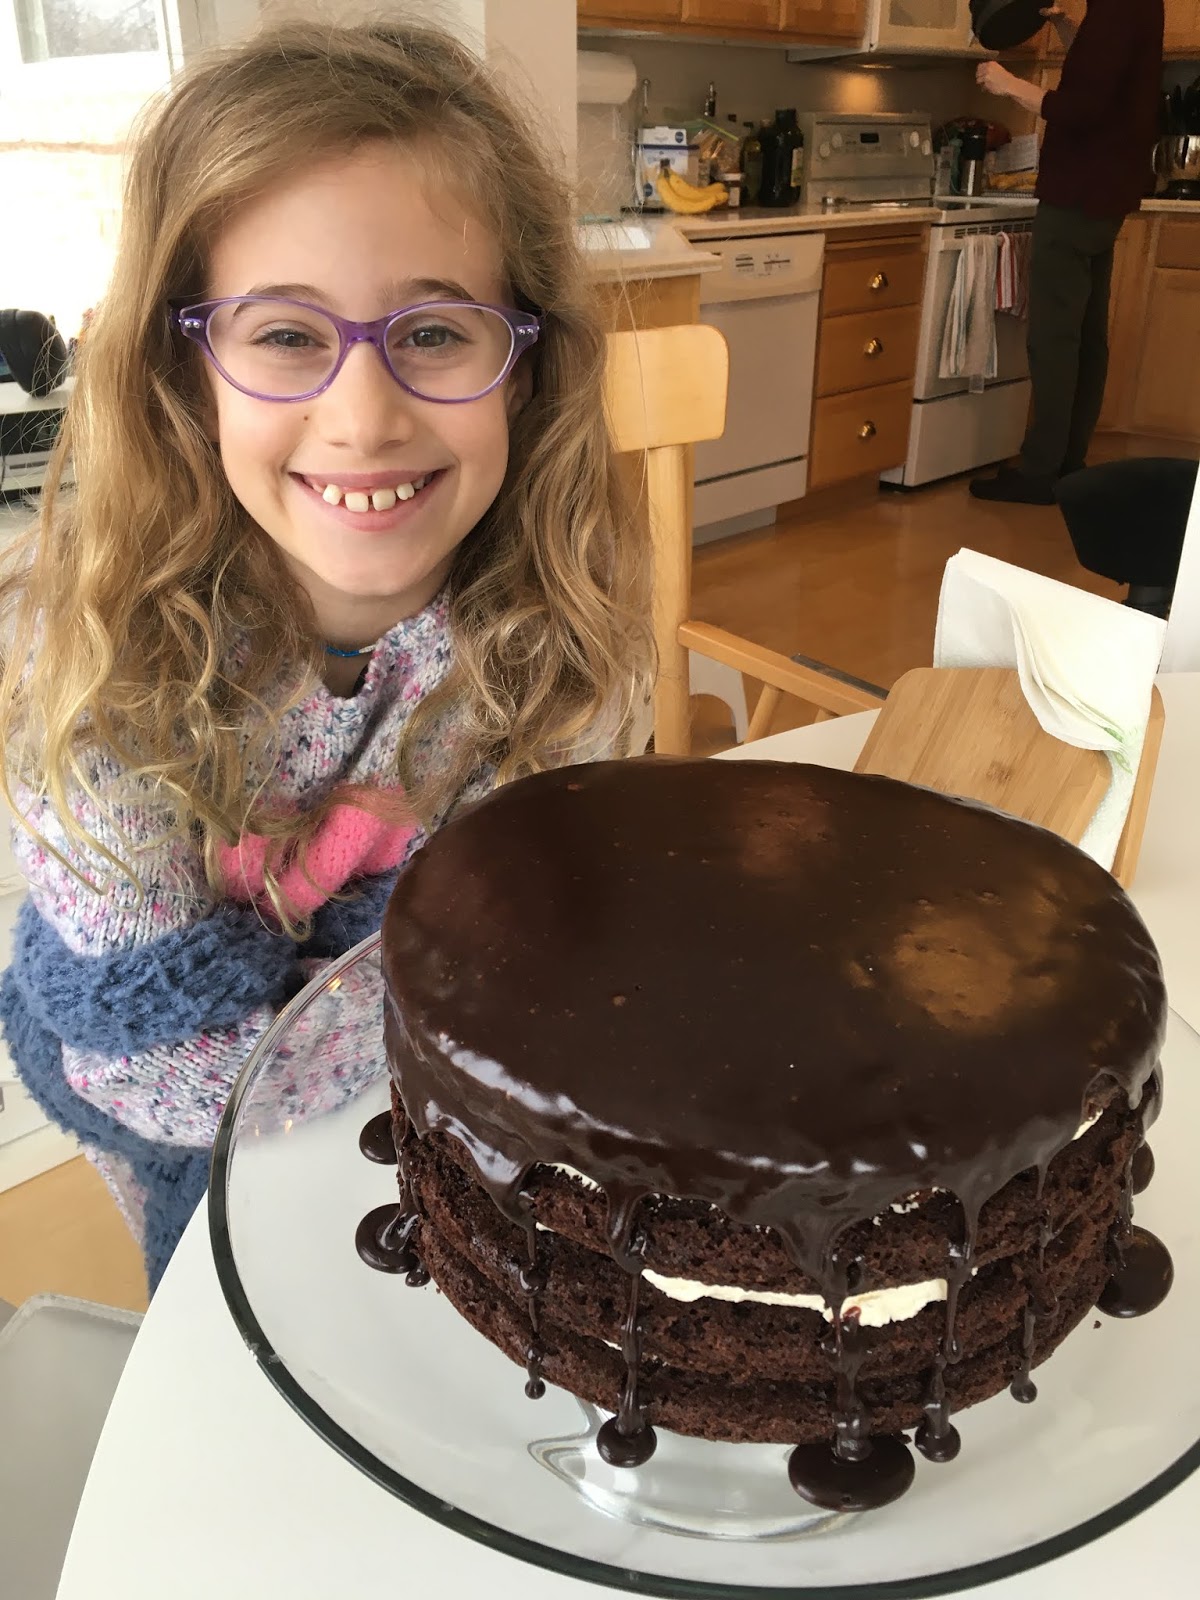
My now 9 year old requested a chocolate cake with vanilla frosting for her birthday.  I added a bit of dark chocolate glazing on top, and voila!  A beautifully light, delicious chocolate cake that everyone raved over.  I love making thin cake layers, too, because they cook up quickly and cool quickly, meaning the entire cake was finished within a couple hours (accounting for cooling time).  This particular cake ended up tasting like a bit light and fluffy whoopie pie, which we all love.  My parents thought it tasted like a chocolate whoopie pie in cake form. Yum!
Gluten Free Chocolate Cake with Vanilla Frosting and Chocolate Glaze
It was so beautiful and so delicious.  It tasted like a big, soft whoopie pie. 

Delicious Chocolate Cake!!!

Makes a four-layer 8"cake

Preheat oven to 350 F.  I find I need to use 325 F convection to fit all four pans in at the same time.
Butter & line pans with parchment paper OR butter and flour pans with a GF flour mix or just some rice flour.

Melt in a small pot over medium heat:
1 cup butter

Add and stir, just until bubbling and then remove from heat:
1/2 cup cocoa powder
1 cup boiling water

In a large bowl, whisk together:
3/4 cup brown rice flour
3/4 cup white rice flour
1/4 cup cornstarch OR arrowroot starch
2 Tbsp potato starch
2 Tbsp tapioca starch
1 tsp xanthan gum
1/4 tsp salt
2 cups white sugar

In a separate medium to large bowl, stir together: (This will expand a bit, so keep that in mind when choosing your bowl)
1/2 cup buttermilk (2 Tbsp apple cider vinegar + milk to equal 1/2 cup)
2 eggs
1 tsp vanilla extract or vanilla bean paste
1 tsp baking soda

In your large bowl, mix together:
dry ingredients, from above
cocoa powder mixture, from above
buttermilk mixture, from above

Divide batter evenly between four 8" round pans, buttered & lined or buttered and GF floured.
Bake at 350 F for 17-18 minutes.
Cakes, ready to bake! 

Let cakes rest 5-10 minutes before removing cakes from pans and putting them to wire racks to cool.
Out of the oven and resting a bit before removing from pans. 

Once cakes are fully cooled, fill layers of cakes with one batch of my favorite marshmallow fluff frosting, evenly divided between the four layers.
One batch of marshmallow fluff frosting divided in 3.  Four beautifully filled layers.  Yum! 

Top the cake with a Chocolate Glaze:

In a small pot over medium heat melt:
3/4 cup butter

Add, and let bubble 30 seconds:
1/3 cup cocoa powder

Remove from heat and mix in:
5 Tbsp milk (lactose free or dairy free work)
1 tsp vanilla extract

Whisk in, until nice and smooth:
2 3/4 cup powdered sugar

You may want to let this glaze cool just a bit before pouring over the cake.  Too warm and it will drip more than you'd like down the sides.  Carefully pour the glaze onto the top of the cake, gently spreading it toward the edges of the cake, just so a bit drizzles down the sides.   Serve this cake at room temperature for the best texture.  If you refrigerate it to serve later, it's best left to come to room temperature before serving, so let rest at room temperature 30-40 minutes before eating.

Enjoy your delicious cake!
We had one VERY happy 9 year old! 
It's so soft and light and fluffy. Mmmmm... 

Delicious Chocolate Cake by Successfully Gluten Free! 

Monday, 20 April 2020

Ginger Rice Pudding

The fresh ginger root added to this recipe makes a lighter, more refreshing dessert.  We've enjoyed it several times, and I love it because I can just make 2 cups of rice and use half the rice for this pudding and the rest for whatever dinner we happen to be having that evening.  I based it on a ginger & raisin pudding recipe on the side of a bag of jasmine rice, then modified it to my preferences. Yum! Enjoy!
Ginger Rice Pudding Gluten Free
Fresh Ginger Rice Pudding - yum!

Ginger Rice Pudding

In a medium pot, combine the following: 
1 cup white jasmine rice, well rinsed
1 1/2 cup water
pinch salt

Bring to a boil over high heat.  Stir once.  Immediately put on a lid and lower heat to between low and medium-low.  Simmer rice for 20 minutes.  Turn off heat and let rest 15 minutes. 

In the same pot, or in a new medium-sized pot, combine the following: 
cooked rice, from above (should be about 3 cups cooked)
2 1/4 cups coconut milk (for a richer pudding, you can use a mixture of 1 1/2 cups coconut milk, 1/2 cup milk, 1/4 cup cream OR use canned coconut milk, which is richer)
3 - 4 Tbsp white sugar
2 tsp fresh grated ginger (I have this frozen and it also works perfectly)
pinch salt

Cook over medium heat, stirring regularly, until your pudding bubbles and thickens.  This usually takes about 20 minutes.  

Remove from heat and stir in: 
1/2 tsp vanilla bean paste (OR vanilla extract)

Great served while hot, but this is also nice chilled.  Refrigerate leftovers in a bowl with plastic wrap tightly pressed to the surface. 


Ginger Rice Pudding Recipe by Successfully Gluten Free!

Saturday, 11 April 2020

Smoked Salmon Quiche with Potato Pastry

Obviously, you need to like smoked salmon to really be able to enjoy this dish, but it's delicious and really quite easy to whip together.  I based my recipe off one from a Comfort Foods cookbook I purchased years ago while living in England.  Though I've had to occasionally tweak things and now convert things to gluten-free, it still remains one of my favorite book of recipes.  It's a fun alternative to having smoked salmon on a bagel with cream cheese, although that is still one of my favorite ways to eat smoked salmon.  Enjoy!
Gluten Free Smoked Salmon Quiche
A yummy slice of warm smoked salmon quiche with potato pastry. Yum!

Smoked Salmon Quiche with Potato Pastry

Potato Pastry:
In cold, salted water, place: 
4-5 oz small, thin-skinned potatoes, coarsely chopped

Bring to a boil, and simmer over medium heat 10-15 minutes, until your potatoes are softened.  (Check with with a fork - depending on how your heat is, these may take a little longer to cook). 

Drain, rinse and let your potatoes fully cool. 

In a large bowl, chop together: 
4 - 5 oz cooked potatoes, from above
1 1/3 cup Kristin's Gluten Free Flour Mix
6 - 8 Tbsp butter
1/2 egg, beaten

Add water, 1-2 tsp at a time, mixing with your hands, until your pastry is just holding together, but still a little crumbly.  

Scoop into a pie dish and quickly press evenly around edges and bottom.  I like to press the edges first and then flatten the bottom briefly.  

Smoked Salmon Filling:
In a large bowl, whisk together: 
6 eggs
1 cup heavy whipping cream
1/2 cup milk
3-4 Tbsp fresh chopped dill
2 Tbsp capers, drained and coarsely diced
1 tsp pepper, fresh ground, if possible
1/4 tsp salt

Add and mix in: 
8-10 oz smoked salmon, chopped into bite-size pieces

Pour the mixture into your potato pastry base.
Gluten Free Smoked Salmon Quiche
Ooo... doesn't that look tasty, ready to bake. 

Bake at 425 F for 15 minutes.  Lower the oven temperature to 350 F and cook an additional 20-25 minutes, until your quiche is cooked in the center.  
Gluten Free Smoked Salmon Quiche
Hot out of the oven - Could have used a minute or two less baking time, but when you have kids, it's best to be grateful it's not really overdone. 

This is delicious fresh from the oven, but is nice chilled from the refrigerator and reheats well, too.  Delicious served with a light green salad.  
Enjoy!


Smoked Salmon Quiche with Potato Pastry Recipe by Successfully Gluten Free!

Thursday, 2 April 2020

Kristin's Gluten-Free Carrot Muffins

I love muffins that aren't too sweet and pack in a variety of good things.  These have become a favorite around here.  You have the carrot, oats, applesauce, and dried fruit to create a delicious, moist carrot muffin.  Update: Add a bit of sweetened coconut for an alternate twist (option below). We've loved it! Enjoy!
Gluten Free Carrot Cake Muffins
Carrot muffins fresh out of the oven.  They are golden browned, although the lighting is hard to see with the orange batter. :) 

Kristin's Gluten Free Carrot Muffins

Makes 12 muffins

Preheat oven to 350 F.  Line 12 muffin tins with paper liners.

Mix together dry ingredients in a separate bowl.  It's important to mix dry ingredients separately in gluten-free baking.
3/4 cup Kristin's Gluten-Free Flour Mix
1/2 cup whole rolled oats (Make sure they're gluten-free if Celiac or sensitive)
1 tsp cinnamon
3/4 tsp baking soda
3/4 tsp baking powder
1/4 tsp salt

Stir together in a large bowl:
1 1/2 - 2 cups grated carrot (2-3 carrots) 
1/2 cup brown sugar (OR 1/4 cup brown sugar and 1/4 cup coconut sugar OR 1/4 cup brown sugar and 1/4 cup maple sugar flakes)
1/2 cup unsweetened applesauce
1/4 cup oil
2 eggs
1 tsp vanilla
1/4 - 1/3 cup raisins OR dried cranberries OR dried currants (my favorite) (Optional, but recommended)
1/4 cup sweetened shredded coconut (Optional, but is a nice twist)

Add the dry ingredients into the wet ingredients.  Stir until well combined.

Divide between 12 lined muffin tins.
Carrot Muffins, ready to bake.

Bake at 350 F for 20 minutes.

Remove from tin to cooling rack to cool.  Once fully cooled, store in a Tupperware at RT for up to a couple days or freeze to have ready for lunches or snacks!  Enjoy! 

Kristin's Gluten Free Carrot Muffins Recipe by Successfully Gluten Free!

Friday, 13 March 2020

Soft, Buttery Dinner Rolls

I thought a back to basics recipe might be nice for everyone stuck at home right now.  And easy to share, if you know of someone in need of a meal.  Rolls can be used for regular sandwiches, open-faced sandwiches, served alongside soups, chowders, pasta dishes, etc.  The good news is that this recipe is easy, AND it makes a whole baking sheet of rolls (~20 rolls).  They're soft, tasty, and they can be sliced, frozen, and reheated later.   We've enjoyed these brushed with butter or egg before baking, but you can make them plain if you prefer.  I like them best warm, but they're also good room temp.  Enjoy!
Gluten Free Dinner Rolls
Buttery Gluten-Free Dinner Rolls.  These have a nice, soft texture - they pull apart easily
Gluten Free Dinner Rolls
A fresh pan of butter dinner rolls, ready to move to the cooling rack
Gluten Free Dinner Rolls
Brushed with egg, for a shiny look

Soft, Buttery Gluten Free Dinner Rolls

Makes ~20 rolls  - inspired by a recipe from glutenfreehabit.com

Preheat oven to 375 F.  Line a baking sheet with parchment paper.  Have another baking sheet on hand to put upside down over top the rolls during rising.

In a glass measuring cup, combine:
1 1/2 cup warm, not hot water
6 Tbsp sugar
4 tsp Active Dry Yeast (or rapid-rise yeast)

In a mixer, combine:
2 cups brown rice flour
1 1/2 cups arrowroot starch (or cornstarch)
1 1/2 cups tapioca starch
1 Tbsp xanthan gum
1 tsp salt
4 tsp baking powder (I don't usually add baking powder into my rolls or bread, but in this recipe, it works nicely to aid the texture and rise)

Add and beat, scraping down the bowl occasionally, for 5-8 minutes:
yeast mixture, from above
6 Tbsp butter, softened
4 eggs
2 tsp apple cider vinegar

Using a large cookie scoop, scoop dough onto parchment-lined pan.  I find if I aim for about 4 x 5 rolls on the pan, I'm just about right.   Smooth and flatten the rolls with water - wet your hand and smooth the top of each roll (dip hand in water between each roll).
Brushed with water to smooth and flatten a bit.

Place pan in a warm location.  Put your extra baking sheet upside down over the top of the rolls.  This keeps them nice and warm and helps them rise.   Let rise 30-40 minutes, until rolls are doubled in size. 
Covered with an upside-down pan, these rise up nicely.

Brush rolls with 1-2 Tbsp melted butter OR 1 egg, beaten, if desired.
Brushed with butter (they look similar, but a little more yellow when brushed with beaten egg)

Bake at 375 F for 30 minutes.  If you're worried about your rolls browning too much, you can loosely cover with foil for the last 5-10 minutes of baking. 
Gluten Free Dinner Rolls
Butter brushed gluten-free dinner rolls, fresh from the oven. 

Gluten Free Dinner Rolls
Egg brushed gluten-free dinner rolls, fresh from the oven. 

Move rolls to a cooling rack (without pan or parchment paper) to cool.  These are delicious warm.  Leftovers can be sliced and frozen to use later for sandwiches, open-faced tuna melts, or with butter & jam.  Enjoy!

Soft, Buttery Gluten Free Dinner Rolls by Successfully Gluten Free!